


 Bottom
 Top
Top
Description
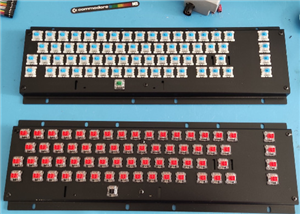
OpenC64Cart V2 (8K)
OpenC64Cart is an Open Hardware 8 KB Cartridge for the Commodore 64.
For more information, please visit github.com/SukkoPera/OpenC64Cart.
Code
https://github.com/SukkoPera/OpenC64Cart
Schematic and Layout
https://github.com/SukkoPera/OpenC64Cart
Jan 04,2018
10,312 views
OpenC64Cart V2 (8K)
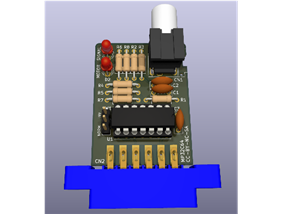
2 Layers PCB 50.8 x 58.42 mm FR-4, 1.6 mm, 1, HASL with lead, Blue Solder Mask, White silkscreen
10312
36
20
10.00 (2)
Published: Jan 04,2018
Standard PCB
Download Gerber file 257
BOM(Bill of materials)
Centroid file
PCBWay Donate 10% cost To Author
File Last Updated: 2023/08/02 (GMT+8)
File update record
2023-08-0214:27:04
Centroid file is updated.
Only PCB
PCB+Assembly
*PCBWay community is a sharing platform. We are not responsible for any design issues and parameter issues (board thickness, surface finish, etc.) you choose.


Under the
Attribution-ShareAlike (CC BY-SA)
License.


- Comments(20)
- Likes(36)
Upload photo
You can only upload 5 files in total. Each file cannot exceed 2MB. Supports JPG, JPEG, GIF, PNG, BMP
0 / 10000
VOTING
2 votes
- 2 USER VOTES
10.00
- YOUR VOTE 0.00 0.00

-
10design
-
10usability
-
10creativity
-
10content
10.00
-
10design
-
10usability
-
10creativity
-
10content
10.00
 More by SukkoPera
-
 Hannes512 - 512 kB RAM Expansion for the Commodore 16/+4
Hannes512 is an Open Hardware internal 512 kB RAM Expansion board for the Commodore 16.For more info...
Hannes512 - 512 kB RAM Expansion for the Commodore 16/+4
Hannes512 is an Open Hardware internal 512 kB RAM Expansion board for the Commodore 16.For more info...
-
 ReSeed v2 - SIDcard for the Commodore 16/Plus 4
ReSeed is an expansion card for the Commodore 16 and Plus/4 computers that allows interfacing the co...
ReSeed v2 - SIDcard for the Commodore 16/Plus 4
ReSeed is an expansion card for the Commodore 16 and Plus/4 computers that allows interfacing the co...
-
 WheelOfJoy - Commodore 16/116/+4 8-Player Joystick Adapter
WheelOfJoy is an Open Hardware 8-player joystick adapter for the Commodore 16 and Plus/4.The origina...
WheelOfJoy - Commodore 16/116/+4 8-Player Joystick Adapter
WheelOfJoy is an Open Hardware 8-player joystick adapter for the Commodore 16 and Plus/4.The origina...
-
 LittleSixteen V3 - Improved Commodore 16 Mainboard
LittleSixteen is an Open Hardware remake of the Commodore 16 home computer, featuring many improveme...
LittleSixteen V3 - Improved Commodore 16 Mainboard
LittleSixteen is an Open Hardware remake of the Commodore 16 home computer, featuring many improveme...
-
 OldPromAdapter V1
OldPromAdapter is an Open Hardware Adapter that allows replacing 82s126, 82s129 and 82s131 PROMs wit...
OldPromAdapter V1
OldPromAdapter is an Open Hardware Adapter that allows replacing 82s126, 82s129 and 82s131 PROMs wit...
-
 OpenC64KernalCart V1
This cartridge allows replacing the KERNAL (i.e.: operating system) of a Commodore C64 computer with...
OpenC64KernalCart V1
This cartridge allows replacing the KERNAL (i.e.: operating system) of a Commodore C64 computer with...
-
 OpenAmiga600RamExpansion V1
OpenAmiga600RamExpansion is an Open Hardware 1 MB Chip RAM Expansion for the Commodore Amiga 600 Com...
OpenAmiga600RamExpansion V1
OpenAmiga600RamExpansion is an Open Hardware 1 MB Chip RAM Expansion for the Commodore Amiga 600 Com...
-
 MechBoard16 - Mechanical Keyboard for the Commodore 16 and LittleSixteen Computers
MechBoard16 is a mechanical keyboard for the Commodore 16.For more information please visit the GitH...
MechBoard16 - Mechanical Keyboard for the Commodore 16 and LittleSixteen Computers
MechBoard16 is a mechanical keyboard for the Commodore 16.For more information please visit the GitH...
-
 LittleSixteen V4 - Build your own Commodore 16/Plus4!
LittleSixteen is an Open Hardware remake of the Commodore 16, 116 and Plus/4 home computers, featuri...
LittleSixteen V4 - Build your own Commodore 16/Plus4!
LittleSixteen is an Open Hardware remake of the Commodore 16, 116 and Plus/4 home computers, featuri...
-
 DatassetteAudioAdapter - Replace the Commodore Datassette with any audio source!
DatassetteAudioAdapter is a simple adapter that allows connecting any audio source to the Datassette...
DatassetteAudioAdapter - Replace the Commodore Datassette with any audio source!
DatassetteAudioAdapter is a simple adapter that allows connecting any audio source to the Datassette...
-
 MP32C64 - Replace the Commodore Datassette with any audio source!
MP32C64 is a simple adapter that allows connecting any audio source to the Datassette port of a Comm...
MP32C64 - Replace the Commodore Datassette with any audio source!
MP32C64 is a simple adapter that allows connecting any audio source to the Datassette port of a Comm...
-
 NessieSoup - Super Nintendo Controller Adapter for the Commodore 64, VIC-20 and Plus/4
NessieSoup is a simple adapter that allows connecting Super Nintendo controllers to a Commodore 64, ...
NessieSoup - Super Nintendo Controller Adapter for the Commodore 64, VIC-20 and Plus/4
NessieSoup is a simple adapter that allows connecting Super Nintendo controllers to a Commodore 64, ...
-
 Plus42Wire - I2C Bus Interface for the Commodore 16/116/+4
Plus42Wire is an I2C (Inter-Integrated Circuit, sometimes known as 2-Wire) Interface for the Commodo...
Plus42Wire - I2C Bus Interface for the Commodore 16/116/+4
Plus42Wire is an I2C (Inter-Integrated Circuit, sometimes known as 2-Wire) Interface for the Commodo...
-
 Plus4i8255 V2 - Intel 8255 Interface for the Commodore 16, 116 and Plus/4
Plus4i8255 is an Intel 8255 Interface for the Commodore 16, 116 and Plus/4.For more information plea...
Plus4i8255 V2 - Intel 8255 Interface for the Commodore 16, 116 and Plus/4
Plus4i8255 is an Intel 8255 Interface for the Commodore 16, 116 and Plus/4.For more information plea...
-
 PiRTOII - Flash multicart for the Mattel Intellivision - Original Pico Version
PiRTO II if a flash multicart for the Mattel Intellivision based on the Raspberry Pico.This version ...
PiRTOII - Flash multicart for the Mattel Intellivision - Original Pico Version
PiRTO II if a flash multicart for the Mattel Intellivision based on the Raspberry Pico.This version ...
-
 Hannes256 - 256 kB RAM Expansion for the Commodore 16/+4
Hannes256 is an Open Hardware internal 256 kB RAM Expansion board for the Commodore 16.For more info...
Hannes256 - 256 kB RAM Expansion for the Commodore 16/+4
Hannes256 is an Open Hardware internal 256 kB RAM Expansion board for the Commodore 16.For more info...
-
 Fixteen V3 - Internal 64 kB RAM Expansion for the Commodore 16
Fixteen is an Open Hardware internal 64 kB RAM Expansion board for the Commodore 16.For more informa...
Fixteen V3 - Internal 64 kB RAM Expansion for the Commodore 16
Fixteen is an Open Hardware internal 64 kB RAM Expansion board for the Commodore 16.For more informa...
-
 SoundX - An AdLib card for your Commodore 16/116/+4!
SoundX is an Open Hardware sound card for the Commodore 16, 116 and Plus/4 home computers based on t...
SoundX - An AdLib card for your Commodore 16/116/+4!
SoundX is an Open Hardware sound card for the Commodore 16, 116 and Plus/4 home computers based on t...
You may also like
-
-
mammoth-3D SLM Voron Toolhead – Manual Drill & Tap Edition
207 0 0 -
-
-
-
Tester for Touch Screen Digitizer without using microcontroller
438 2 2 -
Audio reactive glow LED wristband/bracelet with NFC / RFID-Tags
391 0 1 -
-


