|
|
GP1287 VFD display 256x50 |
x 1 | |
|
|
Arduino Nano R3 |
x 1 | |
|
|
2x10k Potentiometer |
x 1 | |
|
|
1N4007 – High Voltage, High Current Rated Diode |
x 2 | |
|
|
Capacitor 10 µF |
x 2 | |
|
|
Resistor 4.7k ohm |
x 2 | |
|
|
Resistor 47k ohm |
x 2 |

|
arduino IDEArduino
|
|

|
Soldering Iron Kit |
Arduino Bar graph Stereo VU meter on VFD display GP1287
A VU meter, also known as a Volume Unit meter, is a device used to display the audio signal level in decibels (dB) in real-time. It is commonly found on audio equipment to help users monitor and control audio levels. Some time ago, in one of my previous videos , I presented to you Analog style retro look VU meter on VFD display.

This time, I will also describe a way to make a VU meter on the VFD Display, but this time in the form of a Bar Graph. A bar graph VU (Volume Unit) meter is a type of audio level meter that represents the intensity of an audio signal using a series of bars. These bars visually indicate the amplitude or volume of the audio signal across a range.
In this meter, each bar corresponds to a particular volume level or decibel level. In this case, unlike the previous project, the response of the Vu meter in relation to the input signal is instantaneous (instantejnius). The display is again of the GP1287 type with a resolution of 256 by 50 points, and it can be obtained at a relatively cheap price.

The device is extremely simple to build and contains only a few components
- Arduino Nano Microcontroller
- GP1287 VFD Display
- 10K stereo potentiometer,
- Four resistors,
- and two capacitors and diodes

On the occasion of the upcoming Christmas and New Year holiydays visit the PCBWay Christmas Big Sales where you will found discounts of up to 50%, as well as many other prizes and benefits. PCBway is one of the most experienced PCB manufacturing company in China in field of PCB prototype and fabrication. They provide completed PCB assembly service with worldwide free shipping , and ISO9001 quality control system. Also, on their site there is an online gerber viewer where you can upload your gerber and drill files to render your board.
The signal from both audio channels (left and right) is brought to the analog inputs of the Arduino microcontroller. After that comes a circuit called "Enveope Follower" with a filter.

As for the code, I took the idea from a similar OLED VU meter project, but it used the Adafruit_GFX library, which is not compatible with VFD displays, so I created a new code with the U8G2 library, which has support for this type of display. The sensitivity of the VU meter can be controlled with the potentiometer mounted on the back of the device.

Due to the relatively high consumption of the display, it is preferable to power it through the power connector of the display itself, which is shown in the picture.

The device is installed in a suitable box made of PVC material with a thickness of 5 mm and covered with colored self-adhesive wallpaper.

#include <U8g2lib.h>
#include <SPI.h>

U8G2_GP1287AI_256X50_1_4W_SW_SPI u8g2(U8G2_R0, /* clock=*/ 13, /* data=*/ 11, /* cs=*/ 10, /* dc=*/ 9, /* reset=*/ 8);

 int  an_izm_r , an_izm_l ;
 int  ur_l , urr_l , ur_r , urr_r ;


 void setup(void) {
  u8g2.begin();
  u8g2.setContrast(15);
  u8g2.enableUTF8Print();
  u8g2.setFont(u8g2_font_7x14B_tf);
  analogReference(INTERNAL);
  pinMode(A0,INPUT);
  pinMode(A2,INPUT);
 }

void  loop ( )  {
  an_izm_r  =  analogRead ( A0 ) ;
  an_izm_l  =  analogRead ( A2 ) ;
   urr_l  =  an_izm_l ;
   urr_r  =  an_izm_r ;
  if ( urr_l < ur_l ) { ur_l = ur_l - 15 ; } else { ur_l  =  an_izm_l ; }
  if ( urr_r < ur_r ) { ur_r = ur_r - 15 ; } else { ur_r  =  an_izm_r ; }
 testfillrect ( ) ;
 }

 void  testfillrect ( void )  {
   u8g2.firstPage();
  do {
  u8g2.drawFrame(0,0,256,50);
  u8g2.drawRFrame(2,2,252,46,3);
  u8g2.drawFrame(5,18,170,14);
  u8g2.setCursor(16, 30); u8g2.print(F("-20"));
  u8g2.setCursor(77, 30); u8g2.print(F("-10"));
  u8g2.setCursor(140, 30); u8g2.print(F("-3"));
  u8g2.setCursor(8, 16); u8g2.print(F("R"));
  //u8g2.drawFrame(5,4,10,14);
  u8g2.setCursor(8, 44); u8g2.print(F("L"));
  //u8g2.drawFrame(5,32,10,14);
  u8g2.drawBox(18,5,4,11);
  u8g2.drawBox(18,34,4,11);
  u8g2.setFontMode(1);
  u8g2.drawBox(175,18,76,14);
  u8g2.setDrawColor(2);
  u8g2.drawStr(182, 30, "0");
  u8g2.drawStr(210, 30, "+3 db");

   u8g2.setColorIndex(1);
   for ( int  i = 20 ; i <= ur_r ; i += 4 ) {
   u8g2.drawBox ( i ,  5 ,  2 ,  11 ) ;
 }
    for ( int  i = 20 ; i <= ur_l ; i += 4 ) {
  u8g2.drawBox (  i ,  34 ,  2 ,  11  ) ;

   }
    }
    while ( u8g2.nextPage() );
 }

Arduino Bar graph Stereo VU meter on VFD display GP1287
- Comments(0)
- Likes(0)
- 0 USER VOTES
- YOUR VOTE 0.00 0.00
- 1
- 2
- 3
- 4
- 5
- 6
- 7
- 8
- 9
- 10
- 1
- 2
- 3
- 4
- 5
- 6
- 7
- 8
- 9
- 10
- 1
- 2
- 3
- 4
- 5
- 6
- 7
- 8
- 9
- 10
- 1
- 2
- 3
- 4
- 5
- 6
- 7
- 8
- 9
- 10
 More by Mirko Pavleski
-
 Arduino 3D Printed self Balancing Cube
Self-balancing devices are electronic devices that use sensors and motors to keep themselves balanc...
-
 How to make simple Variable HIGH VOLTAGE Power Supply
High Voltage Power Supply is usually understood as a device that is capable of generating a voltage...
-
 DIY 5-Day Rainfall Forecast Device - ESP32 E-Paper Project
In several of my previous projects I have presented ways to make weather stations, but this time I ...
-
 Build simple Retro Style VFO (Variable frequency oscillator) with Crowoanel 1.28 inch Round Display
Today I received a shipment with a Small round LCD display from Elecrow. The device is packed in tw...
-
 Human vs Robot – Rock Paper Scissors with MyCobot 280 M5Stack
Today I received a package containing the few Elephant Robotics products. The shipment is well pack...
-
 How to Build a Simple Audio Spectrum Analyzer with Adjustable Settings
An audio spectrum analyzer is an electronic device or software tool that measures and visually disp...
-
 How to Make a Digital Clock on a Vintage B&W TV using Arduino
These days I accidentally came across this small retro Black and White TV with a built-in Radio, so ...
-
 Build a $10 Function Generator with Frequency Meter for Your Lab
A function generator is a piece of electronic test equipment used to generate various types of elec...
-
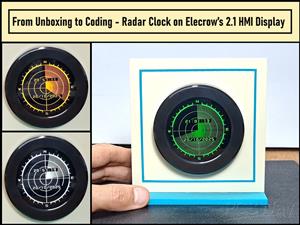 From Unboxing to Coding - Radar Clock on Elecrow’s 2.1 HMI Display
Today I received a shipment with a large round LCD display from Elecrow. The device is packed in two...
-
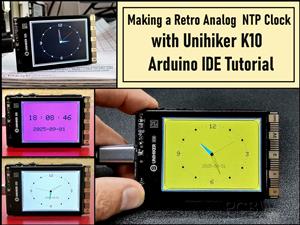 Making a Retro Analog NTP Clock with Unihiker K10 - Arduino IDE Tutorial
Some time ago I presented you a way to use standard Arduino libraries on the Unihiker k10 developme...
-
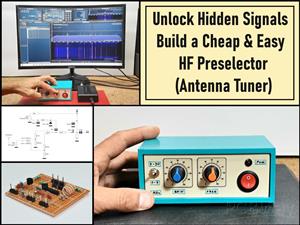 Build a Cheap & Easy HF Preselector - Antenna Tuner
HF antenna preselector is an electronic device connected between an HF radio antenna, and a radio r...
-
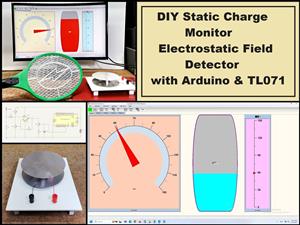 DIY Static Charge Monitor - Electrostatic Field Detector (Arduino & TL071)
A Static Charge Monitor also known as a Static Field Meter or Electrostatic Voltmeter is a device u...
-
 XHDATA D-219 Radio Short Review with complete disassembly
Some time ago I received an offer from XHDATA to be one of the first test users of their new radio m...
-
 How to make Simplest ever Oscilloscope Clock
An oscilloscope clock is a unique and creative way to display the time using an oscilloscope, which...
-
 DIY Digital Barograph with BME280 and ESP32 - 24 Hour Pressure Trends
A barograph is a self-recording barometer that continuously measures and records atmospheric pressu...
-
 Build a Raspberry Pi Pico SDR Radio with Waterfall Display
Software-defined radio (SDR) is a radio communication system where components that have traditional...
-
 DIY Magnet Polarity Detector - How to Identify Poles with a Hall Sensor from a PC Fan
Recently, while working on a project, I needed to determine the polarity of several permanent magne...
-
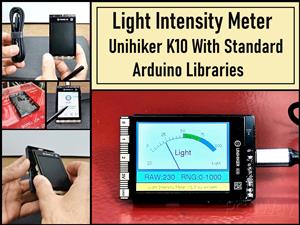 Light Meter Project - Making Dfrobot Unihiker K10 Work with Standard Arduino Libraries
The other day I received a shipment with a UNIHIKER K10 development board from DFRobot, which I rec...
-
-
AEL-2011 Power Supply Module
553 0 2 -
AEL-2011 50W Power Amplifier
512 0 2 -
-
-
Custom Mechanical Keyboard
710 0 0 -
Tester for Touch Screen Digitizer without using microcontroller
340 2 2 -
Audio reactive glow LED wristband/bracelet with NFC / RFID-Tags
321 0 1 -
-
-


