|
OrCad Cadance |
|

|
arduino IDEArduino
|
Diamond Shaped PCB Necklace
Hey Everyone how's it going.
Here's something super cool, a Diamond-shaped PCB Necklace powered by an Attiny13A.
The goal here was to make a Wearable Necklace or jewelry by using a PCB and a few LEDs to make a combination of Electronics and Wearable Jewellery.
The heart of this Project is an Attiny13A that controls all the LEDs present onboard, also this pendant or necklace is powered by a CR2032 Coin Cell that is on the bottom side of the board.
This article is gonna be about the whole built Process of this Necklace so let's get started.
Material Required
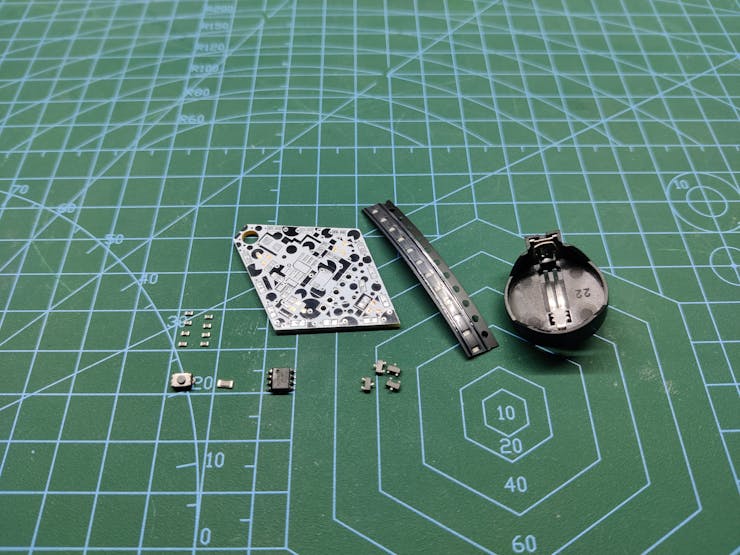
Following were the materials I used in this built-
- Attiny13A
- Custom PCB
- LEDs
- AO3401 Mosfet
- 10K resistors
- CR2032 Coin Cell with its holder
- Chain for necklace
- Solder paste
- Arduino Nano for Programming Attiny13A
Schematic
_nVI8Wqz7ZP.jpg?auto=compress%2Cformat&w=740&h=555&fit=max)
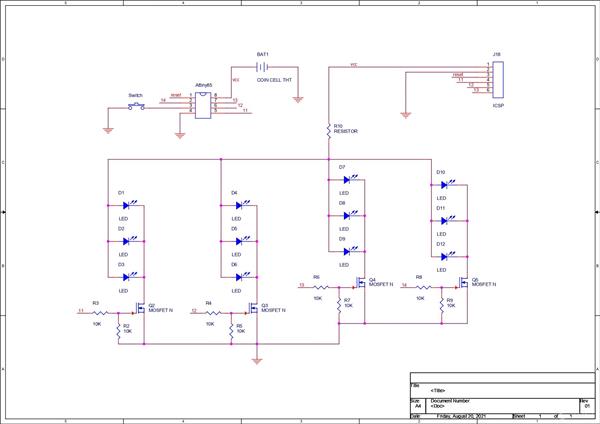
The schematic of this PCB was pretty simple, I've placed a total of 12 LEDs on this board, and 3 LEDs are connected with a single Mosfet, to drive 12 LEDs, I used 4 Mosfets. Attiny13 Controls the gate of each Mosfet and we can change the state of Attiny13 by using the toggle switch.
I've also added a CON6 Header Pin for flashing the Attiny13A, I will later use my Arduino as ISP Setup to connect through this CON6 Pin and flash the Microcontroller.
PCB Design
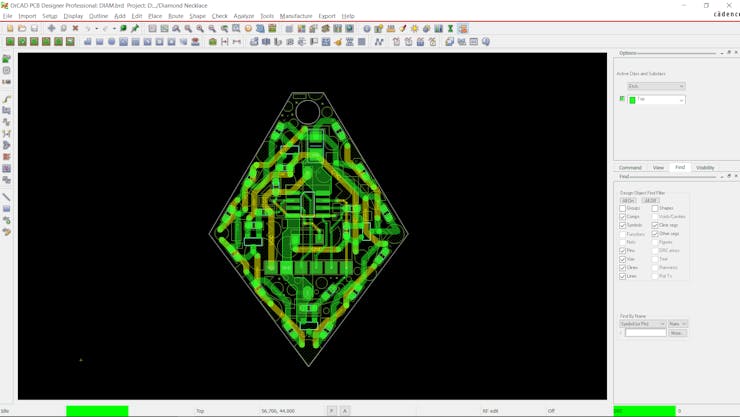
I then finalise the schematic and converted it into a PCB file.
I prepared a Diamond Shaped PCB Board with a hole in the top for mounting the chain with this setup. I placed 3 LED Pairs on one side, I did this with the remaining 3 LED Pair and then put the attiny13A at the center part of the board.
I tried to keep this PCB as Small as possible as it's a wearable device that one will wear all day so by reducing its size, we are reducing the overall weight as well.
PCBWAY
After completing the design, I uploaded the Gerber data on PCBWAY's quote page, selected the solder mask color which was White, and placed the order.


After placing the order, I received the PCBs in a week and the PCB quality was pretty great.
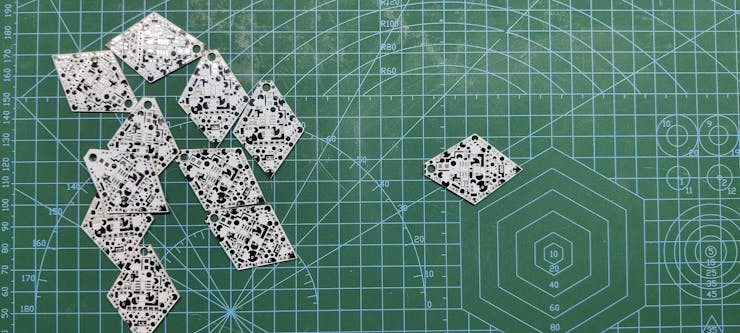
This shape is completely random so it's pretty hard to make but they did an awesome job of making this PCB with no error whatsoever.
You guys can check out PCBWAY If you want Great PCB Service at an Affordable rate and low price.
Error in the Design

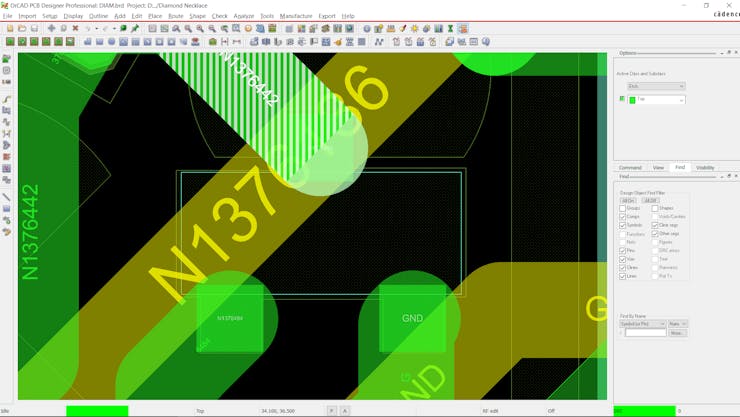
Here's a small mistake I made while designing the board, I forgot to double-check the Mosfet PAD that I made for this project, I made the pad of Mosfet a little smaller than my existing footprint as this PCB was small and so I reduce the side of Mosfet Pad to save space.
I forgot to add a soldermask layer on the Pad of Mosfet that I created and this resulted in a PCB that doesnt have any Soldermask opening for soldering Mosfet with the PCB.
Wire traces were all in their place so I used a tweezer to scratch the solder mask in place of mosfet Pads and this revealed copper terminals that I can solder mosfet with.
PCB Assembly
the PCB Assembly Process will have the following steps.
- Solder Paste Dispensing
- Pick & Place Process
- Hotplate Reflow
- LED Testing
- Programming the Attiny13A
- Adding Coin Cell holder
Solder paste


The first step is to apply solder paste to each component pad.
I used a normal Sn-Pb solder paste which has a melting temp from 140 to 270 °C.
After Adding solder paste, we move on to the next process which is the "PICK & Place Process"
Pick & Place
I then used an ESD Tweeaser to carefully pick and place each component in their assigned place one by one which took like 30 Seconds tops but the result was a perfect PCB with all the components placed in their location.
Hotplate Reflow


After the "PICK & Place Process", I carefully lifted the whole circuit board and place it on my DIY SMT Hotplate which is also homemade just like this project.
After a Few mins when the hotplate reaches the Solderpaste melting TEMP, all the components will get soldered by this Hot Reflow process.
We then remove the PCB from the Hotplate to cool down all componenets and board surface.
Testing LEDs Continuity
Because we are using LEDs here, it's crucial to check whether LEDs are soldered properly or not.


I used a normal Multimeter set in Diode checking mode, we connect the probe of the multimeter to the Anode and Cathode of leds in the right polarity.
If LEDs are soldered properly, all LEDs will glow. If there's any soldering error they won't glow.
Flashing the Attiny13 with Arduino as ISP


For the Flashing Process, we cannot directly program ATTINY13 through any USB, I mean there's a method for programming the Attiny straight from the USB port but I'm not doing that.
Instead, I'll be using the ISP flashing method which will utilize the SPI Pins of attiny13A to burn the bootloader in it and then Flash.
AVRs chips usually come blank, they need to be set up to be Arduino IDE compatible but to do that you need an AVR programmer do to that, for example, a USBASP.
Fun Fact, you could make your own AVR Programer with an Arduino Uno or a Nano board in a very easy step.
- Connect your Arduino board with com port and select the following sketch
- Example>ArduinoISP upload this sketch onto your board
- After uploading, go to the tools menu and choose the Arduino as ISP option in the programmer section.
- Now for flashing Attiny13A, we can select the Attiny13A in the Board section.
The programming process uses VCC, GND, and four data pins. Three pins connect MISO, MOSI, and SCK between the programming micro and the target micro, and the fourth pin from the programming micro goes to the reset pin of the target.
I will use my DIY Attiny Programmer which I made for flashing the Attiny or Atmega MCUs.
which you can check out from here-
https://www.hackster.io/Arnov_Sharma_makes/multiple-attiny85-13a-programmer-84adf8
- connect the Board to the Arduino as ISP Setup in the above wiring config
- choose the right port, right programmer (Arduino as ISP), and hit Burn Bootloader
- wait for a few seconds, you will get done burning the bootloader message.
- Now Open the sketch that you want to upload to this Attiny
- Go to the Sketch menu and select Upload using the programmer.
- and your Sketch will get uploaded onto the attiny13.
Code 01
int pinsCount=4;                        // declaring the integer variable pinsCount
int pins[] = {0,1,2,3};          // declaring the array pins[]


void setup() {
  pinMode(0, OUTPUT);
  pinMode(1, OUTPUT);
  pinMode(2, OUTPUT);
  pinMode(3, OUTPUT);

}


void loop() {
  for (int i=0; i<pinsCount; i=i+1){    // chasing right
    digitalWrite(pins[i], HIGH);         // switching the LED at index i on
    delay(70);                          // stopping the program for 100 milliseconds
    digitalWrite(pins[i], LOW);          // switching the LED at index i off
  }
  for (int i=pinsCount-1; i>0; i=i-1){   // chasing left (except the outer leds)
    digitalWrite(pins[i], HIGH);         // switching the LED at index i on
    delay(70);                          // stopping the program for 100 milliseconds
    digitalWrite(pins[i], LOW);          // switching the LED at index i off
  }

}
This is a simple chaser sketch that I used before the Main Code just for checking if the board was working or not.
Main Code 02
const int switchPin = 4;
int pinsCount=4;                        // declaring the integer variable pinsCount
int pins[] = {0,1,2,3};
int lightMode = 1;

void setup()
{
    pinMode(0, OUTPUT);
    pinMode(1, OUTPUT);
    pinMode(2, OUTPUT);
    pinMode(3, OUTPUT);
    pinMode(switchPin, INPUT_PULLUP);
   digitalWrite(0, LOW);
   digitalWrite(1, LOW);
   digitalWrite(2, LOW);
   digitalWrite(3, LOW);

}
void loop()
{
    if (digitalRead(switchPin) ==LOW)
    {
        lightMode = lightMode + 1;
        if (lightMode == 3)
        {
            lightMode = 1;
        }
    }
    if (lightMode == 1)
    {
        digitalWrite(pins[0,1,2,3], LOW);
        delay(200);
    }
    else if (lightMode == 2)
    {
      for (int i=0; i<pinsCount; i=i+1){    // chasing right
      digitalWrite(pins[i], HIGH);         // switching the LED at index i on
      delay(70);                          // stopping the program for 100 milliseconds
      digitalWrite(pins[i], LOW);          // switching the LED at index i off
    }
      for (int i=pinsCount-1; i>0; i=i-1){   // chasing left (except the outer leds)
      digitalWrite(pins[i], HIGH);         // switching the LED at index i on
      delay(70);                          // stopping the program for 100 milliseconds
      digitalWrite(pins[i], LOW);          // switching the LED at index i off
     }
    }

    //delay(200); // see text
}
This is the code that I have used in this project, it's a simple Chaser sketch that toggles each Mosfet in a chaser sequence when we press the button. (Pretty simple stuff)

Adding Coin cell Holder


As for the Powersource, I used a CR2032 Coin Cell that is being attached to this PCB via its THT Holder.
After Programming the Attiny13A, we add this Coin cell holder in its place as it covers the programming Pins so that's why I added it at last.
We then put the CR2032 Coin cell in its holder and press the button present in front.
This will initiate the Chasing sequence and the LEDs will glow.
Adding Chain
Last, I added a chain to this board so we can wear it like a proper wearable necklace.


Also, we can add an earring hook to this setup and use it as a wearable earring.
Result
By Pressing the button again, it turns off the Chasing Sequence and the Badge Stops working.
This method of using an SMD Tactile button eliminated the THT Slide switch.
This is it for today folks, thanks for reading this post.
And I'll be back with a new project pretty soon!
Diamond Shaped PCB Necklace
*PCBWay community is a sharing platform. We are not responsible for any design issues and parameter issues (board thickness, surface finish, etc.) you choose.
- Comments(0)
- Likes(2)
- 0 USER VOTES
- YOUR VOTE 0.00 0.00
- 1
- 2
- 3
- 4
- 5
- 6
- 7
- 8
- 9
- 10
- 1
- 2
- 3
- 4
- 5
- 6
- 7
- 8
- 9
- 10
- 1
- 2
- 3
- 4
- 5
- 6
- 7
- 8
- 9
- 10
- 1
- 2
- 3
- 4
- 5
- 6
- 7
- 8
- 9
- 10
 More by Arnov Arnov sharma
-
 Pocket SNES
Greetings everyone, and welcome back! Today, I’ve got something fun and tiny to share—the Pocket SNE...
-
 Batocera Arcade Box
Greetings everyone and welcome back, Here's something. Fun and nostalgic. Right now, we are using ou...
-
 64x32 Matrix Panel Setup with PICO 2
Greetings everyone and welcome back.So here's something fun and useful: a Raspberry Pi Pico 2-powere...
-
 Portable Air Quality Meter
Hello everyone, and welcome back! Today, I have something incredibly useful for you—a Portable Air Q...
-
 WALKPi PCB Version
Greetings everyone and welcome back, This is the WalkPi, a homebrew audio player that plays music fr...
-
 Delete Button XL
Greetings everyone and welcome back, and here's something fun and useful.In essence, the Delete Butt...
-
 Arduino Retro Game Controller
Greetings everyone and welcome back. Here's something fun.The Arduino Retro Game Controller was buil...
-
 Super Power Buck Converter
Greetings everyone and welcome back!Here's something powerful, The SUPER POWER BUCK CONVERTER BOARD ...
-
 Pocket Temp Meter
Greetings and welcome back.So here's something portable and useful: the Pocket TEMP Meter project.As...
-
 Pico Powered DC Fan Driver
Hello everyone and welcome back.So here's something cool: a 5V to 12V DC motor driver based around a...
-
 Mini Solar Light Project with a Twist
Greetings.This is the Cube Light, a Small and compact cube-shaped emergency solar light that boasts ...
-
 PALPi V5 Handheld Retro Game Console
Hey, Guys what's up?So this is PALPi which is a Raspberry Pi Zero W Based Handheld Retro Game Consol...
-
 DIY Thermometer with TTGO T Display and DS18B20
Greetings.So this is the DIY Thermometer made entirely from scratch using a TTGO T display board and...
-
 Motion Trigger Circuit with and without Microcontroller
GreetingsHere's a tutorial on how to use an HC-SR505 PIR Module with and without a microcontroller t...
-
 Motor Driver Board Atmega328PU and HC01
Hey, what's up folks here's something super cool and useful if you're making a basic Robot Setup, A ...
-
 Power Block
Hey Everyone what's up!So this is Power block, a DIY UPS that can be used to power a bunch of 5V Ope...
-
 Goku PCB Badge V2
Hey everyone what's up!So here's something SUPER cool, A PCB Board themed after Goku from Dragon Bal...
-
 RGB Mixinator V2
Hey Everyone how you doin!So here's a fun little project that utilizes an Arduino Nano, THE MIXINATO...
-
-
mammoth-3D SLM Voron Toolhead – Manual Drill & Tap Edition
198 0 0 -
-
AEL-2011 Power Supply Module
727 0 2 -
AEL-2011 50W Power Amplifier
605 0 2 -
-
-
Custom Mechanical Keyboard
809 0 0 -
Tester for Touch Screen Digitizer without using microcontroller
437 2 2 -
Audio reactive glow LED wristband/bracelet with NFC / RFID-Tags
390 0 1 -
-


