|
|
BC557 PNP Transistor |
x 1 | |
|
|
Small Audio Trafo 8000:8 ratio |
x 2 | |
|
|
Audio Amplifier Module |
x 1 | |
|
|
Speaker: 0.25W, 8 ohms |
x 1 | |
|
|
50k Potentiometer |
x 1 | |
|
|
6V Battery pack |
x 1 | |
|
|
Slide Switch |
x 3 | |
|
|
capacitors |
x 2 |

|
Soldering Iron Kit |
How to build simple cheap Hulda Clark Syncrometer
Hulda Clark's Syncrometer was a device she claimed could detect the presence of various substances in the body, such as parasites, toxins, and pathogens. Hulda Clark was a controversial figure in the alternative medicine community, and her ideas and devices have not been scientifically validated. At the request of several of my subscribers, I decided to explain to you how you can make such an instrument yourself. The device is extremely simple to make and represents the most common oscillator whose frequency of oscillation depends on a given resistance. In this particular case it will be the resistance of our skin. I want to remind you that I will not at all explain the way of diagnosis using this method, but only the technical part, that is, the way of its production.
The basic version of this device was made at the end of the last century, so some parts are hard to find nowadays, so I will make it with modern components. The most difficult to obtain is the output audio transformer, which was used in small portable radios manufactured in the last century. Instead of original, I'm going to use two audio transformers, each with a winding ratio of 8000:8 which can easily be bought online and the price is less than 2 dollars for 5 pieces.
The other parts of which the device is composed are:
- Universal PNP transistor, I will use the BC 557, but any small signal PNP transistor can be used without any circuit modifications.
- 8 ohm small speaker
- 50 Kilo ohm Potentiometer
- two capacitors
- 2 metal plates wicah a actually open capacitors
- Probe (I use one electrode from a multimeter)
- handhold usually made from a piece of copper or other metal rod
- Small power amplifier or active PC speaker
- switches
- and battery

If you want to make a PCB for this project, or for any other electronic project, PCBway is a great choice for you. PCBway is one of the most experienced PCB manufacturing company in China in field of PCB prototype and fabrication. They provide completed PCB assembly service with worldwide free shipping , and ISO9001 quality control system. Also, on their site there is an online gerber viewer where you can upload your gerber and drill files to render your board.

I made the device in as simple a way as possible so that it is understandable for more viewers and so that even those with relatively little experience in electronics can make it. First we need to determine the primary and secondary winding of the transformer. We will do it most easily with the help of a multimeter, since we measure the resistance. One side has a resistance of about 90 ohms and that is the primary, the secondary side has a resistance of only a few ohms.

To get the mean derivative of the primary winding, we need to connect two such transformers in series as shown in the schematic diagram. The impedance of this type of transformer is significantly higher, so the value of the capacitors is lower compared to those of the original, in order to obtain the same frequency at the speaker output.
And now let's look at what's inside the box:
- The main circuit consist of Trafo, two capacitors. transistor and Potentiometer
- Small Power Amplifier board with Speaker
- Two metal plates connected to the main circuit via switches
- 6V Battery pack
- handhold and probe connectors

First we need to test if the device is properly made and working. We connect the handhold and probe electrodes and turn on the synchrometer. Next Turn the control knob clockwise to nearly the maximum. This reduces the resistance to nearly zero. We can test the circuit by briefly touching the probe to the handhold. The speaker should produce a sound like popping corn. Test plates which serve to put test substances and tissue samples on it. The wiring in it is arranged so that you can switch in either one of the two plates.
We test their functionality in the following way:
Turn on the first switch and Touch plate with the probe, while holding the metal pipe with one hand. We shoud listen soun from the speaker. We repeat the same procedure for the other plate.

Now that we have ensured that the device is working properly, let's explain in general how to exercise, and use this device:
- With the control potentiometer we can finely adjust this frequency, and with this potentiometer we can adjust the sound volume.
- We need a bowl of wet paper, a piece of dry paper, and a piece of wet paper
- Wrap wet paper around the metal pipe handhold to overlap slightly. The wetness improves conductivity and the paper towel itself keeps the metal off your skin.
- Pick up the probe in the same hand, holding it like a pen, between thumb and forefinger.
- Dampen your other hand by making a fist and dunking your knuckles into the wet paper in the saucer.
- Immediately after dunking your knuckles dry them on a paper towel folded in quarters and placed beside the saucer.
- Touch with your probe as soon as your knuckles have been dried (within two seconds) since they begin to air dry further immediately.

This procedure is described in detail in a video by Hulda Clark, where the method of diagnosis is also described.
And finally a short conclusion.
This is an extremely simple device to make that only requires a few dollars and a little know-how to make. Unfortunately, online stores sell such a device at a price of several hundreds of dollars, which was the main reason for me to make it and show you how you can make it yourself. Otherwise, my personal opinion about this method of diagnosis is negative, and the basis for this opinion is the fact that the diagnosis is based only on the resistance of our skin, and this value depends on many different factors.
This video only explains the technical aspect of this device (how to build it) .


How to build simple cheap Hulda Clark Syncrometer
- Comments(2)
- Likes(1)
-
 Engineer
May 10,2024
- 1 USER VOTES
- YOUR VOTE 0.00 0.00
- 1
- 2
- 3
- 4
- 5
- 6
- 7
- 8
- 9
- 10
- 1
- 2
- 3
- 4
- 5
- 6
- 7
- 8
- 9
- 10
- 1
- 2
- 3
- 4
- 5
- 6
- 7
- 8
- 9
- 10
- 1
- 2
- 3
- 4
- 5
- 6
- 7
- 8
- 9
- 10
-
10design
-
10usability
-
10creativity
-
10content
 More by Mirko Pavleski
-
 Arduino 3D Printed self Balancing Cube
Self-balancing devices are electronic devices that use sensors and motors to keep themselves balanc...
-
 DIY 5-Day Rainfall Forecast Device - ESP32 E-Paper Project
In several of my previous projects I have presented ways to make weather stations, but this time I ...
-
 Build simple Retro Style VFO (Variable frequency oscillator) with Crowoanel 1.28 inch Round Display
Today I received a shipment with a Small round LCD display from Elecrow. The device is packed in tw...
-
 Human vs Robot – Rock Paper Scissors with MyCobot 280 M5Stack
Today I received a package containing the few Elephant Robotics products. The shipment is well pack...
-
 How to Build a Simple Audio Spectrum Analyzer with Adjustable Settings
An audio spectrum analyzer is an electronic device or software tool that measures and visually disp...
-
 How to Make a Digital Clock on a Vintage B&W TV using Arduino
These days I accidentally came across this small retro Black and White TV with a built-in Radio, so ...
-
 Build a $10 Function Generator with Frequency Meter for Your Lab
A function generator is a piece of electronic test equipment used to generate various types of elec...
-
 From Unboxing to Coding - Radar Clock on Elecrow’s 2.1 HMI Display
Today I received a shipment with a large round LCD display from Elecrow. The device is packed in two...
-
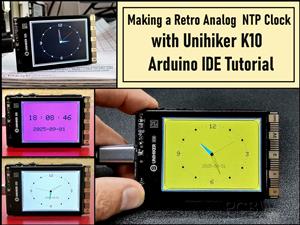 Making a Retro Analog NTP Clock with Unihiker K10 - Arduino IDE Tutorial
Some time ago I presented you a way to use standard Arduino libraries on the Unihiker k10 developme...
-
 Build a Cheap & Easy HF Preselector - Antenna Tuner
HF antenna preselector is an electronic device connected between an HF radio antenna, and a radio r...
-
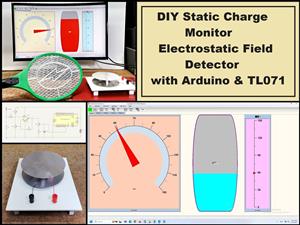 DIY Static Charge Monitor - Electrostatic Field Detector (Arduino & TL071)
A Static Charge Monitor also known as a Static Field Meter or Electrostatic Voltmeter is a device u...
-
 XHDATA D-219 Radio Short Review with complete disassembly
Some time ago I received an offer from XHDATA to be one of the first test users of their new radio m...
-
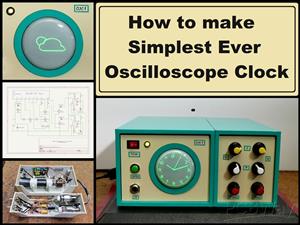 How to make Simplest ever Oscilloscope Clock
An oscilloscope clock is a unique and creative way to display the time using an oscilloscope, which...
-
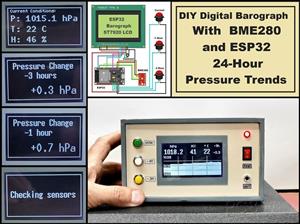 DIY Digital Barograph with BME280 and ESP32 - 24 Hour Pressure Trends
A barograph is a self-recording barometer that continuously measures and records atmospheric pressu...
-
 Build a Raspberry Pi Pico SDR Radio with Waterfall Display
Software-defined radio (SDR) is a radio communication system where components that have traditional...
-
 DIY Magnet Polarity Detector - How to Identify Poles with a Hall Sensor from a PC Fan
Recently, while working on a project, I needed to determine the polarity of several permanent magne...
-
 Light Meter Project - Making Dfrobot Unihiker K10 Work with Standard Arduino Libraries
The other day I received a shipment with a UNIHIKER K10 development board from DFRobot, which I rec...
-
 DIY Simple Arduino Whack-a-Mole Game
A "Whack-a-Mole" game is a classic arcade-style game where moles pop up randomly from holes, and th...
-
-
AEL-2011 Power Supply Module
528 0 2 -
AEL-2011 50W Power Amplifier
492 0 2 -
-
-
Custom Mechanical Keyboard
700 0 0 -
Tester for Touch Screen Digitizer without using microcontroller
331 2 2 -
Audio reactive glow LED wristband/bracelet with NFC / RFID-Tags
312 0 1 -
-
-


