Maker Your Own Professional Bench Power Supply

Every workbench should have at least one power supply.
When you’re experimenting with electronics and microcontrollers a good power supply can be an essential piece of equipment. While you can certainly make do with USB power bricks and “battery eliminators” nothing beats having a dedicated power supply with plenty of voltage selection and current capability.
An ideal workbench power supply should have both 5-volt and 12-volt outputs, with 3.3-volts being a nice option as well. It should be capable of providing several amperes of current for each voltage.
You can buy bench power supplies of course, but they are not inexpensive. As the current capability and number of output voltages go up so does the price.
While a commercial bench power supply is certainly a worthwhile investment there is a cheaper solution that you might want to consider. Adapt an old computer power supply to use on your workbench.
Computer power supplies have all the voltages you’ll need and some very impressive current capabilities. And, thanks to mass production, they are cheap when compared to dedicated bench power supplies.
In fact, if you have access to an old computer that is on its way to the junk heap you can rescue its power supply and put together a nice bench power supply for just a few dollars.
That’s what I did actually – an old Windows desktop computer has now become a useful addition to my workshop.
Supplies:
1 x AXT Power Supply
1 x DC Volt/Amp Digital Meter
15 x Female Banana Connectors (7-0Black, 8-Red)
1 x 50W 8 Ohm Load Resistor
1 x AC Switch
2 x Mini DC Switch
1 x LED
1 x 10KOhm Resistor
4 x Rubber Foot
Few Male Banana Connectors


Sorting the Power Supply Wires:
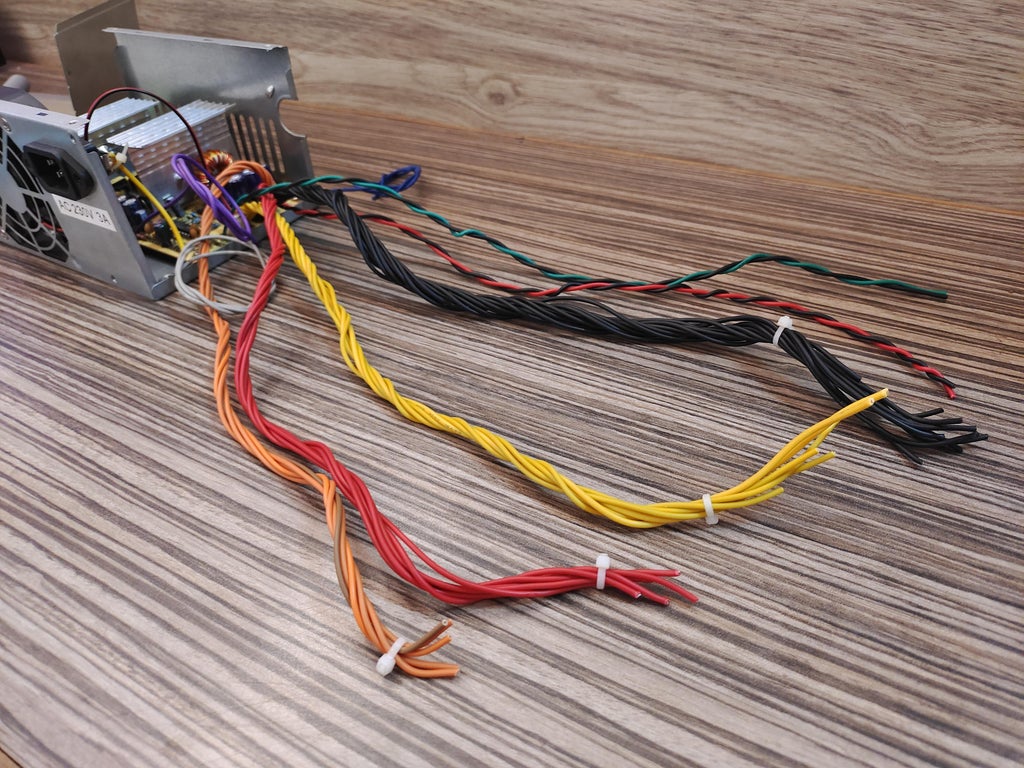
- Cut all the connectors.
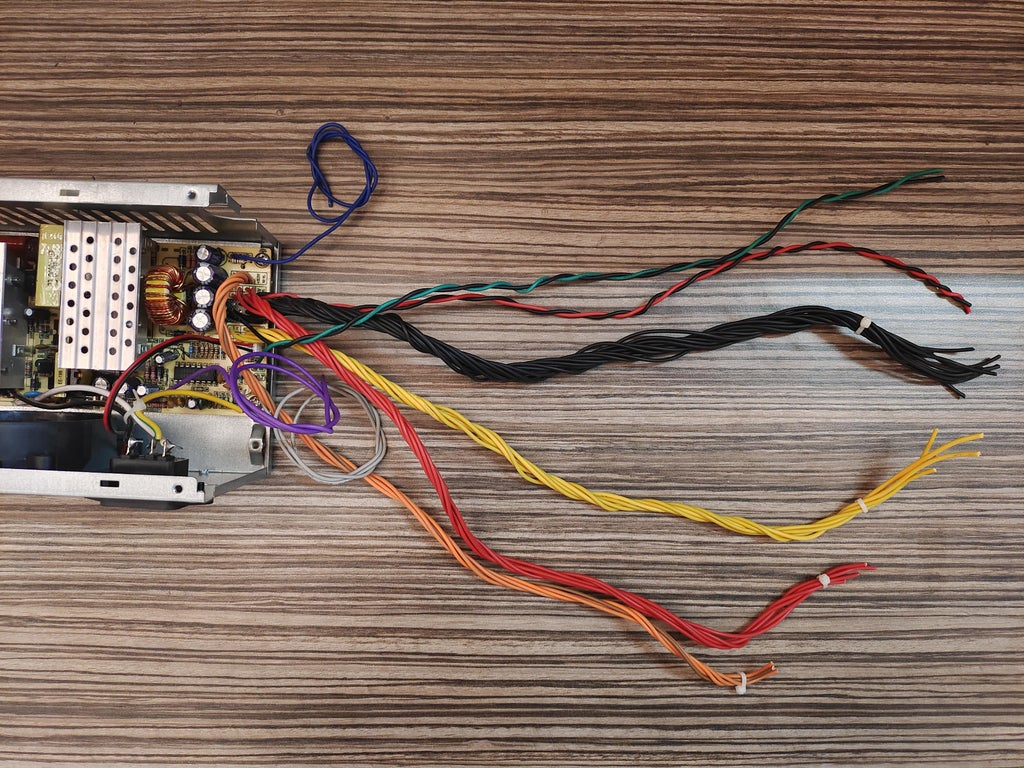
- Separate the different colored wires and group the wires with same colors.
- Ground – (BLACK) – The Ground or reference.
- +5 V – (RED) – Positive 5 volts.
- +12 V – (YELLOW) – Positive 12 volts.
- +3.3 V – (ORANGE) – Positive 3.3 volts.
- -12 V – (BLUE) – Negative 12 volts.
- -5 V – (WHITE) – Negative 5 volts (not on later models).
- PS-ON – (GREEN) – Power Switch On. Connect to Ground to turn on the power supply.
- PG – (GREY) – Power Good. A status voltage that is 5 volts when power is good.
- 5V Standby – (PURPLE) – Standby voltage, 5-volts at up to 2 amps. On when supply is powered up.
- Group Green and one Black wires.
- Group one Red and one Black wires.
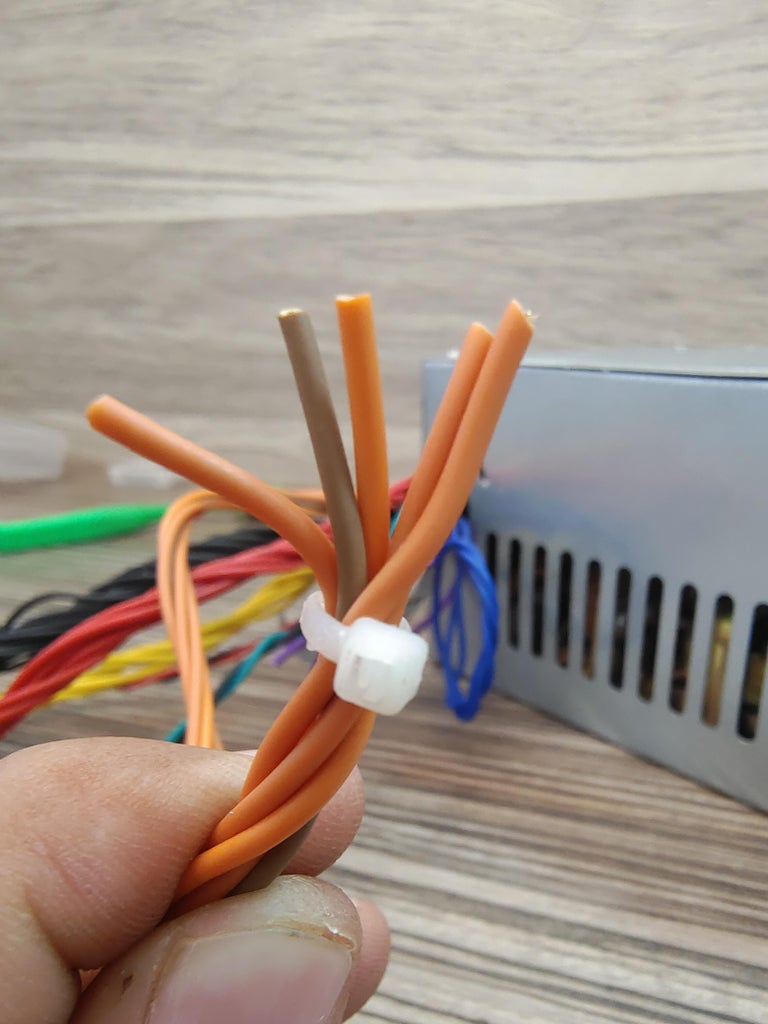
- Group the Brown wire with Orange Wires.


3D Printing:
- Download the stl files from below Attachment section and 3D Print them (There are two different types of main body and front panels print any one set).
- Fusion 360 File , You can make changes in the design using Fusion 360.
Check Out Full Instructables Page for step by step guide.


Maker Your Own Professional Bench Power Supply
*PCBWay community is a sharing platform. We are not responsible for any design issues and parameter issues (board thickness, surface finish, etc.) you choose.
- Comments(0)
- Likes(6)
-
 Engineer
Jul 19,2024
-
 Engineer
Oct 15,2023
-
 Rafał Motorny
Oct 07,2023
-
 exxelent
Jan 27,2023
-
 tripleclown
Dec 24,2022
-
 Engineer
Jun 06,2022
- 0 USER VOTES
- YOUR VOTE 0.00 0.00
- 1
- 2
- 3
- 4
- 5
- 6
- 7
- 8
- 9
- 10
- 1
- 2
- 3
- 4
- 5
- 6
- 7
- 8
- 9
- 10
- 1
- 2
- 3
- 4
- 5
- 6
- 7
- 8
- 9
- 10
- 1
- 2
- 3
- 4
- 5
- 6
- 7
- 8
- 9
- 10
 More by Mukesh Sankhla
-
 Tillu - The Robot
Meet Tillu - The Robot, a unique fusion of advanced robotics and creativity designed to inspire lear...
-
 Maker Your Own Professional Bench Power Supply
Every workbench should have at least one power supply.When you’re experimenting with electronics and...
-
 Interfacing Huskylens with Raspberry Pi Pico
In this tutorial we are going to interface the Huskylens with Raspberry Pi Pico and program the Pico...
-
-
mammoth-3D SLM Voron Toolhead – Manual Drill & Tap Edition
251 0 0 -
-
AEL-2011 Power Supply Module
776 0 2 -
AEL-2011 50W Power Amplifier
643 0 2 -
-
-
Custom Mechanical Keyboard
838 0 0 -
Tester for Touch Screen Digitizer without using microcontroller
460 2 2 -
Audio reactive glow LED wristband/bracelet with NFC / RFID-Tags
407 0 1 -
-


