Next Builder
INDIA • + Follow
Edit Project
Tools, APP Software Used etc.

|
KiCADKicad
|
|

|
arduino IDEArduino
|
Description
Pcbway 10th Anniversary Celebration Badge
AVR USB ISP Programmer and connect your AVR USB ISP Programmer to Your Laptop/PC.
Now the final step;) Open the provided source code in your setuped Arduino IDE And customised this Code according to your needs or upload it directly.
Now the badge is ready to use just insert the coin cell and celebrate pcbway 10th Anniversary.
Thankyou guys, hope you like it. Stay tuned for next one until follow Next Builder on Instagram & Subscribe on YouTube.
Code
Schematic and Layout
Schematic
May 28,2024
918 views
Pcbway 10th Anniversary Celebration Badge
This Badge is specially designed For Celebrating Pcbway 10 Anniversary
918
1
0
Published: May 28,2024
Standard PCB
BOM(Bill of materials)
Centroid file
Purchase
Donation Received ($)
PCBWay Donate 10% cost To Author
File Last Updated: 2024/05/28 (GMT+8)
File update record
2024-05-2822:25:08
Gerber file is updated.
2024-05-2822:18:06
Centroid file is updated.
2024-05-2822:18:06
Parts List (BOM) is updated.
2024-05-2822:18:06
Gerber file is updated.
Only PCB
PCB+Assembly
*PCBWay community is a sharing platform. We are not responsible for any design issues and parameter issues (board thickness, surface finish, etc.) you choose.
Copy this HTML into your page to embed a link to order this shared project
Copy
Under the
Attribution-ShareAlike (CC BY-SA)
License.
- Comments(0)
- Likes(1)
Upload photo
You can only upload 5 files in total. Each file cannot exceed 2MB. Supports JPG, JPEG, GIF, PNG, BMP
0 / 10000
It looks like you have not written anything. Please add a comment and try again.
You can upload up to 5 images!
Image size should not exceed 2MB!
File format not supported!
View More
-
 Next Builder
May 28,2024
View More
VOTING
0 votes
- 0 USER VOTES
0.00
- YOUR VOTE 0.00 0.00
- 1
- 2
- 3
- 4
- 5
- 6
- 7
- 8
- 9
- 10
Design
1/4
- 1
- 2
- 3
- 4
- 5
- 6
- 7
- 8
- 9
- 10
Usability
2/4
- 1
- 2
- 3
- 4
- 5
- 6
- 7
- 8
- 9
- 10
Creativity
3/4
- 1
- 2
- 3
- 4
- 5
- 6
- 7
- 8
- 9
- 10
Content
4/4
 More by Next Builder
-
 DIY Smart Battery Charger
In today's world, batteries are an integral part of our lives, powering everything from our smartpho...
-
 DIY 3D Printed Keychain Light
Hello Friends, welcome back in my new Instructables. Today I'm going to build my own smallest & ...
-
 DIY 3D Printed Compact Size Bluetooth speaker
Hello Friends, My self Kishan Pratap Singh. I developed my new project. Kindly let me know your thou...
-
 200w Mini Smart Inverter PCB
Introducing our Mini Inverter PCB, a compact and efficient solution for portable power needs. This c...
-
 PCBWay 11th Anniversary LED Badge – Services Edition 🎉
This project is a custom-designed PCB badge created to celebrate PCBWay’s 11th anniversary and highl...
-
 OrbitClock – a Tiny Space-Inspired IoT Environment Clock
Time and space are deeply connected — satellites orbit Earth to keep our clocks synchronized with in...
-
 DIY Compact UPS for Wifi Router (Easy To Build)
In villages and towns where electricity cut-offs are a daily challenge, one of the first things to g...
-
 Pocket Glow: a perfect camping light
The call of the wild is always exciting, but it also comes with challenges – like needing the right ...
-
 Face Recognition Door Lock with Smartphone Notification
Have you ever wished your home security system felt as futuristic and intelligent as JARVIS from Iro...
-
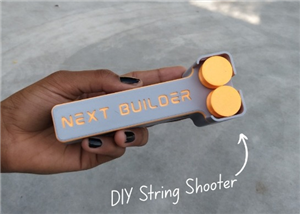 DIY String Shooter
This is my DIY 3D Printed String Shooter—a fun little project I made using two micro dc toy motor. I...
-
 PCBWay 11th Anniversary LED Badge 🎉
This project is a custom-designed PCBWay 11th Anniversary Badge, created to celebrate 11 years of PC...
-
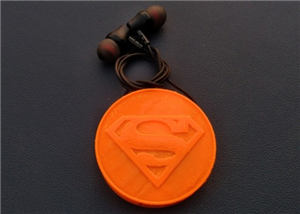 3d Printed Wireless Earphone
These days, most new smartphones don’t come with a headphone jack. And if you're like me, you probab...
-
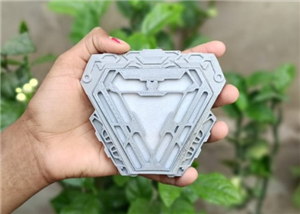 3d Printed Iron Man Arc Reactor
Have you ever dreamed of holding a piece of Iron Man’s genius in your own hands? Well, I did—and I t...
-
 Build your own DIY 4s Battery Pack
Having a flexible and modular battery pack is essential for many DIY projects. That’s why I designed...
-
 Pogo Pins For AVR USB ISP Programmer
Hey Guys, Welcome back in my new project. Today I build this pogo pin connector for programming. It'...
-
 Spring Test Probe Pogo Pin for programming
Hey Guys, Welcome back in my new project. Today I build this pogo pin connector for programming. It'...
-
 Pcbway 10th Anniversary Celebration Badge
AVR USB ISP Programmer and connect your AVR USB ISP Programmer to Your Laptop/PC.Now the final step;...
-
 Control Stepper Motor &:Servo Motor Using this
Hey Guys, Welcome back in my new project. Today I build this PCB to make a self balancing robot. Thi...
You may also like
-
-
mammoth-3D SLM Voron Toolhead – Manual Drill & Tap Edition
258 0 0 -
-
AEL-2011 Power Supply Module
783 0 2 -
AEL-2011 50W Power Amplifier
651 0 2 -
-
-
Custom Mechanical Keyboard
844 0 0 -
Tester for Touch Screen Digitizer without using microcontroller
468 2 2 -
Audio reactive glow LED wristband/bracelet with NFC / RFID-Tags
416 0 1 -
-


