|
|
Resistor 560k |
x 9 | |
|
|
Resistor 470 |
x 7 | |
|
|
Resistor 33k |
x 4 | |
|
|
LM7805 |
x 1 | |
|
|
Resistor 12k |
x 4 | |
|
|
Header PINS 2 |
x 1 | |
|
|
Header Pins 10 |
x 1 | |
|
|
CD74HC147MT |
x 1 | |
|
|
CD4511BNSR |
x 1 | |
|
|
BC547B |
x 4 | |
|
|
7-segment |
x 1 |
|
|
Inventhub |
|

|
Altium DesignerAltium Designer
|
Water Level Indicator PCB Design Board
Measure level of Water:
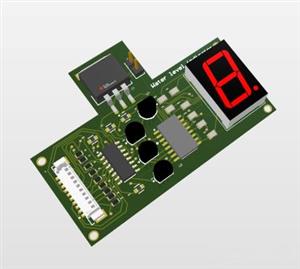
The water level indicator is used to indicate the level of water or any fluid in order to control the overflow. This PCB device can be used within containers or water tanks. Using this device we can save water for generations. We can also use it as safety equipment in swimming pools for kids to avoid an increase of water above a certain limit. This is a digital water level indicator in which a seven-segment LED display will show the level of the water in terms of numbers ranging from 0 to 9. This device is also useful for irrigation purposes.
Working:
This device consists of three major components; IC74174 and IC4511, 7-segment display.


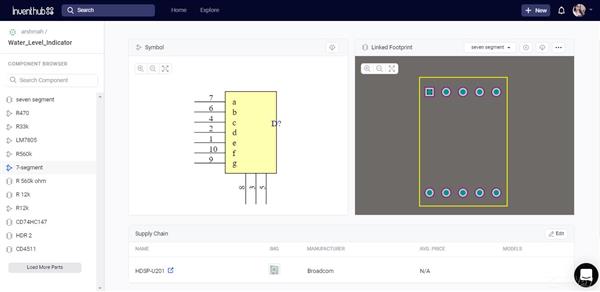
IC74147 has nine dynamic low input sources and changes over the dynamic contribution to dynamic low BCD yield output. There is 10 pins connector header attached on this board, this header is indicating some levels; pin1 indicates L9, pin2 indicates, L8, and so on till pin9 indicates L1.
When the water tank is empty, all the inputs of IC74174 are high. Output also remains high, making all the inputs of IC4511 low. The 7-segment display shows 0, which means the water tank is empty. When the level of the water arrives at the L1 position, the 7-segment shows 1, and when the level of the water arrives at the L2 position, the displa7-segment shows 2. When the tank is full, all the inputs of IC74174 become low making IC4511 high. The 7-segment display shows 9, which means the water tank is full.
Uses:
- Useful to make an alert in any Tsunami warning
- Irrigation water control
- Control level of water in Sewage pumps, water tanks, oil tanks, pools
- Turn on or off pumps by indicating the level of water
Schematic:
I have designed a schematic diagram on Altium Designer. Then I created an empty project online on Inventhub and uploaded my schematic file there. Making project online is helpful for the users who want to implement my design. They can visually view and download it from the Inventhub easily and can directly implement the design without any error.
PCB Design:
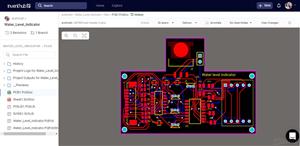
I have converted my schematic file to the PCB file. Here I can view my board in 3D, check for errors, and edit the shape of the board. I have uploaded my PCB file on Inventhub. Instead of visiting the manufacturer, I can send him the PCB file. This is also useful for the users who want to design my board, they can view and download it from the Inventhub. I can also enable or disable the layers of the board to focus on a specific layer.
Project History:
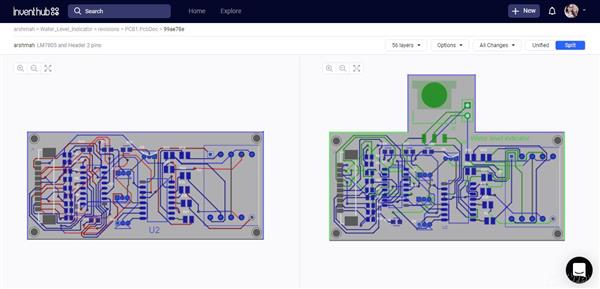
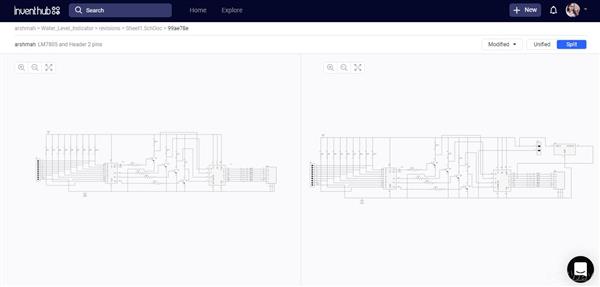
Project revisions allow users to view their previous or current changes in the design they could be added, deleted, or modified parts of the schematic or PCB file. I have uploaded revisions of my design online on Inventhub to keep the backup. If I want to get any previous change I have made in my design, I can go to the revision, select that particular file, and can download it as my current design.
The below figures show two different designs representing the previous revision on the left side and the current or final revision on the right side. You can see the difference in the design between the first and the final revision.
Release file:
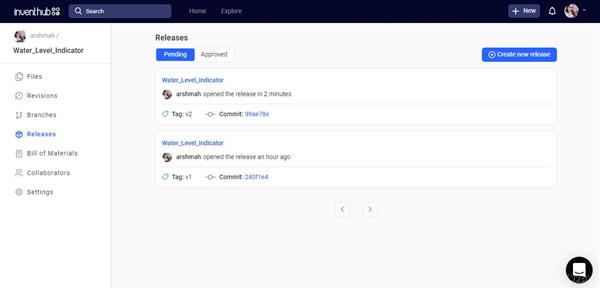
For fabrication, I have uploaded a release file of my project in a ZIP file format which contains all my design files. Instead of visiting the manufacturer, I can send him this release file and he can fabricate my board without any error.
BOM file:
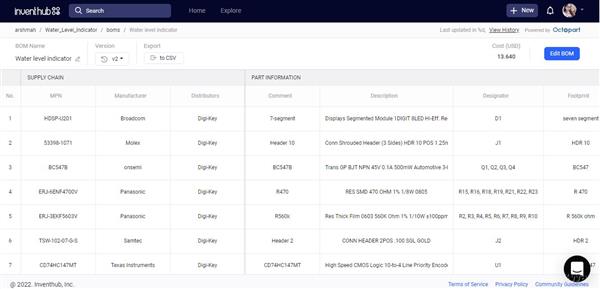
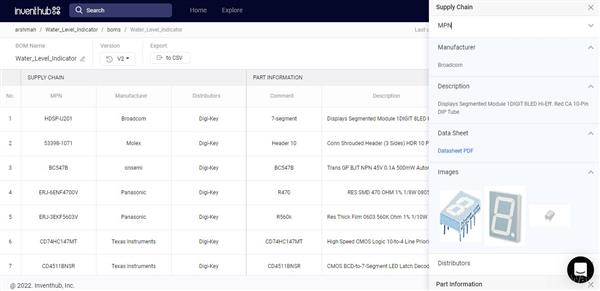
I have created a bill of materials online on Inventhub that contains the details of my components. To embed components on the board, I can send this file in CSV format to my component provider. He can deliver the components easily as per design requirements. I can calculate the total cost of my project by clicking on ‘Supply Chain’. My total cost is $13.640 as per the choice of my supplier, manufacturer, and availability of the component.
Water Level Indicator PCB Design Board
*PCBWay community is a sharing platform. We are not responsible for any design issues and parameter issues (board thickness, surface finish, etc.) you choose.
- Comments(0)
- Likes(0)
- 0 USER VOTES
- YOUR VOTE 0.00 0.00
- 1
- 2
- 3
- 4
- 5
- 6
- 7
- 8
- 9
- 10
- 1
- 2
- 3
- 4
- 5
- 6
- 7
- 8
- 9
- 10
- 1
- 2
- 3
- 4
- 5
- 6
- 7
- 8
- 9
- 10
- 1
- 2
- 3
- 4
- 5
- 6
- 7
- 8
- 9
- 10
 More by Arshmah Arshmah Shahkar
-
 Control Household Appliances Remotely- PCB Board
This is a simple remote controller circuit consisting of two main parts:TransmitterReceiverThese kin...
-
 Better Quality of Sound with Class D Audio Amplifier PCB Board
What is Class D Amplifier?As the name suggests D, is a digital amplifier. It is also known as a swit...
-
 Digital Voltmeter PCB Board To Measure Voltages Accurately
Digital Voltmeter:Digital voltmeters are used to measure potentials between two different points and...
-
 Control Direction of DC Motor Using H-Bridge Driver PCB
Working of H-Bridge Driver:H- Bridge driver circuit is made up of four transistors that act as switc...
-
 FPGA PCB Using ICE40 To Drive 64×64 LED Matrix
ICE40 FPGA:The ICE40 chip is an ultra-low-power FPGA and sensor manager designed for ultra-low power...
-
 Heart Rate Monitoring PCB Board Design for Workout
The heart rate monitor is used to measure heartbeats in a minute. It can be useful in many applicati...
-
 Determine Electric Field Strength To Adjust Gain and Transmitting Range-PCB Design
Description:This PCB design board is useful for the RF signals to determine the strength of the sign...
-
 H-Bridge Inverter PCB Design Board
The H bridge inverter is used to convert DC voltages to AC voltages. An h bridge is common in genera...
-
 For Avionic Applications: Reliable Phase-Shift Driver PCB based on TLC6A598
Phase Shift:Avionics refers to the electronic systems designed for use in aviation. It is a combinat...
-
 Water Level Indicator PCB Design Board
Measure level of Water:The water level indicator is used to indicate the level of water or any fluid...
-
 Fire Alarm Sensor with Arduino Interface PCB Design Board
Flame sensor:A flame sensor is sensitive to normal light. It is used to detect the presence of flame...
-
 Getting Started with STM32- Arduino code Programming and PCB Design
STM32 Board:STM32 is a high-performance, development board with loads of features in a small form fa...
-
 PCB Board To Determine the Performance and Properties of an Antenna
Antenna in Wireless Communication:Antennas are everywhere! An Antenna is an electrical device that c...
-
 PCB Device to Test Continuity in Circuit and Polarity of Components
Introduction:A continuity testing device is used to check the breakage and shortage of wires in a ci...
-
 High Accuracy and Low Power Digital Temperature Sensor PCB MAX30207
Introduction to MAX30207:MAX30207 IC is a low-power and high-accuracy digital temperature sensor. It...
-
 PICAXE40X2 Efficient MCU Ideal in Hobbyist Project PCB
Overview:Take an example of a microwave oven, the microcontroller processes your input that you ente...
-
 DC to AC Inverter Based on CD4047: PCB Design Board
Inverter:Inverters are those electrical devices that convert DC voltages to AC voltages. It is used ...
-
 SMPS Power Supply PCB Board Design for Different Applications
Background Story:Switch Mode Power Supply (SMPS) can switch the main AC supply to a 12V DC supply fo...
-
-
mammoth-3D SLM Voron Toolhead – Manual Drill & Tap Edition
69 0 0 -
-
AEL-2011 Power Supply Module
587 0 2 -
AEL-2011 50W Power Amplifier
531 0 2 -
-
-
Custom Mechanical Keyboard
729 0 0 -
Tester for Touch Screen Digitizer without using microcontroller
361 2 2 -
Audio reactive glow LED wristband/bracelet with NFC / RFID-Tags
333 0 1 -
-


