RGB LED MATRIX DISPLAY
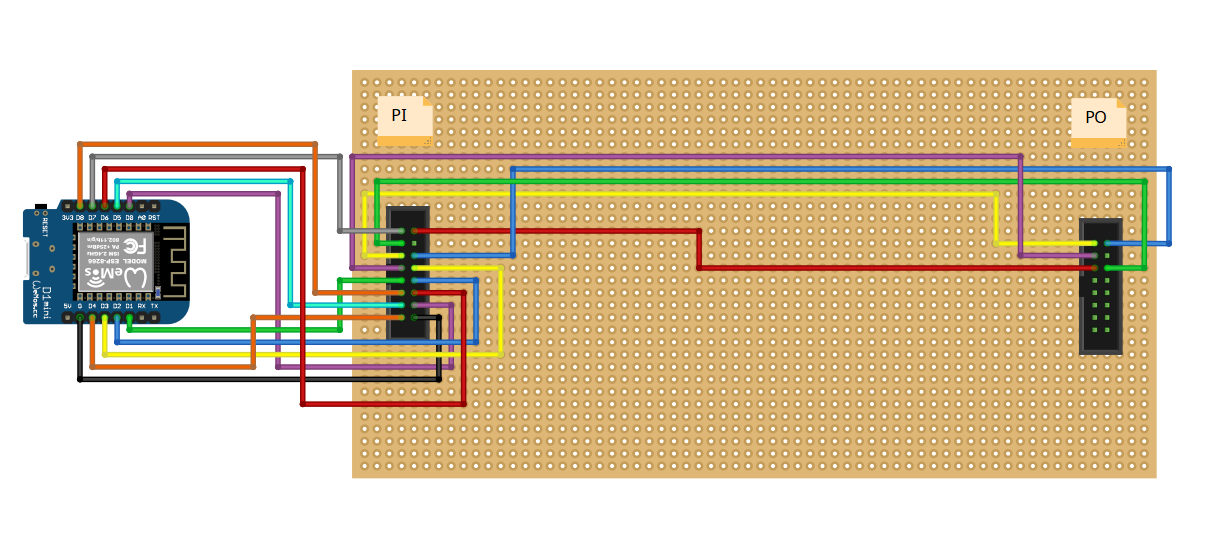
The RGB LED matrix displays are one of the coolest displays you can use with an NodeMCU. But to power up the display the wiring part is huge mess as you need to connect too many wires from nodemcu to the display connector port. Its a very tedious process. that's why I have created this little driver board. you can plug it in directly into the input header pin of the display and run the matrix display. use the ribbon cable that comes provided with most of these panels to connect the pins of the output header. Also it has screw terminals to connect the power cable that comes with most panels.
This is how a 16x32 RGB LED matrix board looks like

Multiple panels may be chained together to build larger displays. The driver is Adafruit GFX compatible and currently works with ESP8266, ESP32 and Atmel-based Arduinos (only up to 64x32).
This image shows how to connect the display with nodemcu. [Brian Lough (@witnessmenow)]

A few more things we will need to run the display :
Power Supply
We'll need is a pretty large 5v power supply, Adafruit suggest that 64x32 matrix can require up the 8 Amps! This is worst case scenario (all LEDs set to white) so in reality you probably won't need one that big.
A ribbon cable - this can be used to chain displays together. Which is supported by the library we will be using,
You'll notice on the back of the display that there are two connectors, the one you want to wire to is the one where the arrows are moving away from it
After connecting the display with the nodemcu it looks like this,

Programming :
To use the display we are also going to need to install some libraries.
The first one we need to install is the PXMatrix Library by 2Dom.
We also need to install the Adafruit GFX library.
To install this you can search on the Arduino library manager.
Then open the PixelTime code from the examples. Select the appropriate configuration for your display and upload it. Done!
- Comments(0)
- Likes(0)
 Log in to post comments.


