|
Autodesk Fusion 360Autodesk
|
3D Printed BATMAN Logo
Hey Guys how you doin!
So here's something super cool, a completely 3D Printed Huge BATMAN Logo.

My goal was to make a super simple Glowing logo from TIM BURTON's Batman.
This Logo Lamp has no complex circuitry, just some plain old LED Strip and 3D Printed body.

It's super easy to make, all you need is a 3D Printer and white strip LED.
This article is gonna be about the whole built process of this LOGO so let's get started!
Material required
- 3D Printed parts
- Superglue
- 5V Adaptor
- 3V WHITE LED STRIP
Design and Planning

In order to get started, I first have to search for a Batman logo.
- In Fusion360, I uploaded the image of the batman logo and calibrated its size so it would be 500mm long.
- After that, I modeled the bat by tracing the image and the end result was a huge batman logo that is ready to be 3D Printed.
3D Printing Process


Now here's a slight problem, I only have an Ender 3 whose built area is 235mm x 235 mm but my model is 500m Long.
To print the model on my ender 3, I cut down the model into seven pieces and printed all of them with these below settings by using orange PLA.
- Nozzle size- 0.8mm
- Layer height- 0.32mm
- Supports- YES
- Infill- 30%
Printing all the parts took 5 cycles and a total of 50 Hours.
Also, Here's an alternative if you dont own a 3D Printer.
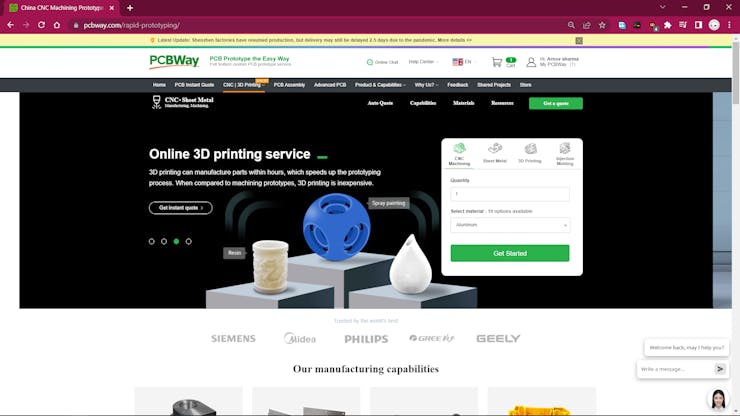
You could use PCBWay's 3D Printing Service, PCBWay also provides CNC/3D Printing services apart from PCB manufacturing and PCB Assembly.
Earlier, I place an order for a custom 3D Printed part from PCBWAY and its quality was super great.
https://www.pcbway.com/project/shareproject/DIY_Studio_Light__Light_Box.html
This Service is useful for those who don't own a 3D Printer or who want an SLA 3D Print which cannot be made in an FDM Printer or a metal 3D Print.
Check out PCBWay's 3D Printing Service for ordering custom 3D Printed/CNC Parts for a low Price.
Attaching the 3D Printed Parts Together


After 3D Printing the parts, we need to attach them together by using standard superglue.
This whole process includes connecting all parts together and adding superglue between them, then adding a clip to hold two parts in their place until two parts are completely welded together.
PAINT PROCESS


I used metallic Black paint to add a nice layer onto the 3D Print to make it look more glossy and sleek.
Adding Light Strip


To Make this logo glow, the best way is to add an LED strip on it.
I've made the Logo in such a way that the Bottom side has a wall all over the BAT shape, we can attach an LED strip onto this wall.
I haven't used any LED Driver or Microcontroller based Circuit in this project, I could use a circuit that fades or control the LED in any way but I didnt, because of keeping this project simple and easy to make.

Here's one suggestion, we can use LEDs that are controlled by a remote control like those fancy RGB Strips that comes with remote control.

I didnt have those so I use a white LED strip instead.
These ones dont come with sticky tape so I had to manually add double-sided thermal tape to each LED strip and then connect them all in parallel to one another.
Adding USB Cable


After adding the Light strip, I added a USB Cable to the LOGO.
I cut down the VCC and GND part from the Micro side of the USB and soldered it to Light Strip VCC and GND.
I then added hot glue to hold the cable in its place.
Power Source


As for the power source for this project, I'm using this DC to DC Buck converter module that I got from PCBWAY's giftshop.
https://www.pcbway.com/project/gifts_detail/6USB_output_DC_step_down_module_12V24v36V_to_5V_8A.html
This module takes voltage between 8V to 40V and outputs constant 5V and provides 8A current. Pretty good for driving LEDs.
It has reverse connection protection, overcurrent protection, and overtemperature protection which is what I needed for this kind of project.
I've connected a 12V 20Ah Battery Pack with this module, for proper daily usage, I will be housing this module inside a proper enclosure that I will be making pretty soon.
Result

In the end, I mounted this light beside my Flash logo which is also made in a similar way.
Check out my previous FLASH logo light from here-
https://www.instructables.com/3D-Printed-Glowing-Lightning-Bolt-Logo/
Special thanks to PCBWAY for supporting this project, you can check them out for getting PCB Service along with CNC and 3D Printed service as well.
Thanks again and I'll be back with a new project soon!
3D Printed BATMAN Logo
*PCBWay community is a sharing platform. We are not responsible for any design issues and parameter issues (board thickness, surface finish, etc.) you choose.
- Comments(0)
- Likes(0)
- 1 USER VOTES
- YOUR VOTE 0.00 0.00
- 1
- 2
- 3
- 4
- 5
- 6
- 7
- 8
- 9
- 10
- 1
- 2
- 3
- 4
- 5
- 6
- 7
- 8
- 9
- 10
- 1
- 2
- 3
- 4
- 5
- 6
- 7
- 8
- 9
- 10
- 1
- 2
- 3
- 4
- 5
- 6
- 7
- 8
- 9
- 10
-
1design
-
1usability
-
4creativity
-
1content
 More by Arnov Arnov sharma
-
 Pocket SNES
Greetings everyone, and welcome back! Today, I’ve got something fun and tiny to share—the Pocket SNE...
-
 Batocera Arcade Box
Greetings everyone and welcome back, Here's something. Fun and nostalgic. Right now, we are using ou...
-
 64x32 Matrix Panel Setup with PICO 2
Greetings everyone and welcome back.So here's something fun and useful: a Raspberry Pi Pico 2-powere...
-
 Portable Air Quality Meter
Hello everyone, and welcome back! Today, I have something incredibly useful for you—a Portable Air Q...
-
 WALKPi PCB Version
Greetings everyone and welcome back, This is the WalkPi, a homebrew audio player that plays music fr...
-
 Delete Button XL
Greetings everyone and welcome back, and here's something fun and useful.In essence, the Delete Butt...
-
 Arduino Retro Game Controller
Greetings everyone and welcome back. Here's something fun.The Arduino Retro Game Controller was buil...
-
 Super Power Buck Converter
Greetings everyone and welcome back!Here's something powerful, The SUPER POWER BUCK CONVERTER BOARD ...
-
 Pocket Temp Meter
Greetings and welcome back.So here's something portable and useful: the Pocket TEMP Meter project.As...
-
 Pico Powered DC Fan Driver
Hello everyone and welcome back.So here's something cool: a 5V to 12V DC motor driver based around a...
-
 Mini Solar Light Project with a Twist
Greetings.This is the Cube Light, a Small and compact cube-shaped emergency solar light that boasts ...
-
 PALPi V5 Handheld Retro Game Console
Hey, Guys what's up?So this is PALPi which is a Raspberry Pi Zero W Based Handheld Retro Game Consol...
-
 DIY Thermometer with TTGO T Display and DS18B20
Greetings.So this is the DIY Thermometer made entirely from scratch using a TTGO T display board and...
-
 Motion Trigger Circuit with and without Microcontroller
GreetingsHere's a tutorial on how to use an HC-SR505 PIR Module with and without a microcontroller t...
-
 Motor Driver Board Atmega328PU and HC01
Hey, what's up folks here's something super cool and useful if you're making a basic Robot Setup, A ...
-
 Power Block
Hey Everyone what's up!So this is Power block, a DIY UPS that can be used to power a bunch of 5V Ope...
-
 Goku PCB Badge V2
Hey everyone what's up!So here's something SUPER cool, A PCB Board themed after Goku from Dragon Bal...
-
 RGB Mixinator V2
Hey Everyone how you doin!So here's a fun little project that utilizes an Arduino Nano, THE MIXINATO...
-
-
mammoth-3D SLM Voron Toolhead – Manual Drill & Tap Edition
234 0 0 -
-
AEL-2011 Power Supply Module
761 0 2 -
AEL-2011 50W Power Amplifier
633 0 2 -
-
-
Custom Mechanical Keyboard
825 0 0 -
Tester for Touch Screen Digitizer without using microcontroller
451 2 2 -
Audio reactive glow LED wristband/bracelet with NFC / RFID-Tags
402 0 1 -
-


