ATMega16 AVR Dev Board
https://github.com/piavarelectro/ATMega16-Development-Board
Overview
After a few years of making the AVR microcontroller programming and prototyping on the breadboard. I decided to design a development board for the Atmel AVR that contain most of my previous experiment.

Features
I putted many blocks containing many components, easing the prototyping works.
Power Supply
Basic Parts Of MCU
RS-232
Digital Input And Output
External Interrupts
LED Display
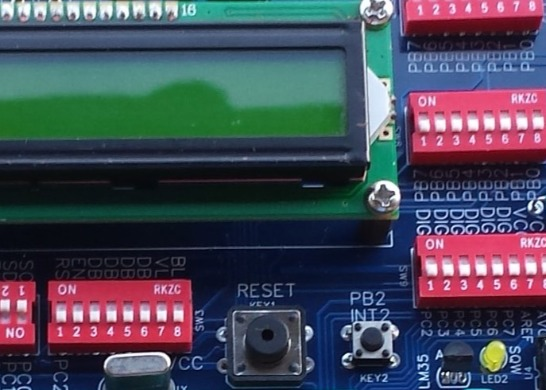
LCD Display
LCD Display
Analog Inputs
Serial Peripheral Interface
Two Wire Interface
Power Supply
The power supply block fed from a DC/DC converter at the voltage of +12V. This input voltage will be converted to a +5V and a +3.3V outputs. The +5V output supplies the microcontroller and other onboard devices. Optionally, the +3.3V output supplies to other +3.3V devices outside the board.
Basic Parts Of MCU
A 16MHz crystal clock is soldered with the MCU, yielding a 16MIPS executing speed. A reset circuit is already puted on board. The reset button triggers a reset signal whenever it's pressed by the user. An ISP socket allows the programm uploading to the microcontroller. It's a 10-pins IDC socket compatiable with the USBasp.
RS-232
The traditional RS-232 communication port could become very classic today. However I stil use it due the rich of the MAX232 driver IC in my warehouse.
Digital Input And Output
PORTA is selected as a digital input PORT. The input is changed by switching the connected on-board DIP switch ON and OFF. PORTB outputs its digital data to the Light Emitting Diodes, crossing a DIP switch.
External Interrupts
The external interrupts of the ATMega16 are INT0, INT1 and INT2. Three input buttons trigger the interrupt respectively.
LED Display
The LED display is a six digits multiplexed display. The digits are common cathode type, green color with the size of 0.4". PORTB displays the segments while PORTC controls the digits.
LCD Display
A 16x2 HD44780 LCD display assembed on this board. It's controlled by PORTC in 4-bit data mode.
Analog Inputs
The analog input fed from two analog input devices, a POT and a LM35DZ analog temperature sensor.
Serial Peripheral Interface
The Serial Peripheral Interface (SPI) of this board is the MCP4922 dual 12-bit Digital to Analog Converter (DAC). The two analog voltage outputs connect to the outside device.
Two Wire Interface
The Two Wire Interface (TWI) Communication protocol allow the communication between the master MCU and its slave device via two wires on a single bus. The TWI slave devices here are, a DS1307 RTC and a AT24C16 EEPROM.
For more information click here to see the details.
ATMega16 AVR Dev Board
*PCBWay community is a sharing platform. We are not responsible for any design issues and parameter issues (board thickness, surface finish, etc.) you choose.
- Comments(0)
- Likes(0)
- 0 USER VOTES
- YOUR VOTE 0.00 0.00
- 1
- 2
- 3
- 4
- 5
- 6
- 7
- 8
- 9
- 10
- 1
- 2
- 3
- 4
- 5
- 6
- 7
- 8
- 9
- 10
- 1
- 2
- 3
- 4
- 5
- 6
- 7
- 8
- 9
- 10
- 1
- 2
- 3
- 4
- 5
- 6
- 7
- 8
- 9
- 10
 More by Nuno
-
-
AEL-2011 Power Supply Module
525 0 2 -
AEL-2011 50W Power Amplifier
485 0 2 -
-
-
Custom Mechanical Keyboard
693 0 0 -
Tester for Touch Screen Digitizer without using microcontroller
330 2 2 -
Audio reactive glow LED wristband/bracelet with NFC / RFID-Tags
310 0 1 -
-
-


