Matrix Computer Side Panel
Intro
This project uses a PCB board with a NodeMCU ESP8266, coded to control 216 NeoPixels, that animates the side of a computer tower with the famous "raining code" animation from the Matrix franchise.
The NeoPixel control board is a modular, customizable PCB breakout board for controlling multiple strips of NeoPixels with user input options to control the speed and brightness of the display with potentiometers and control the animation mode with a push button.
The GitHub repo for this project, including the PCB Gerber files and code, is available here: https://github.com/WillDonaldson/NeoPixel_Control_Board
Supplies
Materials
- 1x PCB (see comments in next section)
- 1x NodeMCU ESP8266
- 1x 74AHCT125 chip
- 2x 10K Ohm resistors
- 4x 470 Ohm resistors
- 2x 1N4001 diodes
- 1x 1000uF electrolytic capacitor
- 12x M3 20mm bolts
- 1x DC barrel jack female and male connector (recommend 5A rating over the more common 2.5A rating)
- 1x ON/OFF switch (optional)
- 1x Momentary push button (optional)
- 2x 10K Ohm potentiometers (optional)
- 2x 2-pin JST-VH female and male connectors (optional)
- 4x 3-pin JST-VH female and male connectors (optional)
- Zipties for cable management (optional)
- 5m strip of WS2812B NeoPixels (60 LEDs/meter)
- 2x 40cm by 40cm sheet of black acrylic 3mm (dimensions will vary depending on you PC)
- 1x 40cm by 40cm sheet of white diffusing acrylic 3mm (dimensions will vary depending on you PC)
- Acrylic glue or super glue
- Assorted electrical accessories: wire, solder, heat shrink tube
- Computer with a power supply that has one 5V and GND pin available. Alternatively can bypass the inbuilt power supply and power the circuit by a traditional 5V 5Amp power supply
Tools
- Laser cutter (optional but recommended)
- Soldering iron
- Allen key for M3 bolt
- Miscellaneous tools: Wire strippers, snips
PCB Fabrication
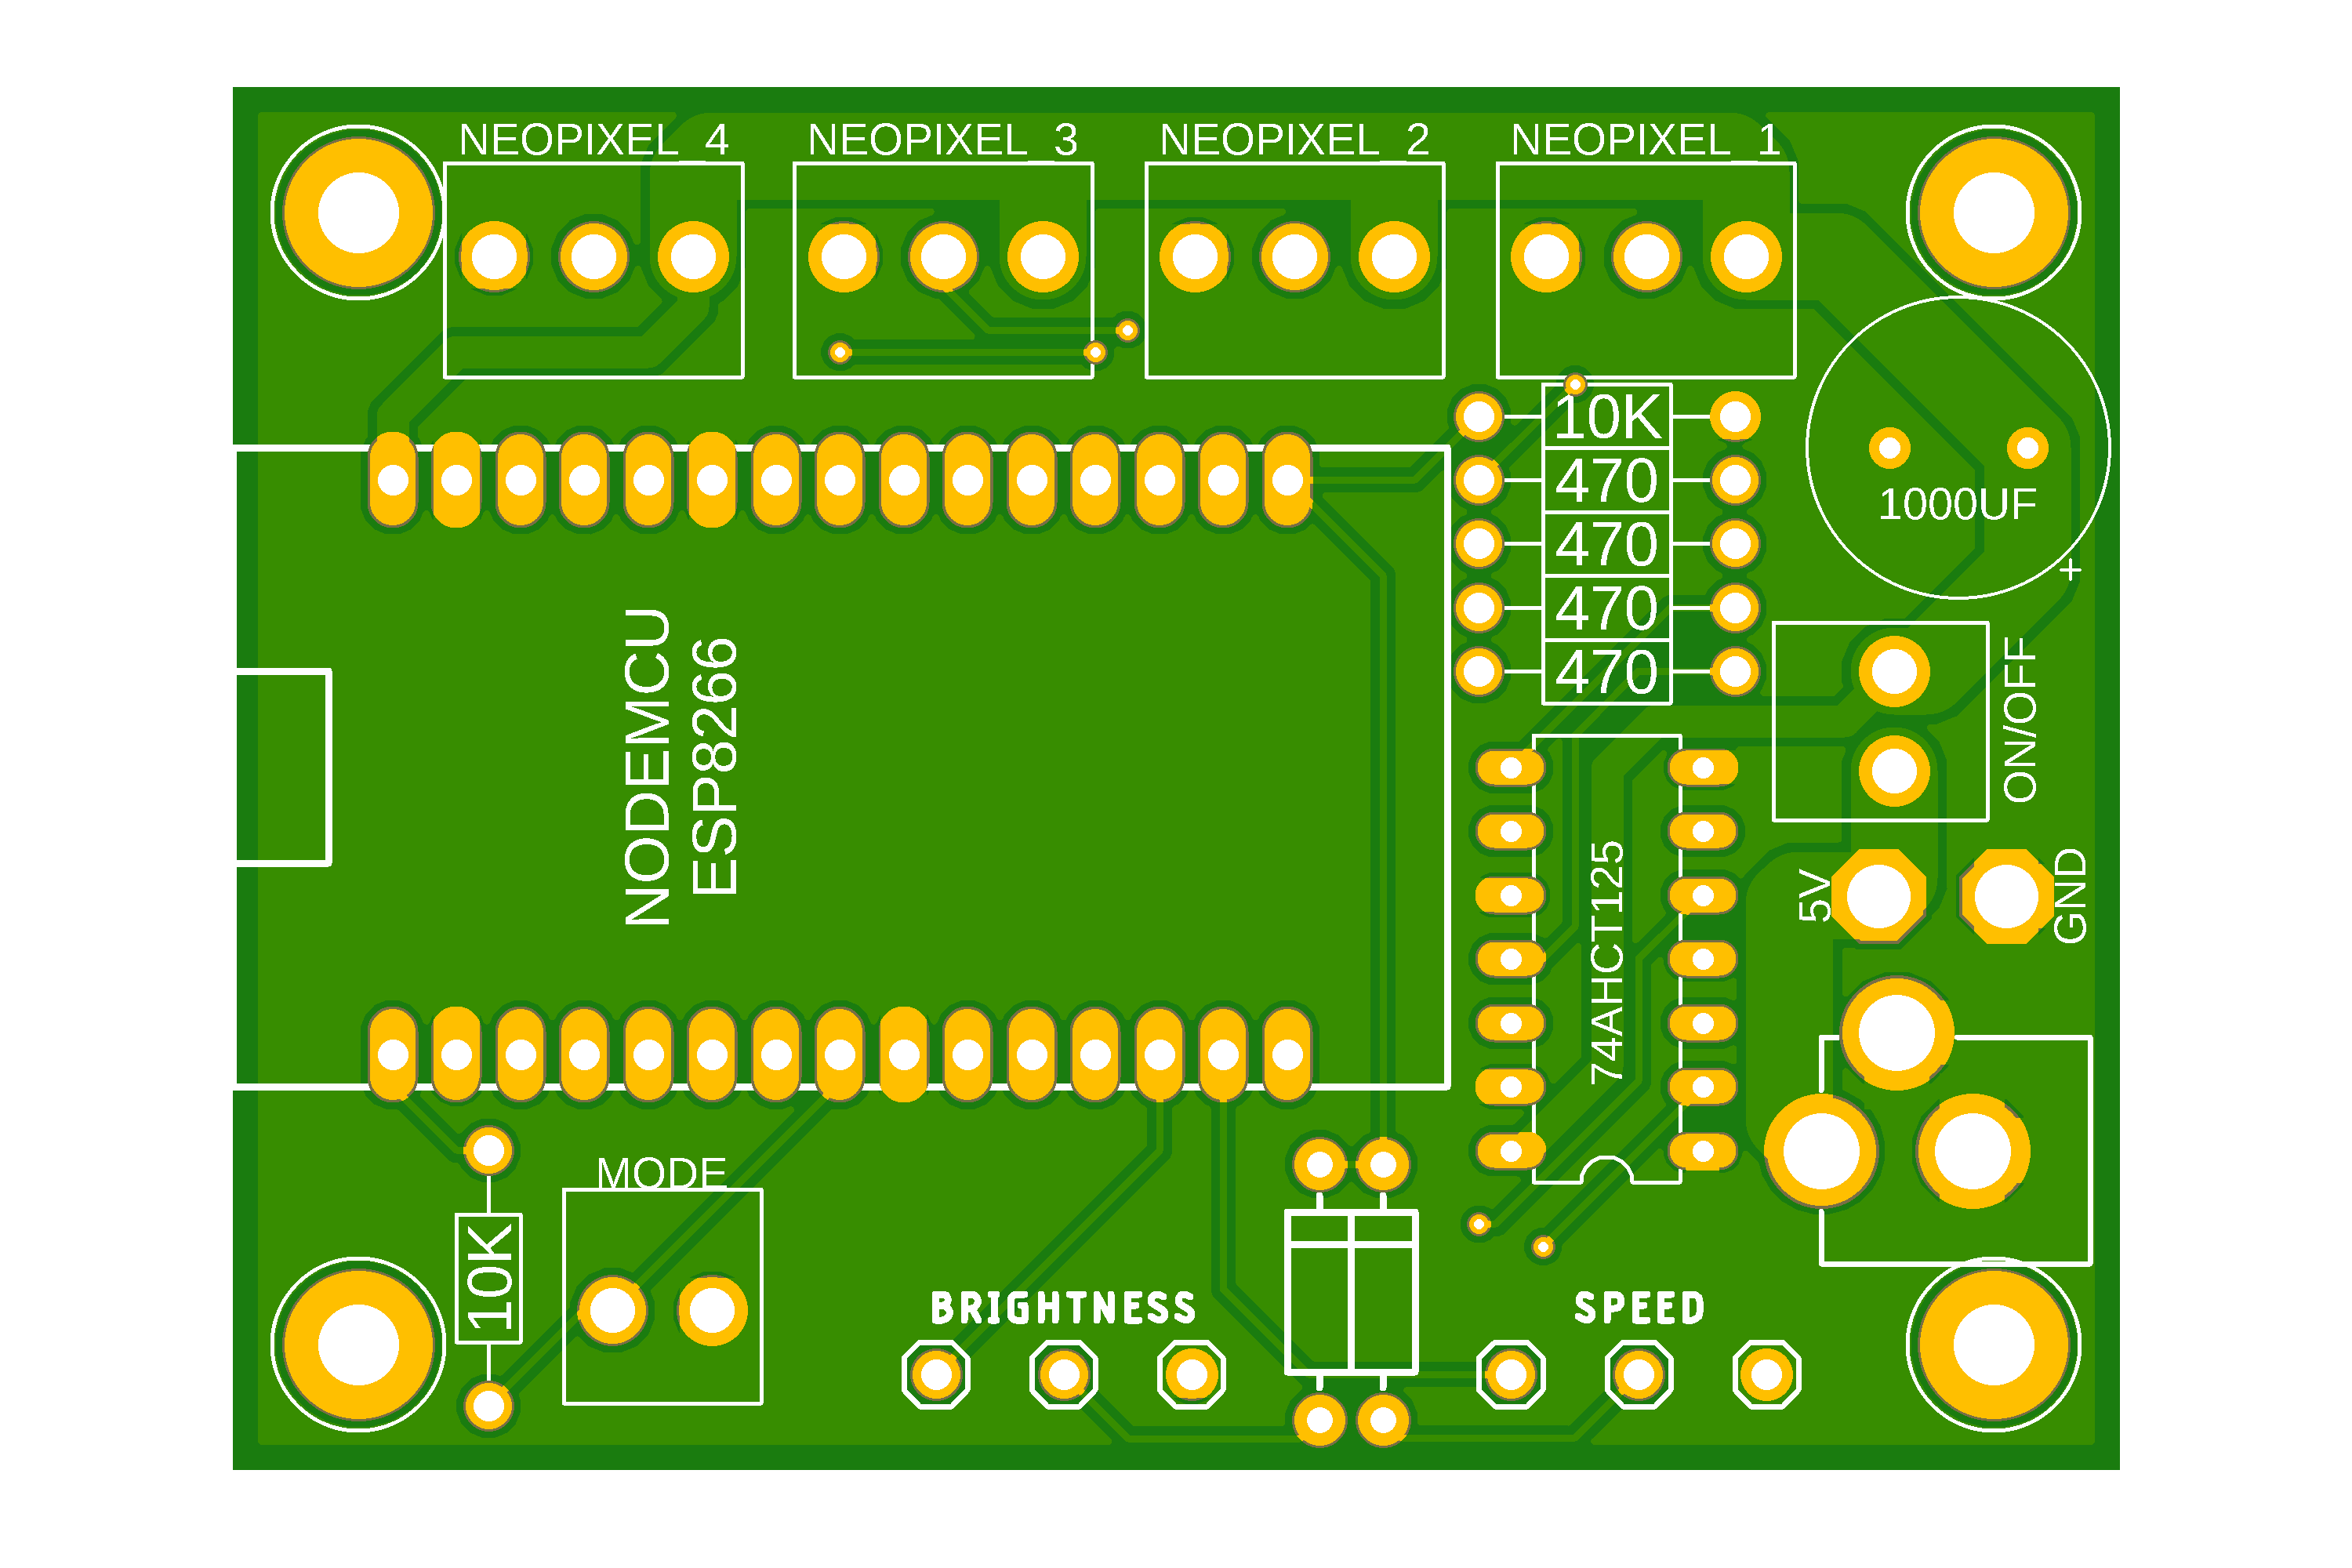
I designed this PCB in Fusion 360 electrical, in the next section you can see the electronic schematic. To fabricate the board I sent the Gerber files to PCBWay at www.pcbway.com (Disclaimer: the YouTube video I posted of this build process is sponsored by PCBWay).
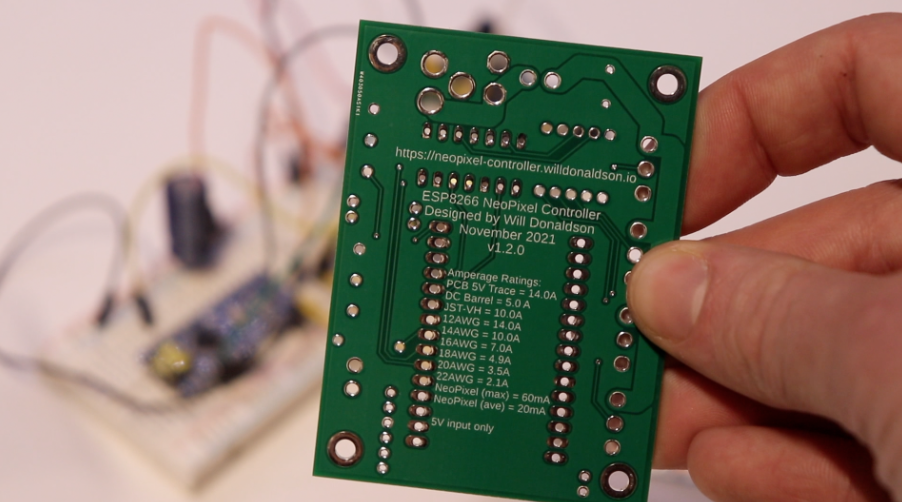
Download the latest Gerber files zip version from the GitHub repo. As of publishing (Dec 12 2021), the latest version is v1-2-0. This zip file can be uploaded directly to the PCB fabrication website with the default options left as is. https://github.com/WillDonaldson/NeoPixel_Control_Board/tree/main/gerber-files
When assembling the PCB you will notice in the pictures above I have marked the PCB with all the labels of where the different resistors, diodes, chips, and other components go.
Circuit Assembly
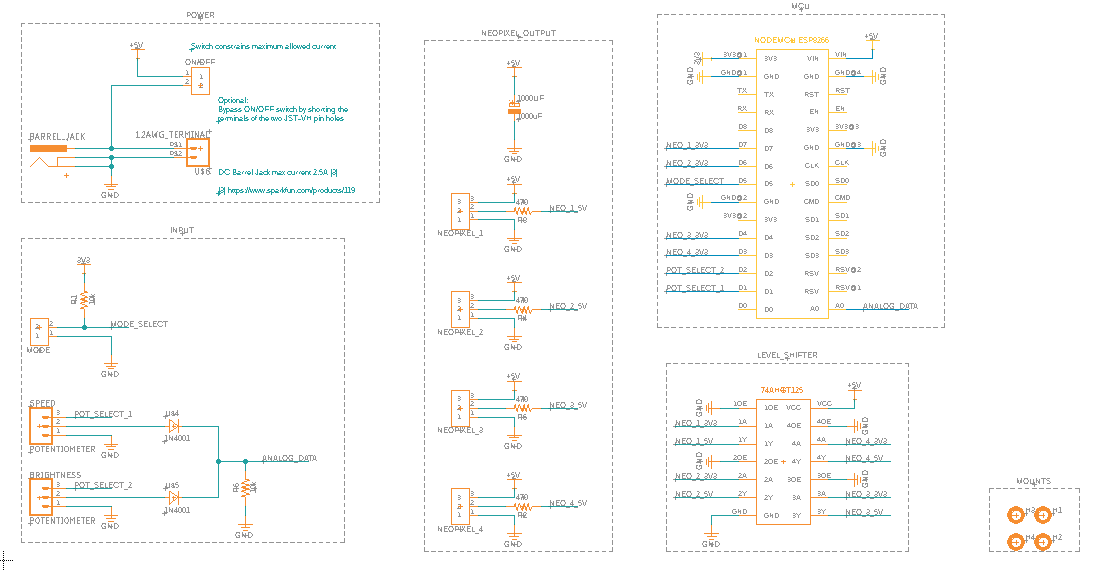
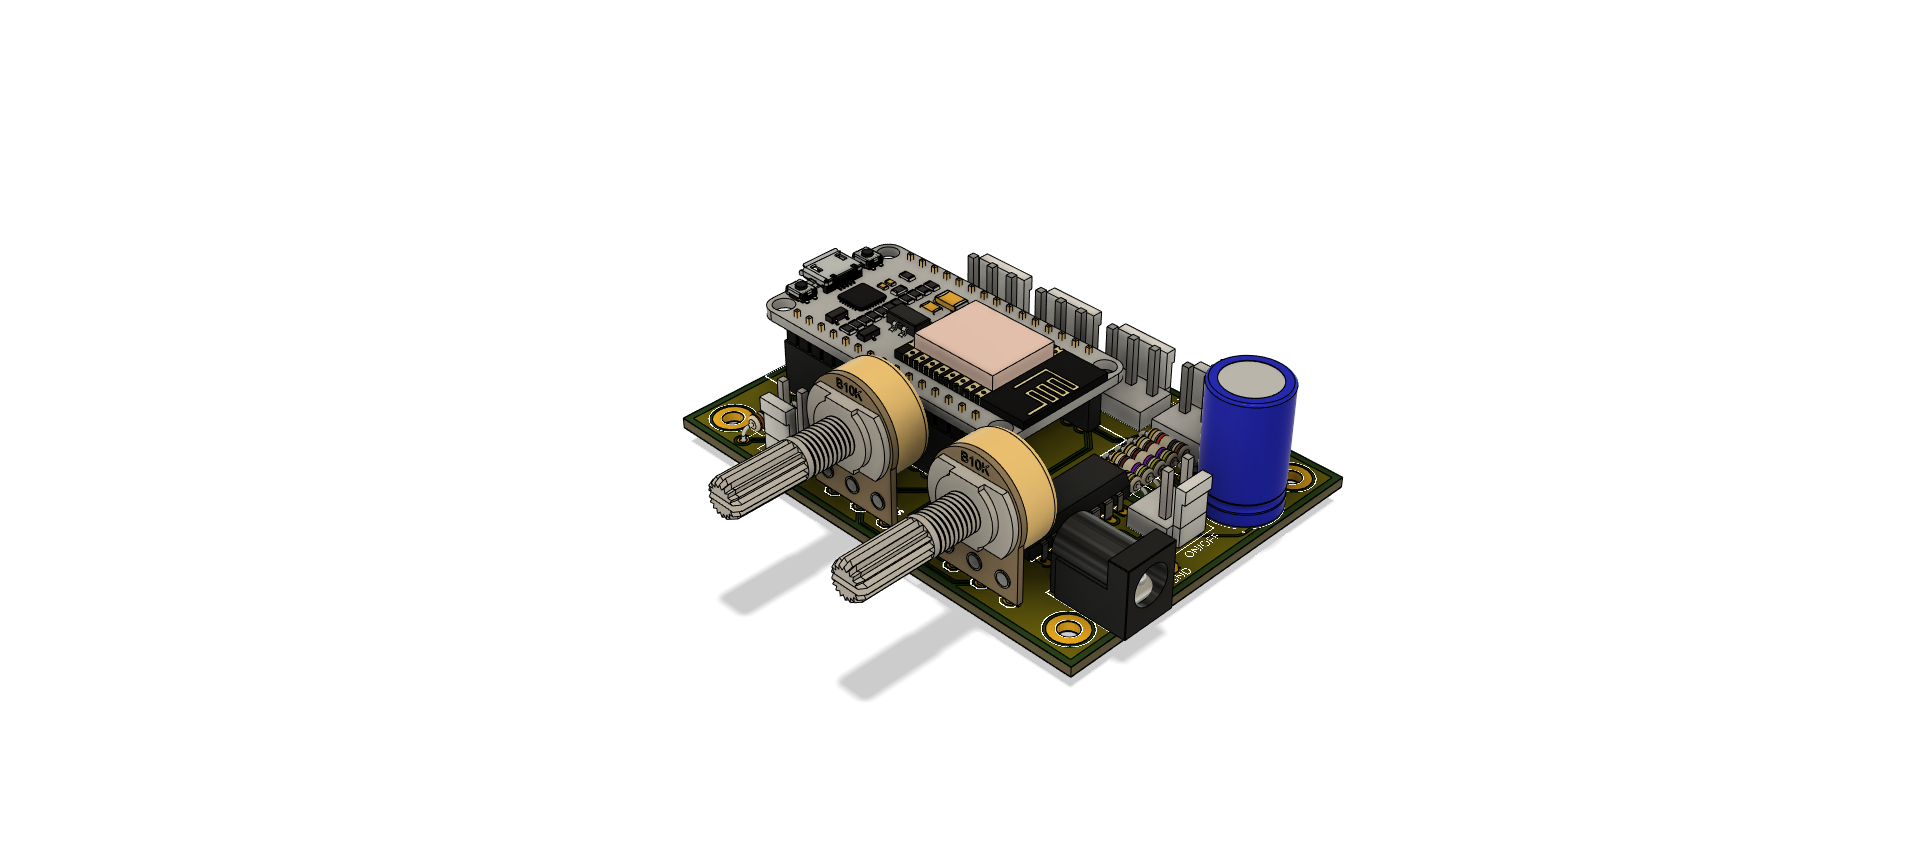
As mentioned in the previous section, the first picture in this section shows the electronic schematic. This can be used as a reference when assembling the circuit, although I did my best to label all the components directly on the PCB so you can follow the markings directly on the board when assembling the circuit.
Laser Cut LightBox
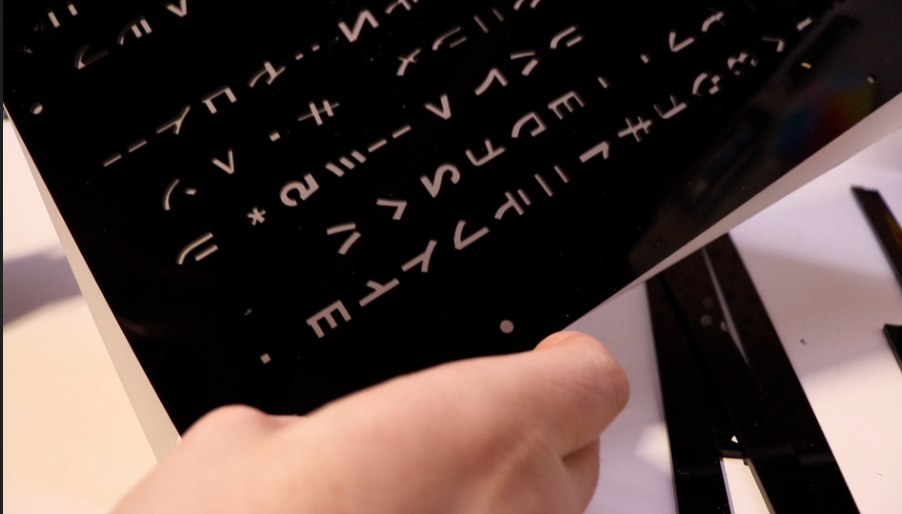
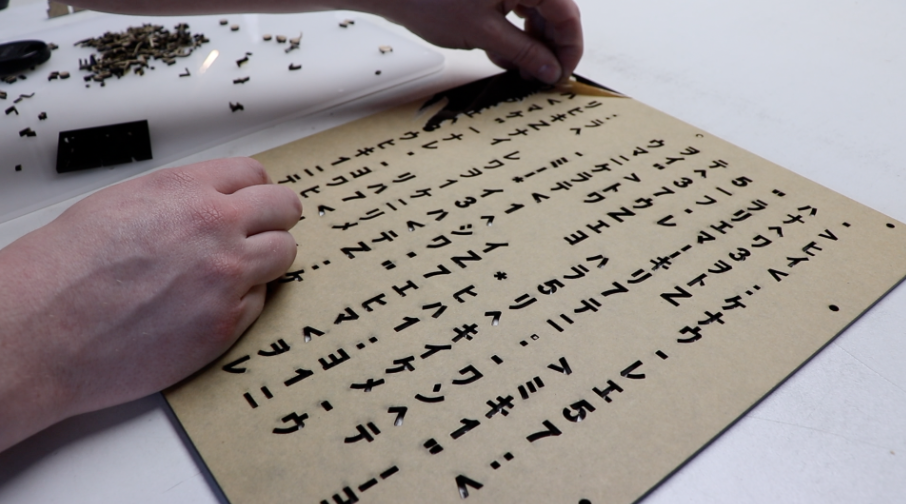
To build the lightbox we need several pieces of laser-cut acrylic. The components have been modeled to the dimensions of my PC case so you will likely need to adjust the dimensions to fit yours. All the .svg files for laser cutting can be found on GitHub here: https://github.com/WillDonaldson/NeoPixel_Control_Board/tree/main/examples/matrix-computer-side-panel/laser-cut-files
- Cut 1 copy of "character-panel.svg" out of 3mm black acrylic
- Cut 1 copy of "solid-panel.svg" out of 3mm black acrylic
- Cut 1 copy of "solid-panel.svg" out of 3mm white diffusing acrylic
- Cut 11 copies of "spacer-grid-1.svg" out of 3mm black acrylic
- Cut 2 copies of "spacer-grid-2.svg" out of 3mm black acrylic
Comments on NeoPixels
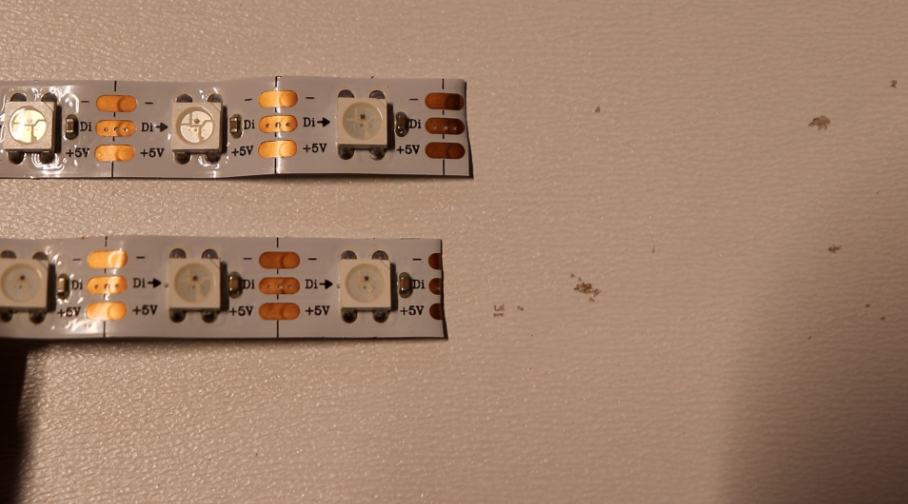
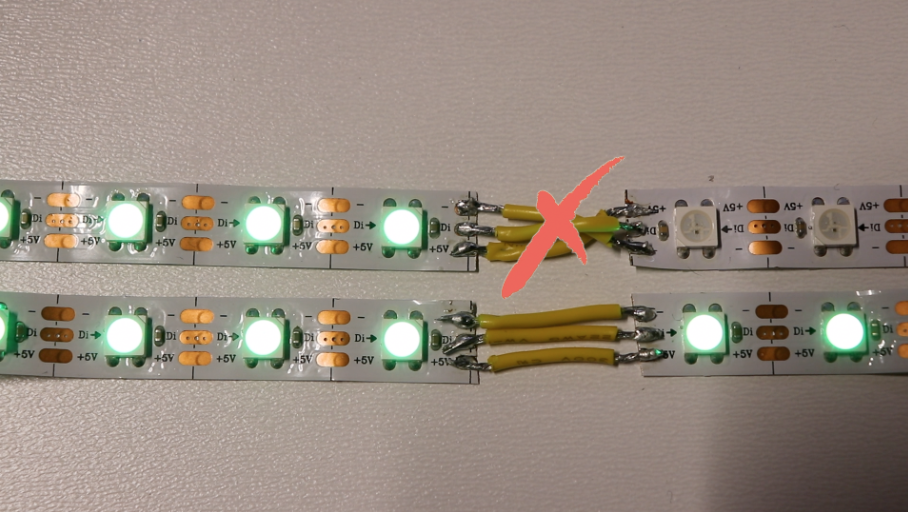
Before we start assembling the side panel I wanted to share some tips on using NeoPixels. A full reference guide can be found here and it is a resource I strongly recommend checking out: https://learn.adafruit.com/adafruit-neopixel-uberguide?view=all
The abbreviated summary of NeoPixels is that they are a strip of RGB LEDs, each with its own unique address. Having a unique address means that all the LEDs can be connected on the same data line as each LED will only listen to messages addressed directly to it.
When cutting the NeoPixel strips, instead of cutting in the middle of the copper pad I recommend cutting just past the copper pad and sacrificing the next LED in the chain as the larger pad will make soldering a lot easier (see picture above).
Additionally, make sure you observe the direction of data transmission (as indicated by the arrow next to each LED). Reversing the direction of data transmission will prevent the following LEDs from turning on (as shown in the second picture above).
Fabricate the Lightbox
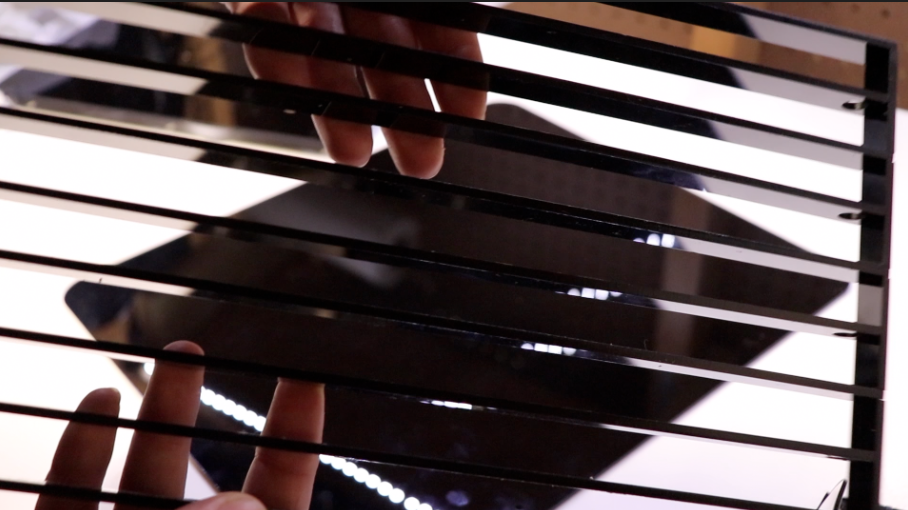
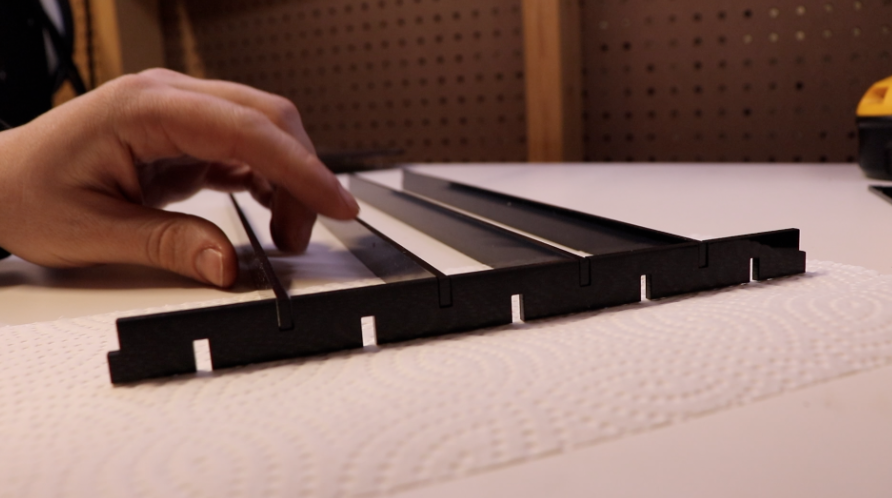
After laser cutting, assemble the 13 pieces that make up the spacer grid as shown in the pictures above. The components fit press together and then can be secured in place with acrylic glue or super glue. Note that "spacer-grid-1.svg" has a hole at one end and not at the other. These holes are used to pass the wires through and should be installed in an alternating pattern when assembling the grid. The spacer grid serves two purposes: firstly to ensure the light diffuses nicely in the white layer (if the LEDs are too close there will be visible white spots) and secondly, to ensure light doesn't spill out of one column into its neighbors (thereby ruining the raining code effect).
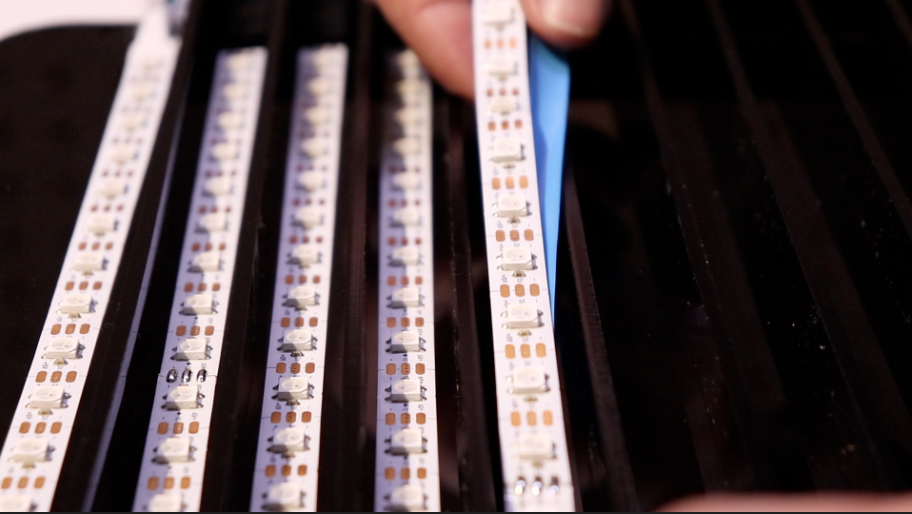
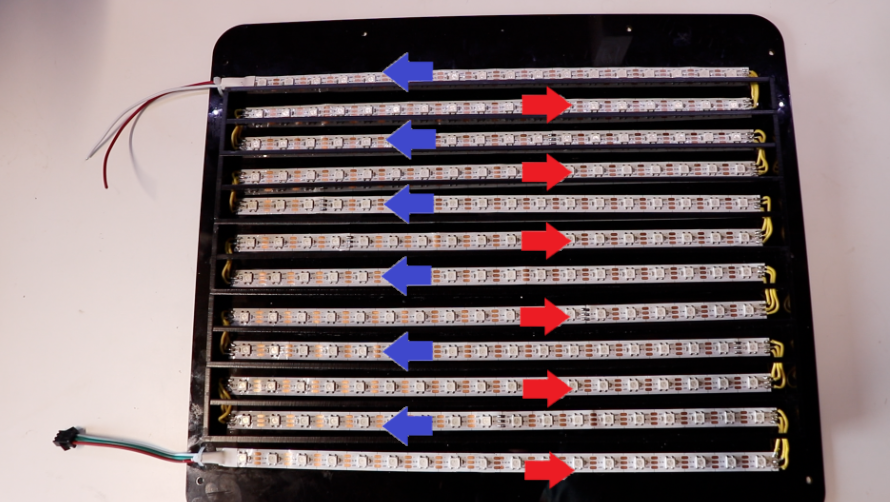
After the grid is assembled it can be glued in the center of the "solid-panel.svg" that was cut from 3mm black acrylic. This assembly makes up the back panel of the lightbox. The NeoPixel strip should be cut into 12 sections of 18 LEDs, to attach them, peel back the adhesive layer and insert the strips in between the laser cut grid. Note that the LED strips are assembled in an S-shaped pattern as shown in the picture above with blue and red arrows indicating the direction of data transmission.
Install the Side Panel
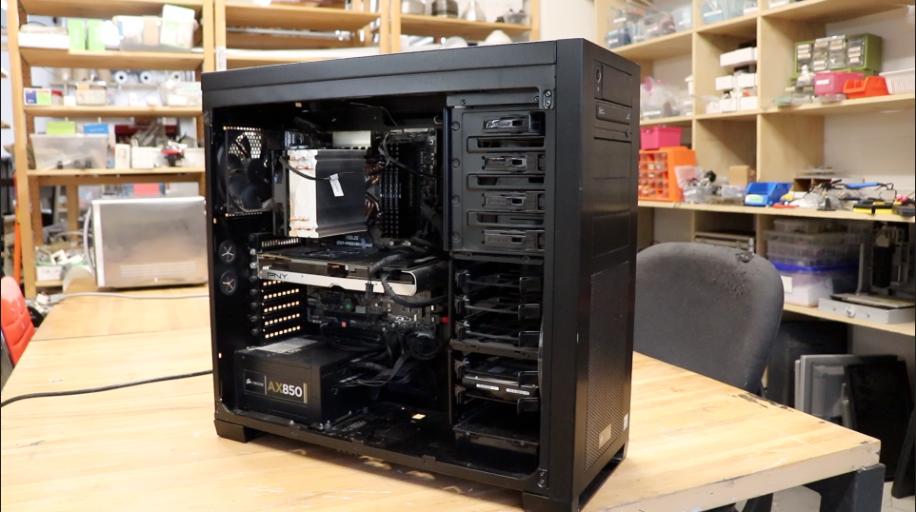
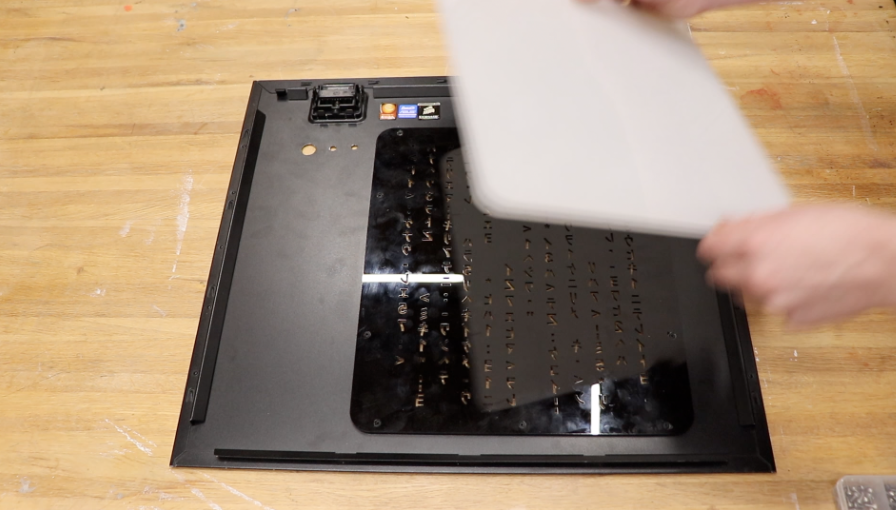
This step is specific to my particular computer so modify the steps as required. I removed the side panel and unscrewed the existing transparent panel and then inserted the 3 layers of acrylic: first the panel with characters cut out, then the white diffusing layer, and then the lightbox layer with LEDs and acrylic spacers. I used M3 bolts to secure the acrylic panels to the existing mounting points on my PC frame.
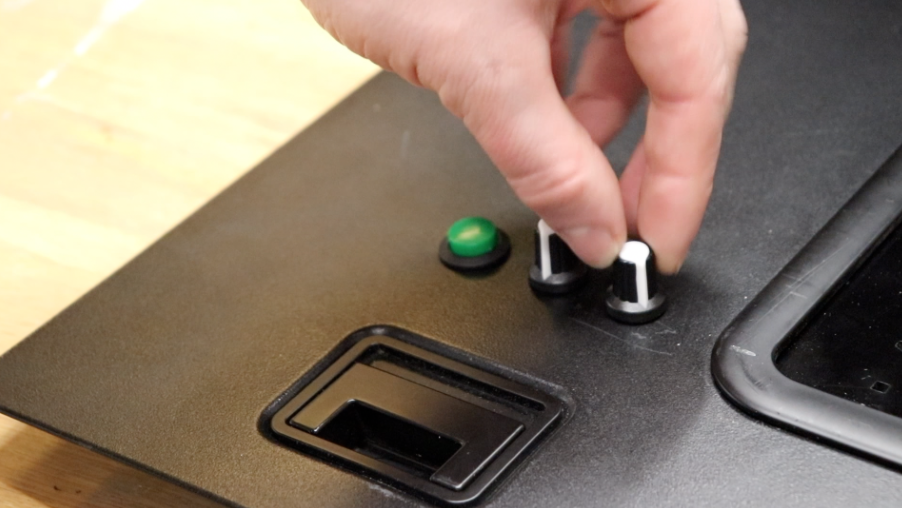
I also drilled 3 holes in the side panel to add the two potentiometers and momentary push button.
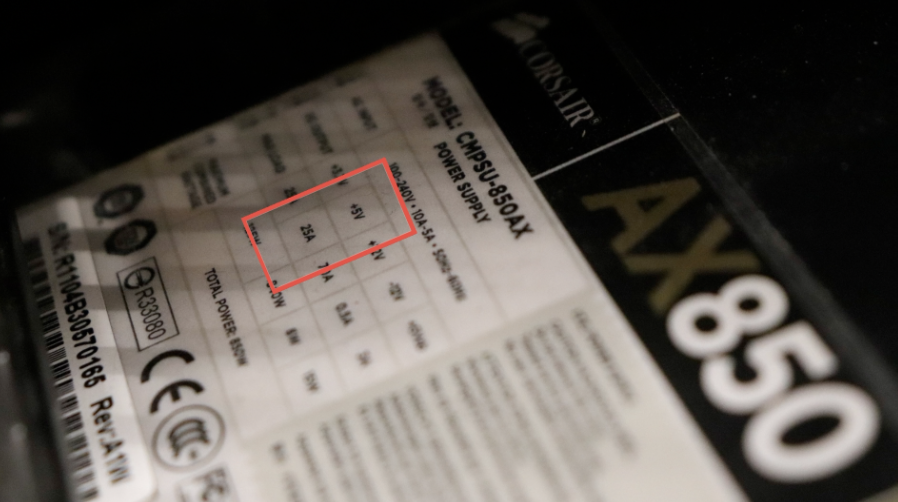
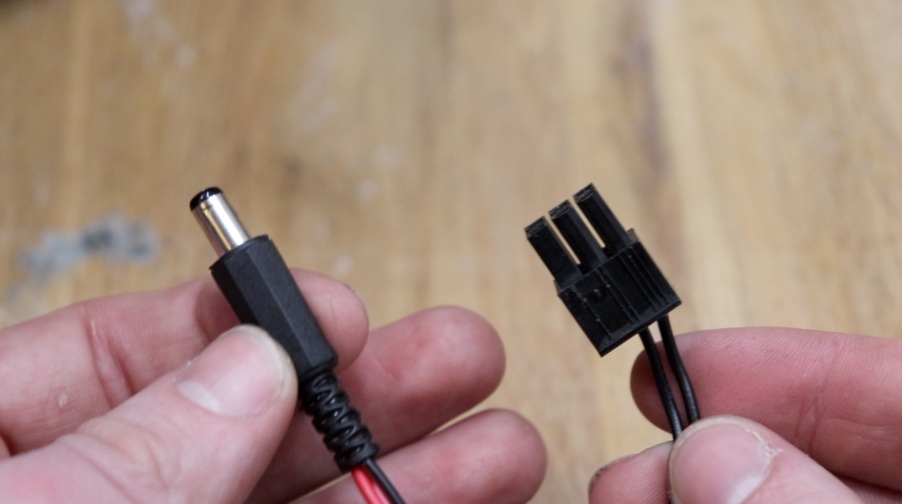
To power the circuit I used a 6 pin MOLEX connector that plugs into my 850W power supply. For the raining code animation, only a few LEDs are turned on at once so the current draw is minimal. But if you turn all the LEDs on at once to different RGB values the total current draw would be about 4.32 Amps ( = 216 LEDs * 20mA average current/LED). If you have a smaller power supply and/or want to light all the LEDs up I would recommend powering the LEDs from a separate power supply that connects directly to the wall as putting too much strain on a small computer power supply may negatively impact the performance of your computer.
Programming the ESP8266 in the Arduino IDE
Assuming you have the Arduino IDE software installed, we can program the NodeMCU ESP8266 microcontroller.
Unfortunately, the Arduino IDE can't quite hit the ground running with the ESP8266 and we need to do a couple of configuration steps first:
- Add the ESP8266 extension. Click the following: File > Preferences > Additional Board Managers > And add the following message: https://arduino.esp8266.com/stable/package_esp8266com_index.json
- Download the ESP8266. Click the following: Tools > Board > Board Manager > Find and download ESP8266
- Select the board. Click the following: Tools > Board > NodeMCU1.0 (ESP-12E)
- Select the port. Click the following: Tools > Port > COM_
- Verify success by running blink sketch. Click the following. File > Examples > Basics > Blink > Upload
And finally, we want to add the NeoPixel library to import some useful tools and functionality.
- Click the following: Sketch > Include Library > Manage libraries > Search and install: Adafruit_NeoPixel
Demo Code
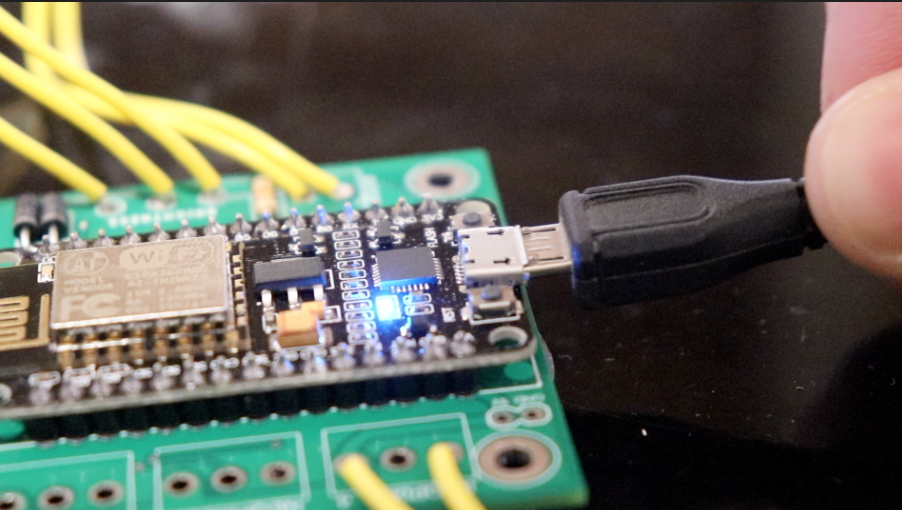
Example code for using the custom PCB is available on the GitHub repo here: https://github.com/WillDonaldson/NeoPixel_Control_Board/tree/main/examples/neopixel-demo
To break down the code there are 3 examples.
1) debounce_switch_demo.ino
This code shows the operation of the momentary push button with an interrupt service routine (ISR) and signals debouncing filter. The momentary switch is connected to an external pullup resistor so it is normally reading a signal of HIGH. The buttonISR() function will be called every time the state falls to LOW, indicating that the use has pushed the button. If however, the signal is noisy a single button press may be measured as multiple, this is undesireable from a user experience perspective so a debounce_delay threshold of 0.2 seconds is included to ignore these erroneous, noisy readings.
2) two_potentiometers_esp8266_demo.ino
Unlike Arduino-based board the NodeMCU ESP8266 only has one analog input pin. To enable the use of 2 potentiometers we need a way to toggle on potentiometer "ON" while ignoring the other potentiometer, and visa-versa. This example program demonstrates how this is achieved using a pair of diodes that act as one-way gates and pulling the pins on the potentiometer either LOW or HIGH when we either want to ignore or listen to them, respectively.
3) neopixel_demo.ino
This program fuses the two previous programs into one, giving multiple user input options, and also builds on the Adafruit NeoPixel library to create several different LED animations. Users can toggle through the different animations using the momentary push button and adjust the speed/brightness with the two potentiometers.
Matrix Animation Code
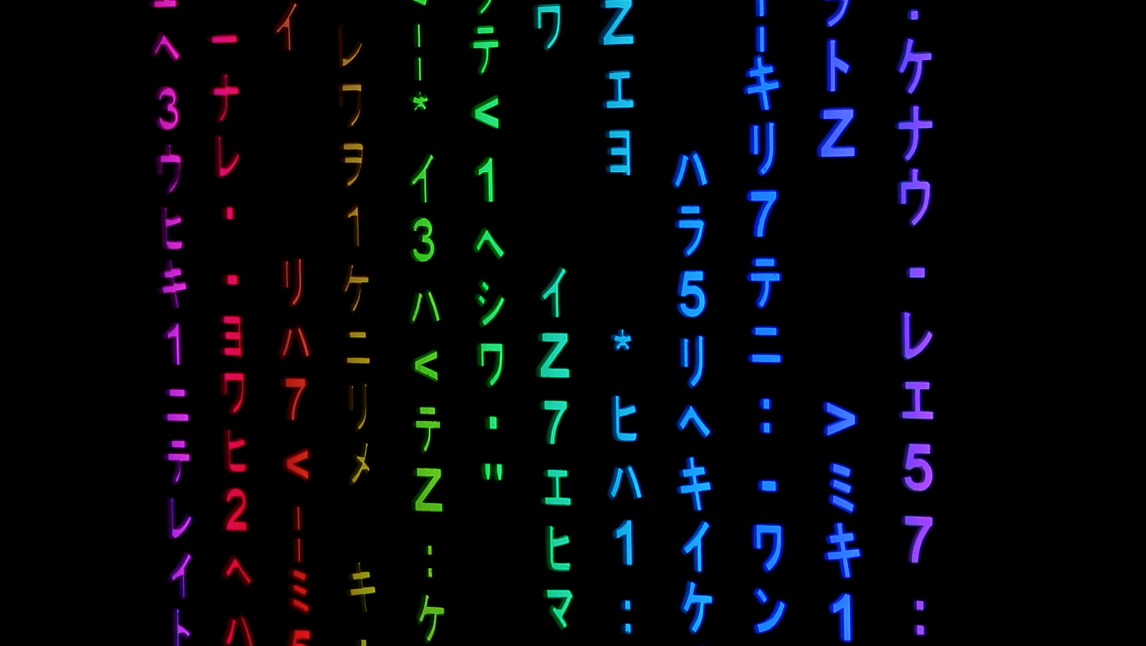
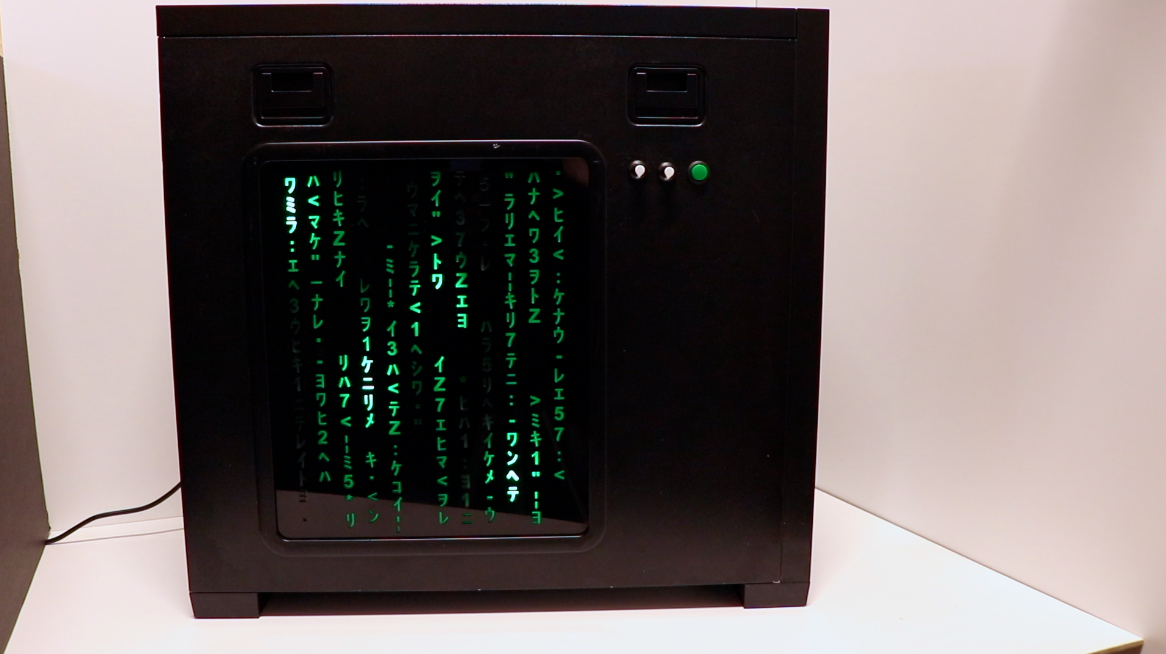
We are now ready to bring everything into one final piece of software: matrix-raining-code.ino
This code creates the raining code animation using the movingPixel() function I wrote. Unfortunately due to the S-shaped wiring of the LEDs (as detailed in Step 5) creating the raining animation is a little tricky as every even column has the direction of data transmission going "upwards" while every odd column is going "downwards". To combat this the movingPixel() function checks if the column is even or odd with the following conditional:
if((col % 2) == 0){} // is an even column
else{} // is an odd column
and then adjusts the direction of the "rain" accordingly.
I encourage you to play around with the variables, adjusting the speed, colors, and even the pattern! Let me know what you create!
Matrix Computer Side Panel
*PCBWay community is a sharing platform. We are not responsible for any design issues and parameter issues (board thickness, surface finish, etc.) you choose.
- Comments(0)
- Likes(0)
- 0 USER VOTES
- YOUR VOTE 0.00 0.00
- 1
- 2
- 3
- 4
- 5
- 6
- 7
- 8
- 9
- 10
- 1
- 2
- 3
- 4
- 5
- 6
- 7
- 8
- 9
- 10
- 1
- 2
- 3
- 4
- 5
- 6
- 7
- 8
- 9
- 10
- 1
- 2
- 3
- 4
- 5
- 6
- 7
- 8
- 9
- 10
 More by Will Donaldson
-
Atomic Force Microscope - electronic part
47 0 0 -
-
-
DIY Fiber Laser Tube Cutting Machine
120 0 1 -
-
-
DIY Transistor Tester | Build Your Own LCR Meter at Home with Arduino Nano
281 0 3 -


