


Arduino Nano Granular OSC
This pcb design project is based on Peter Knight's Arduino Nano Synth code and Notes and Volts Line Output upgrade.
You can find all components needed in Schematic and .xls file. It has 2 option to power the device.
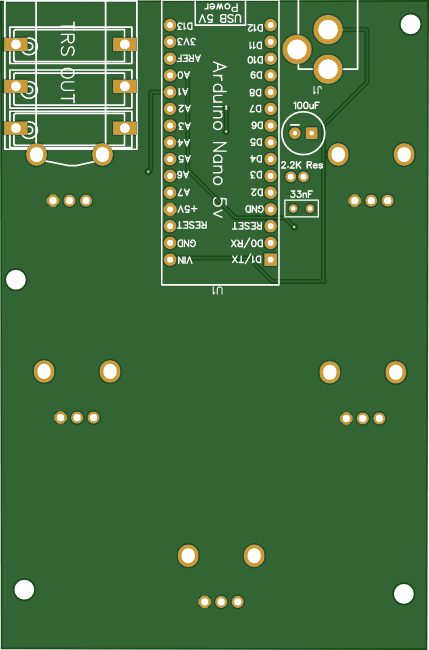
All components are DIP type of component. Please use ceramik type 33 nF capasitor.
The circuit can be power up by directly arduino usb socket or power adaptor socket by using a 9v adaptor.
Please pay attention if your adaptors pinout should be right this; TIP : (-), SLEVE: (+).
And do not plug the adaptor and usb power at the say time. That might burn some components on arduino nano.
Pay attention to solder all components even arduino exception potentiometers to bottom side. Only 5 potentiometers should be soldered to top side of pcb. If you solder other components to top side, that might make difficult to housing the circuit. Just see the rectengular borders for each component to see which side of pcb you should solder.
Thanks to Notes&Volts for easy tutorial videos about this project.
You can download the code by clicking the link below and reading the article.
Code;
https://www.patreon.com/posts/8765003
https://www.notesandvolts.com/2014/07/build-auduino-granular-synth-part-1.html
https://www.youtube.com/watch?v=NTob27lOpcU
Arduino Nano Granular OSC
*PCBWay community is a sharing platform. We are not responsible for any design issues and parameter issues (board thickness, surface finish, etc.) you choose.


Raspberry Pi 5 7 Inch Touch Screen IPS 1024x600 HD LCD HDMI-compatible Display for RPI 4B 3B+ OPI 5 AIDA64 PC Secondary Screen(Without Speaker)
BUY NOW
ESP32-S3 4.3inch Capacitive Touch Display Development Board, 800×480, 5-point Touch, 32-bit LX7 Dual-core Processor
BUY NOW
Raspberry Pi 5 7 Inch Touch Screen IPS 1024x600 HD LCD HDMI-compatible Display for RPI 4B 3B+ OPI 5 AIDA64 PC Secondary Screen(Without Speaker)
BUY NOW

- Comments(0)
- Likes(3)
 Log in to post comments.
- 1 USER VOTES
- YOUR VOTE 0.00 0.00
-
10design
-
10usability
-
10creativity
-
10content
More by Doğan ŞEŞEOĞULLARI
-
Commodore 64 1541-II Floppy Disk Drive C64 Power Supply Unit USB-C 5V 12V DIN connector 5.25
128 1 2 -
Easy to print simple stacking organizer with drawers
75 0 0 -
-
-
Modifying a Hotplate to a Reflow Solder Station
1116 1 6 -
MPL3115A2 Barometric Pressure, Altitude, and Temperature Sensor
628 0 1 -
-
-
V2 Commodore AMIGA USB-C Power Sink Delivery High Efficiency Supply Triple Output 5V ±12V OLED display ATARI compatible shark 100W
1401 4 3


