
|
KiCADKicad
|
|

|
arduino IDEArduino
|
High-performance 3-axis stepper motor control panel
In this project, I show you my new development which is a high-performance 3-axis stepper motor control board. It is high-performance because it uses the super-fast Teensy 4.0 microcontroller and it also uses a modern TMC429 stepper motor ramp generator controller together with three TMC2209 stepper motor drivers. The board can be controlled via buttons and a joystick, and I also programmed it to be fully controllable by sending commands and parameters via the serial terminal.
The board is originally intended to be used for a 3-axis stage setup, for example, as an X-Y stage and Z focus in a microscope system. But it can be used anywhere where 3 motors need to be moved with high precision. The system has three modes.
- A joystick-controlled mode where the user can control the 3 axes with a 3-axis joystick
- A button-controlled mode where the user can select an axis and move it in the positive or negative direction with buttons
- A USB-controlled mode where the user can send commands and parameters from the computer to control the 3 axes.
The system has 6 limit switches, where each axis has 2 switches. Each switch acts as a stop switch. If they are hit during the movement of the motor, the motor stops and then it parks. Furthermore, each axis has a switch (in my application, it is set to be the left switch) that acts as the reference/home switch. Upon startup, each motor goes to its home position and parks using the left switch of the respective axis.
The board has an extra header pin set for the i2c bus (SDA0 and SCL0). It is useful for adding external switches. Furthermore, all “regular” GPIO pins of the Teensy 4.0 are available on the board, so if other pins are needed, they can be accessed with a regular Dupont wire. Also, there are some extra 3.3 V and ground pins available on the board in case the user wants to power something.
Remarks:
Due to the uniqueness of the board, I only prepared the usual interactive BOM for this board. This is because the user can freely vary many components, especially the terminals. For example, the controls such as the buttons, joystick and switches can be directly connected to the board by soldering their cables in the PCB. In that case, all the jumper headers are unnecessary. The same applies to the microcontroller and other modules, however, it might be a good idea to mount them as I did (removable) in case they fail for some reason and they need to be replaced. Also, some parts, especially the Teensy 4.0 microcontroller and the TMC429 ramp generator cannot be sourced from AliExpress or similar sites. They have to be purchased from Mouser, Farnell or similar distributors. On the other hand, the MP2315 voltage regulator is only available on websites such as Amazon or AliExpress.
Don't forget that the circuit needs a "modification" in order to provide 3.3 V. The trace under the potentiometer (ADJ) has to be cut and the solder tabs at the silkscreen that says 3.3V must be shorted together. I also describe this in my video.
If you want a "more official" product, then the SparkFun BabyBuck Regulator can also work. Just pay attention to the polarity of the pins, because the VIN and VOUT are the opposite of the MP2315.
https://www.sparkfun.com/products/18357
[2024-05-27 UPDATE]
I finalized my motorized microscope whose stage and Z-axis are driven by the circuit shared on this page.
High-performance 3-axis stepper motor control panel
*PCBWay community is a sharing platform. We are not responsible for any design issues and parameter issues (board thickness, surface finish, etc.) you choose.
- Comments(4)
- Likes(12)
-
 Engineer
Jul 09,2025
-
 Tomasz Mazur
Jul 05,2025
-
 Electronic Adam
Apr 13,2025
-
 Anthony Pedotto
Feb 22,2025
-
 Uber Blake
Nov 19,2024
-
 Engineer
Sep 16,2024
-
 Engineer
Aug 09,2024
-
 Engineer
Apr 19,2024
-
 Jeffery Thompson
Mar 22,2024
-
 Engineer
Mar 19,2024
-
 İsmet BÜYÜKÜNAL
Mar 19,2024
-
 John Sparrow
Mar 05,2024
- 1 USER VOTES
- YOUR VOTE 0.00 0.00
- 1
- 2
- 3
- 4
- 5
- 6
- 7
- 8
- 9
- 10
- 1
- 2
- 3
- 4
- 5
- 6
- 7
- 8
- 9
- 10
- 1
- 2
- 3
- 4
- 5
- 6
- 7
- 8
- 9
- 10
- 1
- 2
- 3
- 4
- 5
- 6
- 7
- 8
- 9
- 10
-
1design
-
1usability
-
1creativity
-
1content
 More by Curious Scientist
-
 USB PD Breadboard Power Supply
In this article, I show you my new creation. It is a USB PD decoy-based breadboard power supply. All...
-
 ADS1256 - RP2040 Custom DAQ Front Panel with GPIO
This is just a simple PCB panel that belongs to my other project which is a high-performance DAQ.A r...
-
 ADS1256 - RP2040 Custom DAQ Front Panel without GPIO
This is just a simple PCB panel that belongs to my other project which is a high-performance DAQ.A r...
-
 10th Anniversary Badge
I designed this small badge for PCBWay's 10th anniversary.I tried to make a deeper meaning to the bo...
-
 ADS1256 - Atmega32u4 Custom DAQ board
IntroductionIn this project, I show you two things. One is a new version (v1.2) of my custom DAQ bas...
-
 Debounced rotary encoder module
In this project, I show you my approach to making a rotary encoder module.One can buy different rota...
-
 Custom ADS1256 board with ATmega32U4
I created my own ADS1256 PCB after working with this AD converter for several years. I wanted to bui...
-
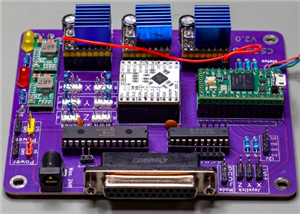 3-axis stepper motor controller with CNC pendant connectivity
In this article, I show you the updated version of my motorized microscope. In one of my older video...
-
 Light meter for analog cameras [CH32V006F8P6 + TSL2591]
In this article, I show you how I built my ow...
Light meter for analog cameras [CH32V006F8P6 + TSL2591]
Light meter for analog cameras [CH32V006F8P6 + TSL2591]In this article, I show you how I built my ow...
-
 5-way navigator PCB
In this article, I show you a genius way of handling multiple buttons with a microcontroller. I “dis...
-
 CH32V006K8U6 Development Board
IntroductionSo, I have been working with the CH32 microcontrollers and chips for a while, and I even...
-
 PCBWay 11-year Anniversary Badge
This visual design was created by https://www.instagram.com/guiye.perez.bongiovanni/ ; however, only...
-
 TCD1304 - STM32F401CCU6 breakout board
The recent modifications made to the circuit board design have improved its functionality and space ...
-
 TCD1304 miniature PCB rev2
The redesign of the PCB involved several key changes to improve its performance and decrease its siz...
-
 2-channel breadboard voltmeter
The project originally stems from my CH32 tutorial series. I started working with this chip not so l...
-
 ADS1256 - RP2040 Custom DAQ Rear Panel
This is just a simple PCB panel that belongs to my other project which is a high-performance DAQ.A r...
-
 ADS1256 - RP2040 Custom DAQ with GPIOs
This is my (hopefully) last iteration of the ADS1256-based DAQ board. I replaced the ATmega32U4 micr...
-
 High-performance 3-axis stepper motor control panel
In this project, I show you my new development which is a high-performance 3-axis stepper motor cont...
-
-
AEL-2011 Power Supply Module
545 0 2 -
AEL-2011 50W Power Amplifier
505 0 2 -
-
-
Custom Mechanical Keyboard
706 0 0 -
Tester for Touch Screen Digitizer without using microcontroller
337 2 2 -
Audio reactive glow LED wristband/bracelet with NFC / RFID-Tags
317 0 1 -
-
-


