


PCB Christmas Tree 2023
A small PCB Christmas tree, using ATtiny85 / ATtiny13A and TTP223 touch sensor.
There are 11 LEDs controlled by four ATtiny pins, plus a TTP223 touch sensor linked to another ATtiny pin, which act as a switch that toggle between different lightning patterns (including an OFF "pattern").
I designed the PCB in order to be able to use both SMD and classic 3mm LEDs.
Please be aware when you order the PCBs.
The zip file I uploaded here (Gerber_PCB_v1.05-STAR_A+B.zip) contains the two .zip files ( A and B parts) of the actual Gerber files. You have to extract the initial Gerber_PCB_v1.05-STAR_A+B.zip file and then upload the Gerber files.

I did this so you can order the A and B parts individually (each part with its own Gerber file). This way you won't be charged extra for "multiple design in the same file".
The PCB is designed for a thickness of 1.2mm. Don't forget to select 1,2mm PCB thickness when placing the orders.

If you want to use SMD LEDs you need to order the PCB with a 1.2mm thickness , otherwise you won't be able to solder the SMD LEDs.
If you plan to use regular 3mm LEDs and for any reason you want a 1.6 mm thick PCB, you have to adjust the width of those middle cuts (where PCBs interconnect with each other and make them 1.6mm as well).

For a complete assembly guide please check out this instructable : https://www.instructables.com/PCB-Christmas-Tree/
You can find the software sketch there as well.
Have fun 😊!
P.S.: I plan to make a version with CR2032 battery as well, so stay tunned.
#include <avr/io.h>
#include <avr/interrupt.h>
#include <avr/sleep.h>
#include <avr/wdt.h>


// Define pins for switch the LED, plus the chosen interrupt for reacting to


#define INTERRUPT_PIN PCINT2  // This is PB2 per the schematic
#define DATADIRECTIONPIN DDB2 //page 64 data sheet
#define INT_PIN PB2           // Interrupt pin of choice: PB1 (same as PCINT2) - Pin 7


#define LED_PIN1 PB0           // PB0 - Pin 5
#define LED_PIN2 PB1           // PB1 - Pin 6
#define LED_PIN3 PB3           // PB3 - Pin 2
#define LED_PIN4 PB4           // PB4 - Pin 3


/*
 * Alias for the ISR: "PCINT_VECTOR" (Note: There is only one PCINT ISR.
 * PCINT0 in the name for the ISR was confusing to me at first,
 * hence the Alias, but it's how the datasheet refers to it)
 */
#define PCINT_VECTOR PCINT0_vect


volatile uint8_t pushCount = 0; // variables used within ISR must be declared Volatile.


void setup() {
    cli();                    // Disable interrupts during setup

    DDRB = (1 << LED_PIN1) | (1 << LED_PIN2)
         | (1 << LED_PIN3) | (1 << LED_PIN4); //replaces pinMode(LED_PIN1, OUTPUT);


    //configuring and enabling the interrupt

    PCMSK |= (1 << INTERRUPT_PIN);    // Enable interrupt handler (ISR) for our chosen interrupt pin (PCINT1/PB1/pin 6)


    GIMSK |= (1 << PCIE);             // Enable PCINT interrupt in the general interrupt mask


    DDRB &= ~(0 << DATADIRECTIONPIN);  //replaces pinMode(INT_PIN, INPUT);

    PORTB |= (1<< INT_PIN); //disable pull-up. Must hook up pulldown resistor [ 1K ].


    sei();                            // enable interrupts after setup


}


void loop() {


  switch(pushCount){
    case 0 :
    pattern1();
    break;
    case 1 :
    pattern2();
    break;
    case 2 :
    pattern3();
    break;
    case 3 :
    pattern4();
    break;
    default:
    pattern1();
  }


}


// This is the interrupt handler called when there is any change on the INT_PIN
// ISR is defined in the headers - the ATtiny85 only has one handler
ISR(PCINT_VECTOR)
{
    if((PINB >> PINB2)&1!=0) {  // or if ( (PINB & PINB2) != 0 ) or (PINB >> PINB2)&1
      if(pushCount > 3) {
        pushCount = 0;
      }else{
        pushCount ++;
      }
  }
  delay(50); //small debounce
}


void pattern1(){
  PORTB |= (1 << LED_PIN2) | (1 << LED_PIN4); //replaces digitalWrite(LED_PINx,HIGH);
  delay(150);
  PORTB &= ~((1 << LED_PIN2) | (1 << LED_PIN4)); //replaces digitalWrite(LED_PINx,LOW);
  delay(150);
  PORTB |= (1 << LED_PIN1) | (1 << LED_PIN3);
  delay(150);
  PORTB &= ~((1 << LED_PIN1) | (1 << LED_PIN3));
  delay(150);
}


void pattern2(){
  PORTB |= (1 << LED_PIN1);
  delay(200);
  PORTB &= ~(1 << LED_PIN1);
  PORTB |= (1 << LED_PIN3);
  delay(200);
  PORTB &= ~(1 << LED_PIN3);
  PORTB |= (1 << LED_PIN2);
  delay(200);
  PORTB &= ~(1 << LED_PIN2);
  PORTB |= (1 << LED_PIN4);
  delay(200);
  PORTB &= ~(1<< LED_PIN4);

}


void pattern3(){
  PORTB |= (1 << LED_PIN2) | (1 << LED_PIN4);
  delay(80);
  PORTB &= ~((1 << LED_PIN2) | (1 << LED_PIN4));
  delay(80);
  PORTB |= (1 << LED_PIN2) | (1 << LED_PIN4);
  delay(80);
  PORTB &= ~((1 << LED_PIN2) | (1 << LED_PIN4));
  delay(80);
  PORTB |= (1 << LED_PIN1) |  (1 << LED_PIN3);
  delay(80);
  PORTB &= ~((1 << LED_PIN1) | (1 << LED_PIN3));
  delay(80);
  PORTB |= (1 << LED_PIN1) |  (1 << LED_PIN3);
  delay(80);
  PORTB &= ~((1 << LED_PIN1) | (1 << LED_PIN3));
  delay(80);
}


void pattern4(){  // POWER OFF
  PORTB &= ~((1 << LED_PIN1) | (1 << LED_PIN2) | (1 << LED_PIN3) | (1 << LED_PIN4)); //LEDs off
  power_off();
}


void power_off()
{
    cli();                               // Disable interrupts before next commands
    wdt_disable();                       // Disable watch dog timer to save power
    set_sleep_mode(SLEEP_MODE_PWR_DOWN); // Set sleep mode power down
    sleep_enable();
    sleep_bod_disable(); // Disable brown-out detector
    sei();               // Enable interrupts
    sleep_cpu();
    sleep_disable();
}
PCB Christmas Tree 2023
*PCBWay community is a sharing platform. We are not responsible for any design issues and parameter issues (board thickness, surface finish, etc.) you choose.


- Comments(2)
- Likes(3)
- 1 USER VOTES
- YOUR VOTE 0.00 0.00

-
9design
-
10usability
-
9creativity
-
8content
 More by Marius M
-
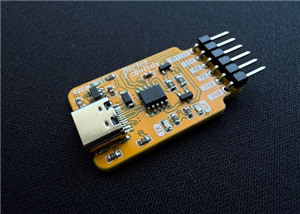 CH340K USB-C Programmer with Auto-Reset (for ESP Chips)
For many embedded or custom ESP-based projects (like this one), a dedicated USB to TTL chip on the m...
CH340K USB-C Programmer with Auto-Reset (for ESP Chips)
For many embedded or custom ESP-based projects (like this one), a dedicated USB to TTL chip on the m...
-
 WLED MiniDuo SR - PJ Sound Reactive LED Controller (ESP32 32D/E)
UPDATE 14.11.2025 - v1.3.1 Small changes to the silkscreen to avoid confusion.UPDATE 30.06.2025 - v1...
WLED MiniDuo SR - PJ Sound Reactive LED Controller (ESP32 32D/E)
UPDATE 14.11.2025 - v1.3.1 Small changes to the silkscreen to avoid confusion.UPDATE 30.06.2025 - v1...
-
 PCB Christmas Star 2024 - PCBWay Edition
Bring a festive sparkle to your celebrations with this delig...
PCB Christmas Star 2024 - PCBWay Edition
PCB Christmas Star 2024 - PCBWay EditionBring a festive sparkle to your celebrations with this delig...
-
 PCB Christmas Star 2024 -1
Bring a festive sparkle to your celebrations with this delightful Christmas-themed PCB badge! Design...
PCB Christmas Star 2024 -1
Bring a festive sparkle to your celebrations with this delightful Christmas-themed PCB badge! Design...
-
 PCB Christmas Tree 2023
A small PCB Christmas tree, using ATtiny85 / ATtiny13A and TTP223 touch sensor.There are 11 LEDs con...
PCB Christmas Tree 2023
A small PCB Christmas tree, using ATtiny85 / ATtiny13A and TTP223 touch sensor.There are 11 LEDs con...
-
 [ LedClock- MICRO - 24x41 ] - 7 Segment PCB
[ LedClock- MICRO- 24x41 ] - 7 Segment PCB7 Segment PCB used in "LedClock- MICRO " project.!!! For s...
[ LedClock- MICRO - 24x41 ] - 7 Segment PCB
[ LedClock- MICRO- 24x41 ] - 7 Segment PCB7 Segment PCB used in "LedClock- MICRO " project.!!! For s...
-
 PCBway 11th anniversary badge
.This badge uses 12 fast changing LEDs so it can create a festive blink...
PCBway 11th anniversary badge
PCBway 11th anniversary badge.This badge uses 12 fast changing LEDs so it can create a festive blink...
-
 MAX6675 Module
MAX6675 K-type thermocouple module.Added some extra capacitors for better temperature reading stabil...
MAX6675 Module
MAX6675 K-type thermocouple module.Added some extra capacitors for better temperature reading stabil...
-
 Reflow Hot Plate - Controller Board with Arduino Pro Mini
Remix of the original Reflow hot plate controller board by Curious Scientist based on Arduino Pro Mi...
Reflow Hot Plate - Controller Board with Arduino Pro Mini
Remix of the original Reflow hot plate controller board by Curious Scientist based on Arduino Pro Mi...
-
 WLED Sound Reactive Controller (ESP32 32D/E)
Say hello to the latest ESP32-powered WLED board, built for awesome LED setups! 2 Channels – Control...
WLED Sound Reactive Controller (ESP32 32D/E)
Say hello to the latest ESP32-powered WLED board, built for awesome LED setups! 2 Channels – Control...
-
 ATTiny1614 and VCNL4200 LED Controller
This project centers on creating a smart lighting system that dynamically turn ON and OFF an address...
ATTiny1614 and VCNL4200 LED Controller
This project centers on creating a smart lighting system that dynamically turn ON and OFF an address...
-
 PCB Christmas Star 2024 -2
Bring a festive sparkle to your celebrations with this delightful Christmas-themed PCB badge! Design...
PCB Christmas Star 2024 -2
Bring a festive sparkle to your celebrations with this delightful Christmas-themed PCB badge! Design...
-
 LedClock - ALL IN ONE PCB
This version features an ALL IN ONE PCB of the LED clock project by @imeszaros. The PCB was specific...
LedClock - ALL IN ONE PCB
This version features an ALL IN ONE PCB of the LED clock project by @imeszaros. The PCB was specific...
-
 WLED controller SR - INMP441 adapter
Basic 1x6 adapter for INMP441 sound module, so you can enable sound reactive on this WLED controller...
WLED controller SR - INMP441 adapter
Basic 1x6 adapter for INMP441 sound module, so you can enable sound reactive on this WLED controller...
-
 ESP32 D1 mini - WLED Controller SR (5-12V)
ESP32 D1 Mini compatible board for led control via WLED App, based on SN74LVC2T45 level shifter, wit...
ESP32 D1 mini - WLED Controller SR (5-12V)
ESP32 D1 Mini compatible board for led control via WLED App, based on SN74LVC2T45 level shifter, wit...
-
 ESP32-S3 DevBoard
Compact ESP32-S3 dev Board, that can be powered by both USB and battery.It features a LED on GPIO2, ...
ESP32-S3 DevBoard
Compact ESP32-S3 dev Board, that can be powered by both USB and battery.It features a LED on GPIO2, ...
-
 ESP01 - TM1637 NTP CLOCK
Basic PCB backplate board for a 0.56" display, that uses an ESP01 /ESP01S to get NTP Time and displa...
ESP01 - TM1637 NTP CLOCK
Basic PCB backplate board for a 0.56" display, that uses an ESP01 /ESP01S to get NTP Time and displa...
-
 Fixed output MT3608
Small size MT3608 DC-DC boost converter with fixed output.You have to use the properly resistor valu...
Fixed output MT3608
Small size MT3608 DC-DC boost converter with fixed output.You have to use the properly resistor valu...
-
-
-
-
Tester for Touch Screen Digitizer without using microcontroller
340 2 2 -
Audio reactive glow LED wristband/bracelet with NFC / RFID-Tags
322 0 1 -
-
-


