|
|
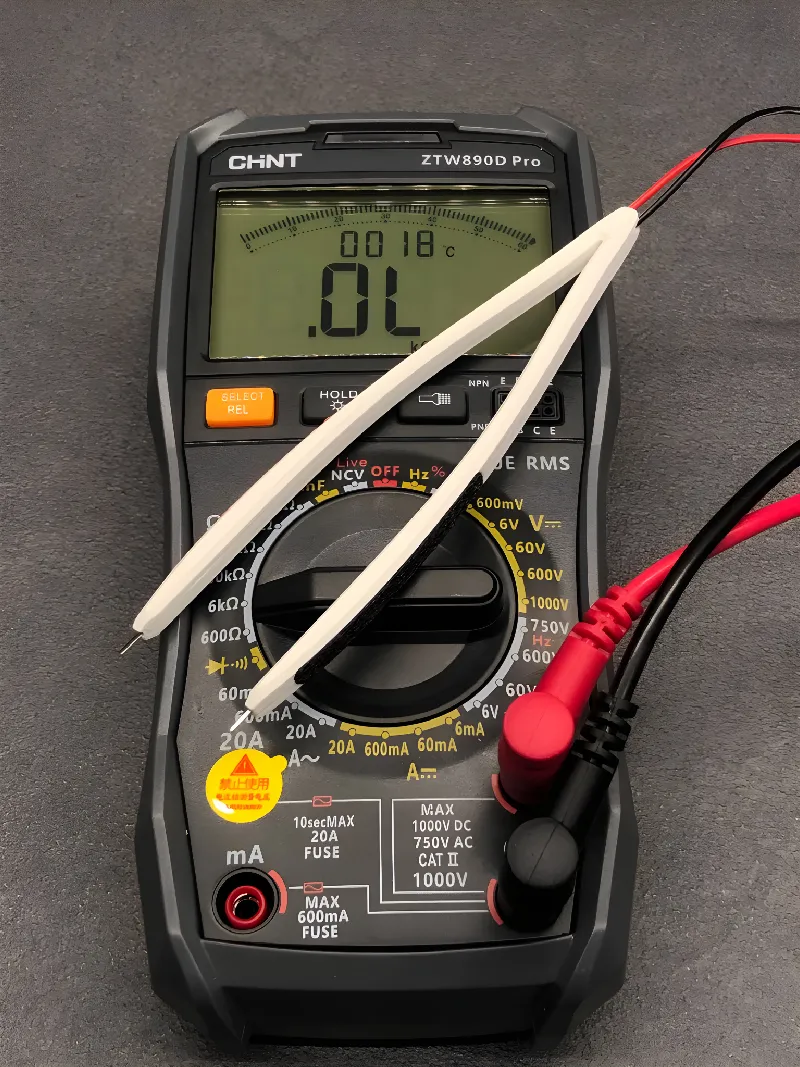
Digital High-precision Automatic Multimeter ZTW890DProCHINT
|
|
|
|
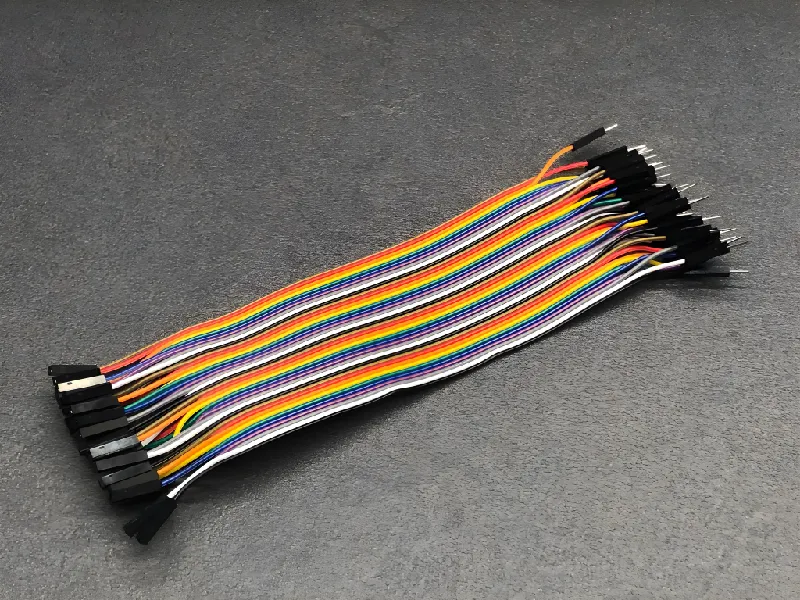
40Pin Jumper Wires Male to Female 20cmPCBWay
|
|
|
|
Banana Plug Male ConnectorBei Qian
|
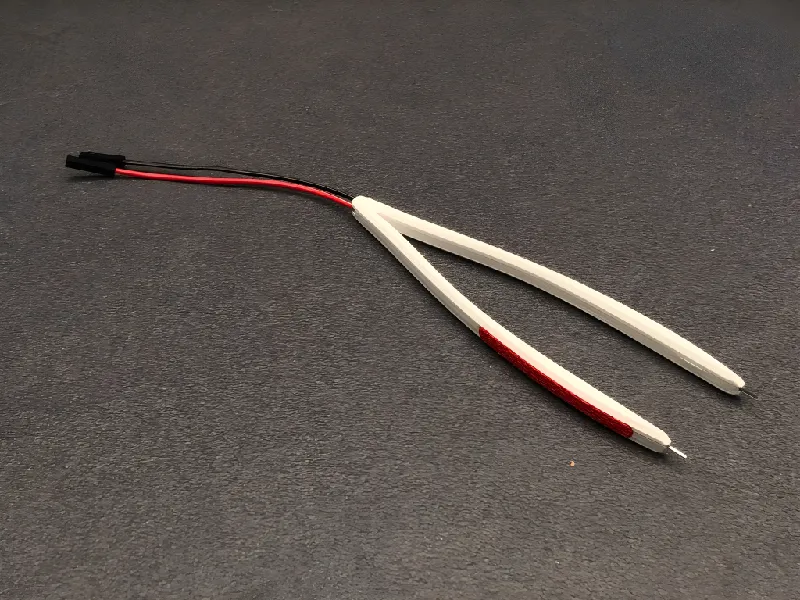
Precision Multimeter Tweezer – SMD & Small Component Testing Tool
Introduction
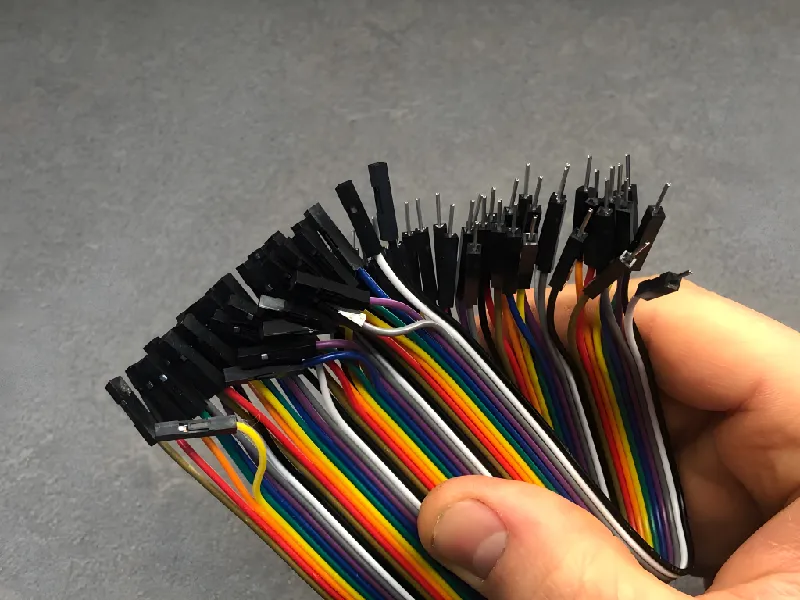
Traditional multimeter probes can sometimes be inconvenient when measuring small components or testing printed circuit boards. To address this, I designed a pair of cheap 3D-printable precision tweezers that provide greater stability and accuracy during measurements. These tweezers use simple jumper wires as contacts, which are inexpensive, easy to find, and directly integrated into the print.
Project Development with PCBWay’s Support
The support from PCBWay was essential in bringing this project to life.
PCBWay specializes in PCB, PCBA, CNC, and 3D Printing, and has (in my experience) the best support & the widest amount of options for manufacturing as compared to other services.
They also have a PCBWay+ Store where you can buy many mechanical, electronic components and tools.
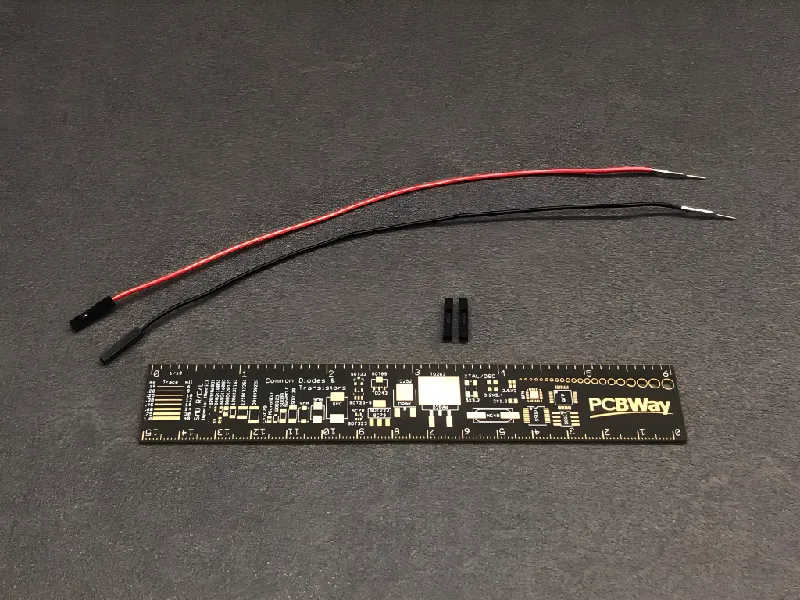
I purchased the Jumper Wires from PCBWay+ Store for just $1.
The jumper wires are of excellent quality, with solid and clean contacts, making them perfect for integration into the tweezers.
Along with the jumper wires needed as probe tips, I also got a Multimeter for testing purposes. It’s an affordable yet professional model with advanced features.
The multimeter’s build quality is excellent: it’s sturdy, has a bright backlit display, and is an essential tool for your projects
The ordering process was extremely simple and fast. PCBWay’s store offers a wide range of components and accessories at great prices, ideal for your projects. Both the jumper wires and the multimeter arrived quickly, packaged in a sturdy box with excellent protection.
Printable Files
Precision Tweezers 1X
Printing Instructions:
• Layer Height: 0.1 - 0.2 mm
• Infill: 50-100%
• Perimeters: 2-3
• Supports: Not required
• Material: PETG (for better flexibility) or PLA (more rigid)
Assembling the Tweezers
Assembly is straightforward:
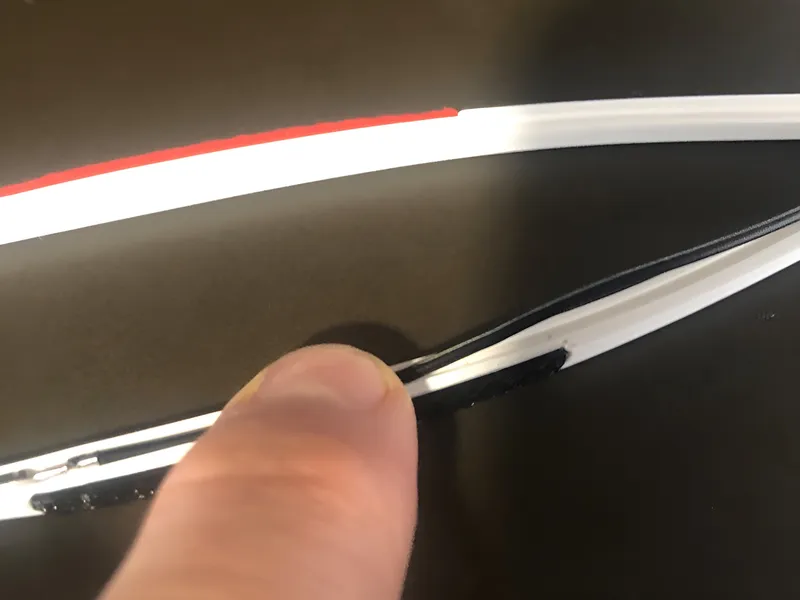
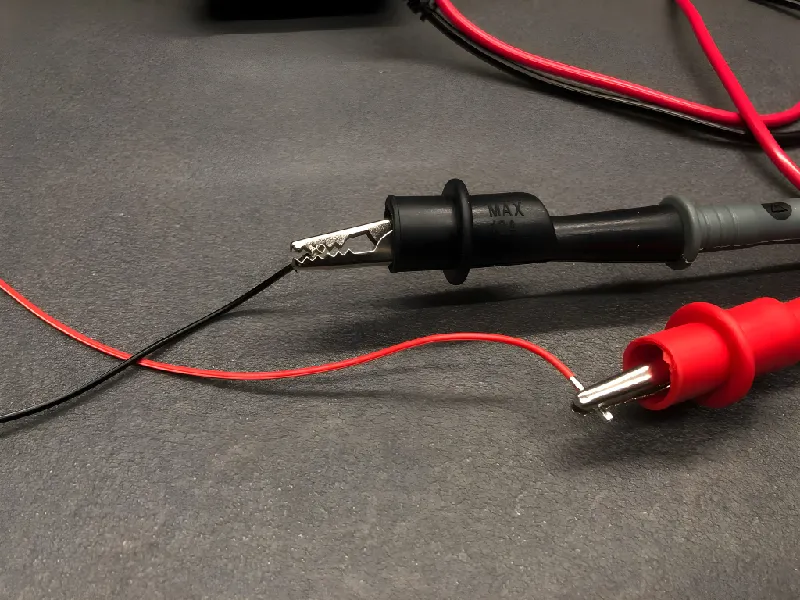
Remove the black cover from the male jumper wire connector by lifting the tab and pushing it out.
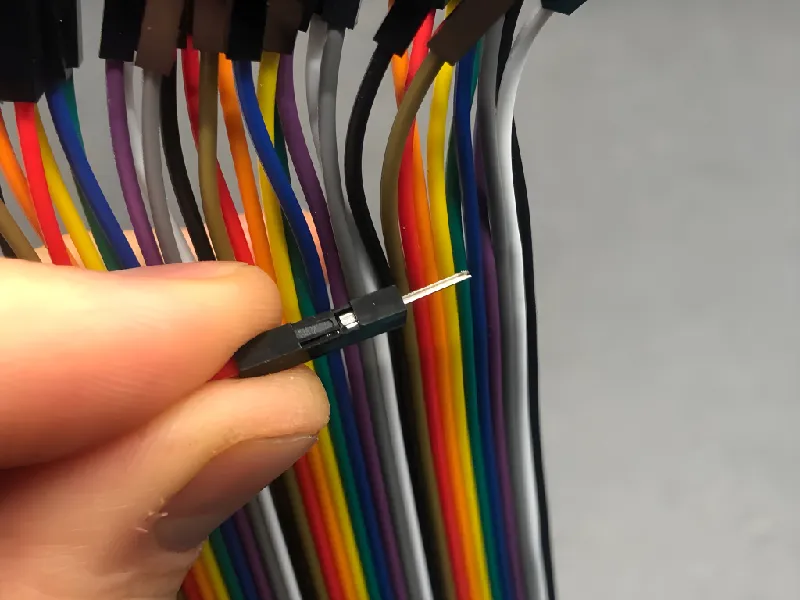
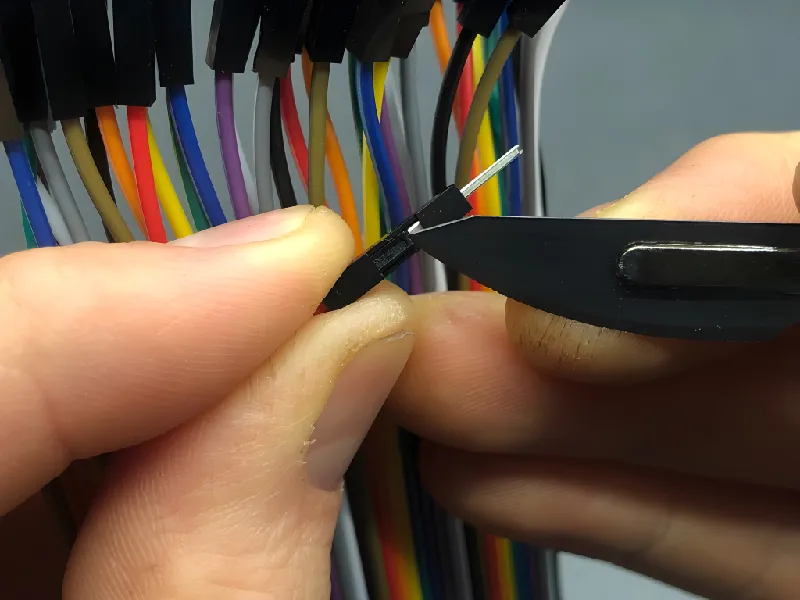


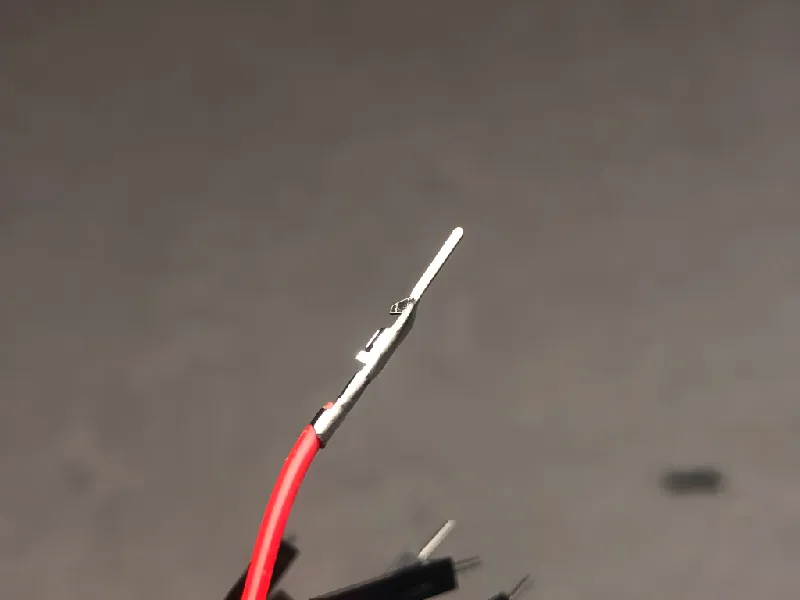
Repeat for two jumper wires.
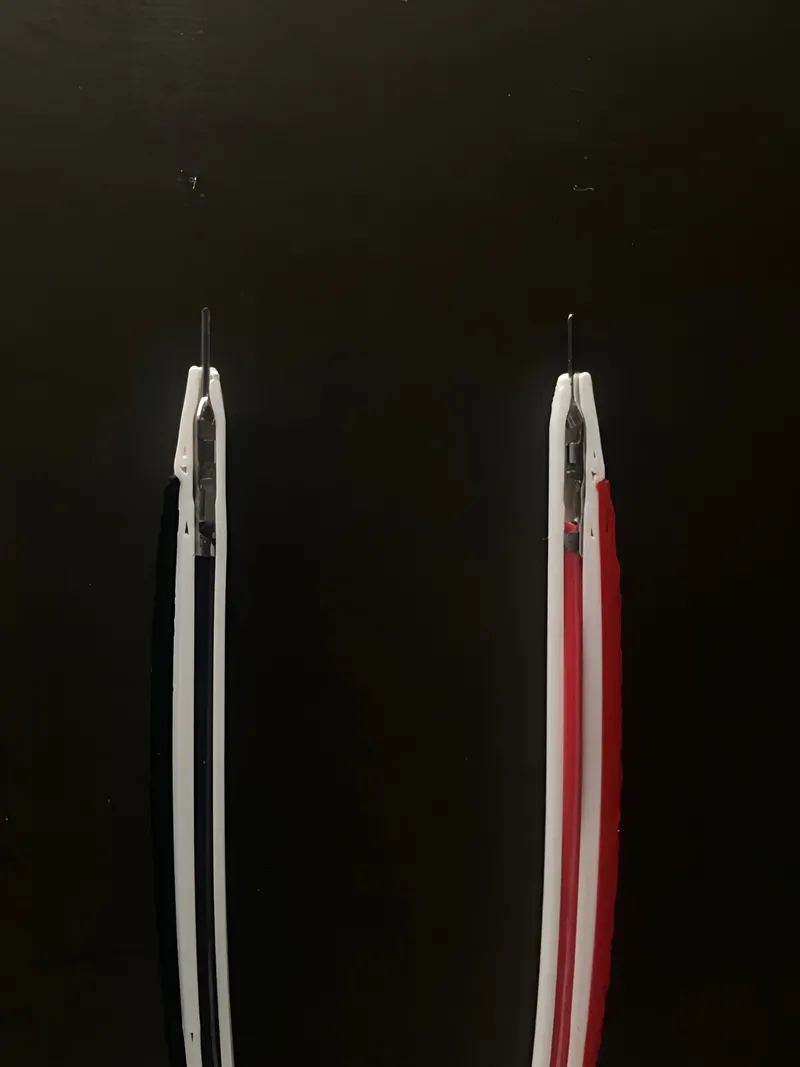
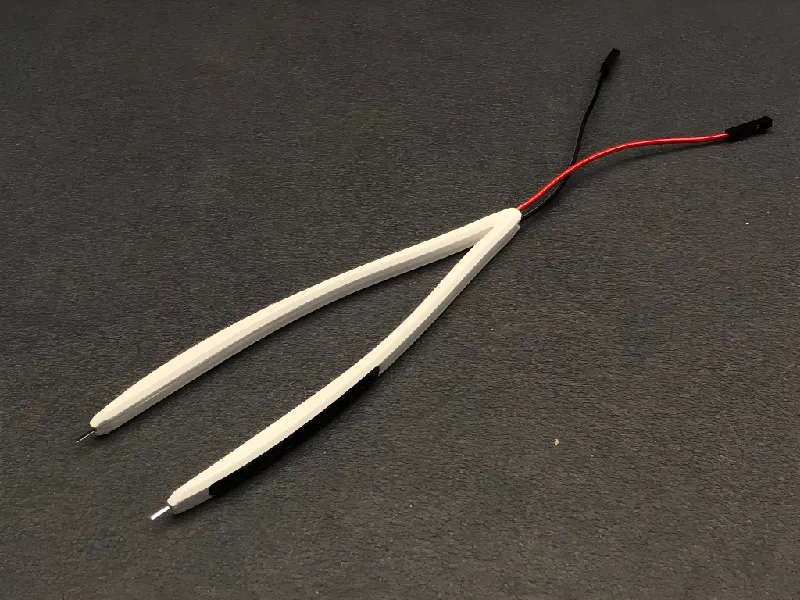
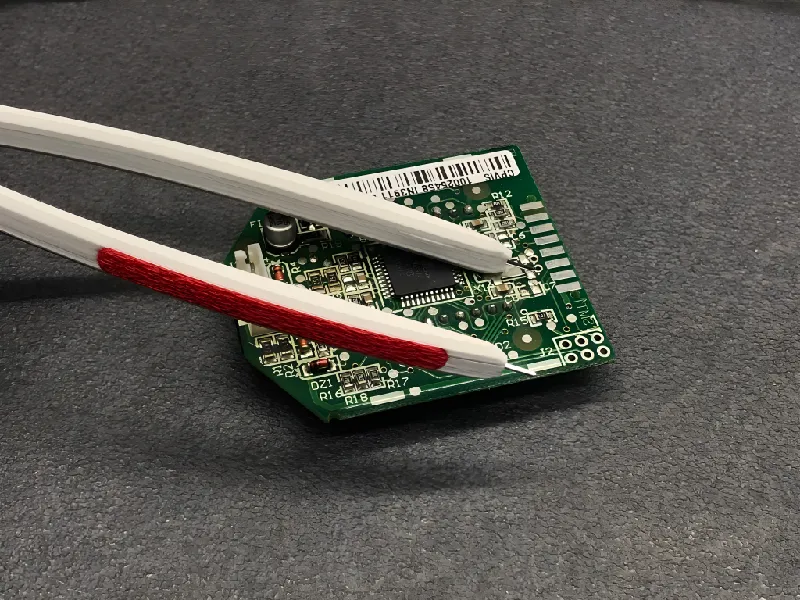
Insert the wires into the tweezers during printing. This ensures a perfect fit and a stable connection. (Position the contacts as shown in the reference image to ensure correct alignment).
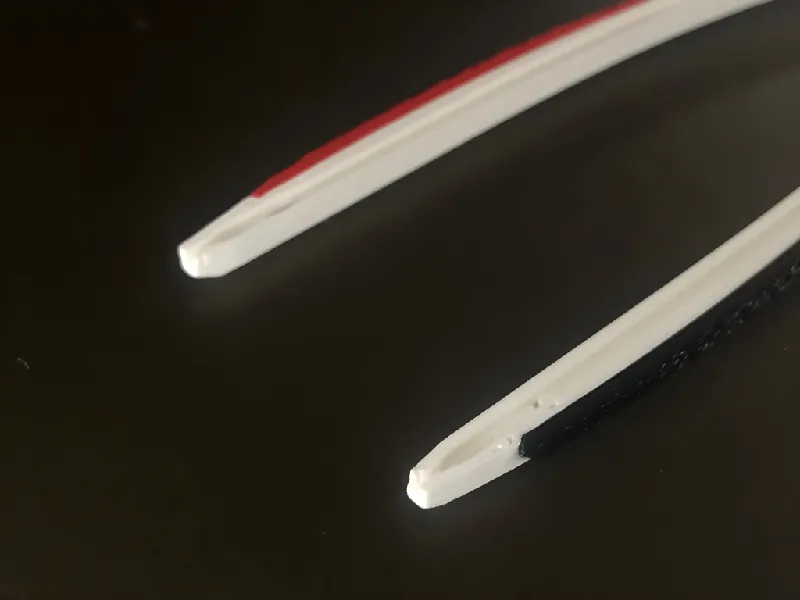
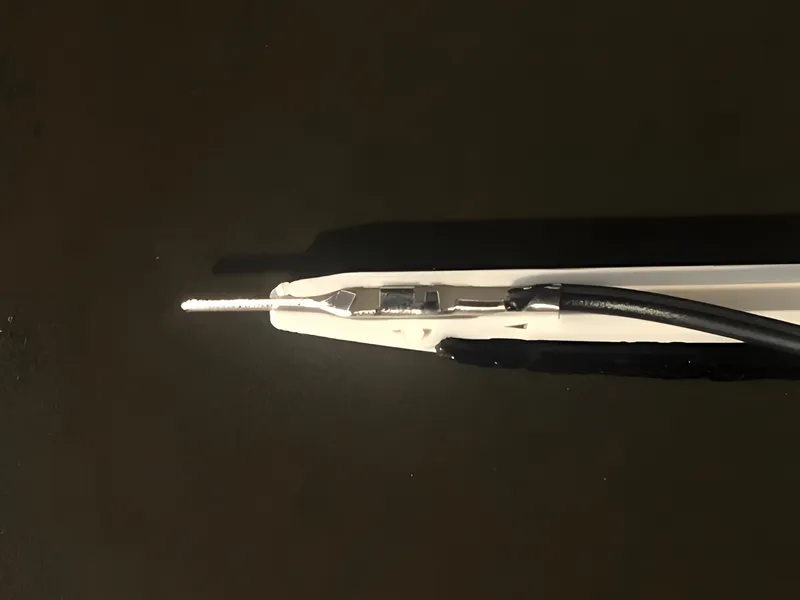
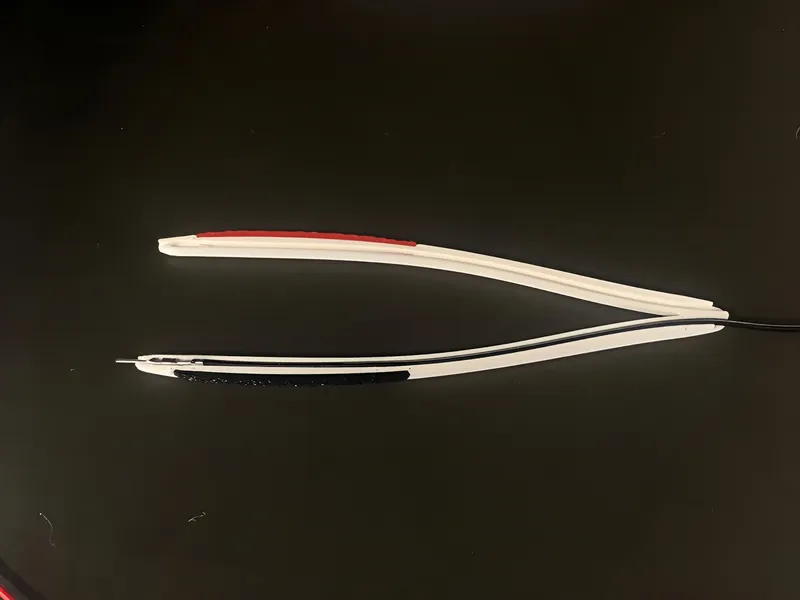
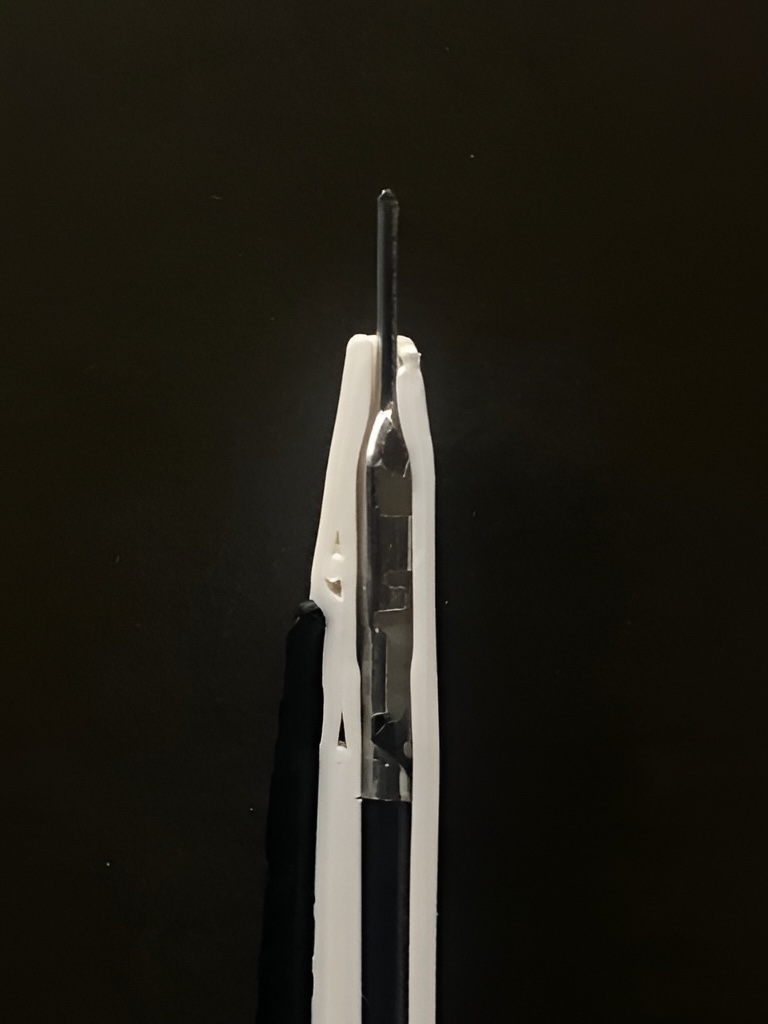
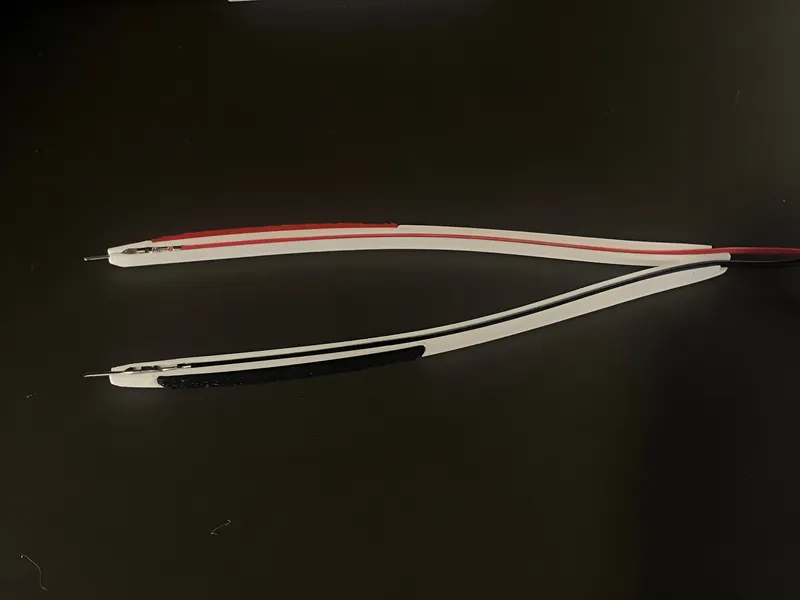
Once the print is complete, the tweezers will be ready to use, with the wires securely embedded within the 3D-printed structure.
Connecting to the Multimeter
There are multiple ways to connect the tweezers to your multimeter:
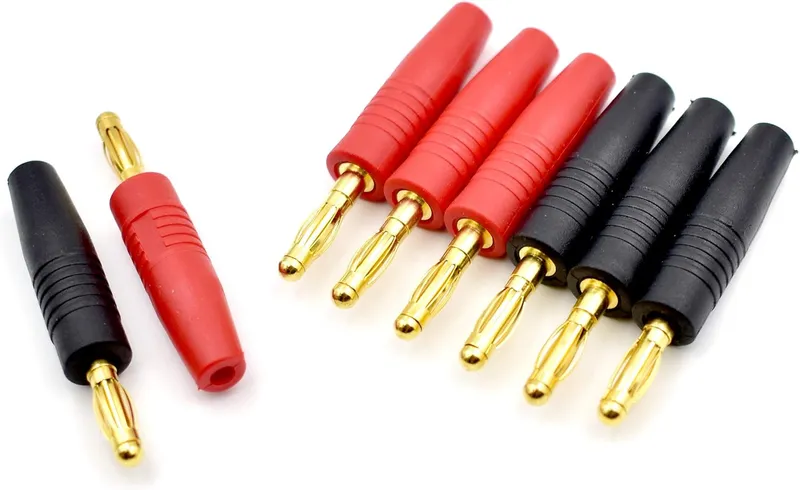
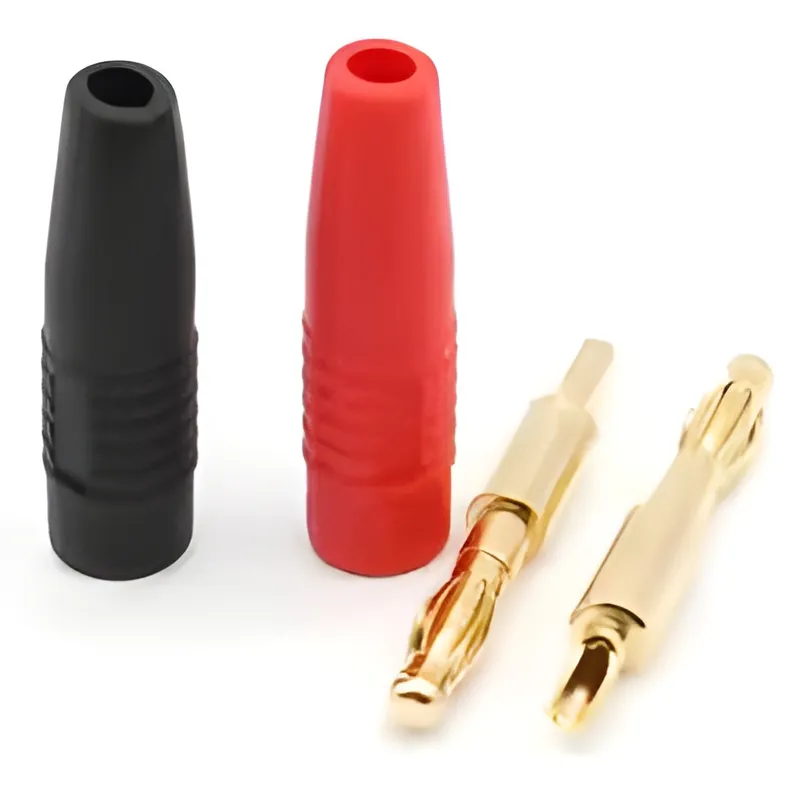
Extend the jumper wires and solder banana male connectors to the ends, creating a direct connection to the multimeter’s input terminals. --Buy on Amazon-- | --Buy on Aliexpress--
If banana connectors are unavailable, you can clip the tweezers directly to the ends of the original multimeter probe wires after removing the jumper connector covers.
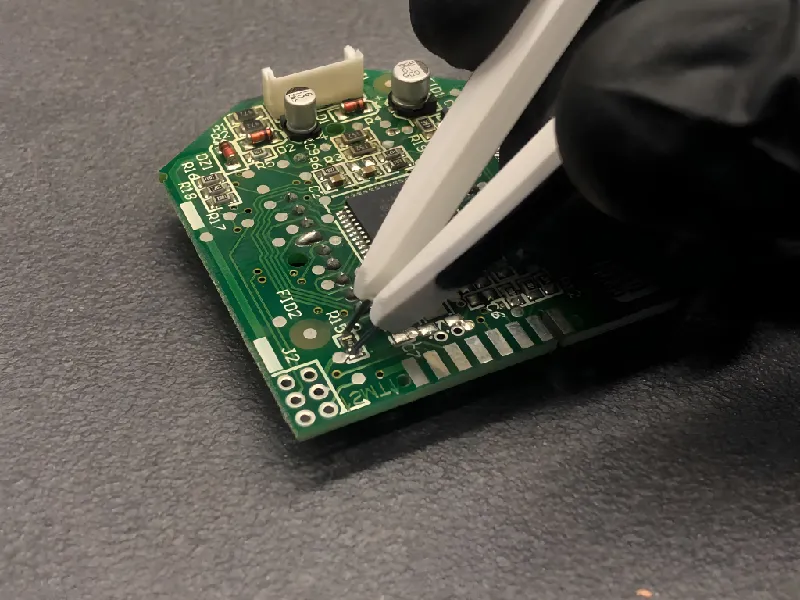
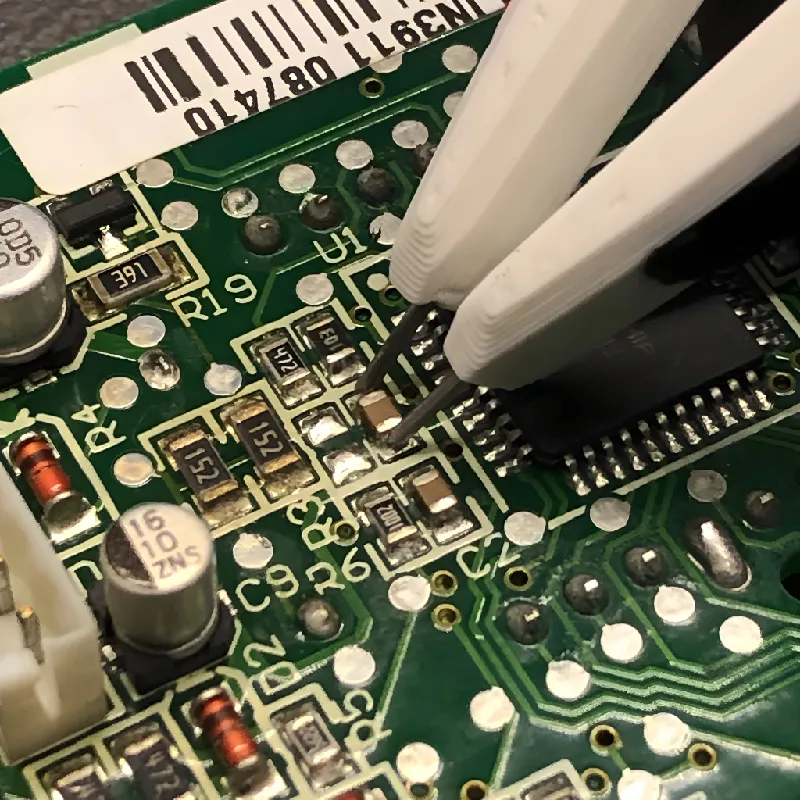
Once connected, the tweezers are ready for use. Their minimalist grip simplifies handling, and they can be printed in different colors to quickly identify the V/A and COM connections.
Now you are ready to precisely reach small components and take accurate measurements with ease !

Future Developments
Although these tweezers could potentially be used as oscilloscope probes, the lack of a coaxial cable may introduce signal interference.
If anyone is interested in testing the tweezers with an oscilloscope and sharing their experience and results, it would be an invaluable contribution!
That said, I plan to develop a shielded version specifically designed for oscilloscope use.
Conclusion
This project offers an affordable and practical alternative to traditional multimeter probes, combining the versatility of 3D printing with readily available electronic components from PCBWay+.
The precision tweezers are perfect for PCB testing and small electronic components, providing greater stability and ease of use in measurements.
Follow Us:
Follow 3D KIMBA for more innovative designs and updates!

Precision Multimeter Tweezer – SMD & Small Component Testing Tool
*PCBWay community is a sharing platform. We are not responsible for any design issues and parameter issues (board thickness, surface finish, etc.) you choose.


Raspberry Pi 5 7 Inch Touch Screen IPS 1024x600 HD LCD HDMI-compatible Display for RPI 4B 3B+ OPI 5 AIDA64 PC Secondary Screen(Without Speaker)
BUY NOW
ESP32-S3 4.3inch Capacitive Touch Display Development Board, 800×480, 5-point Touch, 32-bit LX7 Dual-core Processor
BUY NOW
Raspberry Pi 5 7 Inch Touch Screen IPS 1024x600 HD LCD HDMI-compatible Display for RPI 4B 3B+ OPI 5 AIDA64 PC Secondary Screen(Without Speaker)
BUY NOW

- Comments(0)
- Likes(0)
 Log in to post comments.
 More by 3D KIMBA
-
Modifying a Hotplate to a Reflow Solder Station
461 0 4 -
MPL3115A2 Barometric Pressure, Altitude, and Temperature Sensor
274 0 1 -
-
-
V2 Commodore AMIGA USB-C Power Sink Delivery High Efficiency Supply Triple Output 5V ±12V OLED display ATARI compatible shark 100W
706 4 2 -
How to measure weight with Load Cell and HX711
530 0 3 -
-
Instrumentation Input, high impedance with 16 bit 1MSPS ADC for SPI
609 1 0