
|
arduino IDEArduino
|
SPECTRUM ANALYZER WITH STEAMPUNK NIXIE LOOK
This is my version of a NIXIE tube lookalike Spectrum Analyzer
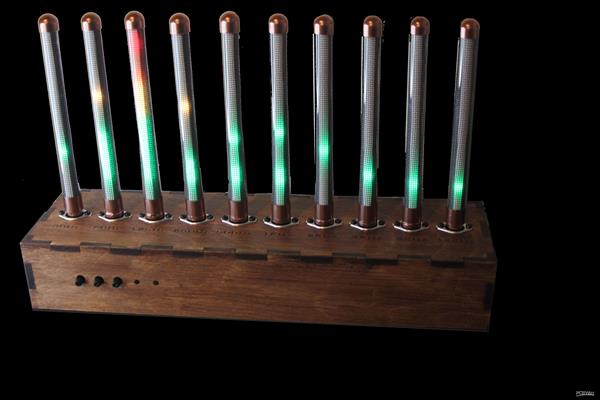
I created my own tubes using testtubes, fly screen fabric and PixelLeds like WS2812b
After making the tubes, I use a lasercutter to create wooden panels for a housing to place the tubes on.
The end result is a 10 channel spectrum analyzer with a antique look that can easily be modified to fit a steampunk theme.
Although the tubes I created look like Nixie Tube's (IN-9/IN-13), they are larger in size and they can display multi colors. How cool is that!
The Pixelleds are controlled by an ESP32. I know this board is way to smart and has processor power beyond what is needed for this project. Therefore, I also included a IoT webserver to display the result of the analyzer. Furthermore, programming the ESP32 can be done with the well known Arduino IDE.
A complete and extended building manual can be found at instructables
Supplies
- ESP32, I used DOIT devkit 1.0 but most ESP32 board will do the job.
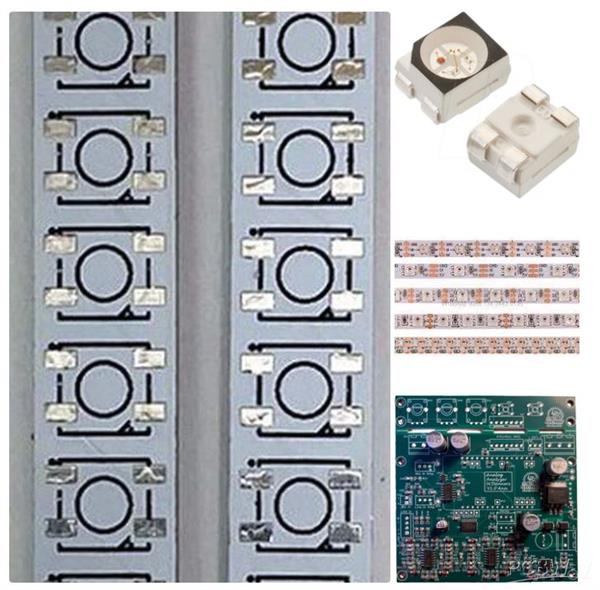
- Pixelled strips of 144 leds per meter. We only need enough to fill 10 tubes..
- Alternatively, you can use a pcb and solder on the pixelleds yourself.( Preferable option! )
- You can buy it he: https://www.tindie.com/products/markdonners/pcb-tubebar-set/
- 3 linear potentiometers that was a resistance between 1K and 20K
- 2 tactile switches to access all the available functions
- 2 Tulp/cinch connectors for the audio input
- 1 power switch
- 1 Power entry connector
- Alternatively, you can feed all without switch and power entry by using the usb input on the ESP32
- Housing ( buy or, like me, create your own)
- Some wires
- 10 Din socket with a minimum of 4 pins, I used 7 pin version
- 10 Din connector with a minimum of 4 pins, that fits in the sockets, I used 7 pin version
- Small blank wire of connector to connect the ledstrip/led pcb to the din connector
- 2-component glue to fixate the din connectors in the test tubes
- 10 glass test tubes ( look for laboratory glass work)
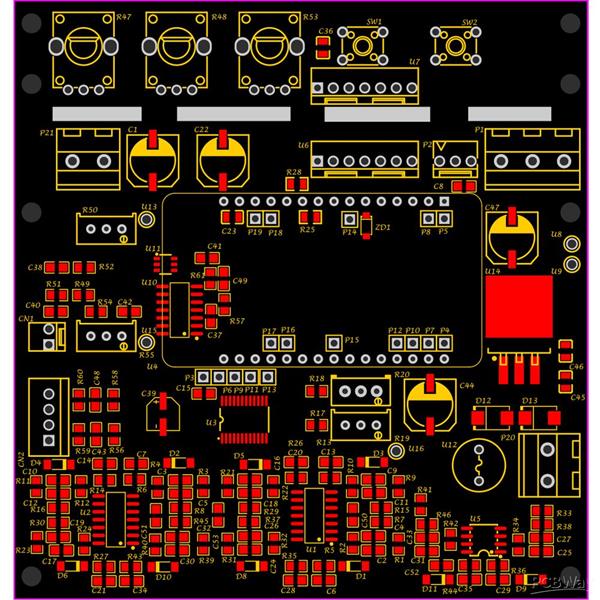
- PCB with electronics.
Step 1: Prepairing the Led PCB's or Ledstrips
If you bought ledstrip than you have to cut it to lenght so that it fits the test tubes. If you bought a LED PCB (you will need 5 sets) then you have to solder on all the WS2812 LEDS first.
Step 2: Completing the Test Tubes

- Disassemble the DIN audio connector and discard all but the actual connector ( the pins in its fixure)
- Print the diffuser on a standard paper and cut it to size.
- Cut the maze to size, both maze and paper should cover the complete inside of the PCB ( a small slit at the backside of the pcb is allowed.
- Place the maze and paper inside the tube
- For Better defusing of the light; put a round beat on top of each pcb so that it will not touch the glass.
- Connect the Din connector to the LED PCB using strong wire or pins from a angled header.
- Place the PCB in the tube and glue it together
- Spray paint the ends of each tube if you like.
Step 3: The Housing
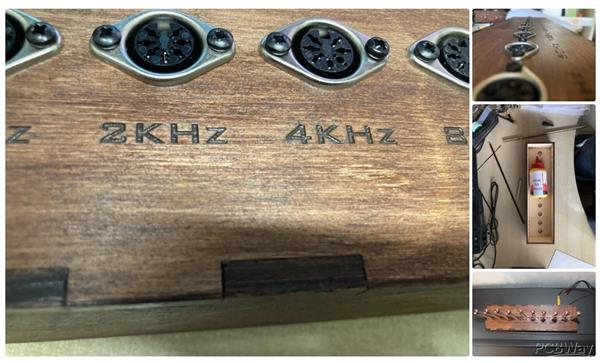
I designed a housing that I made of 6mm plywood and I used a lasercutter to cut it all out.
You can use my design or find/ create your own. It's totally up to you.
Step 4: Operating the VU Meter
You can use the microphone in to connect a small condenser microphone or you can connect your audio device to the line input connectors. Although the signal from the microphone is amplified on the PCB, it might not be strong enough. Depending on your microphone, you can adjust resistor R52; decreasing it’s value will amplify the signal more. In my prototype I replaced it with a resistor of 0 Ohm ( I shorted it). However, when using a different mic, I had to increase it again to 20K. So it all depends on your mic.
Mode button
The mode button has 3 functions:
Short press: change pattern(mode), there are 12 available patterns from which the last one is a fire screensaver.
Fast triple press: The VU meter that is displayed on the top row can be disabled/enabled
Pressed/ hold while booting: This will reset your stored WIFI settings. In case you need to change your WIFI settings or in case your system keeps rebooting, this is where to start!
Select Button
The select button has 3 functions:
Short press: Toggle between line-in and microphone input.
Long press: Press for 3 seconds to toggle “the auto change patterns” mode. When enabled, the pattern that is shown changes every few seconds. Also, when the button is pressed long enough, the Dutch national Flag will be shown. That’s how you know you’ve pressed long enough!
Double press: The direction of the falling peak will change.
Brightness Potmeter
You can use this to adjust the overall brightness of all leds / display. WARNING:Make sure you use a power supply to match the current for the brightness that you set. For sure, the ESP32 onboard regulator cannot handle all leds at full brightness. It is best to use an external powersupply that can handle 4 to 6 A. If you are using the USB cable that is connected to the ESP32, you might end up with a burning sensation coming from the ESP32 Board.
Peak Delay Potmeter
You can use this to adjust the time it takes for a peak to fall down to / rise up from the stack
Sensitivity Potmeter
You can use this to adjust the sensitivity of the input. It’s like cranking up the volume for lower signal inputs.
Serial Monitor
The serial monitor is your friend, it displays all info on booting, including your web server IP address.
Screensaver
When the input signal goes quet, a screensaver will kick in after a few seconds and the display / leds will show a fire animation. As soon as the input signal is back, the unit goes back in to normal mode
Step 5: Connecting the Wires

The wiring is not that difficult.
I used shielded wire to connect the microphone and the audio input and I used some general wire for everything else.
Give some extra attention to the power lines that feed the LED Strips. You must wire the data lines in series, meaning that the data out of one strip will be connected to the data in of the next. Etc. You can also do that with the power lines.
In the photo's you'll see what might look like some chaotic wiring. Make sure you tie them down nicely using some Tyraps or simular.
The wiring is straight forward:
- Power
- Audio in
- Microphone in
- Ledstrip for logo
- Ledmatrix/ Ledstrips
- Front operating panel to main PCB
Step 6: get your sketch, compile and upload with arduino ide
It's included in this project but you can also find it here:
Go to the github and get the sketch
Step 7: Show and tell
Show your design and tell your friends.
See the video
SPECTRUM ANALYZER WITH STEAMPUNK NIXIE LOOK
*PCBWay community is a sharing platform. We are not responsible for any design issues and parameter issues (board thickness, surface finish, etc.) you choose.
- Comments(2)
- Likes(3)
-
 Sam Atkinson
Jan 22,2025
-
 Mr. Marsupial
Jun 22,2023
-
 PCBWay Support Team
Oct 24,2022
- 3 USER VOTES
- YOUR VOTE 0.00 0.00
- 1
- 2
- 3
- 4
- 5
- 6
- 7
- 8
- 9
- 10
- 1
- 2
- 3
- 4
- 5
- 6
- 7
- 8
- 9
- 10
- 1
- 2
- 3
- 4
- 5
- 6
- 7
- 8
- 9
- 10
- 1
- 2
- 3
- 4
- 5
- 6
- 7
- 8
- 9
- 10

-
10design
-
10usability
-
10creativity
-
10content

-
10design
-
9usability
-
10creativity
-
6content
-
10design
-
8usability
-
8creativity
-
9content
 More by Mark Donners
-
 Fast Audio Spectrum Analyzer
This design is nothing if not amazing! Imagine 3500 Colored LEDS dancing around to the music at a ve...
-
 Classic Analog Spectrum Analyzer for Your Desktop
This is a spectrum analyzer that visualizes 10 audio frequency bands. Although it might look like ju...
-
 Cylon Vocoder wit Larson Scanner ( moving eye)
I'm a big fan of the TV series Battlestar Galactica ( BSG) and I love the robots called Cylons. The ...
-
 Pico-Voice_PCB_Pico-Voice_2024-11-14
This is my pcb design for the Pico Voice changer. Software was written by Mike Cook and is open sour...
-
 Gerber_Logo_PCB_Logo_2024-05-15
This is a youtube subscriber counter with audio playback and it has a dot matric spectrum analyzer w...
-
 Twin display pixelled Audio Analyzer
IntroductionThis Spectrum Analyzer project is nothing other than amazing. It includes a Teensy micro...
-
 SPECTRUM ANALYZER WITH STEAMPUNK NIXIE LOOK
This is my version of a NIXIE tube lookalike Spectrum AnalyzerI created my own tubes using testtubes...
-
 Gerber_PCB_BatDetector
This is the PCB that goes with a video that will be published on the element 14 presents community
-
 Talking CR Timer
The StoryImagine working at the office from nine to five punching numbers in a computer the whole da...
-
 Stereo Flyback Driver
This is my design of a stereo flyback driver. (ZVS) You can drive 2 flyback transformers to create a...
-
 Russian Slayer Exciter PCB
This is my take on the Russian Slayer Exciter. The slayer exciter is an easy to build Tesla coil. A ...
-
-
mammoth-3D SLM Voron Toolhead – Manual Drill & Tap Edition
234 0 0 -
-
AEL-2011 Power Supply Module
761 0 2 -
AEL-2011 50W Power Amplifier
633 0 2 -
-
-
Custom Mechanical Keyboard
825 0 0 -
Tester for Touch Screen Digitizer without using microcontroller
451 2 2 -
Audio reactive glow LED wristband/bracelet with NFC / RFID-Tags
402 0 1 -
-


