Arduino School Bell - Simple DIY
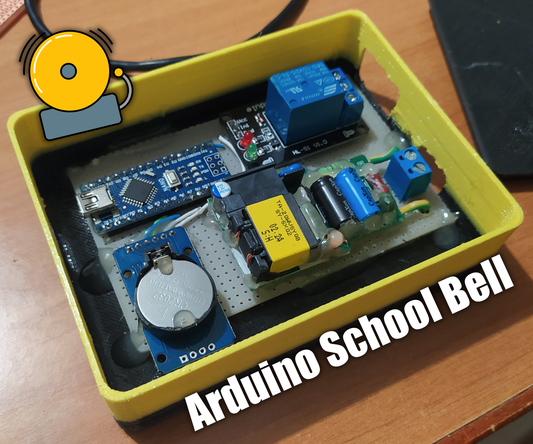
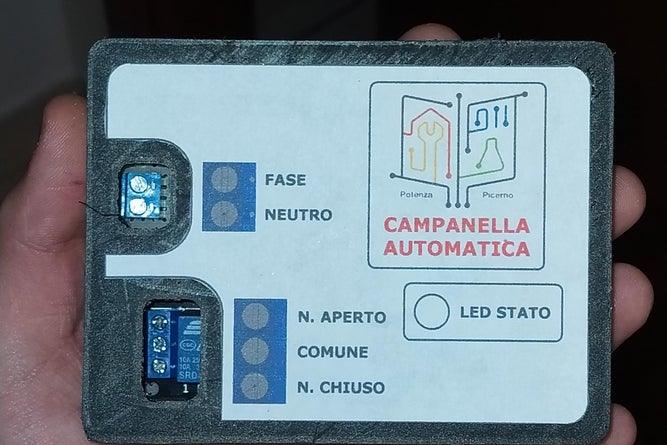
Hi guys, in this article we are going to see how to make a circuit with Arduino and some other components to make a school bell automatic and not make the school staff go to press the button every time.
By the end of this article, you will have created a great system that connects with just four cables to the power supply and bell button.
Supplies




- Smartphone charger (to disassemble, I used a samsung one) (2 options)
- RTC (Real Time Clock) module DS3231
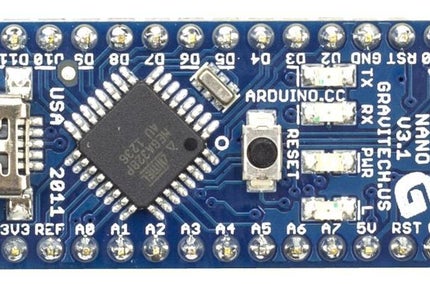
- Arduino Nano
- Hilink Power Module (if you don't want to use your phone charger and to do a cleaner job)
- Relay Module (for Arduino)
Step 1: Making the Electric Circuit
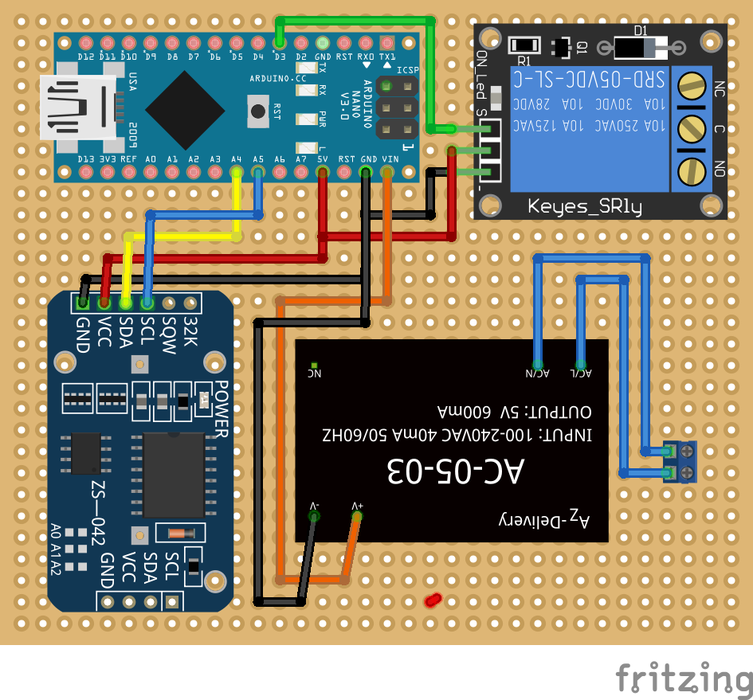
To make the circuit, all we need are, besides the components marked above, a prototyping board, a good soldering iron and an excellent soldering tin.
For the connections, you will have to rely on the diagram in the photo:
- D3 (Arduino) ? Signal (relay module)
- VIN (Arduino) ? V5 (positive of the power supply)
- GND (Arduino) ? -V5 (power supply negative) ? GND (relay module) ? GND (RTC module)
- 5V (Arduino) ? Vcc (Relay module) ? Vcc (RTC module)
- A5 (Arduino) ? SCL (RTC module)
- A4 (Arduino) ? SDA (RTC module)
- ACL ? Screw terminal Line
- ACN ? Screw terminal Neutral
Step 2: Set Time on DS3231
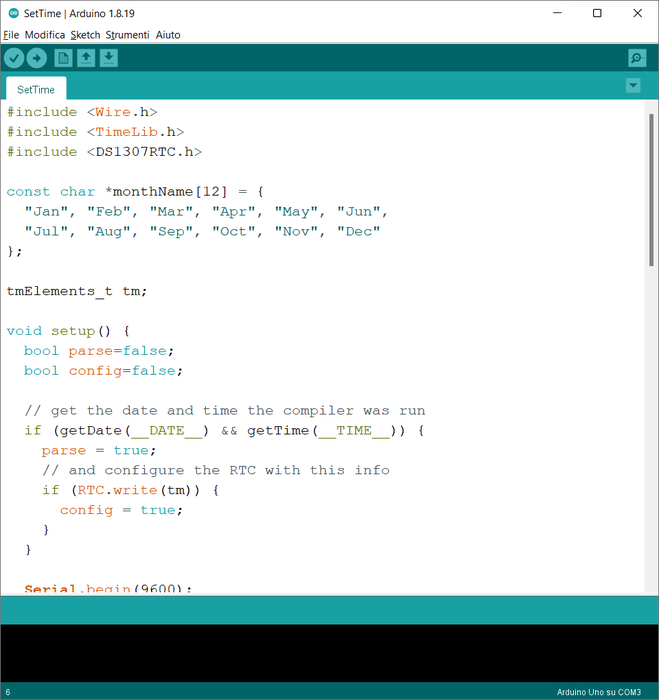
First of all, what you have to do is load a Sketch on the arduino board to set the time in the Real Time Clock DS3231 module. This is used to make the module memorize the time and this, thanks to the 3.3V battery, will keep the time forever.
To do this, however, you must first download the DS1307 module library which is the same as the DS3231 module from the Arduino IDE "library manager" or from this link.
Once this is done, go to file, examples, DS1307, open SetTime and load the Sketch.
Once this is done, if you load the ReadTime sketch, you will see the PRECISE time of the RTC module even after disconnecting the arduino from the power supply.
Here you can find the sketch:
#include <Wire.h>
#include <TimeLib.h>
#include <DS1307RTC.h>


const char *monthName[12] = {
  "Jan", "Feb", "Mar", "Apr", "May", "Jun",
  "Jul", "Aaug", "Sep", "Oct", "Nov", "Dec"
};


tmElements_t tm;


void setup() {
  bool parse=false;
  bool config=false;


  // get the date and time the compiler was run
  if (getDate(__DATE__) && getTime(__TIME__)) {
    parse = true;
    // and configure the RTC with this info
    if (RTC.write(tm)) {
      config = true;
    }
  }


  Serial.begin(9600);
  while (!Serial) ; // wait for Arduino Serial Monitor
  delay(200);
  if (parse && config) {
    Serial.print("DS1307 configured Time=");
    Serial.print(__TIME__);
    Serial.print(", Date=");
    Serial.println(__DATE__);
  } else if (parse) {
    Serial.println("DS1307 Communication Error :-{");
    Serial.println("Please check your circuitry");
  } else {
    Serial.print("Could not parse info from the compiler, Time=\"");
    Serial.print(__TIME__);
    Serial.print("\", Date=\"");
    Serial.print(__DATE__);
    Serial.println("\"");
  }
}


void loop() {
}


bool getTime(const char *str)
{
  int Hour, Min, Sec;


  if (sscanf(str, "%d:%d:%d", &Hour, &Min, &Sec) != 3) return false;
  tm.Hour = Hour;
  tm.Minute = Min;
  tm.Second = Sec;
  return true;
}


bool getDate(const char *str)
{
  char Month[12];
  int Day, Year;
  uint8_t monthIndex;


  if (sscanf(str, "%s %d %d", Month, &Day, &Year) != 3) return false;
  for (monthIndex = 0; monthIndex < 12; monthIndex++) {
    if (strcmp(Month, monthName[monthIndex]) == 0) break;
  }
  if (monthIndex >= 12) return false;
  tm.Day = Day;
  tm.Month = monthIndex + 1;
  tm.Year = CalendarYrToTm(Year);
  return true;
}
Step 3: Programming Arduino As a Bell
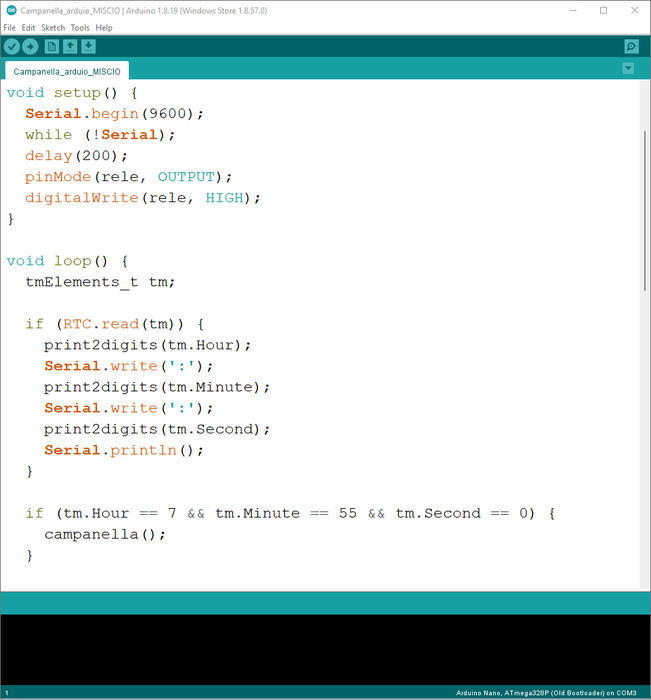
After setting the date and time to our RTC module, we need to program the Arduino so that it sounds every hour at 5am and that it sounds at the entrance (7:55) and break (10:55).
To do this, upload the sketch below to your Arduino Nano:
#include <Wire.h>
#include <TimeLib.h>
#include <DS1307RTC.h>
int RelayPin = 3;
int bell_time = 4000;


void setup() {
  Serial.begin(9600);
  while (!Serial);
  delay(200);
  pinMode(RelayPin, OUTPUT);
  digitalWrite(RelayPin, HIGH);
}


void loop() {
  tmElements_t tm;


  if (RTC.read(tm)) {
    print2digits(tm.Hour);
    Serial.write(':');
    print2digits(tm.Minute);
    Serial.write(':');
    print2digits(tm.Second);
    Serial.println();
  }


  if (tm.Hour == 7 && tm.Minute == 55 && tm.Second == 0) {
    Bell();
  }


  if (tm.Hour == 8 && tm.Minute == 5 && tm.Second == 0) {
    Bell();
  }


  if (tm.Hour == 9 && tm.Minute == 5 && tm.Second == 0) {
    Bell();
  }


  if (tm.Hour == 10 && tm.Minute == 5 && tm.Second == 0) {
    Bell();
  }


  if (tm.Hour == 10 && tm.Minute == 55 && tm.Second == 0) {
    Bell();
  }


  if (tm.Hour == 11 && tm.Minute == 5 && tm.Second == 0) {
    Bell();
  }


  if (tm.Hour == 12 && tm.Minute == 5 && tm.Second == 0) {
    Bell();
  }


  if (tm.Hour == 13 && tm.Minute == 5 && tm.Second == 0) {
    Bell();
  }


  delay(1000);
}


void Bell() {
  digitalWrite(RelayPin, LOW);
  delay(bell_time);
  digitalWrite(RelayPin, HIGH);
}


void print2digits(int number) {
  if (number >= 0 && number < 10) {
    Serial.write('0');
  }
  Serial.print(number);
}
The only two values you can change are:
int RelayPin = 3;         //set pin to connect the relay to
int bell_time = 4000;     //modify this value to make the bell last longer or shorter
to change the duration of the bell (default: 4 seconds) and the pin to which the relay controlling the bell is connected.
To change the times, change the "hour", "minute" and "second" values in each if
Arduino School Bell - Simple DIY
- Comments(0)
- Likes(0)
- 0 USER VOTES
- YOUR VOTE 0.00 0.00
- 1
- 2
- 3
- 4
- 5
- 6
- 7
- 8
- 9
- 10
- 1
- 2
- 3
- 4
- 5
- 6
- 7
- 8
- 9
- 10
- 1
- 2
- 3
- 4
- 5
- 6
- 7
- 8
- 9
- 10
- 1
- 2
- 3
- 4
- 5
- 6
- 7
- 8
- 9
- 10
 More by Maurizio Miscio
-
 DIY UPS (Emergency Battery) for Routers So It Won't Turn Off When the Breakers Are Off
Hi, today we are building a UPS or backup battery for the router / modem so that it does not turn of...
-
 How to Make a Fiido D4S Battery (kind of) Removable
Do you guys have a Fiido D4S but not a place to charge it?You know, your house is too small to park ...
-
 How to (Re)build an Ebike Charger and Add a Fan to Keep It Cool
Hi guys. In the last article we saw how to make a Fiido D4S Battery removable, but now to charge it ...
-
 Automatically Turn Off the Power Strip of the Computer (monitor, Speakers, Etc.) When You Shut Down the Computer.
If you have a desktop computer at home, you will know better than me how boring it is to turn off th...
-
 How to Disable the Throttle of an Electric Bike With an Invisible Switch
Hi folks, in this tutorial we will see how to disable the throttle of an electric bike (in my case a...
-
 Adding a Female Aux Jack to Your Old Headphone - the Best Upgrade You Can Do!
Have you ever broken a headphone jack? Probably the answer is yes! Or simply have you ever had issue...
-
 Easiest Way to Discharge a Ebike Battery
Hi guys, welcome to this new tutorial. Today I will show you the easiest way to discharge a Ebike Ba...
-
 Arduino School Bell - Simple DIY
Hi guys, in this article we are going to see how to make a circuit with Arduino and some other compo...
-
 Arduino Large and Productive Solar Tracker - Do It Yourself
Hi everyone! In this article we are going to see how to build a solar tracker that knows how to do t...
-
 Arduino Robotic Arm Controlled by Touch Interface
Hello. Today I'm here to see with you how I built a robotic arm with Arduino and a graphic touch int...
-
 DIY Bench Variable Power Supply - ZK-4KX
Hello to all boys and girls, today we will see together how I made a very compact DIY benchtop varia...
-
 How to Balance a Battery Pack With USB or the Traditional Method - TP4056
Hi guys, today let's see together how to balance a battery pack through a very common micro-USB conn...
-
 Single 18560 Battery Charger With TP4056
Hi guys, in this article we will see how to make a very convenient single charger for 18650 cells so...
-
 The Best Mini OLED Display I've Ever Tried! - DF Robot 5.5 'HDMI OLED-Display With Touchscreen
IntroHi guys, today let's unpack together the best mini display I've ever seen that I was extremely ...
-
 Let's Add an Active Balancer to the Electric Bike Battery
Intro:Hi guys, today we add an active balancer to the battery of our ebike so as not to risk some ce...
-
-
AEL-2011 Power Supply Module
524 0 2 -
AEL-2011 50W Power Amplifier
485 0 2 -
-
-
Custom Mechanical Keyboard
693 0 0 -
Tester for Touch Screen Digitizer without using microcontroller
329 2 2 -
Audio reactive glow LED wristband/bracelet with NFC / RFID-Tags
310 0 1 -
-
-


