


|
|
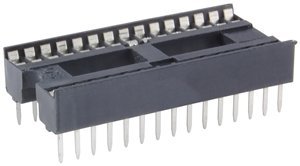
ARDUINO_NANO |
x 1 |
Electronic scale with Arduino with HX711 module and tare function
More info and updates in https://rogerbit.com/wprb/2024/03/balanza-electronica/
In this tutorial, you will learn step by step how to use an HX711 module with a load cell to make accurate weight measurements using an Arduino development board and an SH1106 OLED display. Load cells are sensors widely used in industrial weighing applications, and the HX711 module provides a convenient interface for connecting these load cells to the Arduino.
The HX711 module is a high-precision ADC (Analog to Digital Converter) amplifier and converter designed especially for weighing and load sensing applications. This module is commonly used in DIY electronics projects and in industrial applications where accurate reading of load sensors is required, such as in scales and force measurement systems.
The HX711 is capable of reading small analog signals from voltage bridge sensors, such as those used in load cells, and amplifying them to obtain an accurate reading using a microcontroller. It is compatible with a variety of common development boards, such as Arduino, Raspberry Pi and other development devices.
The HX711 module usually comes on a small printed circuit board that includes the HX711 chip and connectors for the load sensor cables. Some modules also include additional components, such as resistors and capacitors, to aid in measurement stability and accuracy.
Electronic components of the project
Arduino Nano

A socket for arduino
female pins

Male female dupont cables

sh1106 oled display
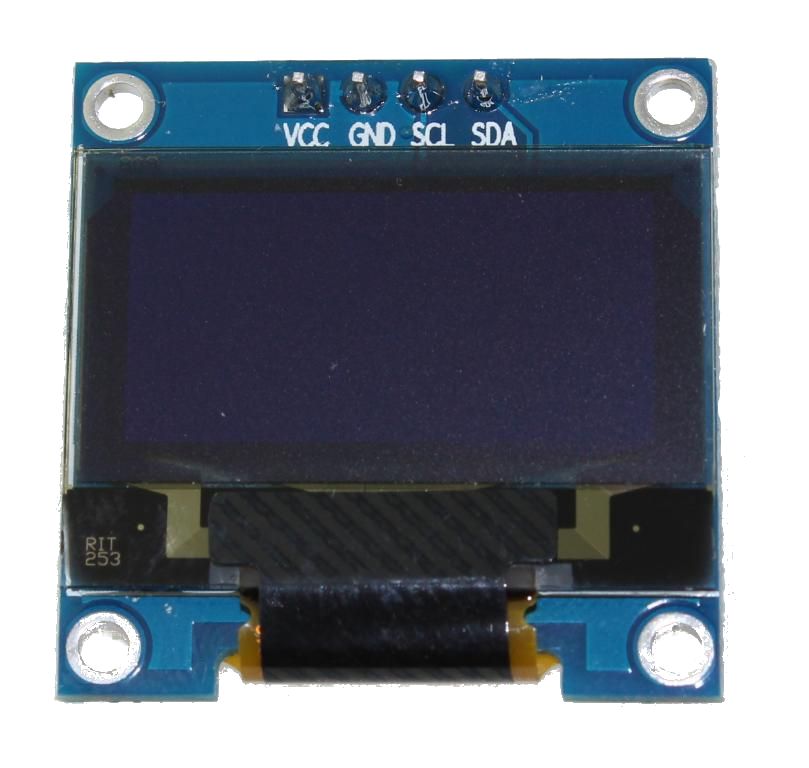
It is a 128x64 dot monochrome OLED display module with I2C interface. It has several advantages compared to LCD screens, and we can highlight its high brightness, very good contrast, a wider viewing angle, and low consumption. of energy. It is compatible with Arduino Rasberry Pi and PIC microcontrollers among others. It works with logic levels from 3.3V to 5V and has a viewing angle greater than 160 degrees. Screen Size is 1.3 inches. It is powered with a voltage of 3.3V to 5V. It can be used in applications such as smart watches, MP3s, thermometers, instruments, and various projects, etc.
Characteristics
Interface: I2C (3.3V / 5V logic level)
Resolution: 128 x 64
Angle of view: >160 degree
Display color: Blue
Display size: 1.3 inch
Driver IC: SH1106
Power supply: DC 3.3V~5V
Operating temperature: -20~70'C
Application: smart watch, MP3, thermometer, instruments, DIY projects, etc.
ky-004 module
The KY-004 module is a mechanical limit switch used to detect the status of a button or switch. This module connects to a development board (such as Arduino) via the input and output pins and can be programmed to detect when the switch is turned on or off. It also has an LED that lights up when the switch is activated. It is a common part in robotics and automation projects for event detection.

One HX711 Module

This module is an interface between the load cells and the microcontroller, allowing the weight to be read easily. Internally, it is responsible for reading the wheatstone bridge formed by the load cell, converting the analog reading to digital with its internal 24-bit A/D converter. It communicates with the microcontroller through 2 pins (Clock and Data) serially.
The HX711 amplifier module is a transmitter between the load cells and a microcontroller such as Arduino, allowing the weight in the cell to be read easily. It is compatible with 5kg, 20kg and 50kg load cells. Used in automated measurement systems, industrial processes, medical industry.
The HX711 chip has internally the electronics for reading the Wheatstone bridge formed by the load cell and also a 24-bit ADC converter. It communicates with the microcontroller through a serial protocol through 2 pins (Clock and Data).
The load cells are made up of strain gauges in a Wheatstone bridge configuration. To connect the cell to the HX711 module, 4 cables are necessary, the colors usually used are Red, Black, White and Green. Each color corresponds to a signal as shown below:
Red: Excitation voltage +, E+, VCC
Black: Excitation voltage -, E-, GND
White: Amplifier +, Signal +, A+
Green: Amplifier -, Signal -, A-
HX711 Cell Amplifier Module Specifications
Supply voltage: 2.7V – 5V
Operating current: < 1.5 mA
Standby current: <1 uA
Complete digitization on the HX711 chip
Connection to breadboard or card with standard header
2 differential input channels
Serial digital output interface
With holes to hold
With 10-pin header
On-chip regulator for analog source
Selectable operation: 80 and 10 samples per second
Works with Arduino, PIC Microcontrollers and other brands
Dimensions: 34mm X 20mm
Model: HX711
One YZC-131 load cell
Load cells are used to measure forces. This cell consists of a resistive bridge coupled to an aluminum bar. The assembly of this cell allows it to be anchored at one end with two screws, supporting the force on the other. Thus, the deformation that occurs in the aluminum bar when the force is applied will be reflected in the value of the bridge resistances and, in turn, in the output voltage. The output voltage varies linearly with the applied force, so an adequate measurement of this allows us to obtain a force value

3Kg load cell
Power: 5-10V
Rated output: 1 mV/V ± 150 μV/V
Material: Aluminum
Connection of the measurement bridge:
Power: Red-Black
Signal: Green-White
PCB


Download the PCB
electronic pcb diagram

Circuit

#include "HX711.h"//Librería para el módulo HX711
#include <U8g2lib.h>//Librería para el control del display oled
#define DAT  4 // Pin DAT del módulo HX711 conectado a Arduino
#define CLK   5 // Pin CLK del módulo HX711 conectado a Arduino
const int d12 = 12;//Pulsador para calibrar la tara
HX711 scale;
U8G2_SH1106_128X64_NONAME_F_SW_I2C u8g2(U8G2_R0, /* clock=*/ SCL, /* data=*/ SDA, /* reset=*/ U8X8_PIN_NONE);
void setup() {
  Serial.begin(9600);//Velocidad del puerto serial
  pinMode(d12, INPUT);//Se configura este pin como entrada para el pulsador
  scale.begin(DAT, CLK);
  scale.set_scale(731.0);//Calibración. Cambia este valor para ajustarlo a tu celda de carga.
  scale.tare();// Pone el valor actual como tara
  u8g2.begin();//Inicializa el display oled
}
void loop() {
float peso = scale.get_units(10);//Toma 10 muestras para mayor presición
Serial.print("Peso: ");
Serial.println(peso, 1);//Vemos el valos del peso en el terminal serial
u8g2.clearBuffer(); // Limpiar el buffer de la pantalla
  u8g2.setFont(u8g2_font_ncenB14_tr); // Establecer la fuente
  // Muestra Peso: en la pantalla
  u8g2.setCursor(0, 15);
  u8g2.print("Peso:");
  u8g2.setCursor(0, 35);
  u8g2.print(peso, 1);//Muestra el valor del peso en el display
  u8g2.print(" gramos");//Muestra gramos en el display
  int boton12= digitalRead(d12);//Lee el estado del pulsador
  if(boton12==LOW){//Si se pulsa el pulsador se cumple esta condición
  scale.tare();//Pone el valor actual como tara
  u8g2.clearBuffer(); // Limpiar el buffer de la pantalla
  u8g2.setFont(u8g2_font_ncenB14_tr); // Establece la fuente
  u8g2.setCursor(0, 15);
  u8g2.print("Tara calibrada");//Muestra en el display Tara Calibrada
  Serial.println("Tara calibrada");
  }
  u8g2.sendBuffer();  // Enviar la información del buffer a la pantalla
  delay(100);        // Esperar un tiempo antes de la siguiente lectura
}
Electronic scale with Arduino with HX711 module and tare function
*PCBWay community is a sharing platform. We are not responsible for any design issues and parameter issues (board thickness, surface finish, etc.) you choose.


- Comments(0)
- Likes(0)
More by CarlosVolt Tutoriales
-
 Infrared stepper motor control with speed control
More info and updates https://rogerbit.com/wprb/2024/09/motor-paso-a-paso-x-infrarrojo/In this proje...
Infrared stepper motor control with speed control
More info and updates https://rogerbit.com/wprb/2024/09/motor-paso-a-paso-x-infrarrojo/In this proje...
-
 Uploading BME280 Sensor Data to ThingSpeak Using ESP32
In this tutorial, we will show you how to connect a BME280 sensor to an ESP32 to read temperature, h...
Uploading BME280 Sensor Data to ThingSpeak Using ESP32
In this tutorial, we will show you how to connect a BME280 sensor to an ESP32 to read temperature, h...
-
 Water pump control for irrigation via telegram and esp32
Water Pump Control by Telegram and ESP32 is an automated system that allows you to remotely control ...
Water pump control for irrigation via telegram and esp32
Water Pump Control by Telegram and ESP32 is an automated system that allows you to remotely control ...
-
 Air conditioning on/off control via telegram and esp32
In this tutorial we will see how to control an air conditioner, with an esp32 and the telegram appli...
Air conditioning on/off control via telegram and esp32
In this tutorial we will see how to control an air conditioner, with an esp32 and the telegram appli...
-
 35 watt stereo amplifier
In this video we will see how to build an audio amplifier, with the TDA7377 integrated circuit, and ...
35 watt stereo amplifier
In this video we will see how to build an audio amplifier, with the TDA7377 integrated circuit, and ...
-
 Laser alarm with RFID module
More info and updates in https://rogerbit.com/wprb/2024/08/alarma-laser-rfid/In this project, we bui...
Laser alarm with RFID module
More info and updates in https://rogerbit.com/wprb/2024/08/alarma-laser-rfid/In this project, we bui...
-
 Control lights by voice commands and keys
In this tutorial we will see how to create a device to control lights by voice commands, with a modu...
Control lights by voice commands and keys
In this tutorial we will see how to create a device to control lights by voice commands, with a modu...
-
 Stepper motor control x bluetooth and app
In this tutorial we will see a circuit, which controls a stepper motor, with an application made in ...
Stepper motor control x bluetooth and app
In this tutorial we will see a circuit, which controls a stepper motor, with an application made in ...
-
 DFplayermini x bluetooth mp3 player control
More info and updates in https://rogerbit.com/wprb/2022/12/dfplayermini-x-bluetooth/In this tutorial...
DFplayermini x bluetooth mp3 player control
More info and updates in https://rogerbit.com/wprb/2022/12/dfplayermini-x-bluetooth/In this tutorial...
-
 Robot with WiFi control and servos driven by ESP32
More info and updates in https://rogerbit.com/wprb/2023/07/robot-wifi/A robot controlled by Wi-Fi, s...
Robot with WiFi control and servos driven by ESP32
More info and updates in https://rogerbit.com/wprb/2023/07/robot-wifi/A robot controlled by Wi-Fi, s...
-
 How to make a water level meter with uln2803
In this tutorial we will see how to make a water level meter circuit with the built-in uln2803.The p...
How to make a water level meter with uln2803
In this tutorial we will see how to make a water level meter circuit with the built-in uln2803.The p...
-
 Color Detector with Arduino and OLED display
In this tutorial we will show you how to build a color detector using the TCS3200 sensor and an SH11...
Color Detector with Arduino and OLED display
In this tutorial we will show you how to build a color detector using the TCS3200 sensor and an SH11...
-
 DTMF decoder for handy with arduino, control over several kilometers
In this tutorial we will see how to make a circuit to connect to our handy, in this case a Baofeng U...
DTMF decoder for handy with arduino, control over several kilometers
In this tutorial we will see how to make a circuit to connect to our handy, in this case a Baofeng U...
-
 Turn on light from thindspeak with esp32
In this tutorial, we will show you how to control lights over the Internet using an ESP32 and the Th...
Turn on light from thindspeak with esp32
In this tutorial, we will show you how to control lights over the Internet using an ESP32 and the Th...
-
 MP3 player control with webserver using ESP32 WIFI
In this tutorial, you will learn how to build a web server using the ESP32 to control the YX5300 mod...
MP3 player control with webserver using ESP32 WIFI
In this tutorial, you will learn how to build a web server using the ESP32 to control the YX5300 mod...
-
 Time clock with fingerprint IoT module, uploading data to thingspeak
More info in and updates in https://rogerbit.com/wprb/2022/07/reloj-de-control-fingerprint/In this t...
Time clock with fingerprint IoT module, uploading data to thingspeak
More info in and updates in https://rogerbit.com/wprb/2022/07/reloj-de-control-fingerprint/In this t...
-
 Make your own logic tip (includes printed circuit board)
In this video tutorial we will see how to make a logic tip, on a printed circuit, with the integrate...
Make your own logic tip (includes printed circuit board)
In this video tutorial we will see how to make a logic tip, on a printed circuit, with the integrate...
-
 Coil or inductor meter with Arduino and OLED display
More info and updates in https://rogerbit.com/wprb/2022/06/medidor-inductores/In this tutorial we wi...
Coil or inductor meter with Arduino and OLED display
More info and updates in https://rogerbit.com/wprb/2022/06/medidor-inductores/In this tutorial we wi...
-
-
-
-
Tester for Touch Screen Digitizer without using microcontroller
321 2 2 -
Audio reactive glow LED wristband/bracelet with NFC / RFID-Tags
306 0 1 -
-
-


