Time clock with fingerprint IoT module, uploading data to thingspeak
More info in and updates in https://rogerbit.com/wprb/2022/07/reloj-de-control-fingerprint/
In this tutorial we will see how to create a personal control reader/clock with esp32, a fingerprint reader sensor. All the data will be uploaded to the cloud, through the services of thingspeak.com. The assembly of the electronic circuit, the detailed explanation of the source code and finally, the device will be tested will be included.
Electronic components
An Esp32
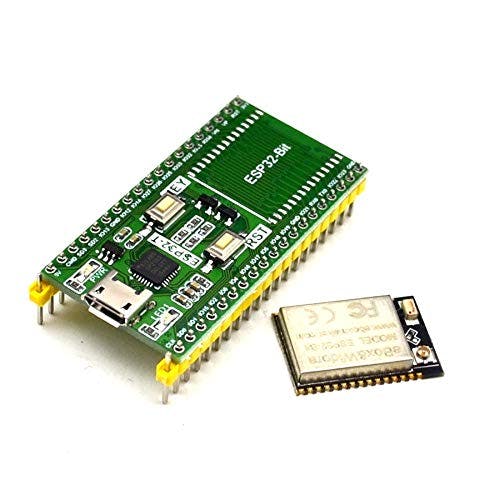
Features of the ESP32-T module
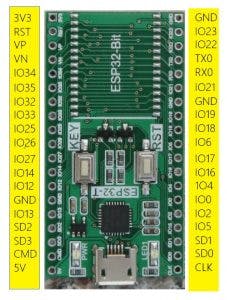
Connectivity
The ESP32 module has all the WiFi variants :
802.11 b/g/n/e/i/n
Wi-Fi Direct (P2P), P2P Discovery, P2P Group Owner mode and P2P Power Management
This new version includes connectivity via low-consumption Bluetooth
Bluetooth v4.2 BR/EDR and BLE
BLE Beacon
In addition, it can communicate using SPI, I2C, UART, MAC Ethernet, Host SD protocols
Microcontroller Features
The CPU is made up of a Tensilica LX6 model SoC with the following features and memory
Dual core 32-bit with 160MHz speed
448 kBytes ROM memory
520kBytes SRAM memory
48 Pin Dispne
18 12-bit ADCs
2 8-bit DACs
10 pin contact sensors
16 PWM
20 Digital inputs/outputs
Food and consumption patterns
For the correct operation of the ESP32, it is necessary to supply a voltage between 2.8V and 3.6V. The energy it consumes depends on the operating mode. It contains a mode, the Ultra Low Power Solution (ULP) , in which basic tasks (ADC, RTC...) continue to be performed in Sleep mode.
Open Smart fingerprint module
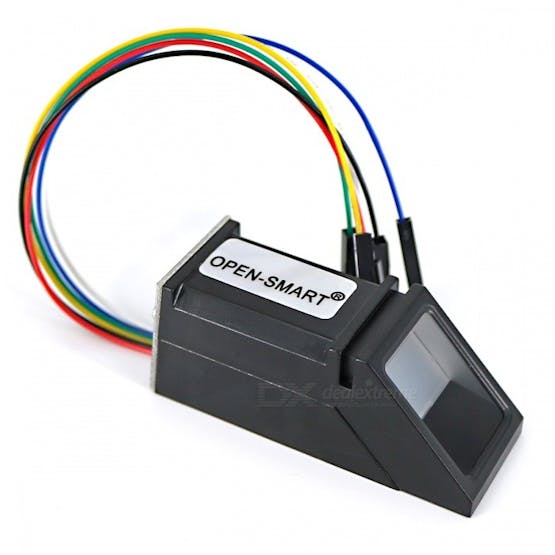
Download Manual –> R308-fingerprint-module-user-manual_English
Buzzer
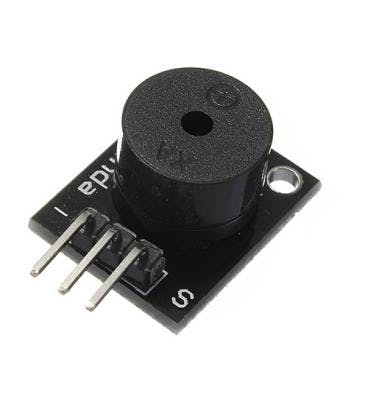
Female pins
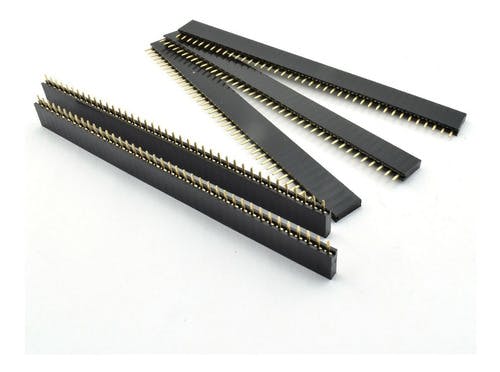
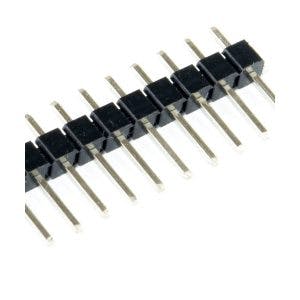
Male pins
PCB
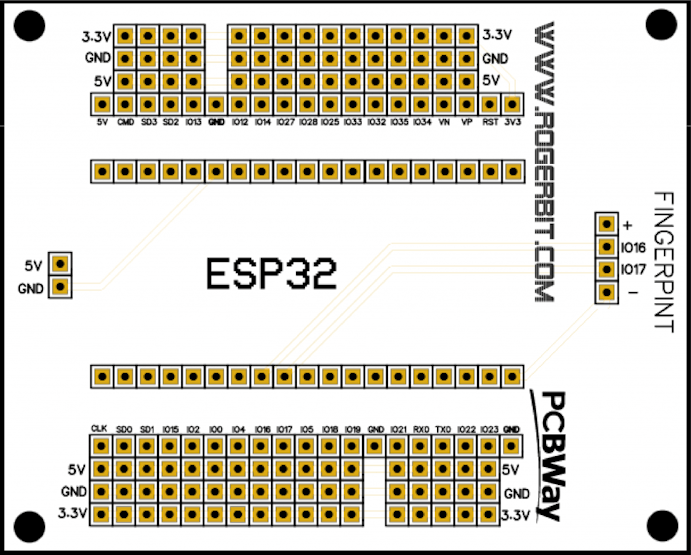
Download gerber file –> https://rogerbit.com/wprb/wp-content/uploads/2022/07/Esp32_fingerprint_PCB.zip
// Importar bibliotecas necesarias #include <WiFi.h> #include <HTTPClient.h> #include <Adafruit_Fingerprint.h> Adafruit_Fingerprint finger = Adafruit_Fingerprint(&Serial2); uint8_t id; int pin27 = 27; const int led = 2;//Led onboard del esp32 String numID; int codigo; // Establezca su nombre y contraseña de wifi const char* ssid = "Tu_red_wifi"; const char* password = "Tu_clave_wifi"; // La URL de tu canal de thingspeak con el número de api_key String nombreServidor = "https://api.thingspeak.com/update?api_key=Tu_Api_Key"; void setup() { while (!Serial); // Para Yun/Leo/Micro/Zero/... Serial.begin(9600);//Velocidad del puerto serie arduino pinMode(pin27, OUTPUT);//Buzzer pinMode(led, OUTPUT);//Led onboard del esp32 WiFi.begin(ssid, password); // Intenta conectarte a wifi con nuestra contraseña Serial.println("Conectando"); // Imprime nuestro estado en el monitor de serie // Espera a que se conecte el wifi while(WiFi.status() != WL_CONNECTED) { delay(500); Serial.print("."); } Serial.println(""); Serial.print("Conectado a la red WiFi con la dirección IP: "); Serial.println(WiFi.localIP()); //Dos bip indican que se conectó el dispositivo a la red wifi bip(100); delay(400); bip(100); Serial.println("Inicio detección del módulo fingerprint"); // Velocidad de transmisión de datos entre el arduino y el módulo fingerprint finger.begin(57600); if (finger.verifyPassword()) { Serial.println("¡Sensor de huellas dactilares conectado ok!"); } else { Serial.println("Revisa la conexión del sensor de huellas :("); while (1); } Serial.println("Esperando una huella válida..."); } void loop() { datosFingerprint(); delay(50); //Pequeño delay } // Devuelve -1 si falla, de lo contrario devuelve ID # int datosFingerprint() { uint8_t p = finger.getImage(); if (p != FINGERPRINT_OK) return -1; p = finger.image2Tz(); if (p != FINGERPRINT_OK) return -1; p = finger.fingerFastSearch(); if (p != FINGERPRINT_OK) return -1; //Encontrado una coincidencia! Serial.print("Huella ID #"); Serial.print(finger.fingerID); Serial.print(" con una confianza de "); Serial.println(finger.confidence); //Activar el buzzer durante 100 mili segundos bip(100); delay(100); numID = String(finger.fingerID); //Convierte el id en cadena para ser compatible con el display Serial.print("Huella Correcta # "); Serial.println(numID); digitalWrite(led, HIGH); ////--------------------- if(WiFi.status()== WL_CONNECTED){ // Comprueba que la wifi todavía esté conectada HTTPClient http; // Inicializar nuestro cliente HTTP String url = nombreServidor + "&field1=" + numID ; // Definir nuestra URL completa http.begin(url.c_str()); // Inicializa nuestra solicitud HTTP int codigoRespuestaHTTP = http.GET(); // Enviar solicitud HTTP if (codigoRespuestaHTTP > 0){ // Verifica que haya código de estado HTTP correcto Serial.print("Codigo de respuesta HTTP: "); Serial.println(codigoRespuestaHTTP); codigo = codigoRespuestaHTTP; }else{ Serial.print("Codigo de error: "); Serial.println(codigoRespuestaHTTP); //Reintentamos una vez más por si hubo un error en la comunicación http.begin(url.c_str()); // Inicializa nuestra solicitud HTTP int codigoRespuestaHTTP = http.GET(); // Enviar solicitud HTTP if (codigoRespuestaHTTP > 0){ // Verifica que haya código de estado HTTP correcto Serial.print("Codigo de respuesta HTTP: "); Serial.println(codigoRespuestaHTTP); } } http.end(); } else { Serial.println("WiFi desconectado"); } numID=""; delay(10000); //Bip largo sibió datos a thingspeak if(codigo == 200){ digitalWrite(led, LOW); bip(750); } //Tres bip hubo un problema al subir los datos a thingpeag if(codigo != 200){ bip(150); delay(150); digitalWrite(led, LOW); bip(150); delay(150); digitalWrite(led, HIGH); bip(150); delay(150); digitalWrite(led, LOW); } } //Sonido del buzzer void bip(int demora){ digitalWrite(pin27, HIGH); delay(demora); digitalWrite(pin27, LOW); }
Time clock with fingerprint IoT module, uploading data to thingspeak
*PCBWay community is a sharing platform. We are not responsible for any design issues and parameter issues (board thickness, surface finish, etc.) you choose.
- Comments(0)
- Likes(0)
 Log in to post comments.
- 0 USER VOTES
- YOUR VOTE 0.00 0.00
- 1
- 2
- 3
- 4
- 5
- 6
- 7
- 8
- 9
- 10
- 1
- 2
- 3
- 4
- 5
- 6
- 7
- 8
- 9
- 10
- 1
- 2
- 3
- 4
- 5
- 6
- 7
- 8
- 9
- 10
- 1
- 2
- 3
- 4
- 5
- 6
- 7
- 8
- 9
- 10
 More by CarlosVolt Tutoriales
-
 DTMF decoder for handy with arduino, control over several kilometers
In this tutorial we will see how to make a circuit to connect to our handy, in this case a Baofeng U...
-
 Turn on light from thindspeak with esp32
In this tutorial, we will show you how to control lights over the Internet using an ESP32 and the Th...
-
 MP3 player control with webserver using ESP32 WIFI
In this tutorial, you will learn how to build a web server using the ESP32 to control the YX5300 mod...
-
 Time clock with fingerprint IoT module, uploading data to thingspeak
More info in and updates in https://rogerbit.com/wprb/2022/07/reloj-de-control-fingerprint/In this t...
-
 Make your own logic tip (includes printed circuit board)
In this video tutorial we will see how to make a logic tip, on a printed circuit, with the integrate...
-
 Coil or inductor meter with Arduino and OLED display
More info and updates in https://rogerbit.com/wprb/2022/06/medidor-inductores/In this tutorial we wi...
-
 Infrared stepper motor control with speed control
More info and updates https://rogerbit.com/wprb/2024/09/motor-paso-a-paso-x-infrarrojo/In this proje...
-
 Uploading BME280 Sensor Data to ThingSpeak Using ESP32
In this tutorial, we will show you how to connect a BME280 sensor to an ESP32 to read temperature, h...
-
 Water pump control for irrigation via telegram and esp32
Water Pump Control by Telegram and ESP32 is an automated system that allows you to remotely control ...
-
 Air conditioning on/off control via telegram and esp32
In this tutorial we will see how to control an air conditioner, with an esp32 and the telegram appli...
-
 35 watt stereo amplifier
In this video we will see how to build an audio amplifier, with the TDA7377 integrated circuit, and ...
-
 Laser alarm with RFID module
More info and updates in https://rogerbit.com/wprb/2024/08/alarma-laser-rfid/In this project, we bui...
-
 Control lights by voice commands and keys
In this tutorial we will see how to create a device to control lights by voice commands, with a modu...
-
 Stepper motor control x bluetooth and app
In this tutorial we will see a circuit, which controls a stepper motor, with an application made in ...
-
 DFplayermini x bluetooth mp3 player control
More info and updates in https://rogerbit.com/wprb/2022/12/dfplayermini-x-bluetooth/In this tutorial...
-
 Robot with WiFi control and servos driven by ESP32
More info and updates in https://rogerbit.com/wprb/2023/07/robot-wifi/A robot controlled by Wi-Fi, s...
-
 How to make a water level meter with uln2803
In this tutorial we will see how to make a water level meter circuit with the built-in uln2803.The p...
-
 Color Detector with Arduino and OLED display
In this tutorial we will show you how to build a color detector using the TCS3200 sensor and an SH11...
-
 DTMF decoder for handy with arduino, control over several kilometers
In this tutorial we will see how to make a circuit to connect to our handy, in this case a Baofeng U...
-
 Turn on light from thindspeak with esp32
In this tutorial, we will show you how to control lights over the Internet using an ESP32 and the Th...
-
 MP3 player control with webserver using ESP32 WIFI
In this tutorial, you will learn how to build a web server using the ESP32 to control the YX5300 mod...
-
 Time clock with fingerprint IoT module, uploading data to thingspeak
More info in and updates in https://rogerbit.com/wprb/2022/07/reloj-de-control-fingerprint/In this t...
-
 Make your own logic tip (includes printed circuit board)
In this video tutorial we will see how to make a logic tip, on a printed circuit, with the integrate...
-
 Coil or inductor meter with Arduino and OLED display
More info and updates in https://rogerbit.com/wprb/2022/06/medidor-inductores/In this tutorial we wi...
-
 Infrared stepper motor control with speed control
More info and updates https://rogerbit.com/wprb/2024/09/motor-paso-a-paso-x-infrarrojo/In this proje...
-
 Uploading BME280 Sensor Data to ThingSpeak Using ESP32
In this tutorial, we will show you how to connect a BME280 sensor to an ESP32 to read temperature, h...
-
 Water pump control for irrigation via telegram and esp32
Water Pump Control by Telegram and ESP32 is an automated system that allows you to remotely control ...
-
 Air conditioning on/off control via telegram and esp32
In this tutorial we will see how to control an air conditioner, with an esp32 and the telegram appli...
-
 35 watt stereo amplifier
In this video we will see how to build an audio amplifier, with the TDA7377 integrated circuit, and ...
-
 Laser alarm with RFID module
More info and updates in https://rogerbit.com/wprb/2024/08/alarma-laser-rfid/In this project, we bui...
-
-
Flood Detection and warning system using LORA and Arduino
276 0 2 -
-
Ender 3 Linear Rail Upgrade (No modifying of existing parts)
310 0 0 -
3D Printed Snow Tires For 1/10 Scale RC Car (12mm hex)
214 0 1 -
Buzz Wire Game enclosure for Futurekit FK145 soldering kit
226 0 1 -
PROJECT NEPTUNE - REV 4 - 30TH ANNIVERSARY EDITION
714 0 0


