Infrared stepper motor control with speed control
More info and updates https://rogerbit.com/wprb/2024/09/motor-paso-a-paso-x-infrarrojo/
In this project, we will learn how to control a 28BYJ-48 stepper motor using an infrared remote controller and an Arduino. The motor will be able to rotate in both directions, stop, and adjust its speed using commands sent from the remote controller. This project is ideal for applications where precise wireless control of a stepper motor is needed, such as in robots, cameras, or automation systems.
The 28BYJ-48 is a low-cost stepper motor that runs on the ULN2003 driver. This driver allows us to easily control the motor from a microcontroller such as the Arduino. In addition, we use the IRremote library to receive infrared signals from the remote control, allowing us to control the motor wirelessly and without physical buttons.
In this project, we implemented the following controls:
Right turn : By pressing a specific button, the motor will continuously rotate in a clockwise direction until another command is sent.
Left turn : With another button, the motor will turn in the opposite direction.
Stop : A third button will stop the motor.
Speed Adjustment : The motor speed can be increased or decreased in a range of 1 to 10 using two additional buttons on the remote control.
During the project, we use the Arduino serial monitor to display the received infrared code, allowing us to easily identify the control buttons and verify their operation. This project is modular and allows adjustments according to user needs, such as changing the maximum speed or adjusting the remote control codes.
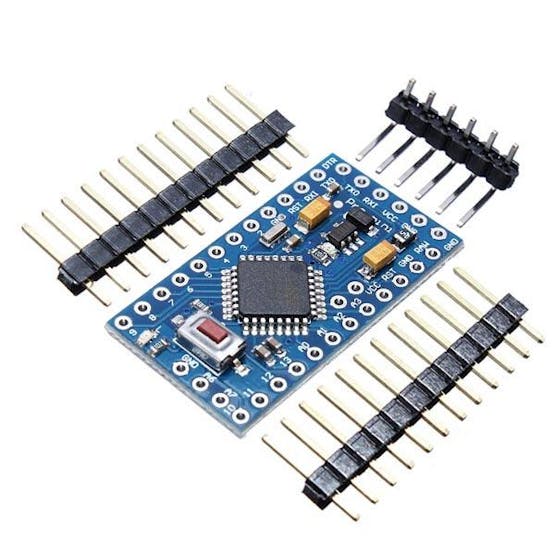
Arduino mini pro
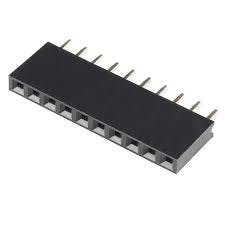
Female pins
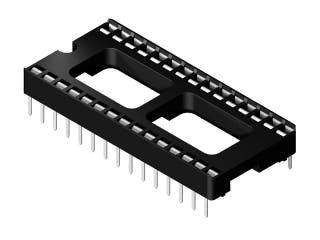
Socket for arduino nano
ky-022 infrared receiver module
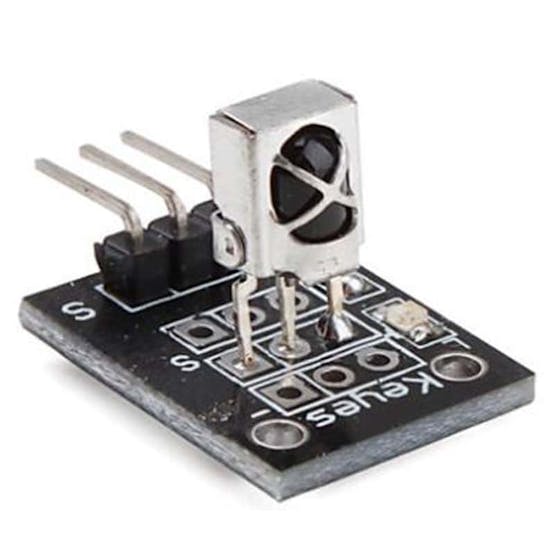
Size: 6.4*7.4*5.1MM, acceptance angle 90°, working voltage 2.7-5.5V.Frequency 37.9KHZ, receiving distance 18m.
Daylight rejection up to 500LUX, electromagnetic interference capability, built-in infrared dedicated IC.Widely used: stereo, TV, VCR, CD, set-top boxes, digital photo frame, car audio, remote control toys, satellite receivers, hard disk, air conditioning, heating, fans, lighting and other household appliances.
Pinout:
1 …. GND (-)
2 …. + 5V
3 …. Output (S)
Stepper motor 28BYJ-48
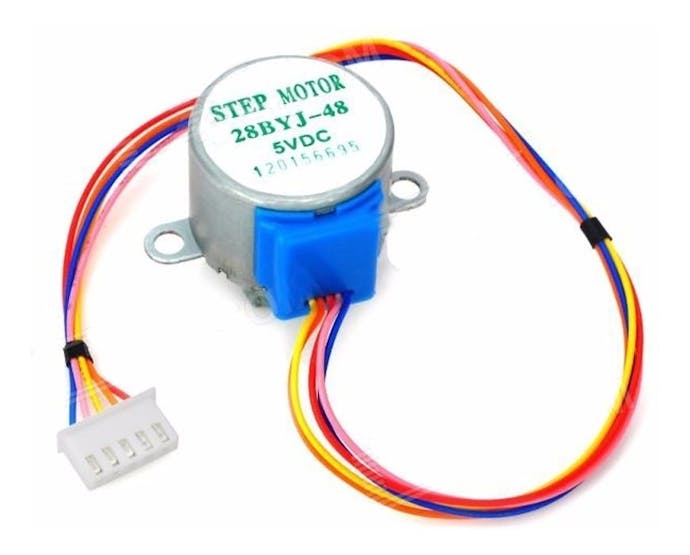
The parameters of this stepper motor are:
Model: 28BYJ-48 – 5V
Nominal voltage: 5V (or 12V, value indicated on the back).
Number of phases: 4.
Speed reducer: 1/64
Step angle: 5.625° / 64
Frequency: 100Hz
DC resistance: 50Ω ±7 % (25° C)
Frequency with traction: > 600Hz
Non-traction frequency: > 1000Hz
Traction torque: >34.3mN.m (120Hz)
Self-positioning torque: >34.3mN.m
Torque with friction: 600-1200 gf.cm
Torque drag: 300 gf.cm
Insulation resistance > 10MΩ (500V)
Electrical insulation: 600VAC/1mA/1s
Insulation grade: A
Temperature rise: < 40K (120Hz)
Noise: < 35dB (120Hz, no load, 10cm)
ULN2003APG
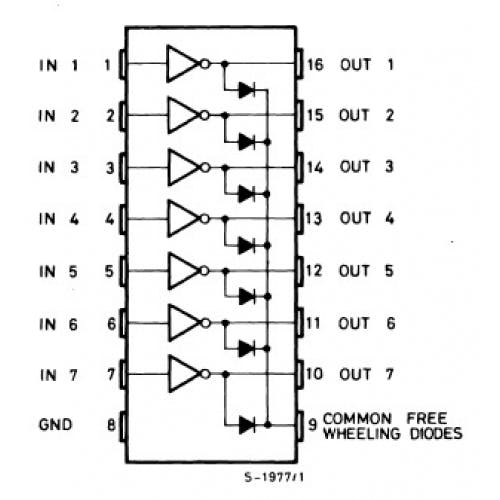
Main specifications:
500 mA nominal collector current (single output)
50V output (there is a version that supports 100V output)
Includes output flyback diodes
TTL and 5-V CMOS logic compatible inputs
Infrared remote control

PCB
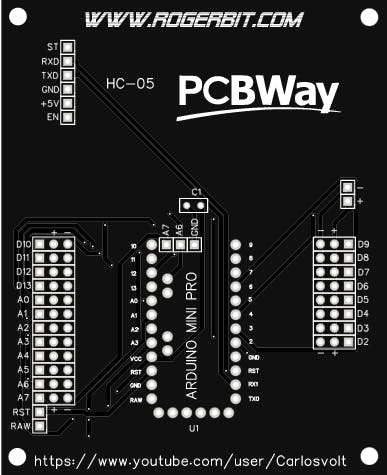
Download gerber file –> ir alarm pcb
Circuit
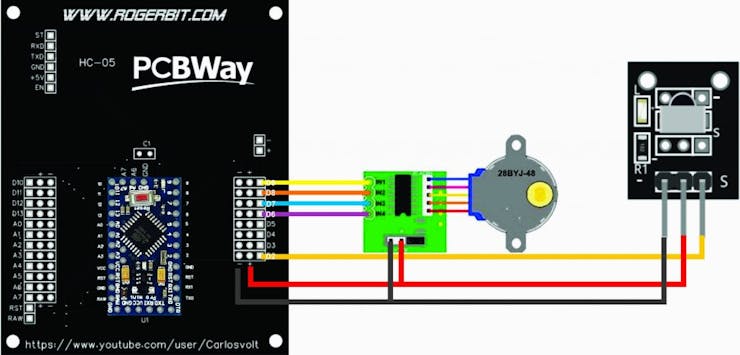
Connection diagram:
Connect the 4 pins of the motor to the outputs of the ULN2003 driver. These are usually the IN1, IN2, IN3 and IN4 pins.
Connect pins IN1 to D6, IN2 to D7, IN3 to D8, and IN4 to D9 on the Arduino board.
Connect the IR receiver signal pin to the D2 pin on the Arduino.
Connect the power and ground of the motor and IR receiver to 5V and GND respectively.
Installing libraries:
IRremote : This library is used to receive infrared signals from the remote controller. To install it, open the Arduino IDE and go to Sketch > Include Library > Manage Libraries. Search for “IRremote” and install it.
Stepper : It is a standard library that is already included in the Arduino IDE, so you do not need to install anything additional to control the motor.
#include <IRremote.h> #include <Stepper.h> // Pines del motor paso a paso #define IN1 6 #define IN2 7 #define IN3 8 #define IN4 9 // Configuración del motor const int pasosPorRevolucion = 2048; // Pasos para una revolución completa Stepper motor(pasosPorRevolucion, IN1, IN3, IN2, IN4); // Pines del receptor IR const int receptorIR = 2; // Variables para el control remoto IRrecv irrecv(receptorIR); decode_results resultados; // Códigos IR para las funciones (ajusta estos códigos según tu control remoto) unsigned long codigoDerecha = 0x7EC31EF7; // Cambia estos códigos por los de tu control unsigned long codigoIzquierda = 0xC101E57B; unsigned long codigoStop = 0x5B83B61B; unsigned long codigoAumentarVelocidad = 0xF63C8657; // Código para aumentar la velocidad unsigned long codigoDisminuirVelocidad = 0x2A89195F; // Código para disminuir la velocidad // Variables de control enum EstadoMotor { PARADO, GIRANDO_DERECHA, GIRANDO_IZQUIERDA }; EstadoMotor estadoActual = PARADO; int velocidad = 6; // Velocidad inicial, valor entre 1 y 12 void setup() { Serial.begin(9600); irrecv.enableIRIn(); // Iniciar receptor IR motor.setSpeed(velocidad); // Ajusta la velocidad inicial del motor } void loop() { // Leer señal del control remoto if (irrecv.decode(&resultados)) { unsigned long codigo = resultados.value; Serial.print("Código IR recibido: "); Serial.println(codigo, HEX); // Mostrar el código en hexadecimal if (codigo == codigoDerecha) { estadoActual = GIRANDO_DERECHA; Serial.println("Cambiar a giro hacia la derecha"); } else if (codigo == codigoIzquierda) { estadoActual = GIRANDO_IZQUIERDA; Serial.println("Cambiar a giro hacia la izquierda"); } else if (codigo == codigoStop) { estadoActual = PARADO; Serial.println("Detener motor"); } else if (codigo == codigoAumentarVelocidad) { cambiarVelocidad(true); // Aumentar velocidad } else if (codigo == codigoDisminuirVelocidad) { cambiarVelocidad(false); // Disminuir velocidad } irrecv.resume(); // Preparar el receptor para la próxima señal } // Ejecutar acción según el estado actual switch (estadoActual) { case GIRANDO_DERECHA: motor.step(1); // Mover en pasos pequeños en dirección derecha break; case GIRANDO_IZQUIERDA: motor.step(-1); // Mover en pasos pequeños en dirección izquierda break; case PARADO: // No hacer nada, el motor está detenido break; } } void cambiarVelocidad(bool aumentar) { if (aumentar && velocidad < 12) { velocidad++; Serial.print("Aumentar velocidad: "); } else if (!aumentar && velocidad > 1) { velocidad--; Serial.print("Disminuir velocidad: "); } motor.setSpeed(velocidad); // Actualizar velocidad del motor Serial.println(velocidad); }
Infrared stepper motor control with speed control
*PCBWay community is a sharing platform. We are not responsible for any design issues and parameter issues (board thickness, surface finish, etc.) you choose.

Raspberry Pi 5 7 Inch Touch Screen IPS 1024x600 HD LCD HDMI-compatible Display for RPI 4B 3B+ OPI 5 AIDA64 PC Secondary Screen(Without Speaker)
BUY NOW
ESP32-S3 4.3inch Capacitive Touch Display Development Board, 800×480, 5-point Touch, 32-bit LX7 Dual-core Processor
BUY NOW
Raspberry Pi 5 7 Inch Touch Screen IPS 1024x600 HD LCD HDMI-compatible Display for RPI 4B 3B+ OPI 5 AIDA64 PC Secondary Screen(Without Speaker)
BUY NOW- Comments(0)
- Likes(1)
 Log in to post comments.
-
 RichardV31
Oct 29,2024
- 0 USER VOTES
- YOUR VOTE 0.00 0.00
- 1
- 2
- 3
- 4
- 5
- 6
- 7
- 8
- 9
- 10
- 1
- 2
- 3
- 4
- 5
- 6
- 7
- 8
- 9
- 10
- 1
- 2
- 3
- 4
- 5
- 6
- 7
- 8
- 9
- 10
- 1
- 2
- 3
- 4
- 5
- 6
- 7
- 8
- 9
- 10
 More by CarlosVolt Tutoriales
-
 DTMF decoder for handy with arduino, control over several kilometers
In this tutorial we will see how to make a circuit to connect to our handy, in this case a Baofeng U...
-
 Turn on light from thindspeak with esp32
In this tutorial, we will show you how to control lights over the Internet using an ESP32 and the Th...
-
 MP3 player control with webserver using ESP32 WIFI
In this tutorial, you will learn how to build a web server using the ESP32 to control the YX5300 mod...
-
 Time clock with fingerprint IoT module, uploading data to thingspeak
More info in and updates in https://rogerbit.com/wprb/2022/07/reloj-de-control-fingerprint/In this t...
-
 Make your own logic tip (includes printed circuit board)
In this video tutorial we will see how to make a logic tip, on a printed circuit, with the integrate...
-
 Coil or inductor meter with Arduino and OLED display
More info and updates in https://rogerbit.com/wprb/2022/06/medidor-inductores/In this tutorial we wi...
-
 Infrared stepper motor control with speed control
More info and updates https://rogerbit.com/wprb/2024/09/motor-paso-a-paso-x-infrarrojo/In this proje...
-
 Uploading BME280 Sensor Data to ThingSpeak Using ESP32
In this tutorial, we will show you how to connect a BME280 sensor to an ESP32 to read temperature, h...
-
 Water pump control for irrigation via telegram and esp32
Water Pump Control by Telegram and ESP32 is an automated system that allows you to remotely control ...
-
 Air conditioning on/off control via telegram and esp32
In this tutorial we will see how to control an air conditioner, with an esp32 and the telegram appli...
-
 35 watt stereo amplifier
In this video we will see how to build an audio amplifier, with the TDA7377 integrated circuit, and ...
-
 Laser alarm with RFID module
More info and updates in https://rogerbit.com/wprb/2024/08/alarma-laser-rfid/In this project, we bui...
-
 Control lights by voice commands and keys
In this tutorial we will see how to create a device to control lights by voice commands, with a modu...
-
 Stepper motor control x bluetooth and app
In this tutorial we will see a circuit, which controls a stepper motor, with an application made in ...
-
 DFplayermini x bluetooth mp3 player control
More info and updates in https://rogerbit.com/wprb/2022/12/dfplayermini-x-bluetooth/In this tutorial...
-
 Robot with WiFi control and servos driven by ESP32
More info and updates in https://rogerbit.com/wprb/2023/07/robot-wifi/A robot controlled by Wi-Fi, s...
-
 How to make a water level meter with uln2803
In this tutorial we will see how to make a water level meter circuit with the built-in uln2803.The p...
-
 Color Detector with Arduino and OLED display
In this tutorial we will show you how to build a color detector using the TCS3200 sensor and an SH11...
-
 DTMF decoder for handy with arduino, control over several kilometers
In this tutorial we will see how to make a circuit to connect to our handy, in this case a Baofeng U...
-
 Turn on light from thindspeak with esp32
In this tutorial, we will show you how to control lights over the Internet using an ESP32 and the Th...
-
 MP3 player control with webserver using ESP32 WIFI
In this tutorial, you will learn how to build a web server using the ESP32 to control the YX5300 mod...
-
 Time clock with fingerprint IoT module, uploading data to thingspeak
More info in and updates in https://rogerbit.com/wprb/2022/07/reloj-de-control-fingerprint/In this t...
-
 Make your own logic tip (includes printed circuit board)
In this video tutorial we will see how to make a logic tip, on a printed circuit, with the integrate...
-
 Coil or inductor meter with Arduino and OLED display
More info and updates in https://rogerbit.com/wprb/2022/06/medidor-inductores/In this tutorial we wi...
-
 Infrared stepper motor control with speed control
More info and updates https://rogerbit.com/wprb/2024/09/motor-paso-a-paso-x-infrarrojo/In this proje...
-
 Uploading BME280 Sensor Data to ThingSpeak Using ESP32
In this tutorial, we will show you how to connect a BME280 sensor to an ESP32 to read temperature, h...
-
 Water pump control for irrigation via telegram and esp32
Water Pump Control by Telegram and ESP32 is an automated system that allows you to remotely control ...
-
 Air conditioning on/off control via telegram and esp32
In this tutorial we will see how to control an air conditioner, with an esp32 and the telegram appli...
-
 35 watt stereo amplifier
In this video we will see how to build an audio amplifier, with the TDA7377 integrated circuit, and ...
-
 Laser alarm with RFID module
More info and updates in https://rogerbit.com/wprb/2024/08/alarma-laser-rfid/In this project, we bui...
-
Commodore 64 1541-II Floppy Disk Drive C64 Power Supply Unit USB-C 5V 12V DIN connector 5.25
142 1 2 -
Easy to print simple stacking organizer with drawers
81 0 0 -
-
-
-
Modifying a Hotplate to a Reflow Solder Station
1123 1 6 -
MPL3115A2 Barometric Pressure, Altitude, and Temperature Sensor
630 0 1 -
-
Nintendo 64DD Replacement Shell
486 0 2 -
V2 Commodore AMIGA USB-C Power Sink Delivery High Efficiency Supply Triple Output 5V ±12V OLED display ATARI compatible shark 100W
1412 4 3


