|
3500Adafruit Industries LLC
|
x 1 | |
|
|
SEN MPU 6050Joy-It
|
x 1 | |
|
|
Colorful Round Tactile Button Switch AssortmentAdafruit Industries LLC-1009
|
x 1 | |
|
|
3D Printed EnclosureDIY
|
x 1 |

|
3D Printer (generic) |
|

|
arduino IDEArduino
|
|

|
Autodesk Fusion 360Autodesk
|
Joytojoy bring game stick and mouse capabilities to your power wheelchair
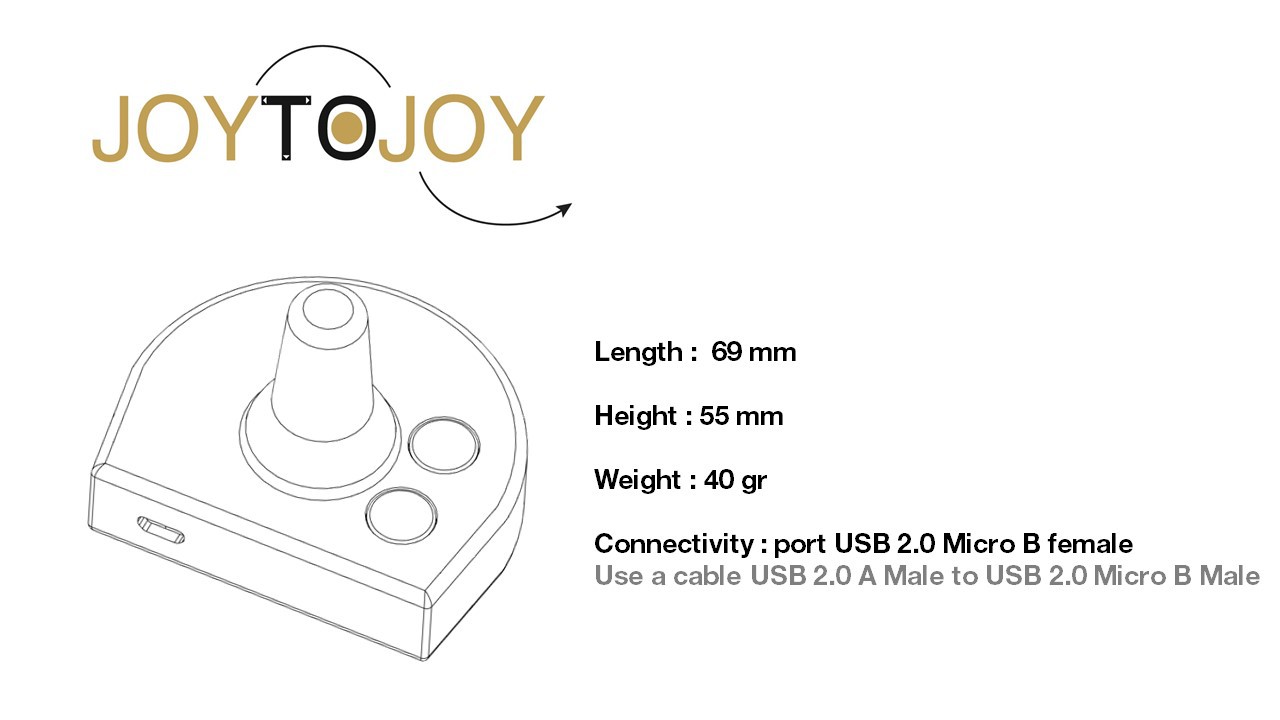
Joytojoy is an affordable and versatile HID (human interface device) that allows power wheelchairs users to bring new functionalities to their wheelchair's controller :
Stick to play on a video game console or a mouse to control a smartphone, PC...
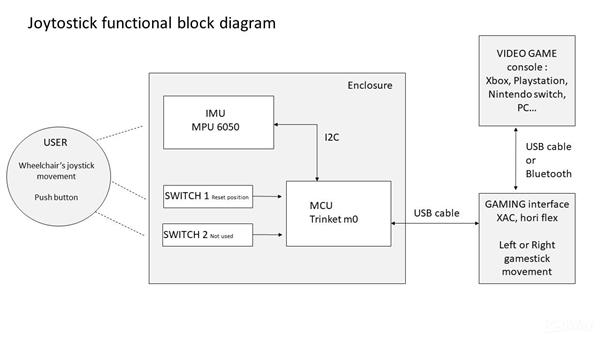
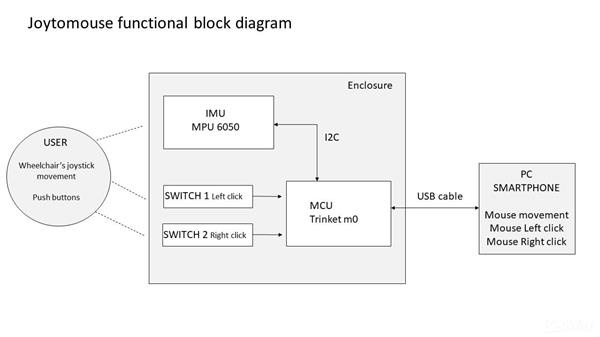
Its principle of operation is quite simple. It's a box connected to the device to be controlled which is fitted in place of the standard wheelchair's joystick knob. Joystick movements are detected by a motion sensor (an inertial measurement unit) and translated into a signal for each system to be controlled.
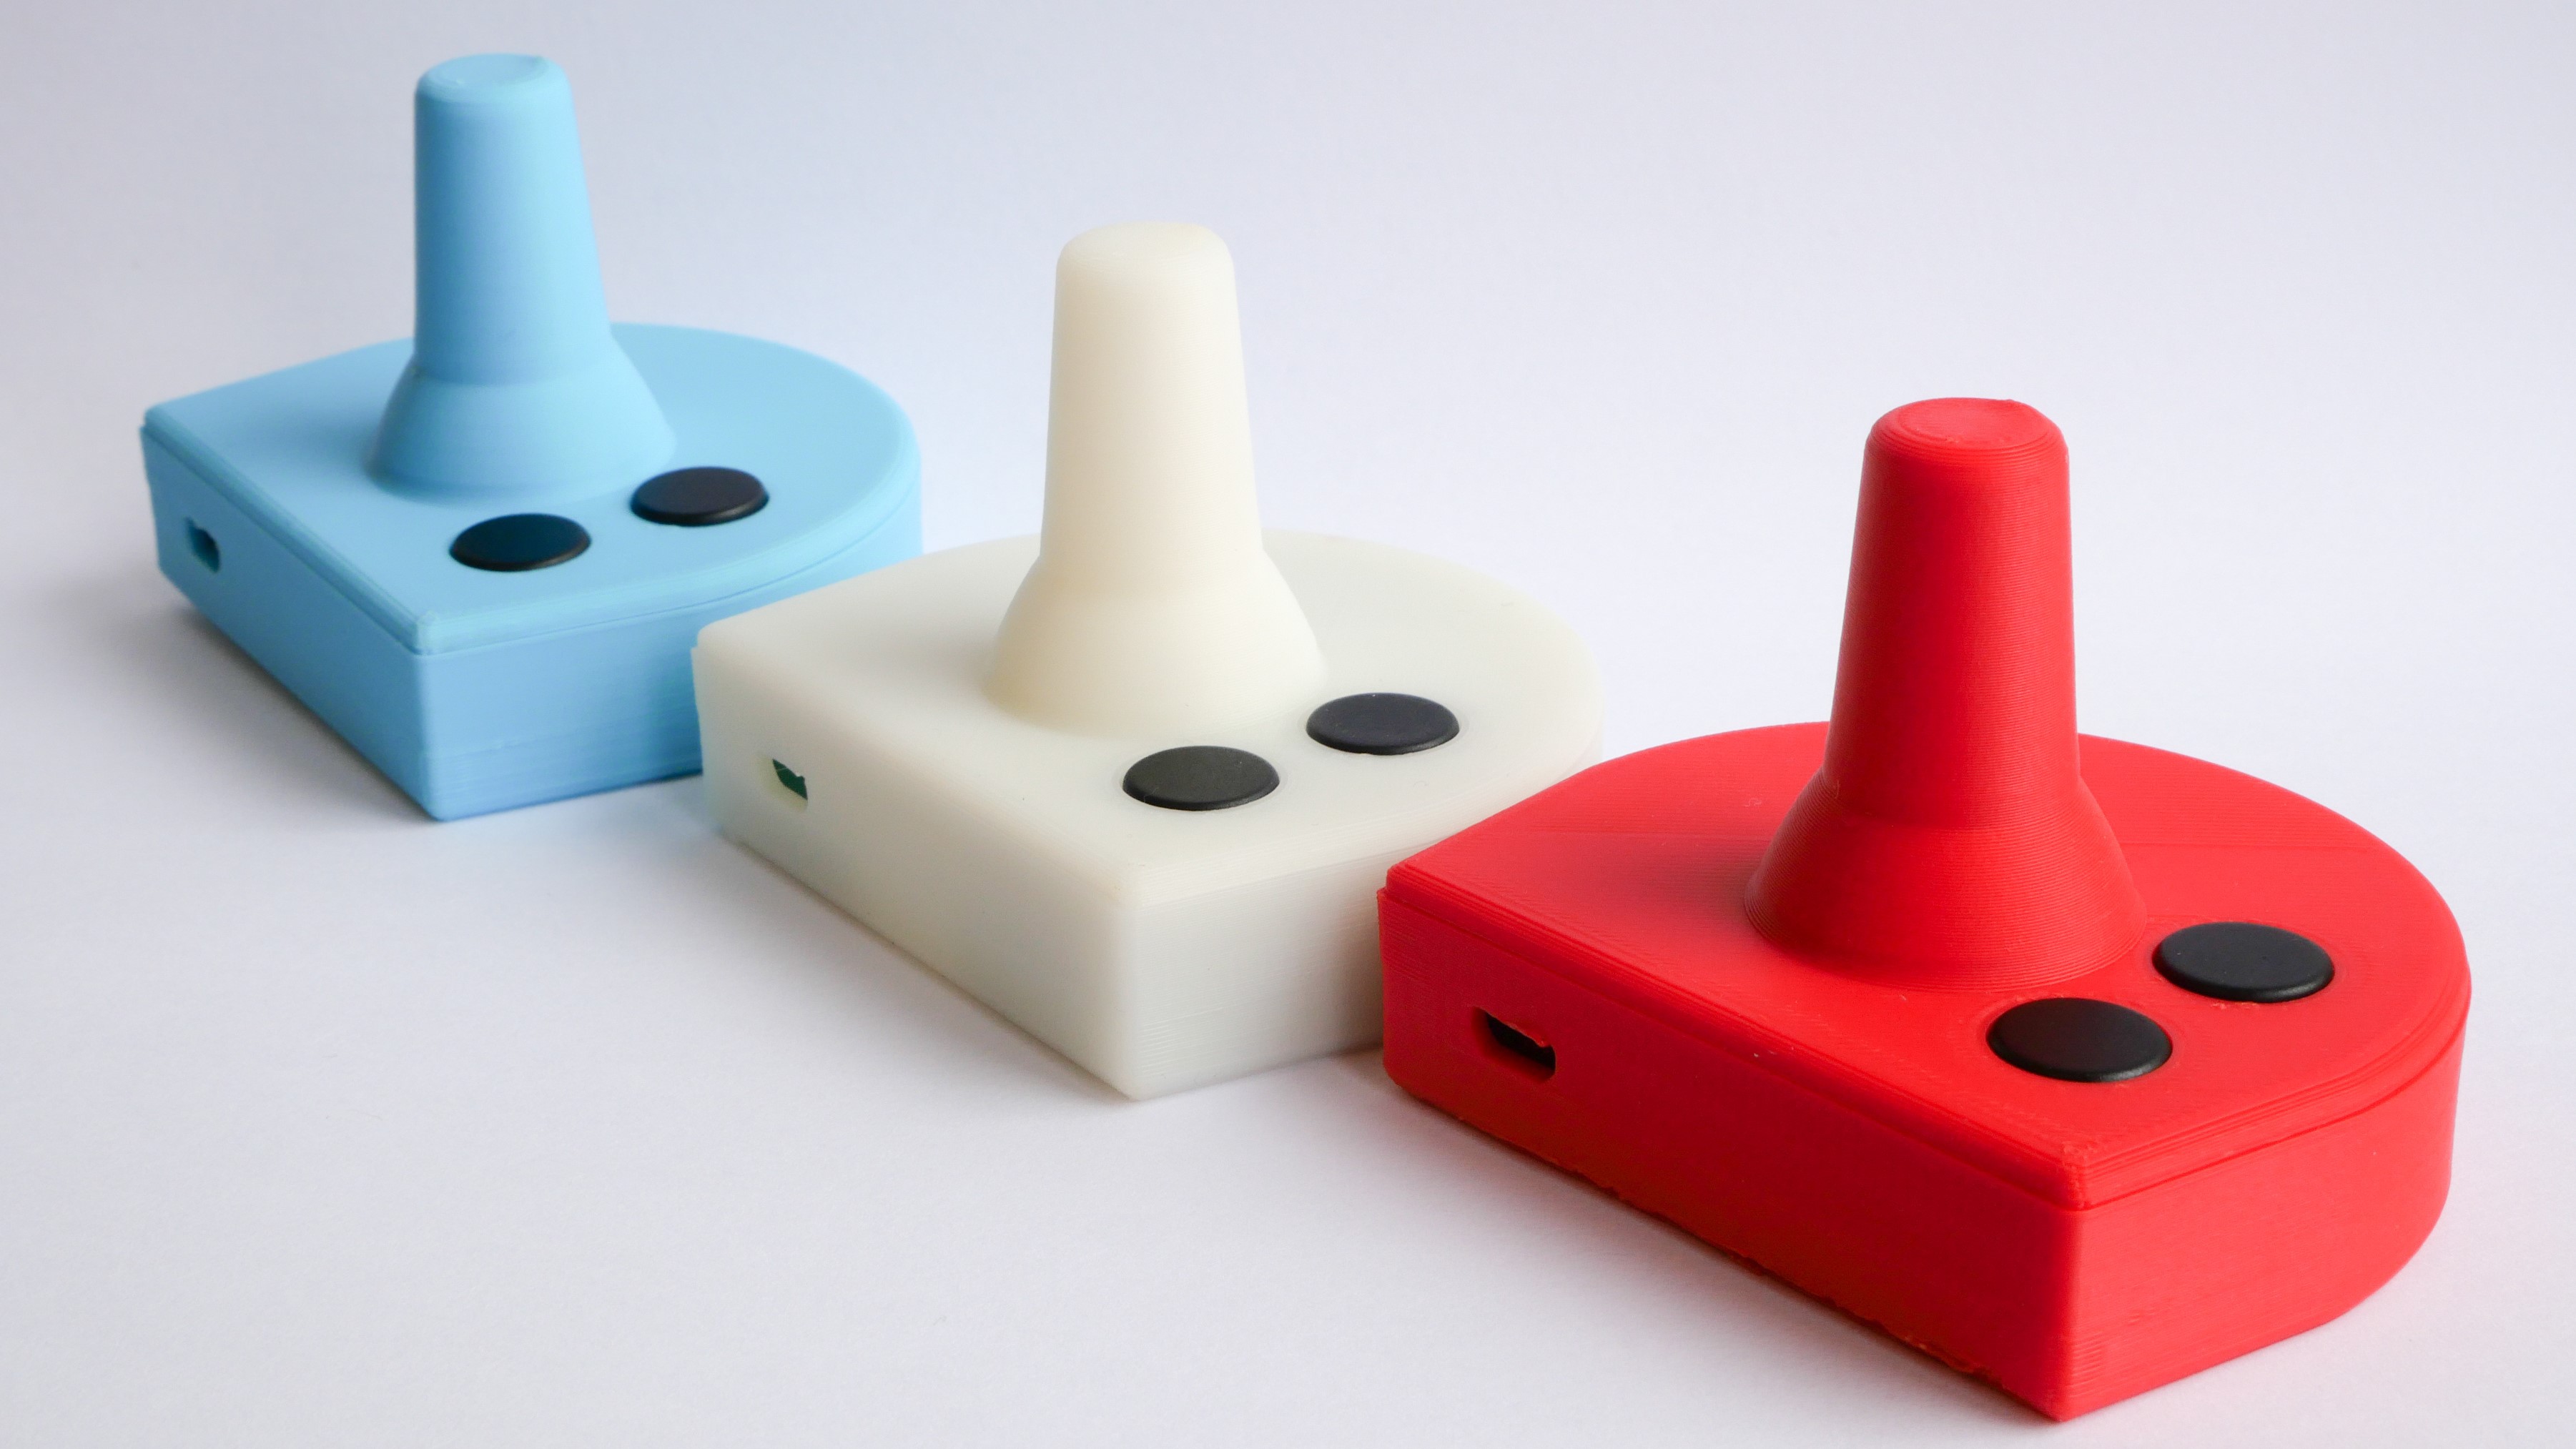
Joytojoy is a ready to make and affordable solution that you can reproduce and customize with a 3d printer freely to tailor fit to you needs.
For several years as an occupational therapist working in a healthcare home, I regularly work with power wheelchair user's who wish to be able to play video games like everyone else.
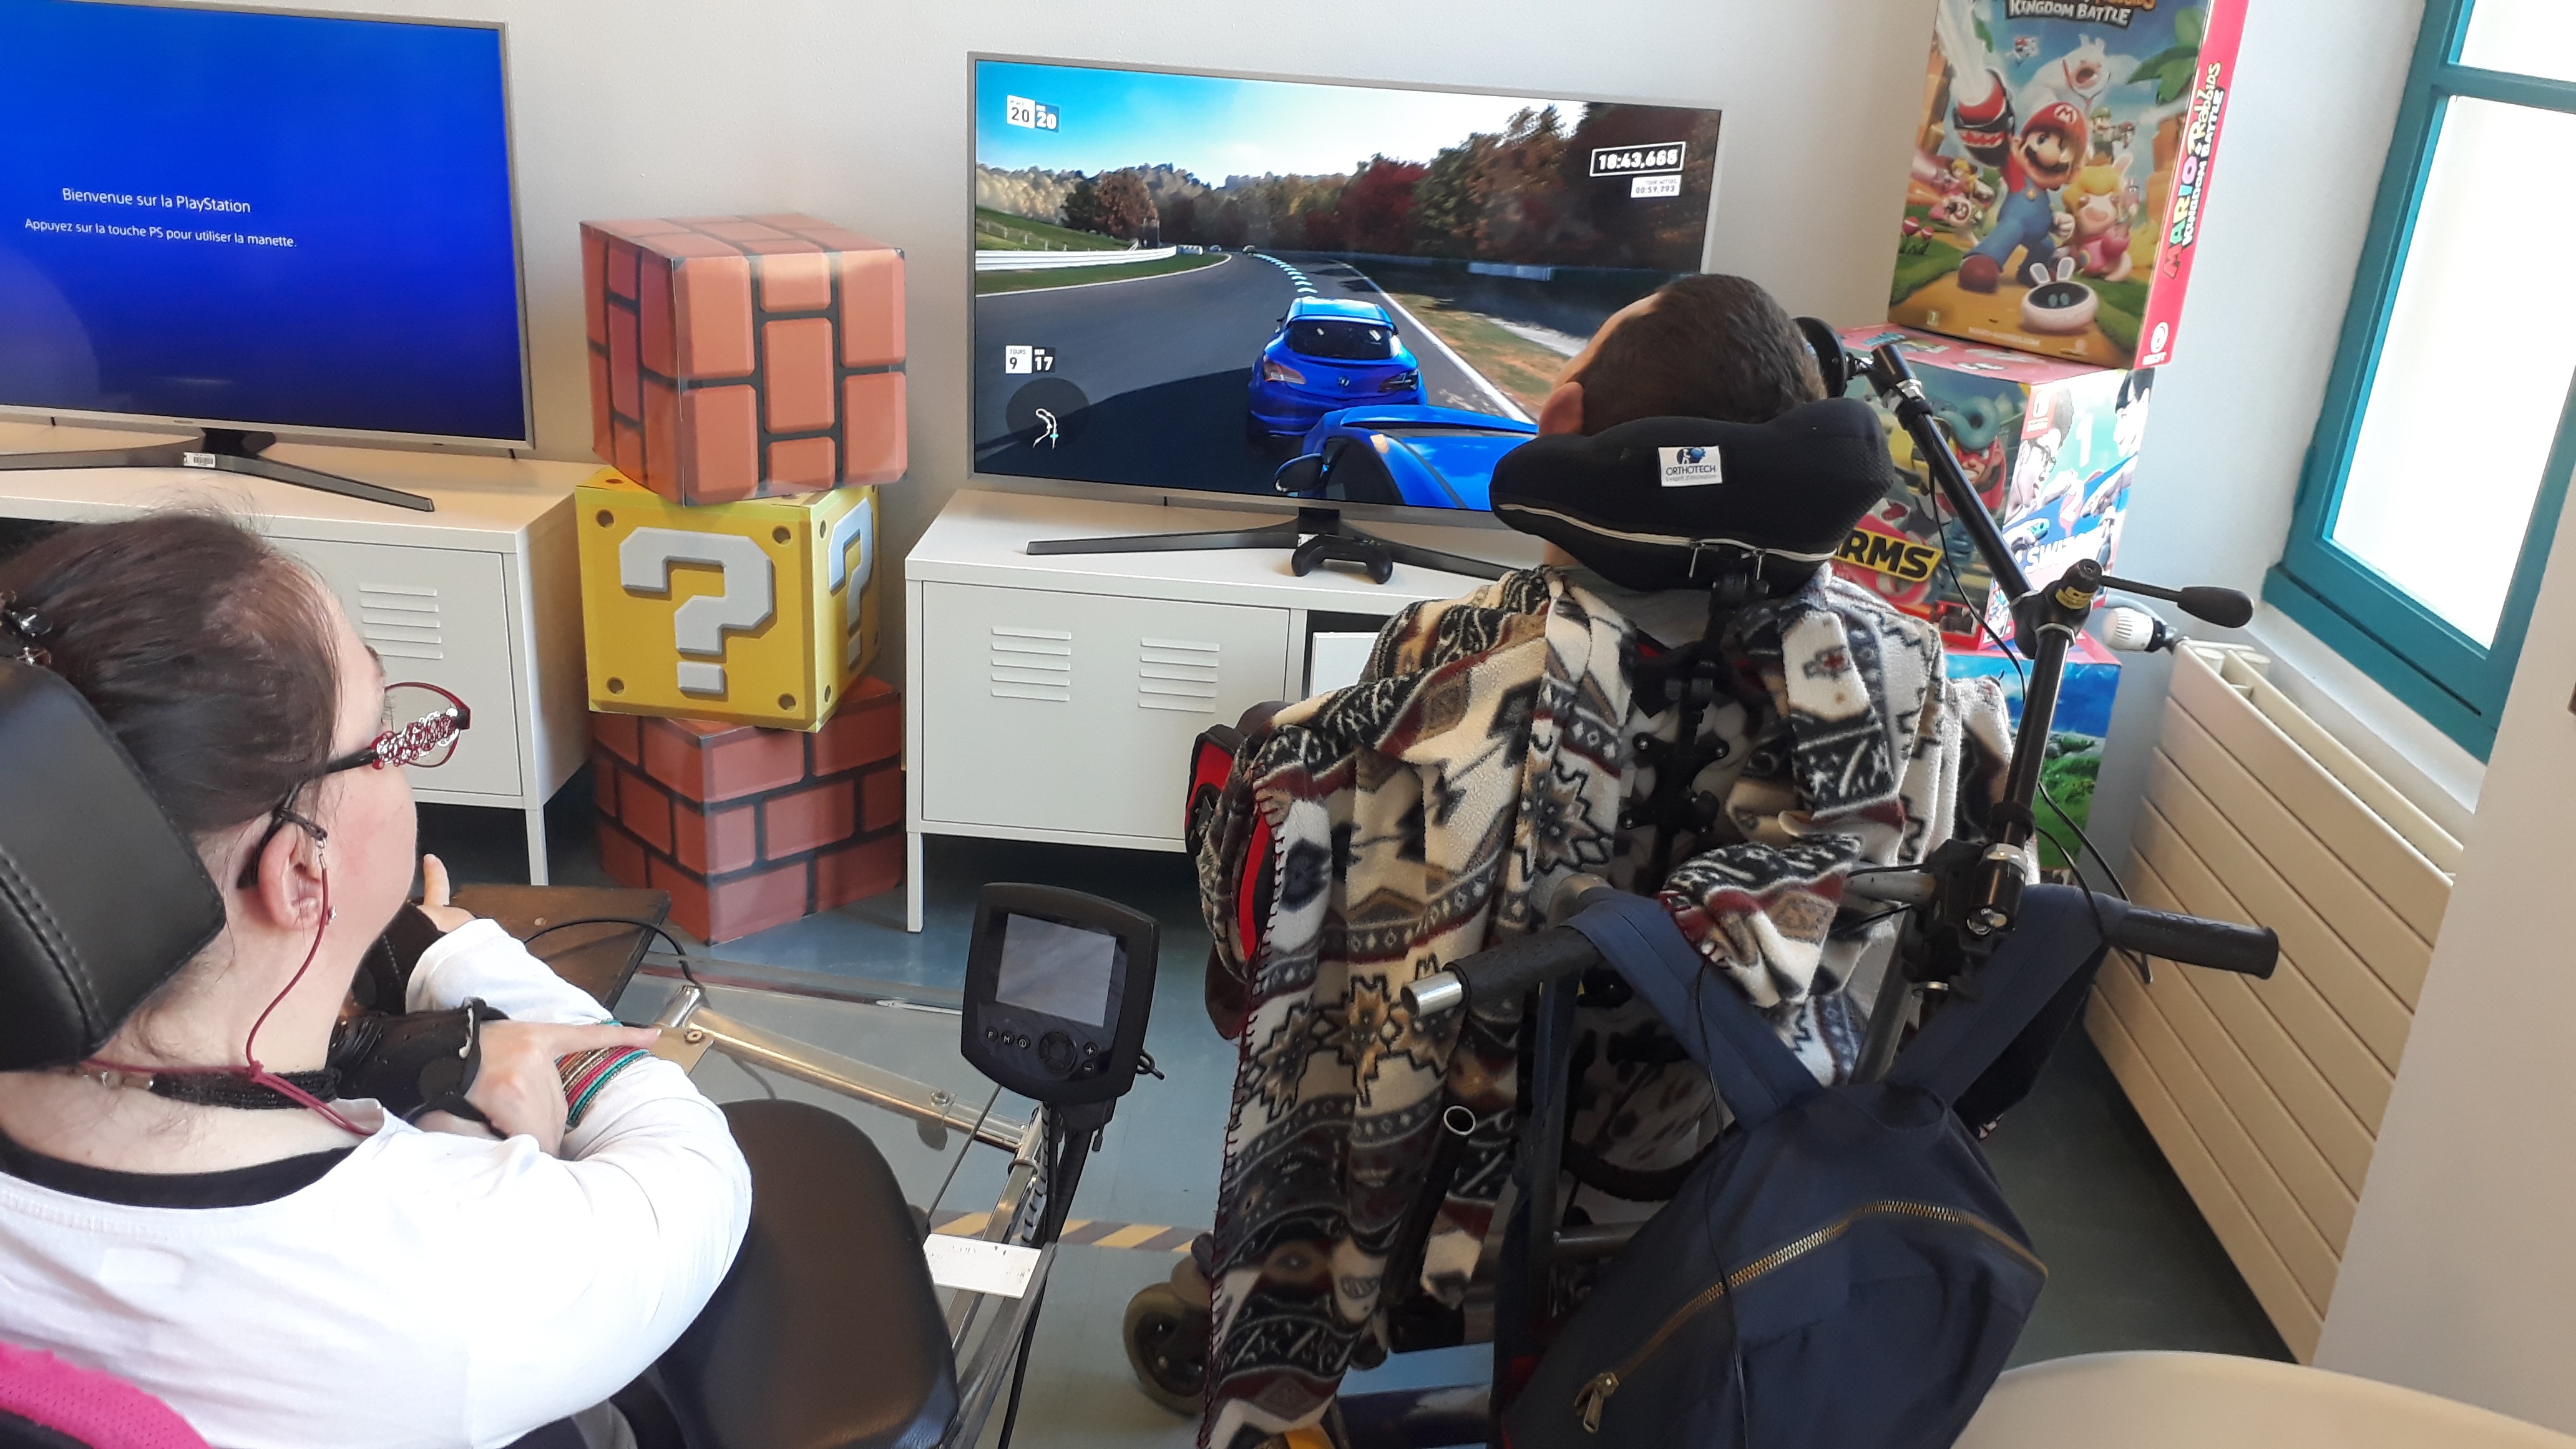
For a power wheelchair user, it is not always possible to hold a game controller in their hands.
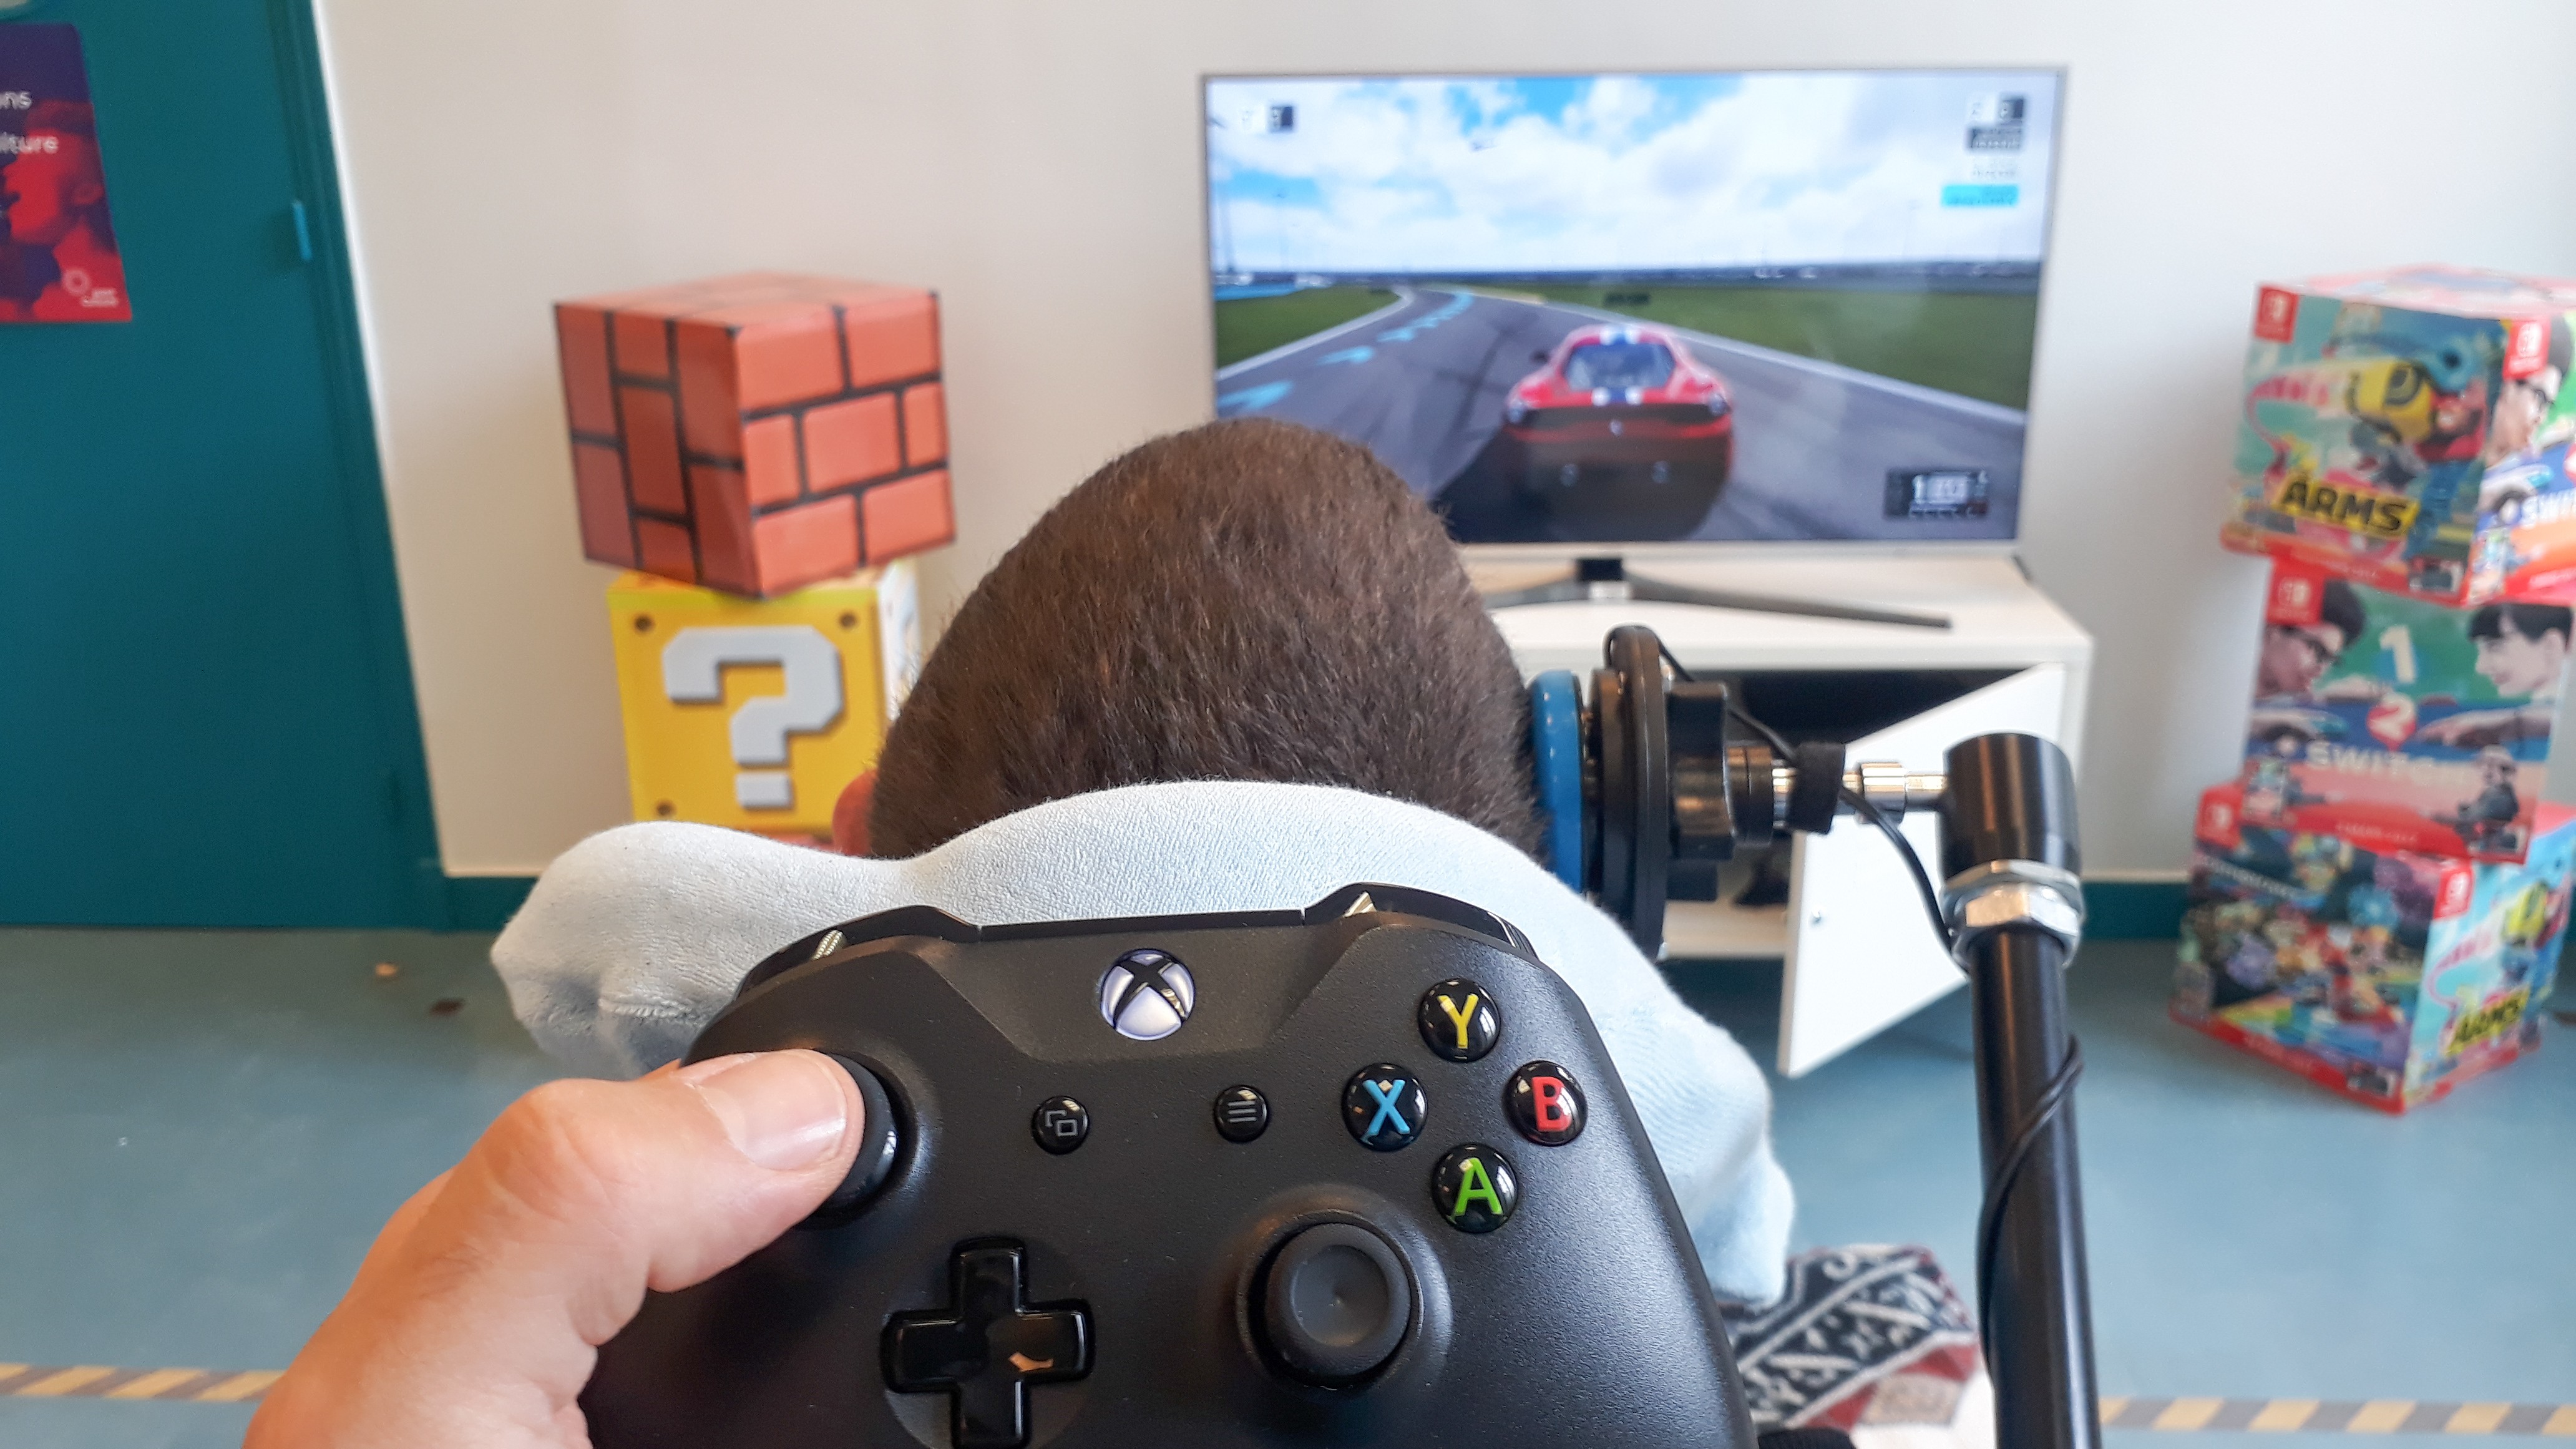
Frequently, the movements he makes with his hand or his chin on his joystick to move with his wheelchair are often the most reliable, efficient and reproducible movements he can produce, and sometimes the only ones he masters.
Great progress has been made in recent years by manufacturers to offer suitable equipment and by game publishers to develop in-game accessibility parameters, but for yet, it's impossible to play directly using the joystick from a wheelchair as an input device .
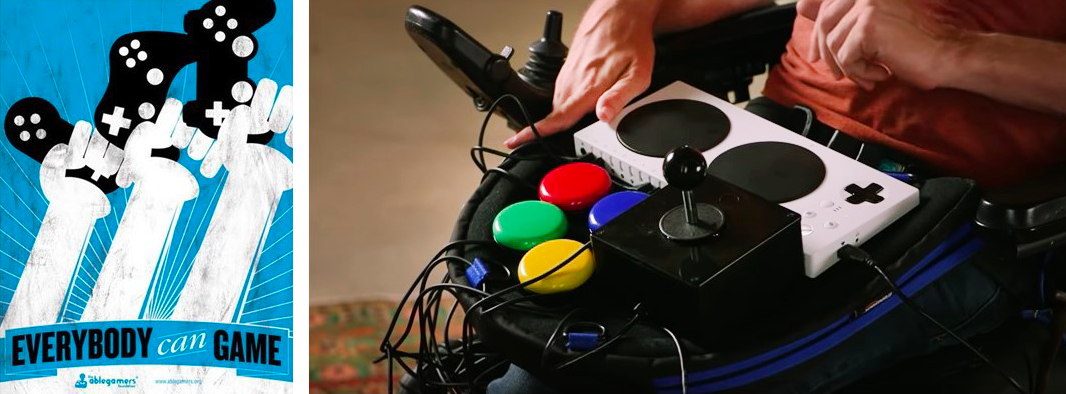
Power wheelchair users manage to play by making specific set ups, based on switches, dedicated interfaces and external joysticks, but this often requires the help of a third party to set up external equipment and make connections.
It would be so much easier to play directly with a familiar controller, which has proven itself because it is known, mastered by users and used on a daily basis.
Having knowledge of its different elements, I wanted to design an assistive device that would allow powerchair user's to play video games, control a smartphone or a computer, using the movements made on their wheelchair's joystick.
And as much as possible, make this device accessible, easily reproducible, customizable to adapt to the specific needs of each user.
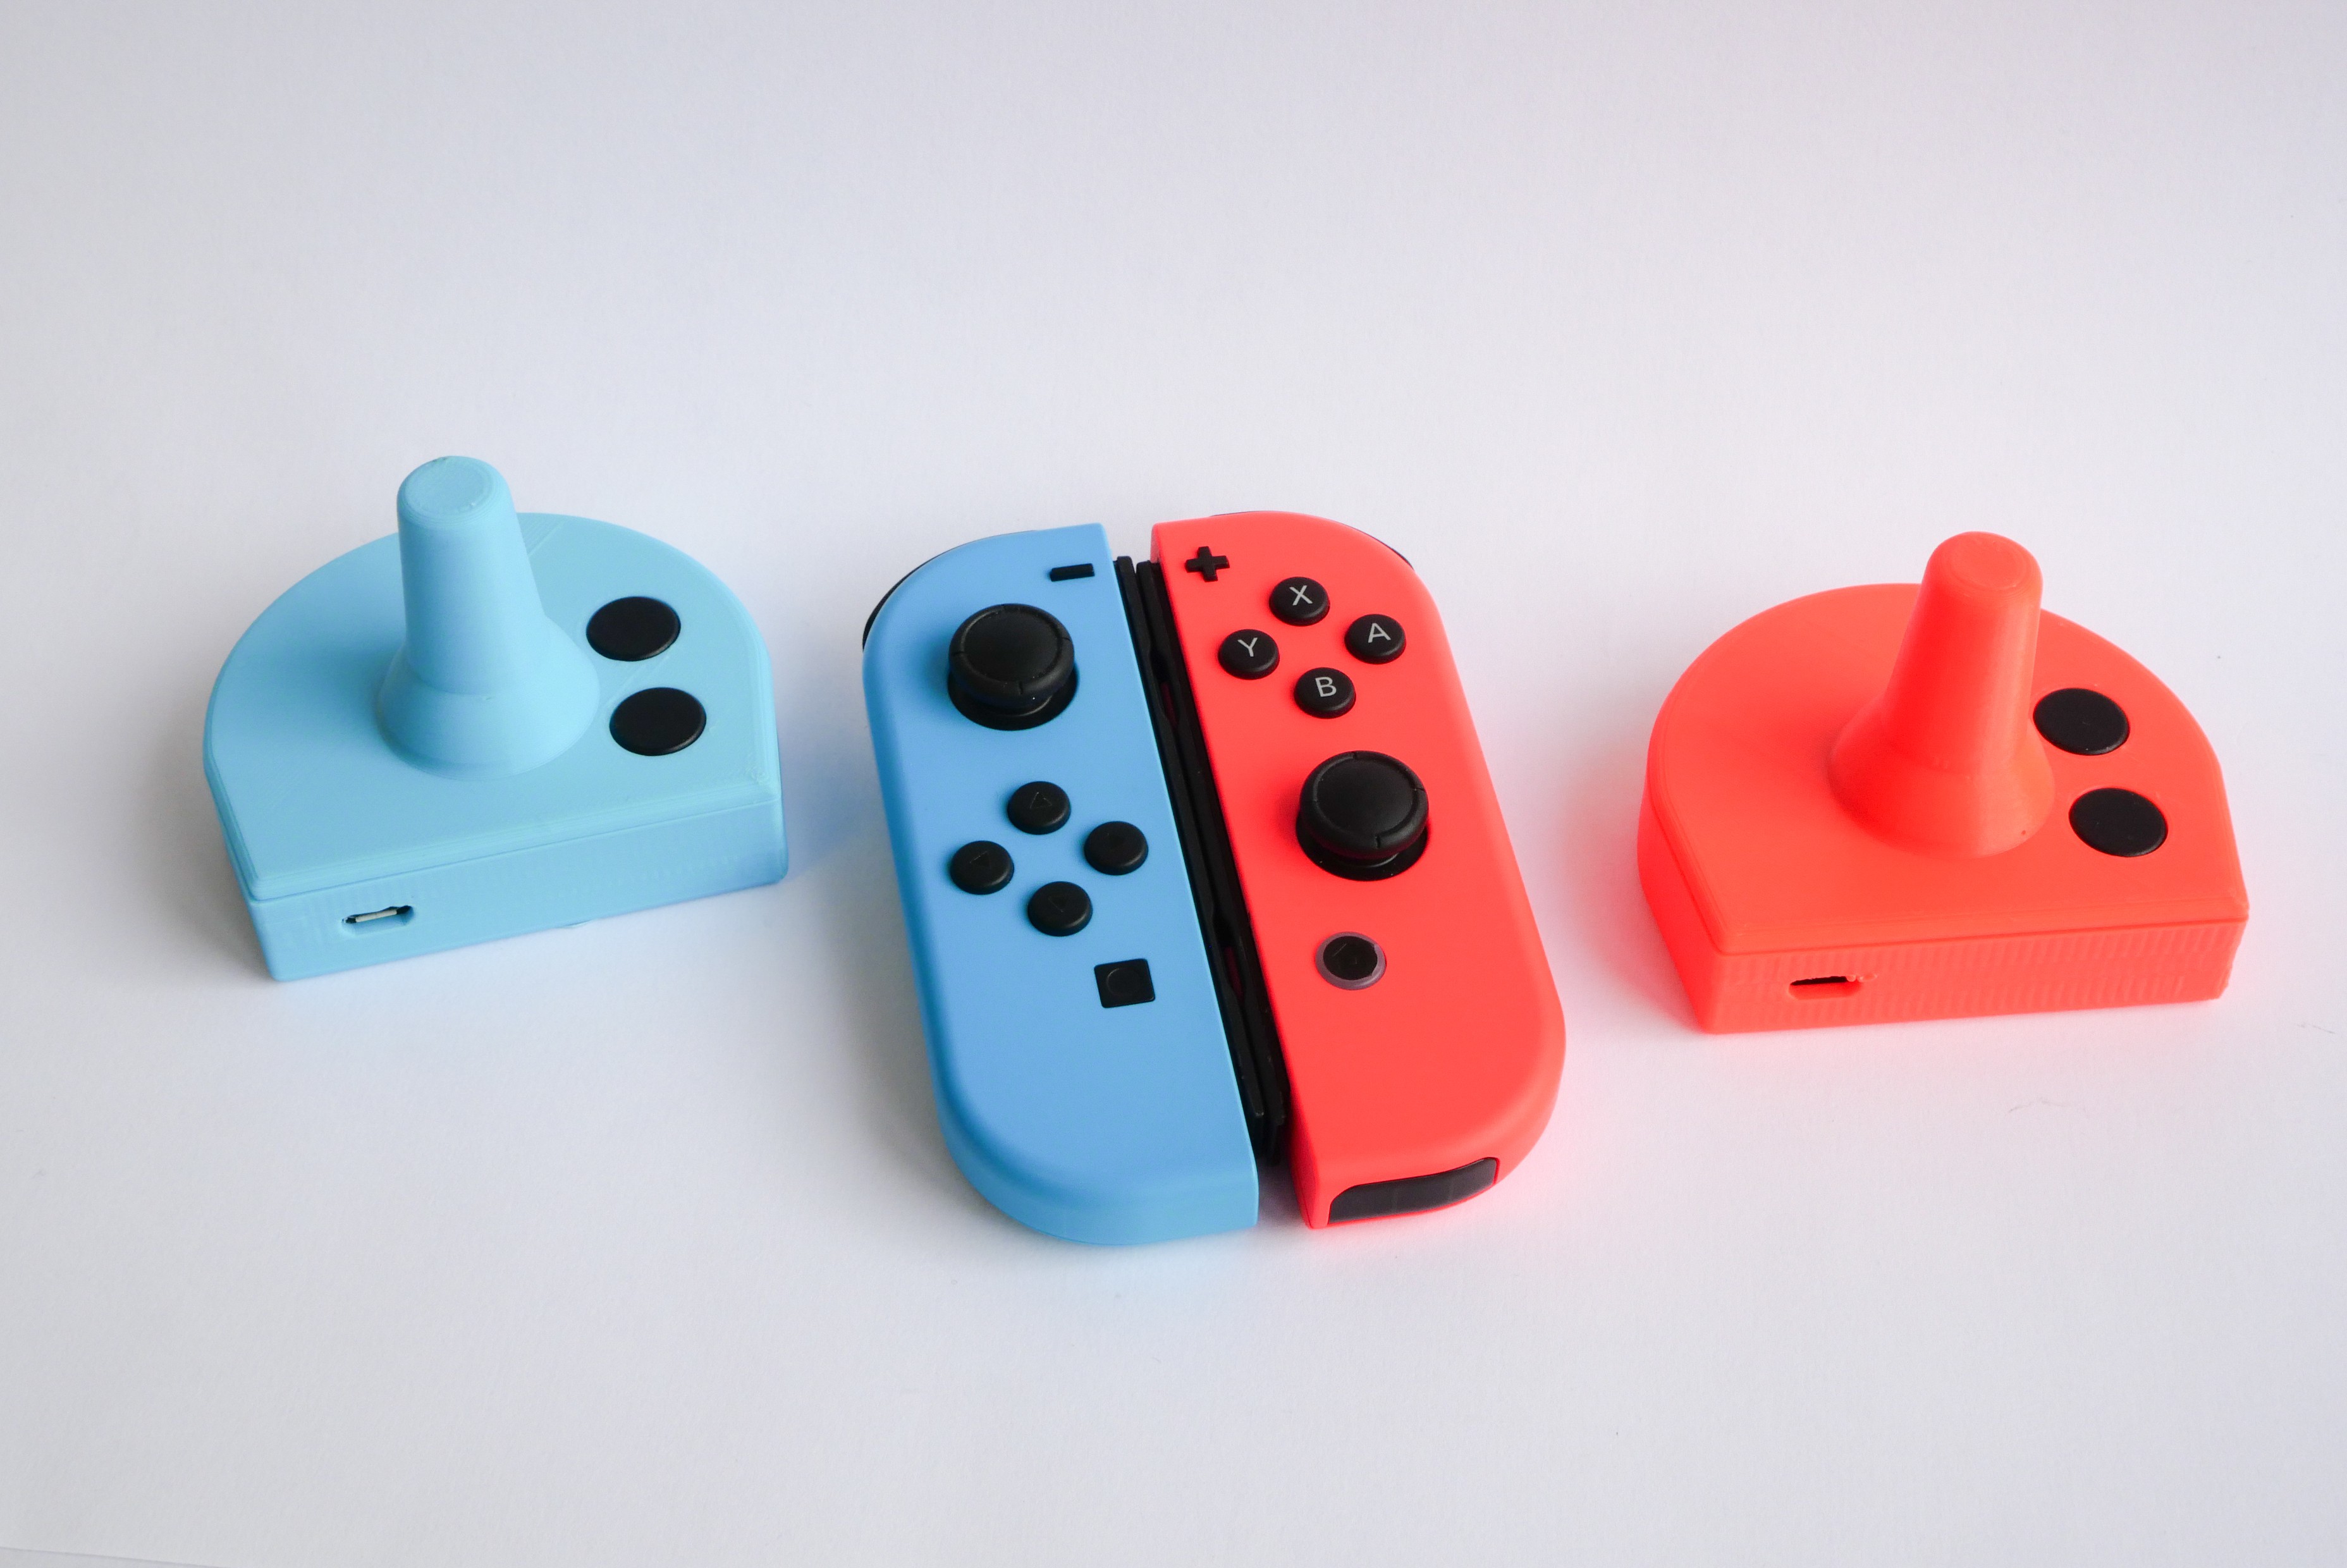
Want to make one ? follow the next steps :
STEP 1 : Select the Design Fit to Your Needs

The enclosure is made of two printed parts (base and top) wich will clip together.
To select the good design, you' have to choose a base compatible with your wheelchair's joystick (depending of your wheelchair's brand) and an top handle fit to your ergonomic needs and motor possibilities
WHEELCHAIR COMPATIBILITY
For a 6.4 mm diameter joybar = Power wheelchair with Rnet or PRIDE electronic : Permobil, Ottobock, Sunrise, Levo.
select : base A_6.4 mm hole.stl
For a 5mm diameter joybar = Power wheelchair with Linx electronic (Invacare)
select : base B_5mm hole.stl

HANDLE
For standard needs (standard joystick handle) : select the file top_joystick.stl
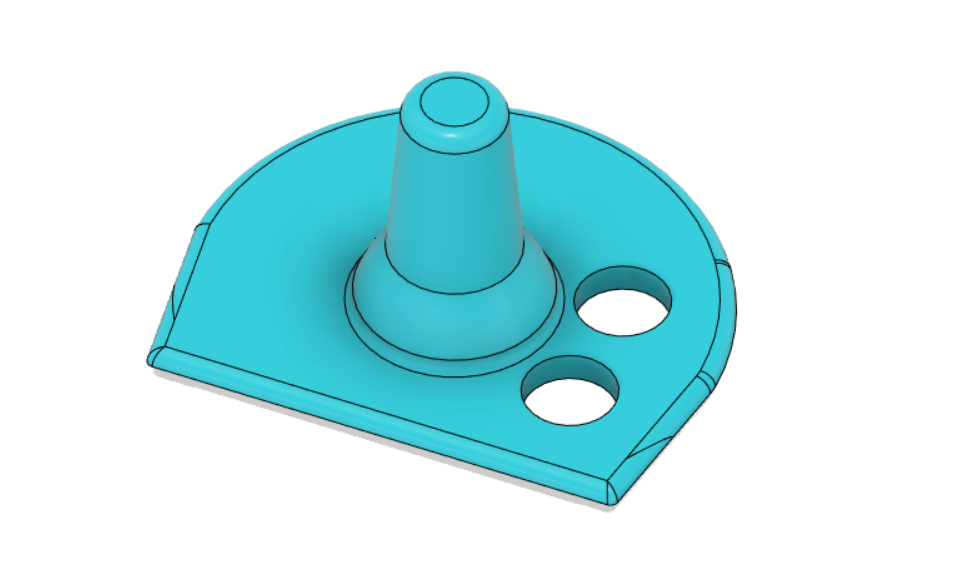
If you need a ball to facilitate gripping select the file : top_ball.stl
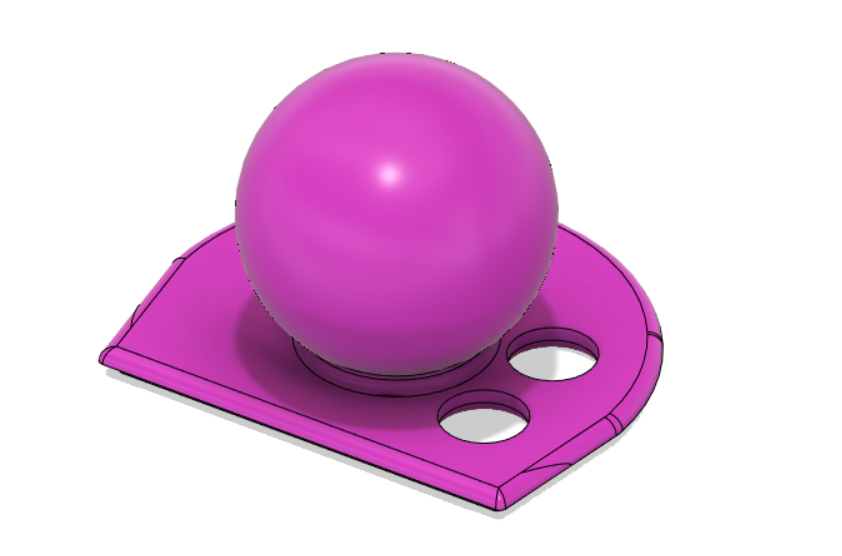
You can also design a specific handle adapted to your need (ergonomic, esthetic) with your favorite CAO software (for example FUSION 360 or tinkercad).
For that, all you have to do is to design an handle suit to your needs, download the top_flat.stl file and mix them together.

STEP 2 : Print the 3D Parts
We use ABS filament on a Zortrax M200 for its resistance and its functional prototyping properties.
It should work well with other plastic types like PLA or PETG, depending of the 3D printers you use
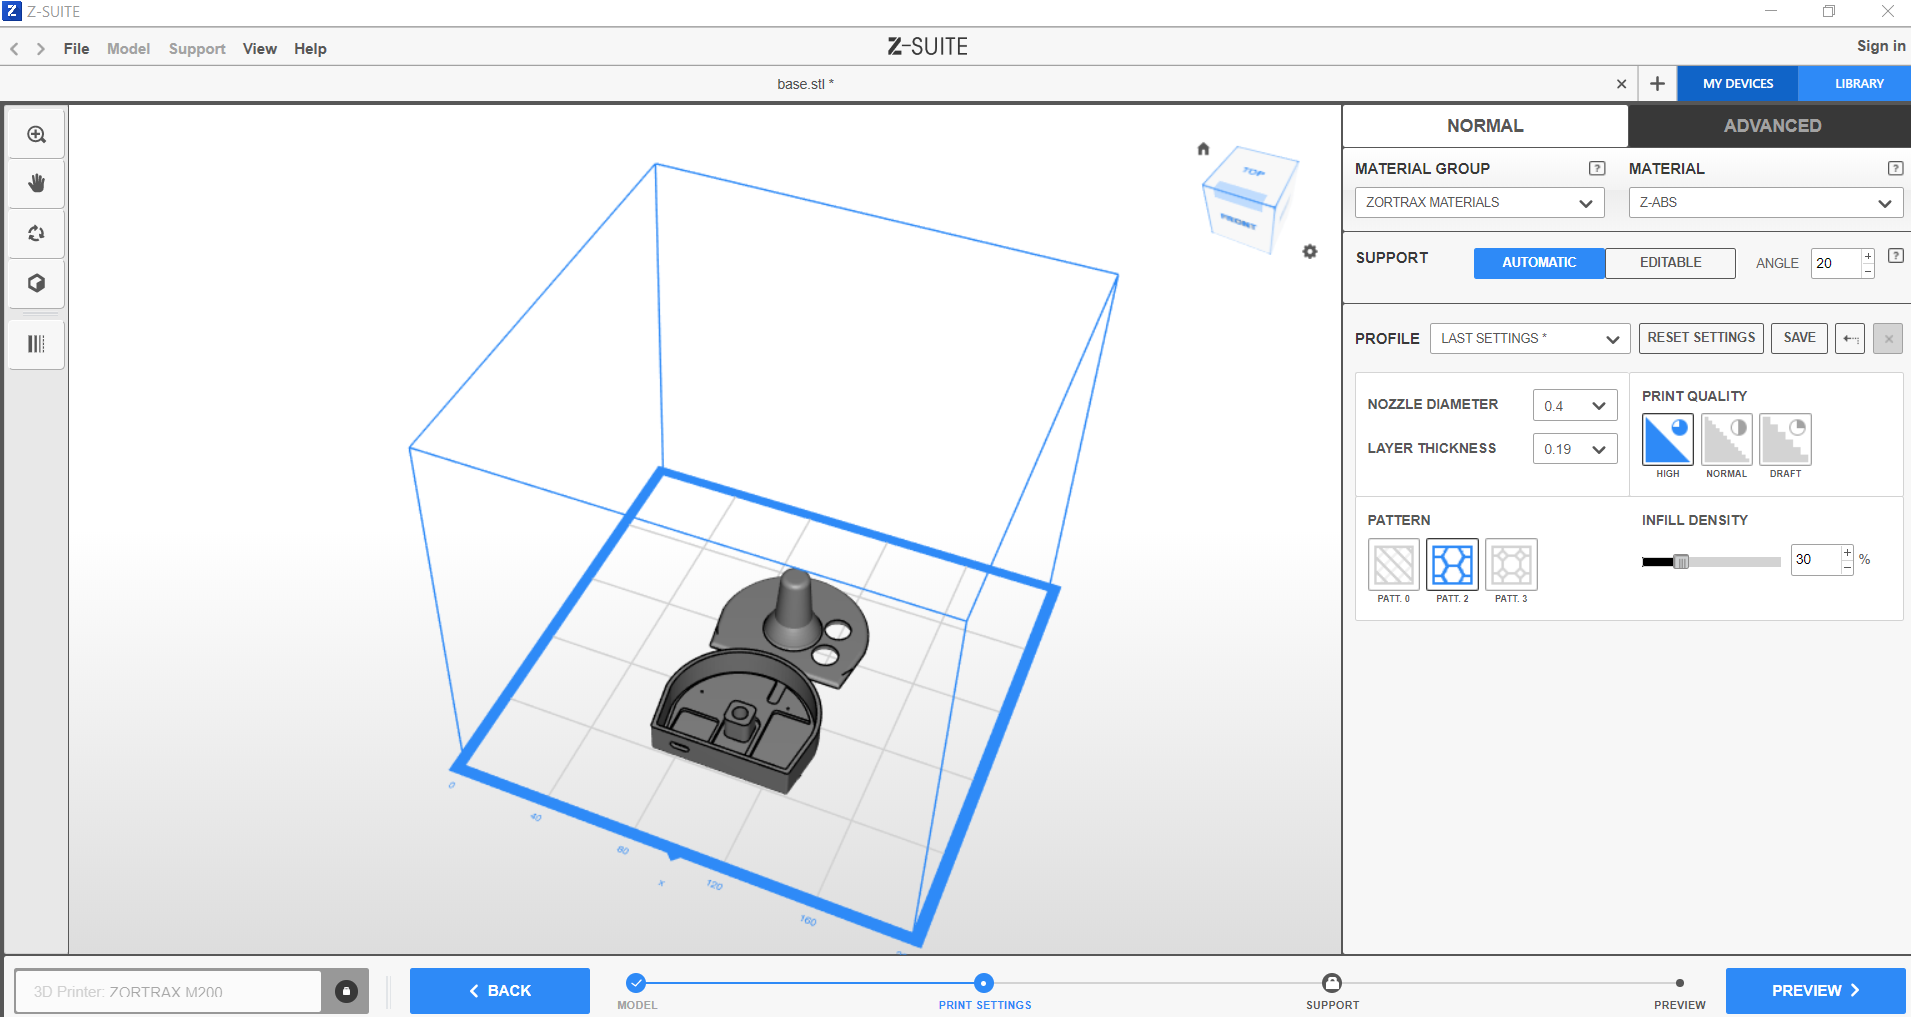
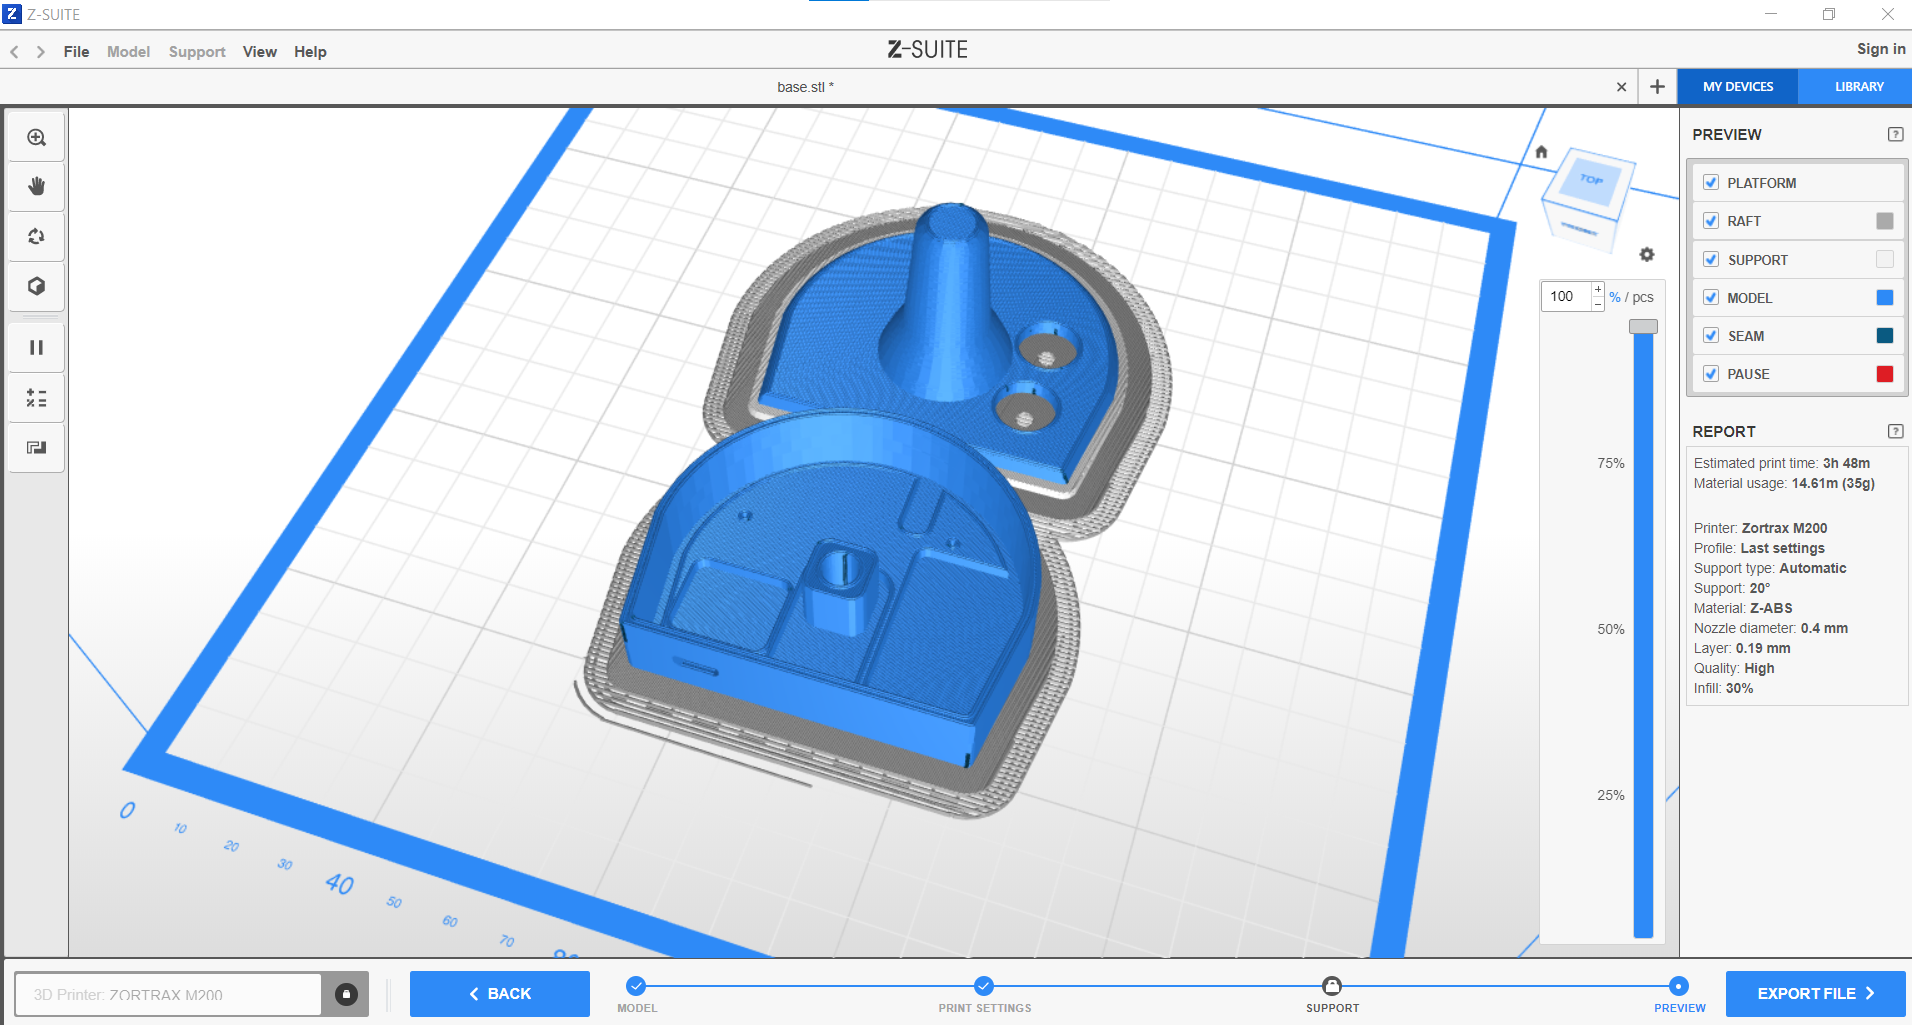
For a standard print, we have good result with this parameters :
Infill = 30 % of
Layers thickness = 0.19mm
No support added
Printing time : 3h48
Material usage : 14.6 m, 35g
Step 3 : Electronic Assembly
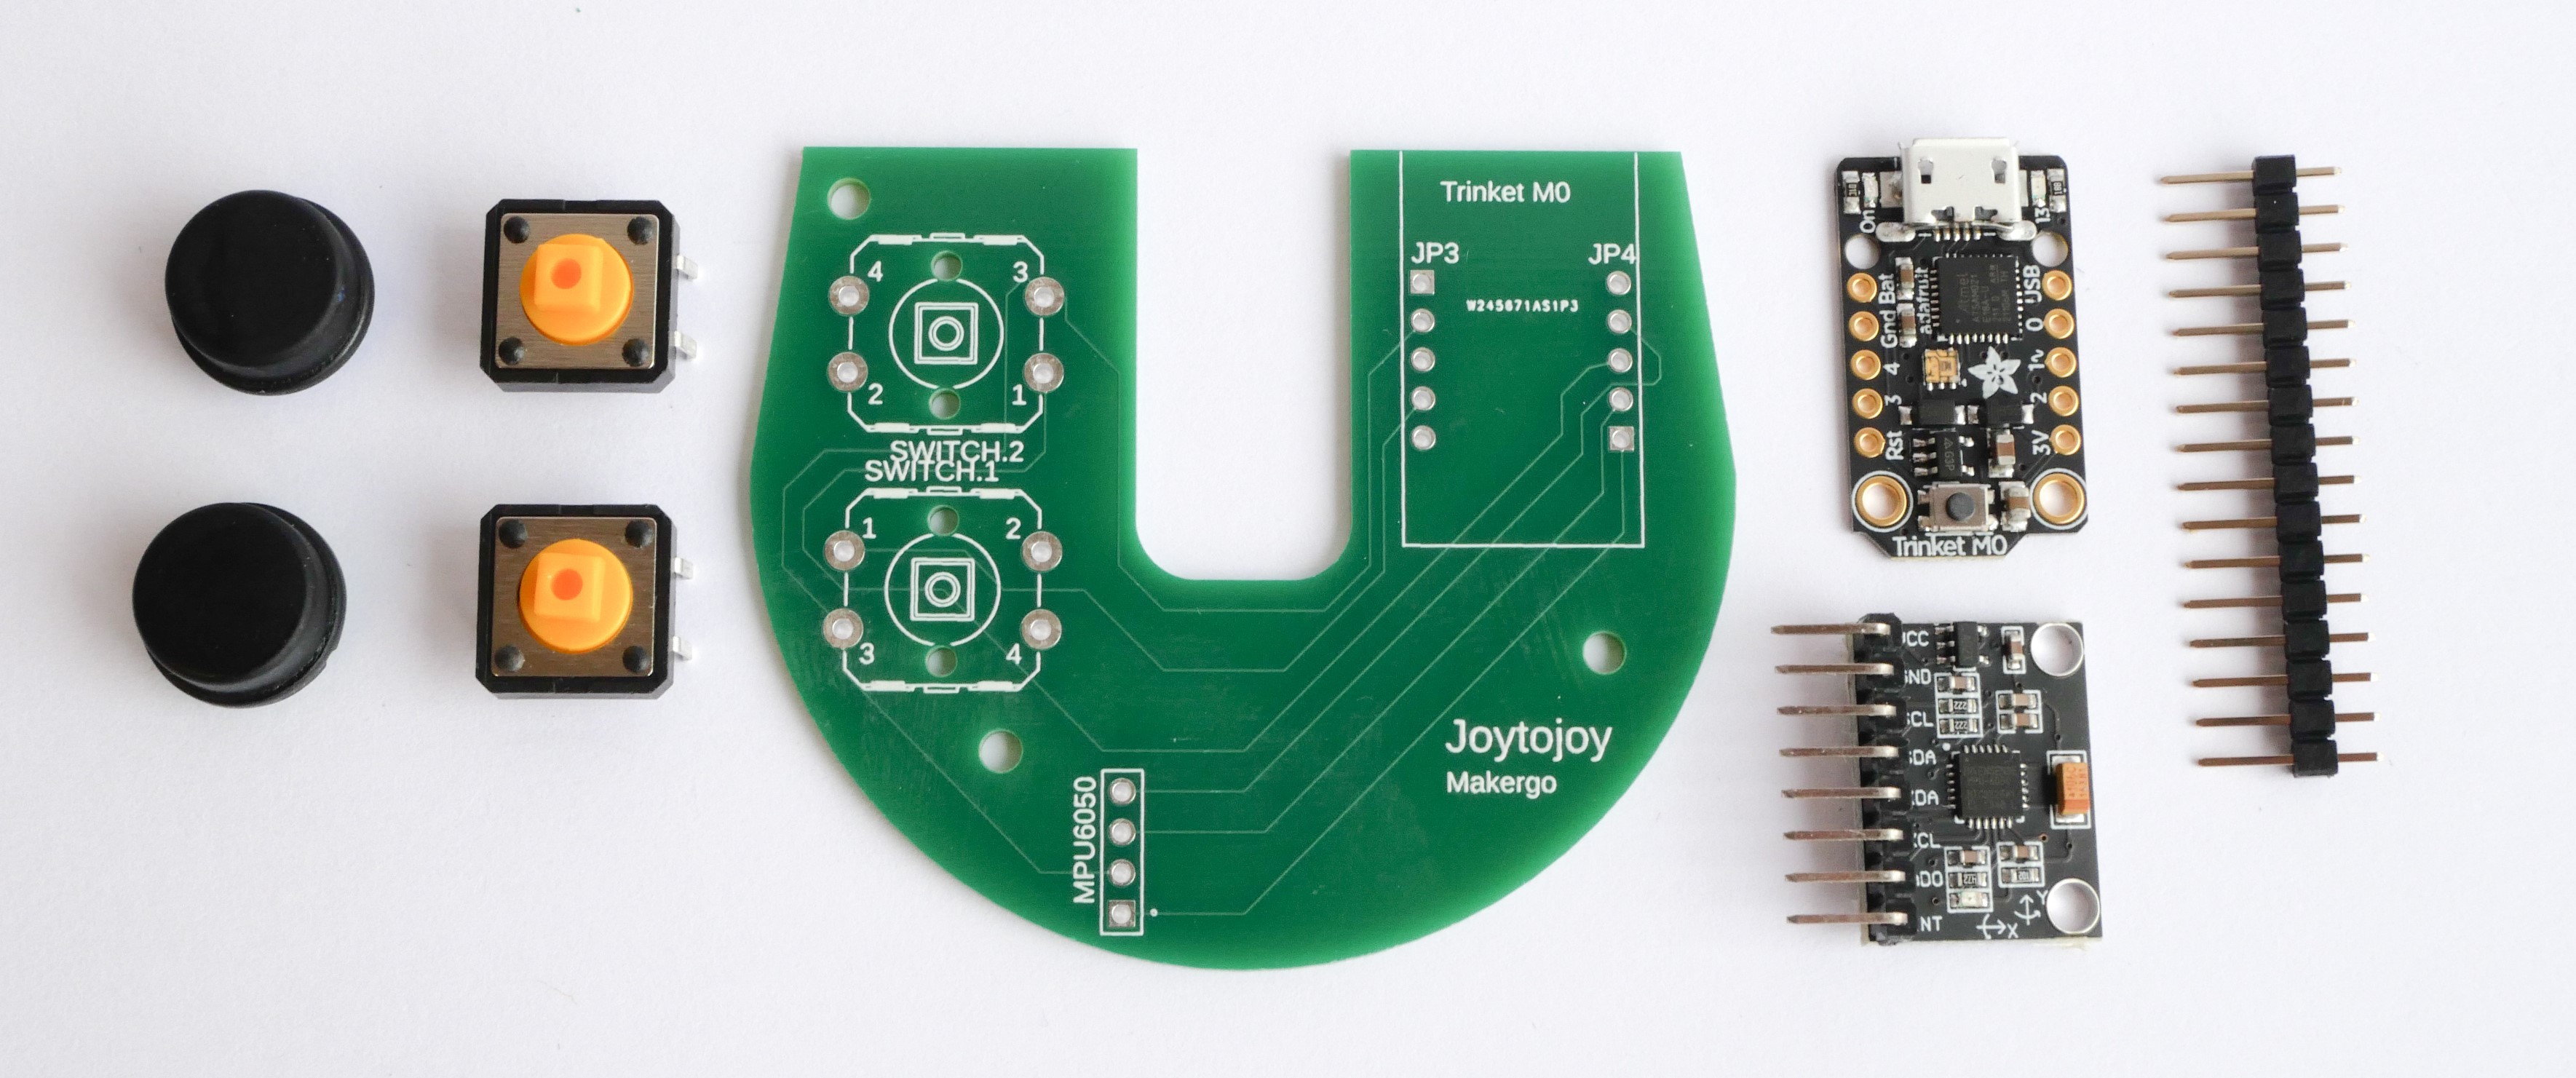
Bring together the different components
Individually prepare the components :
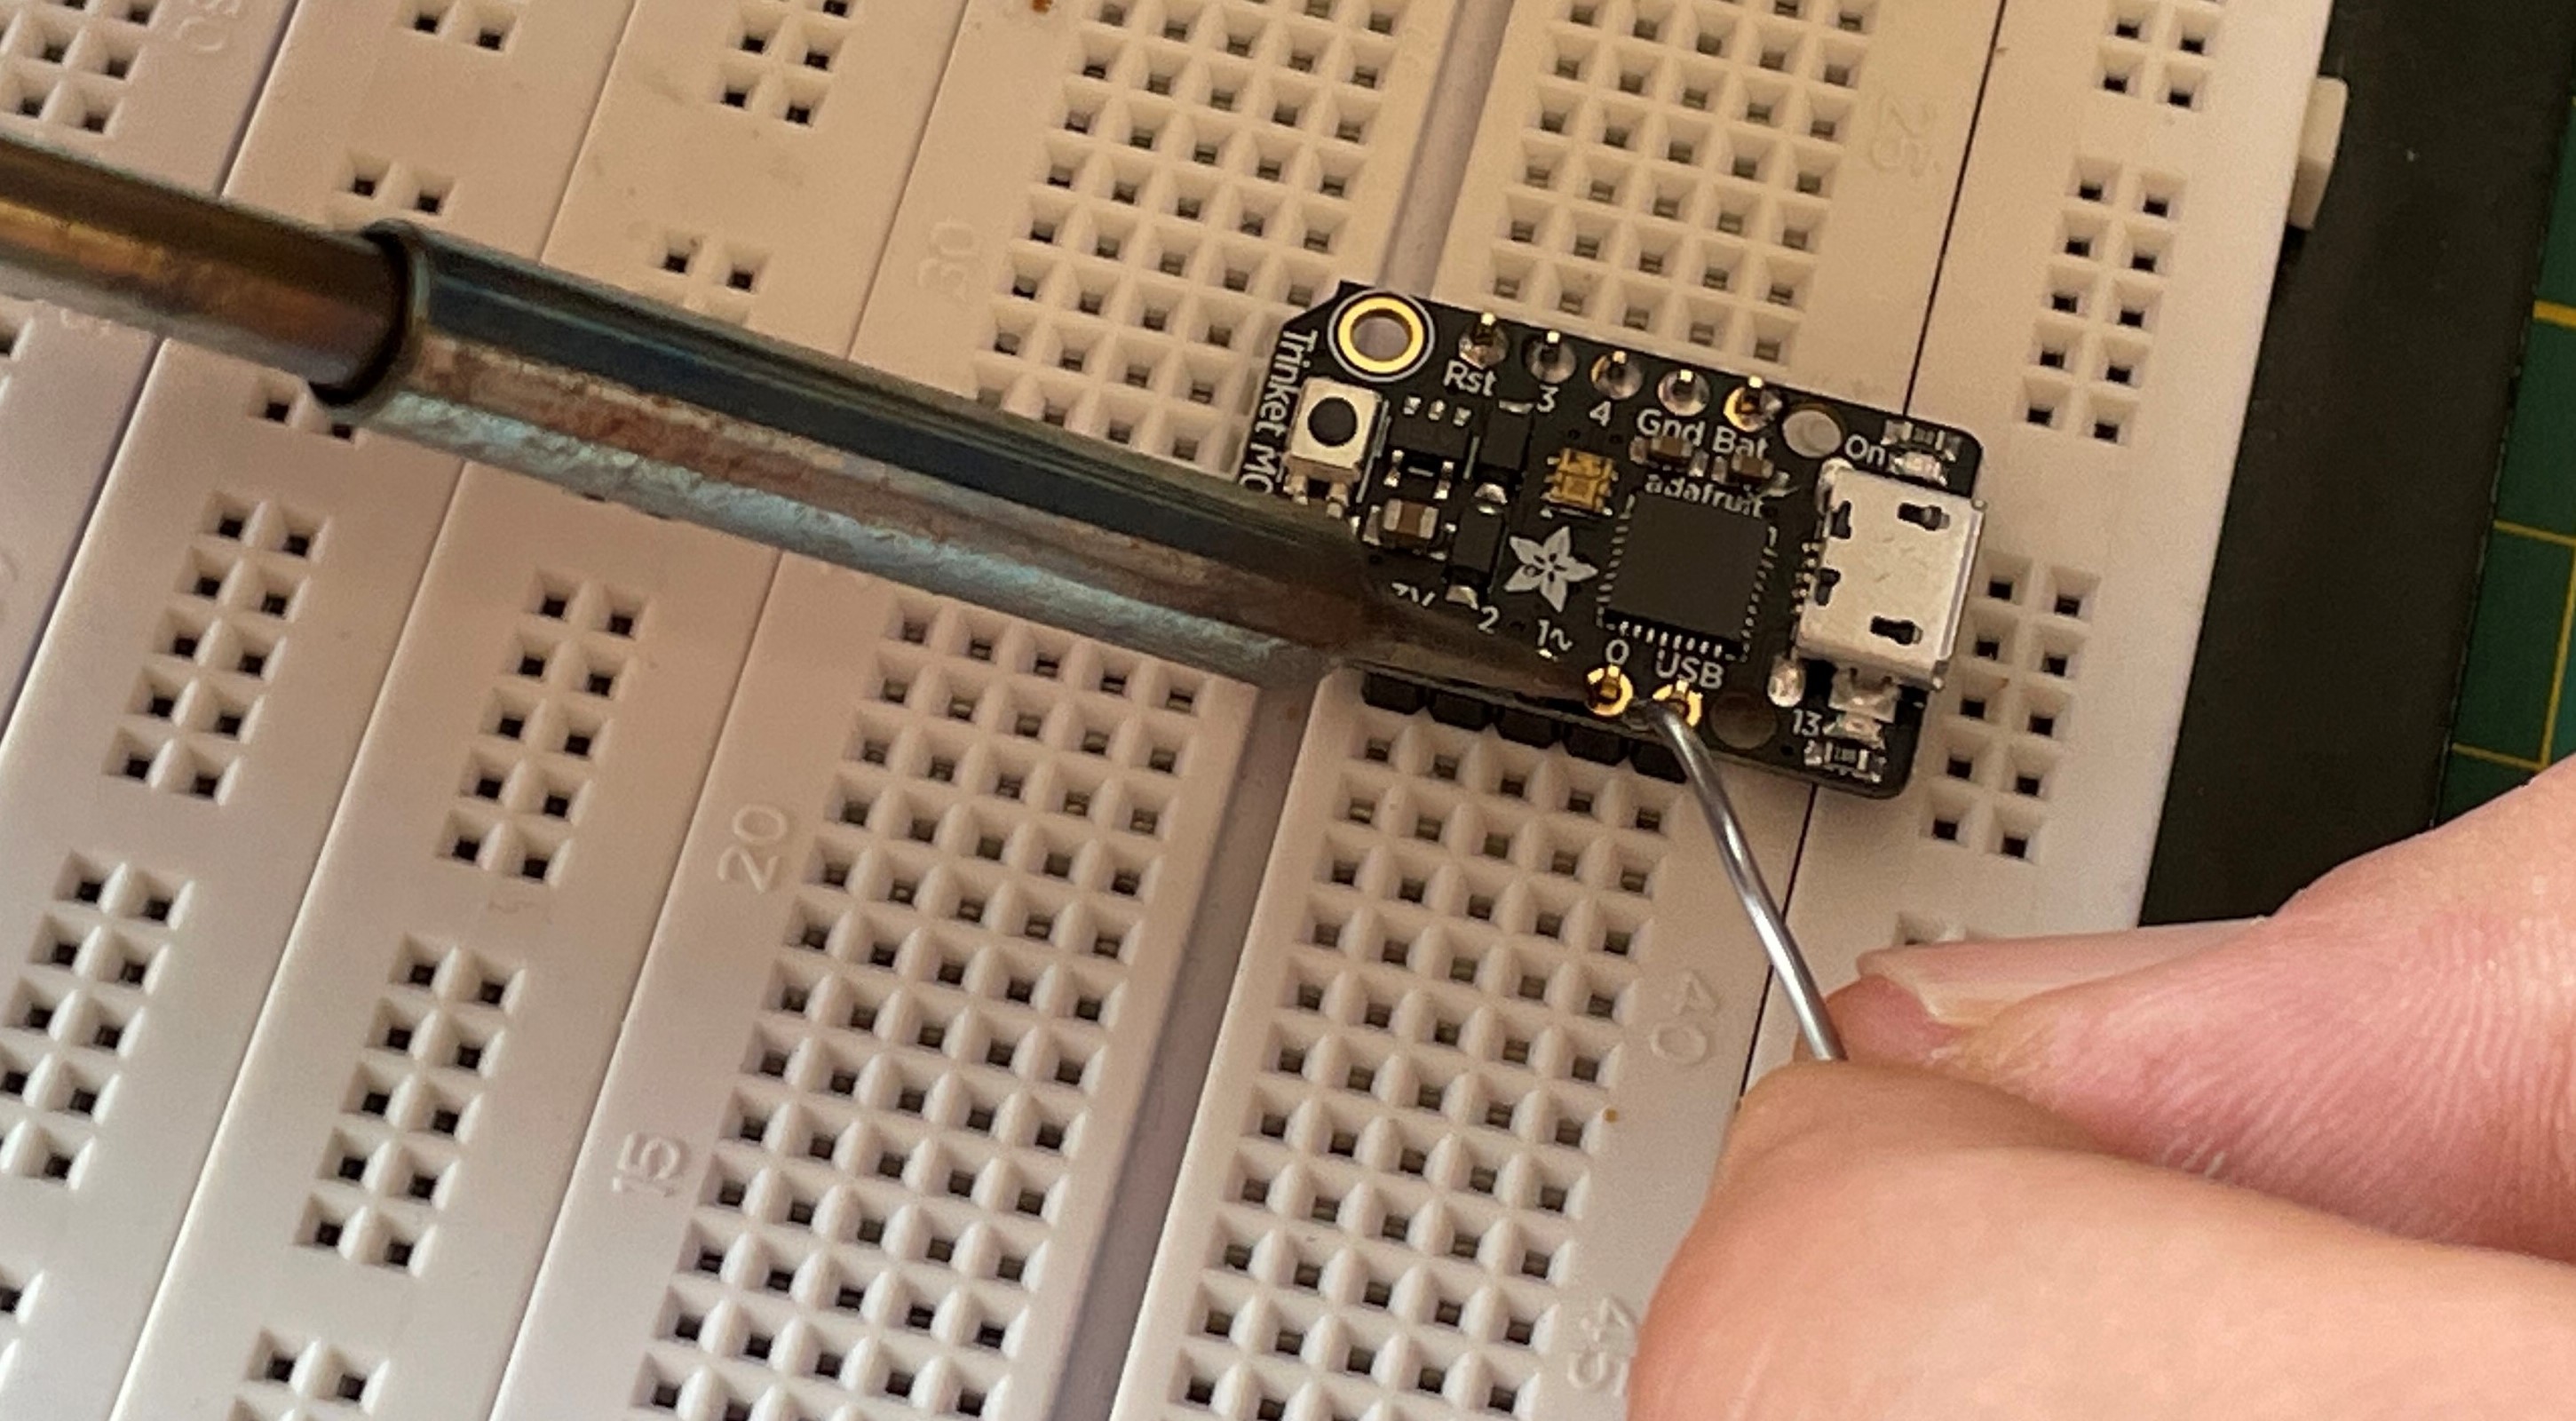
- Solder headers on the trinket m0
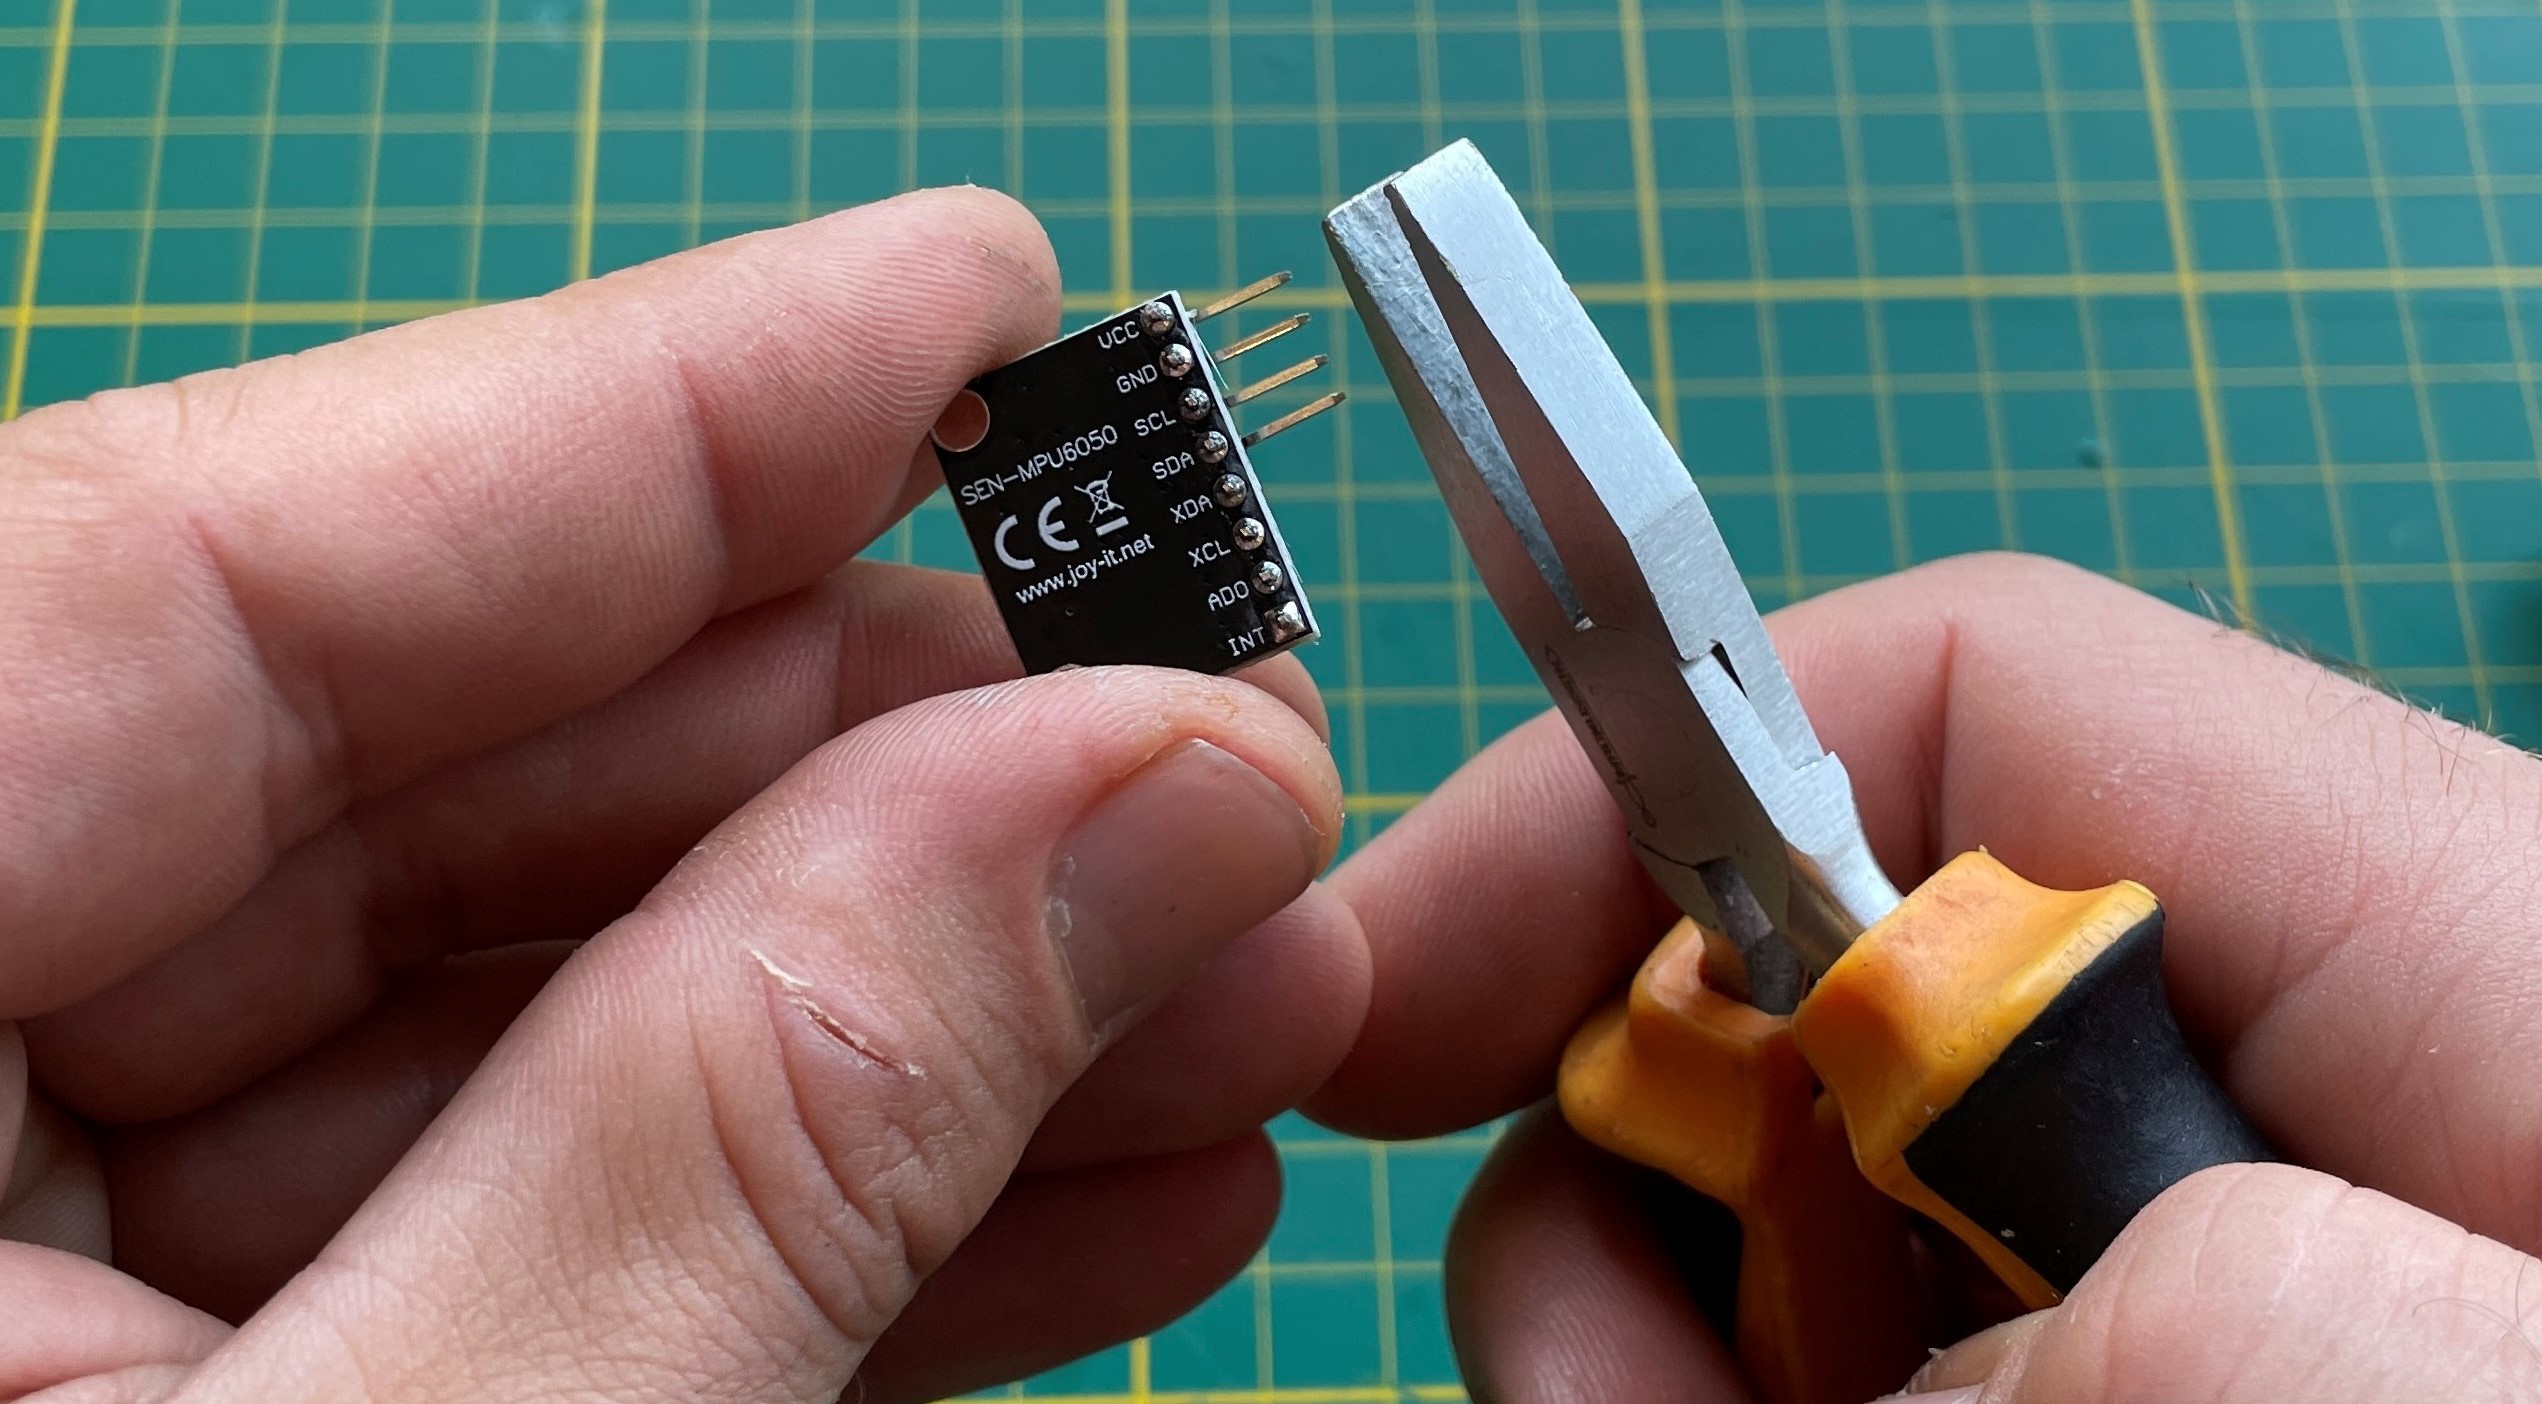
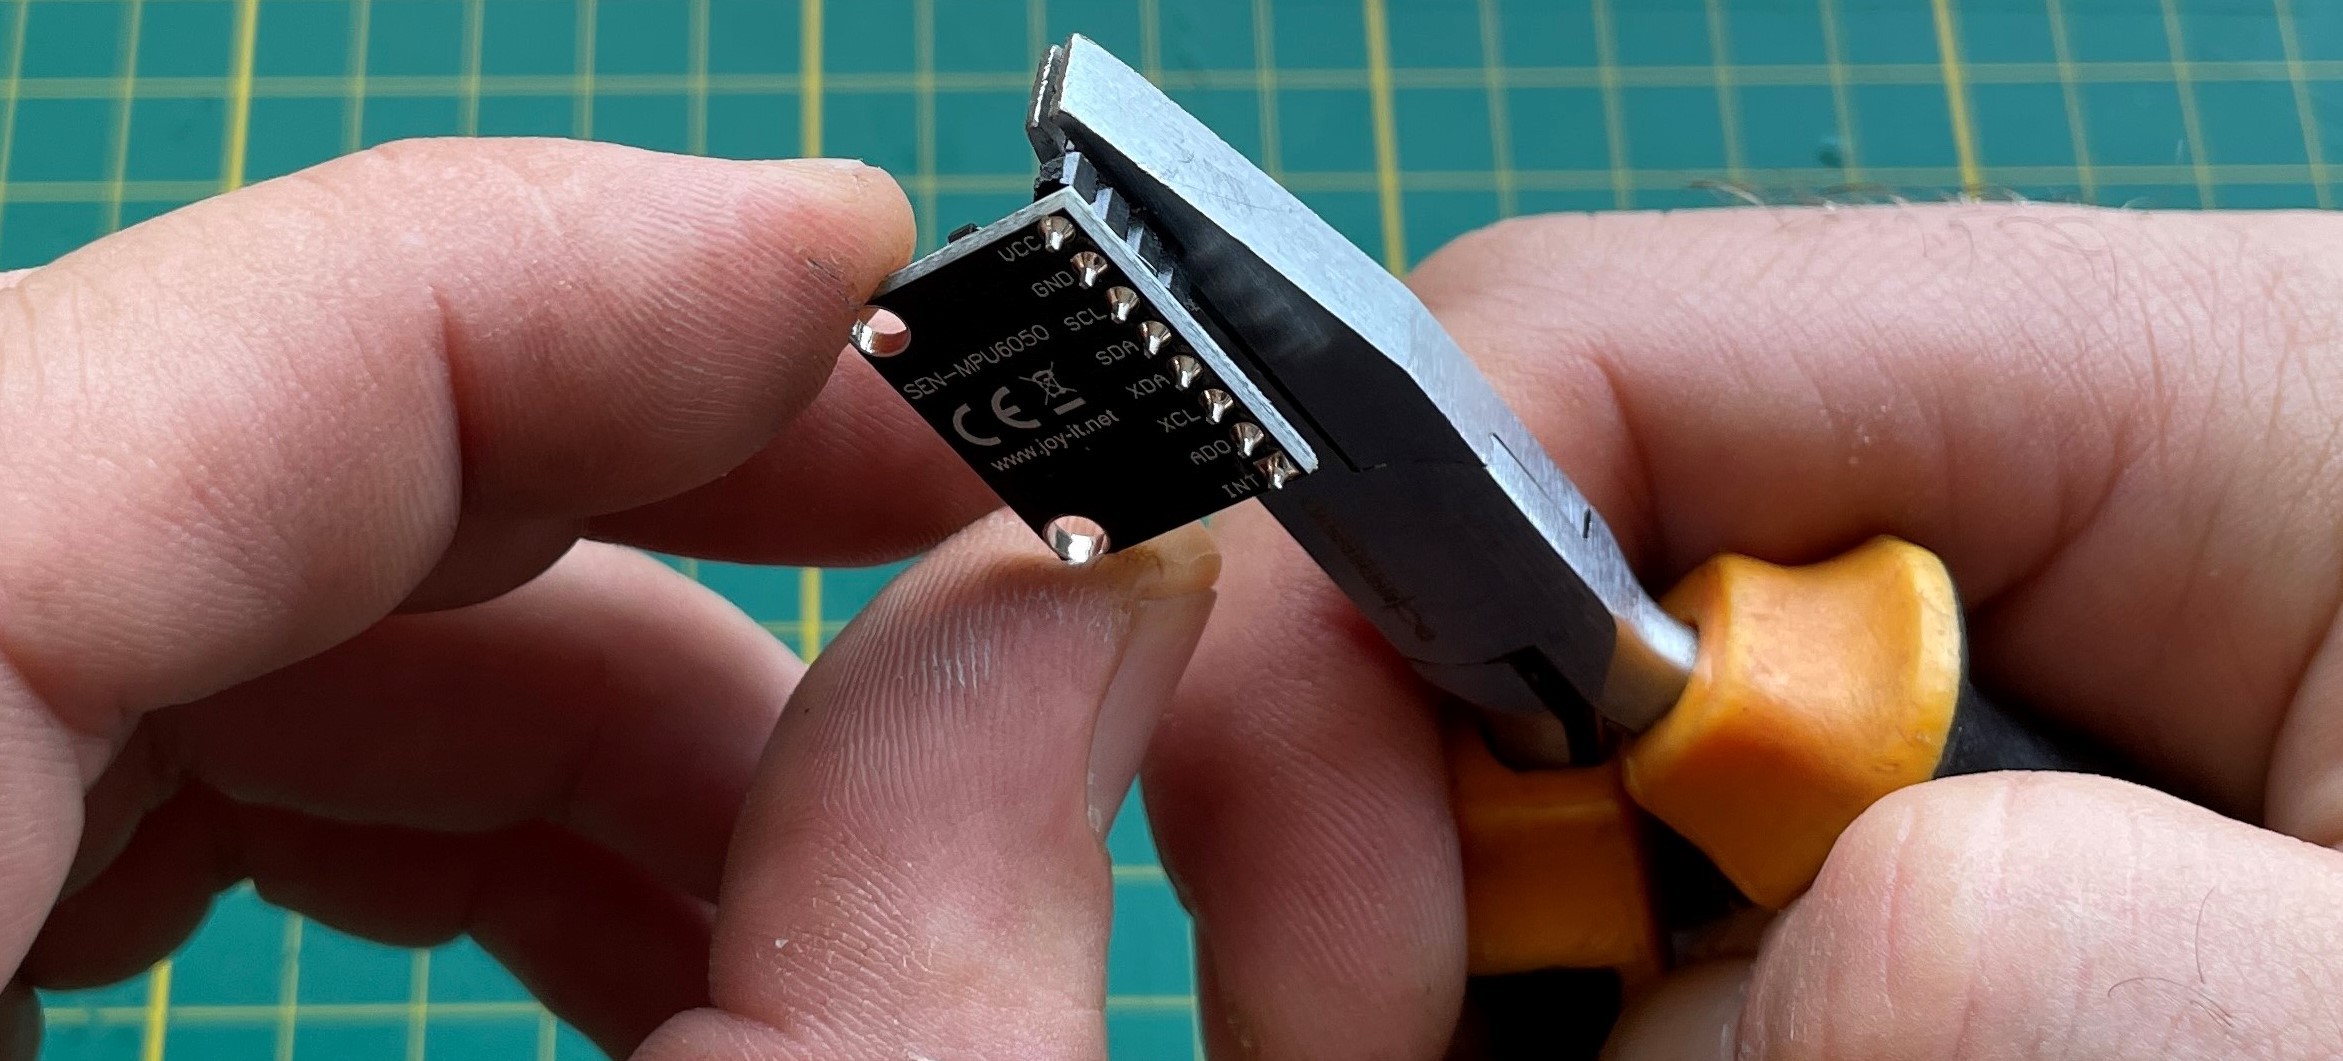
- Cut off the four no use headers of the SEN-MPU6050 ( XDA, XCL, ADO, INT)
- Bend the four headers (VCC, GND, SCL,SDA) at a 90 degree angle
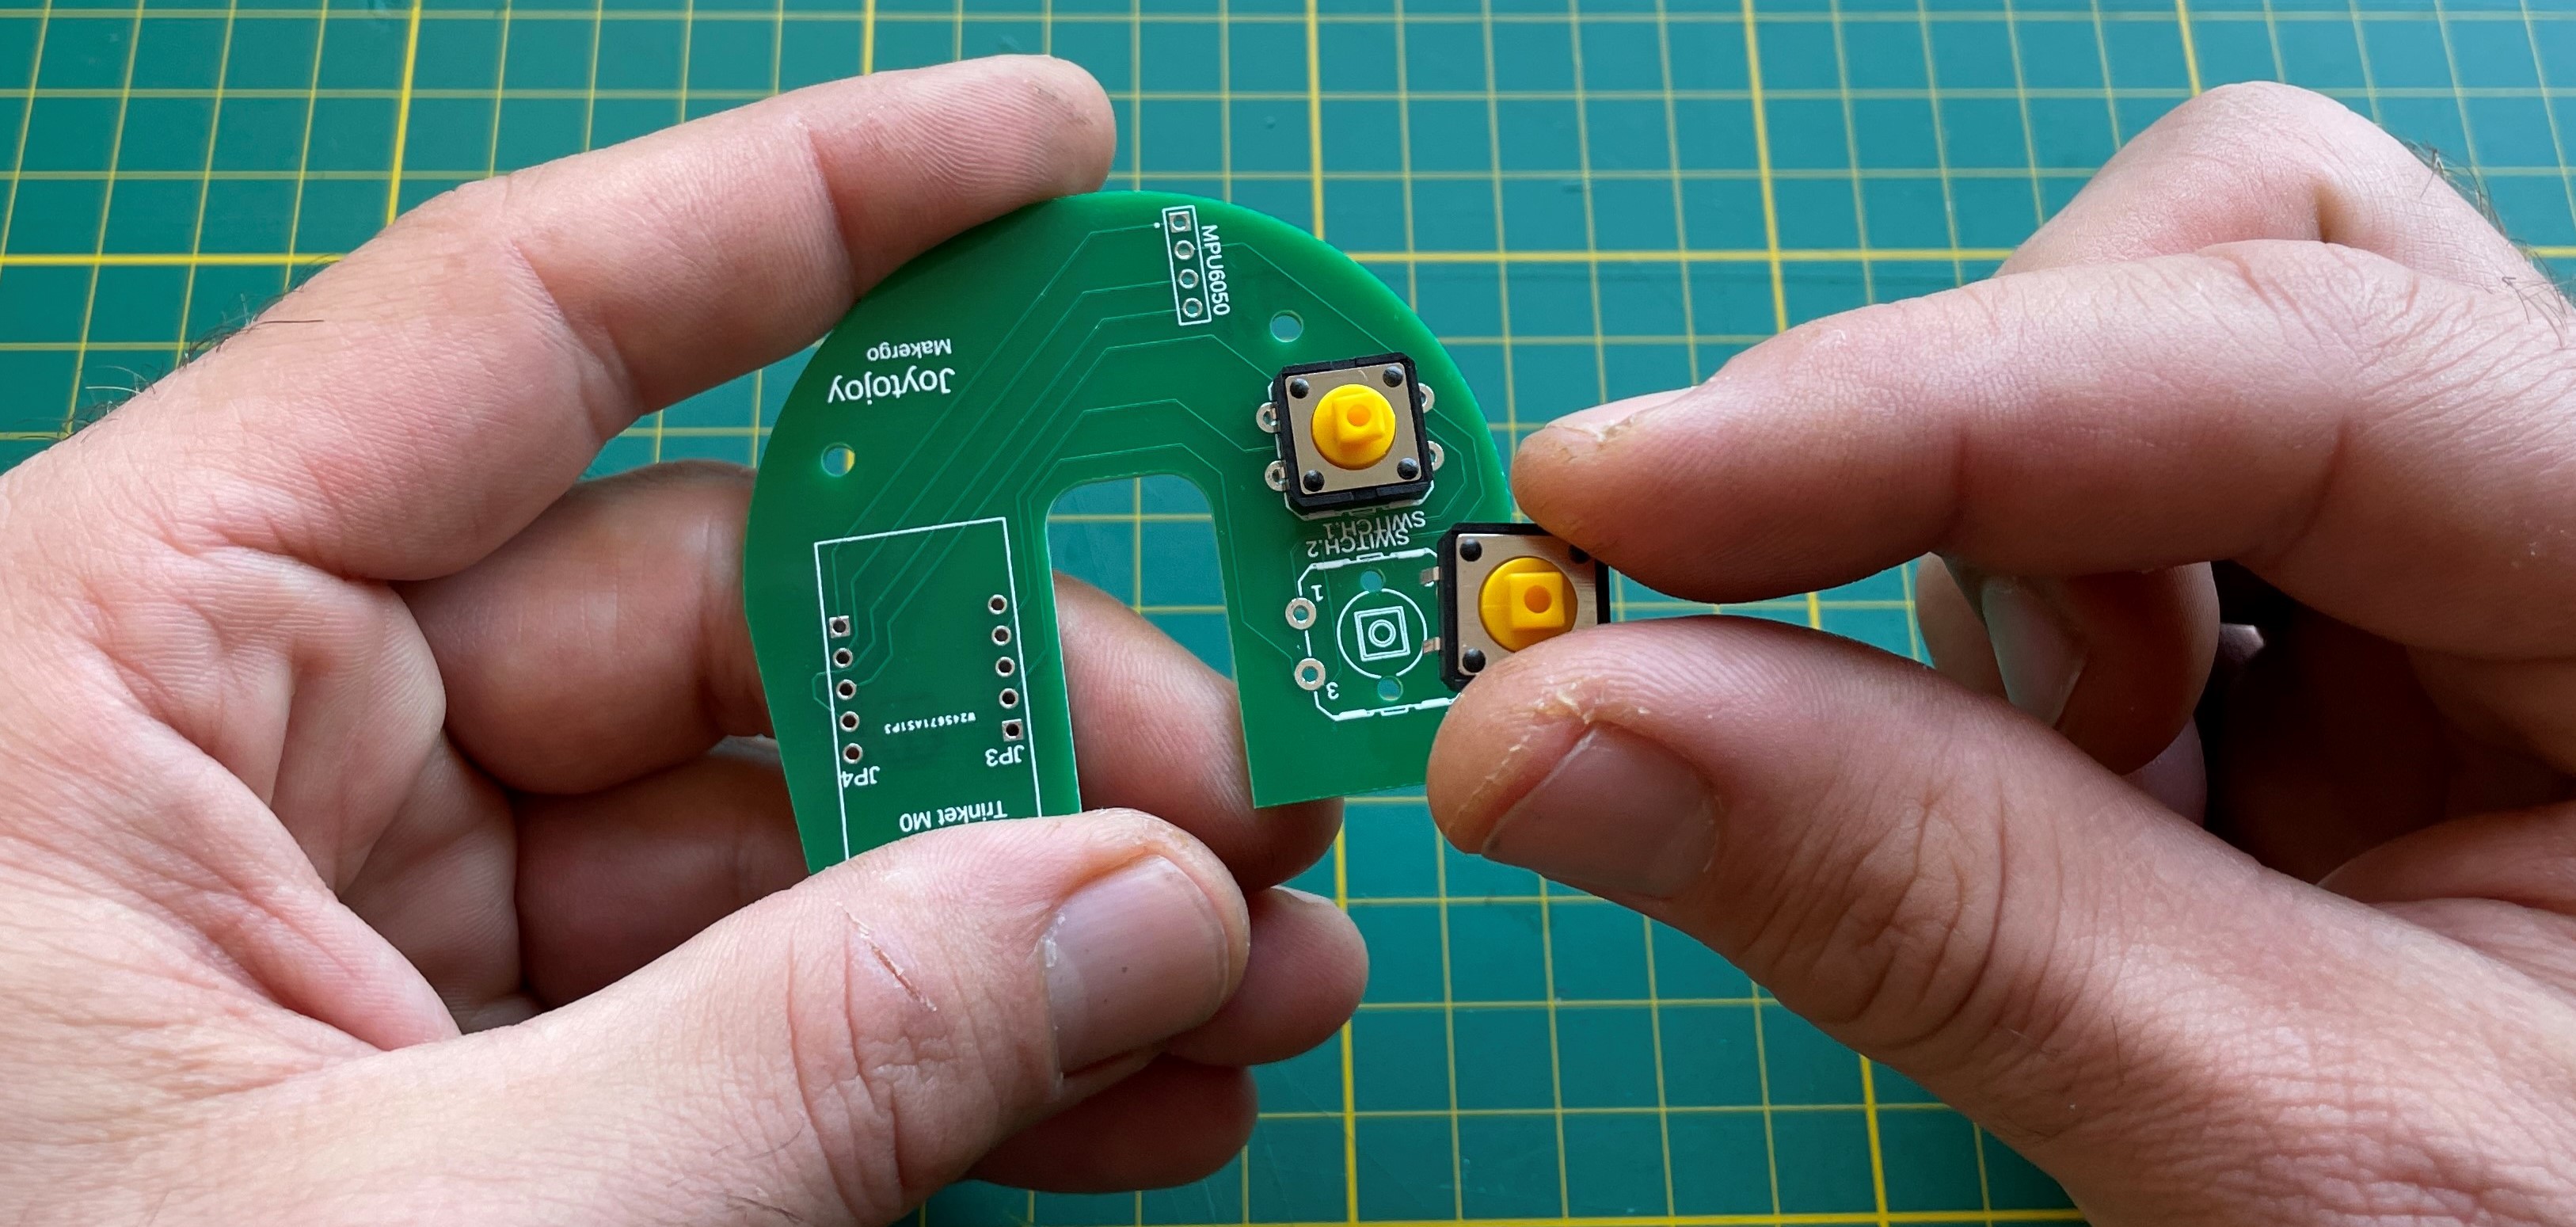
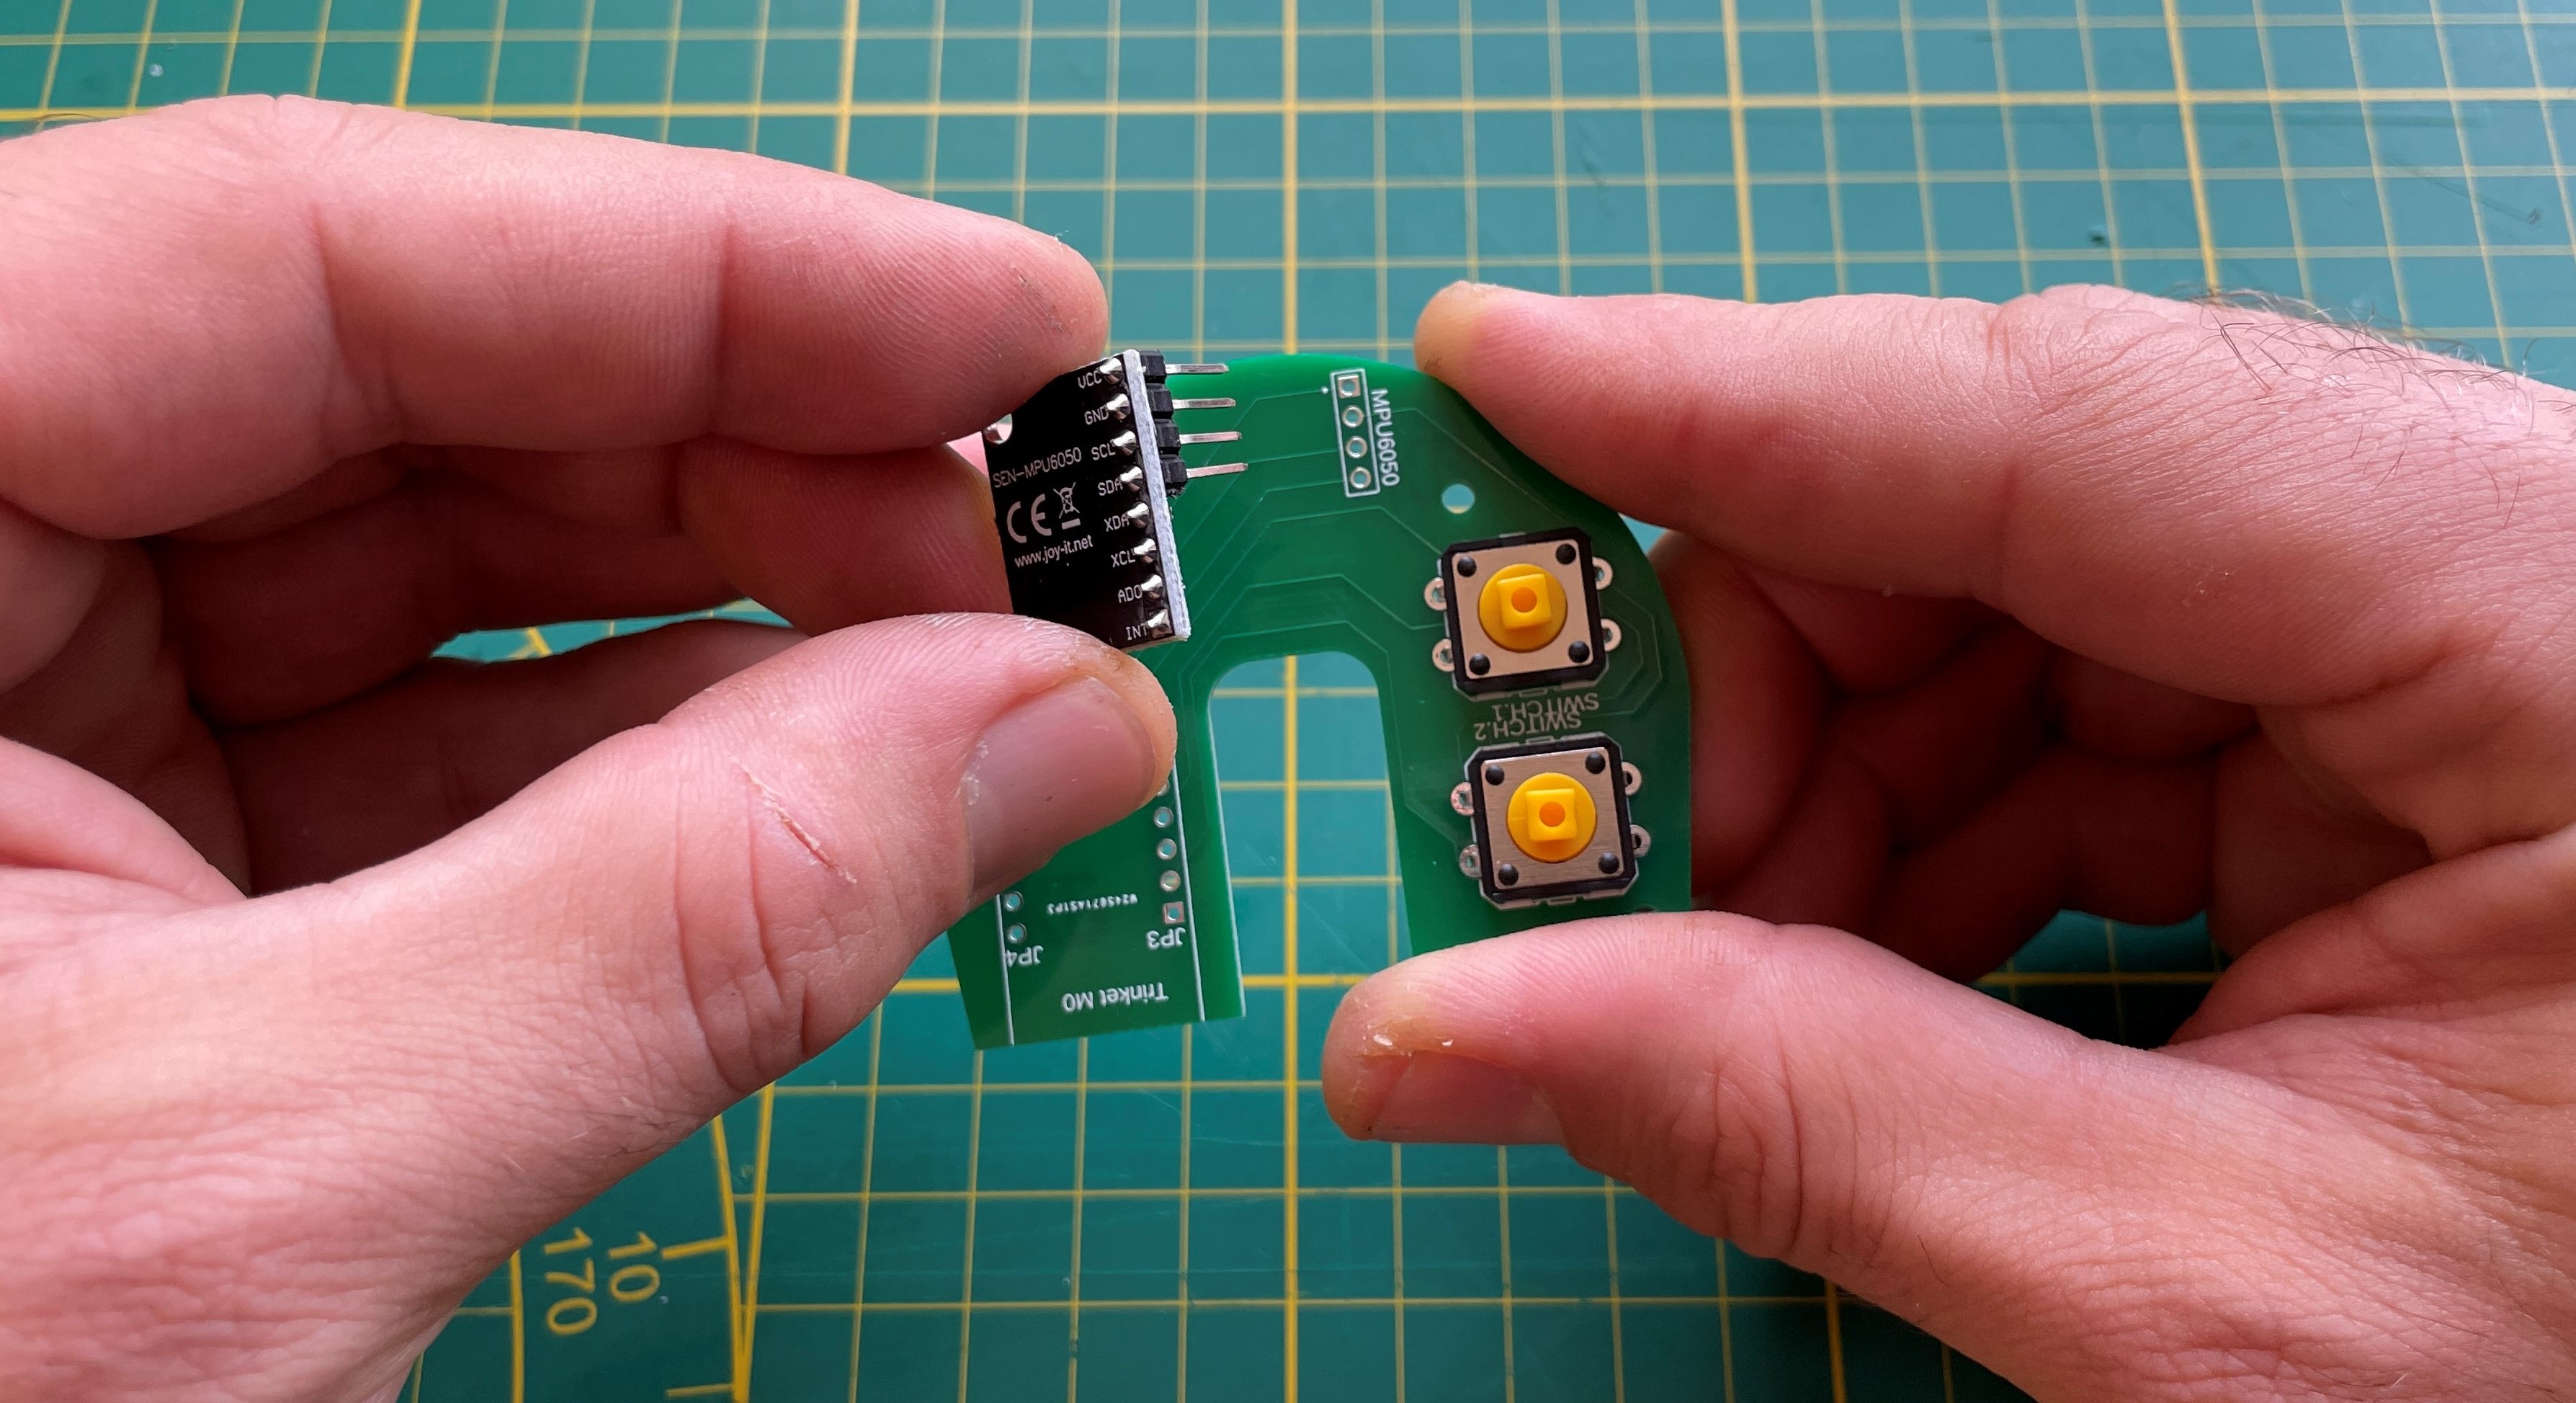
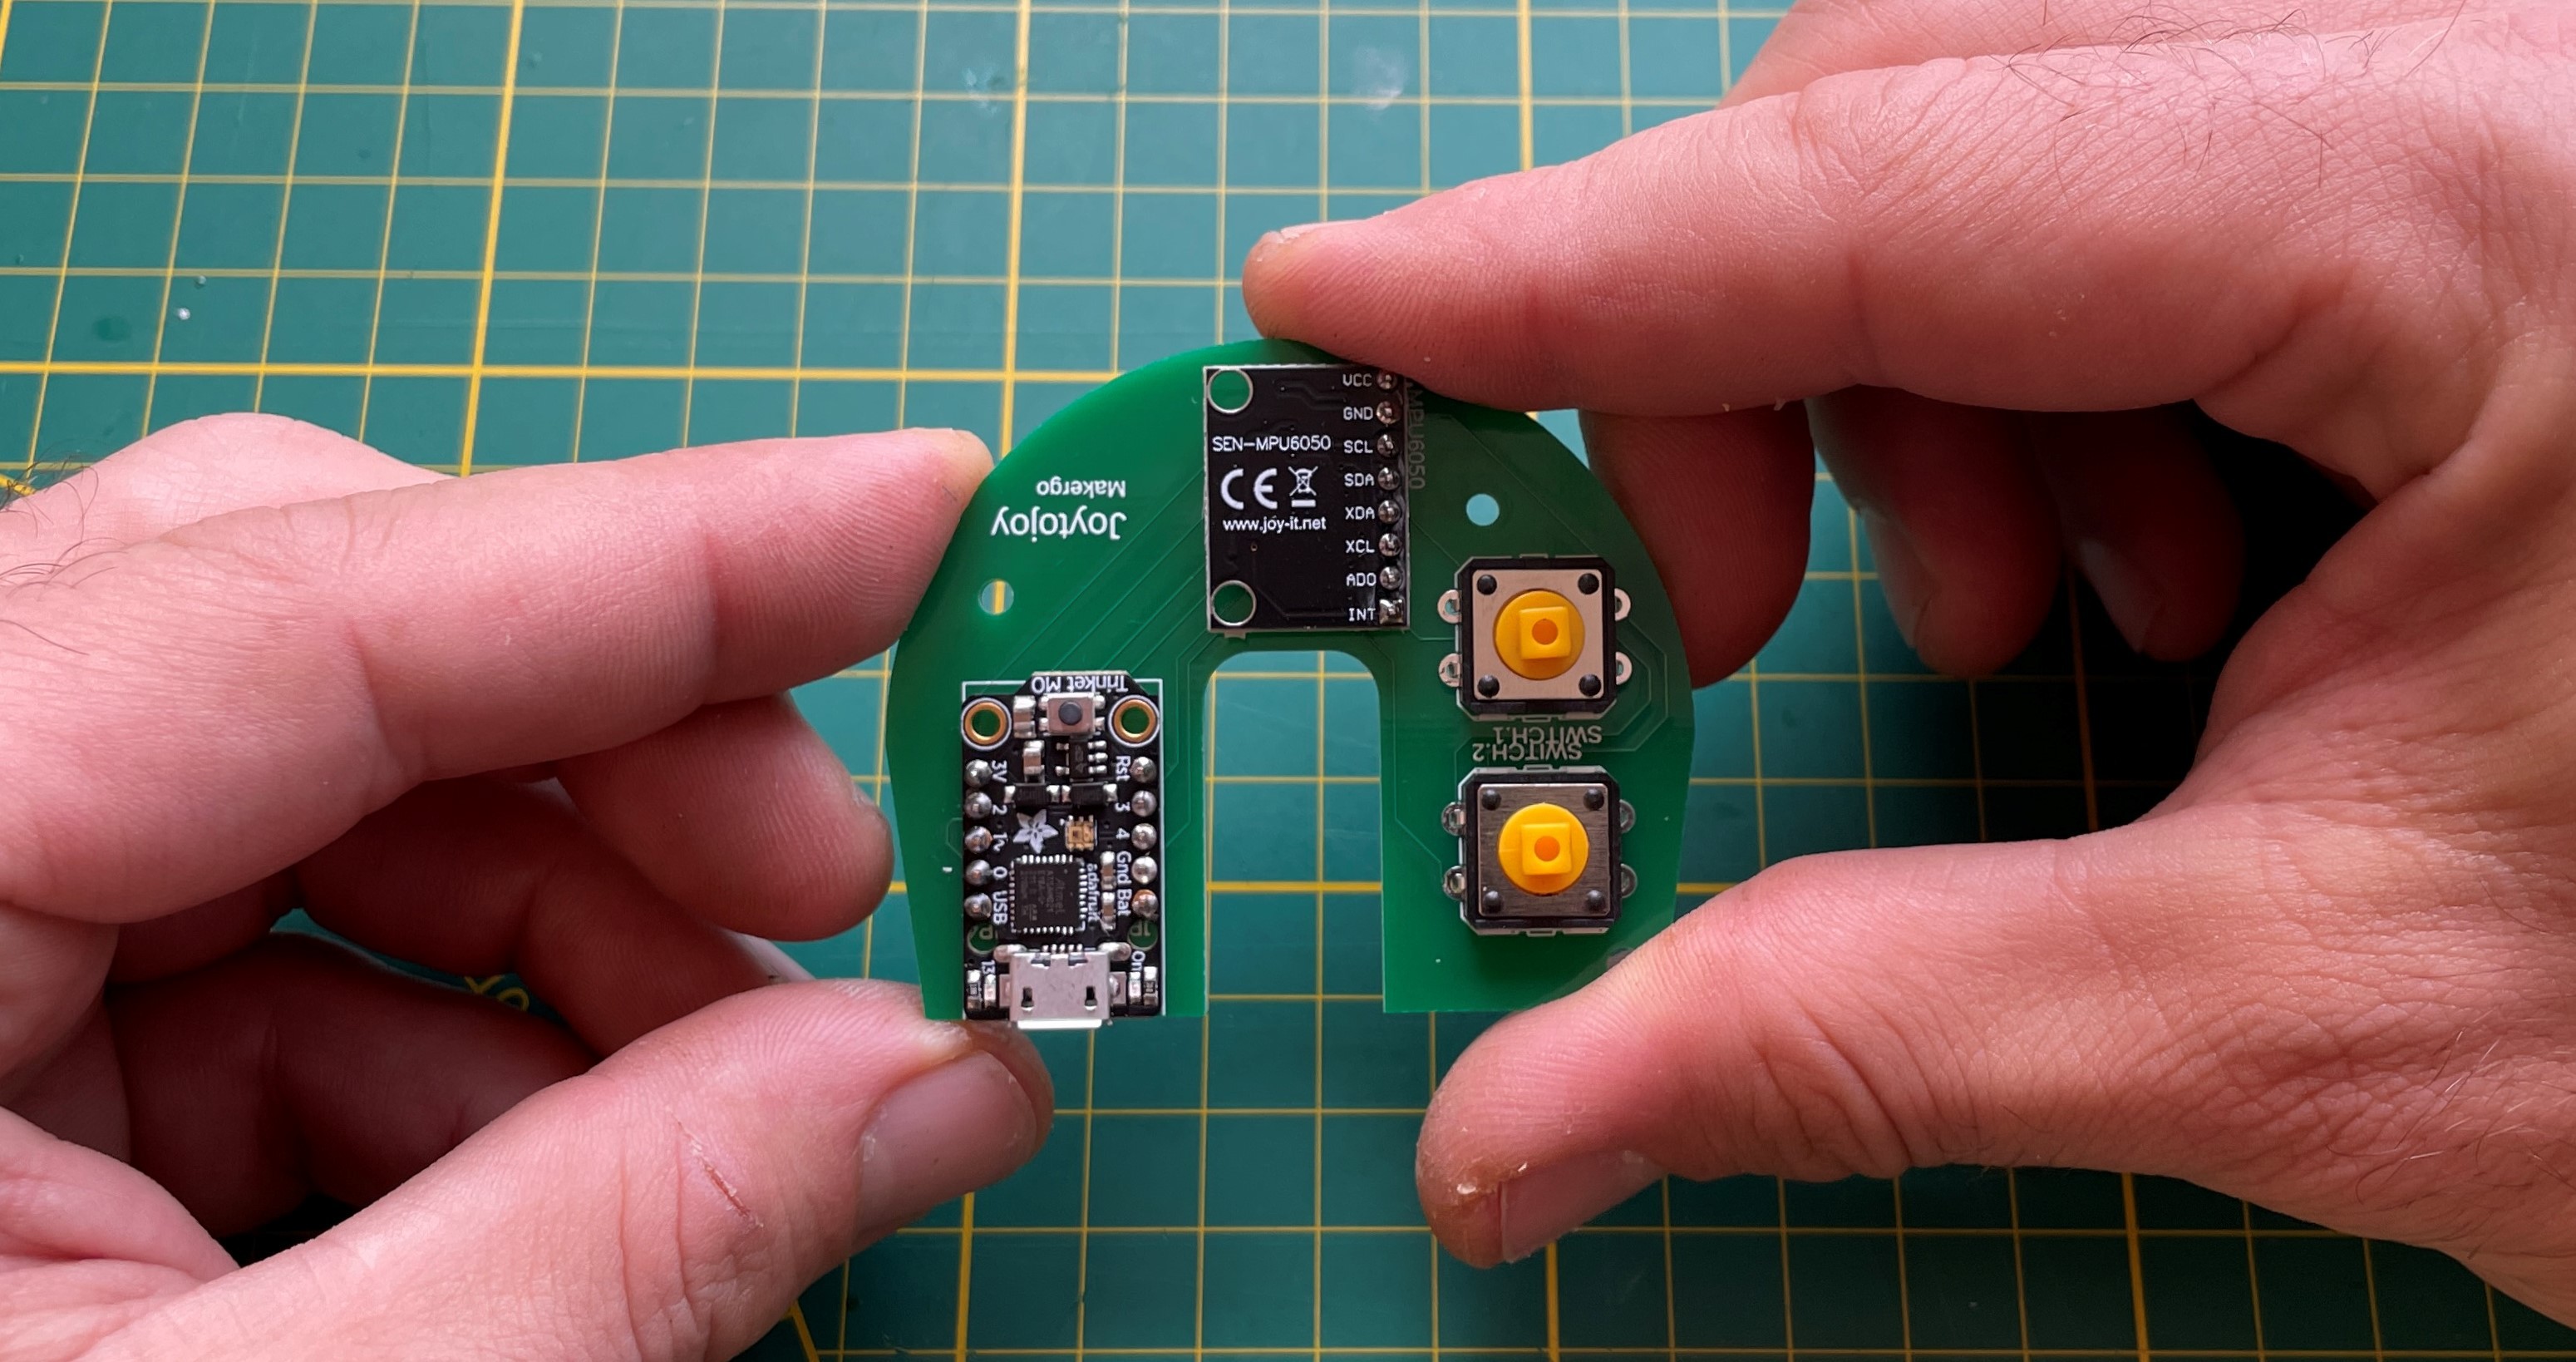
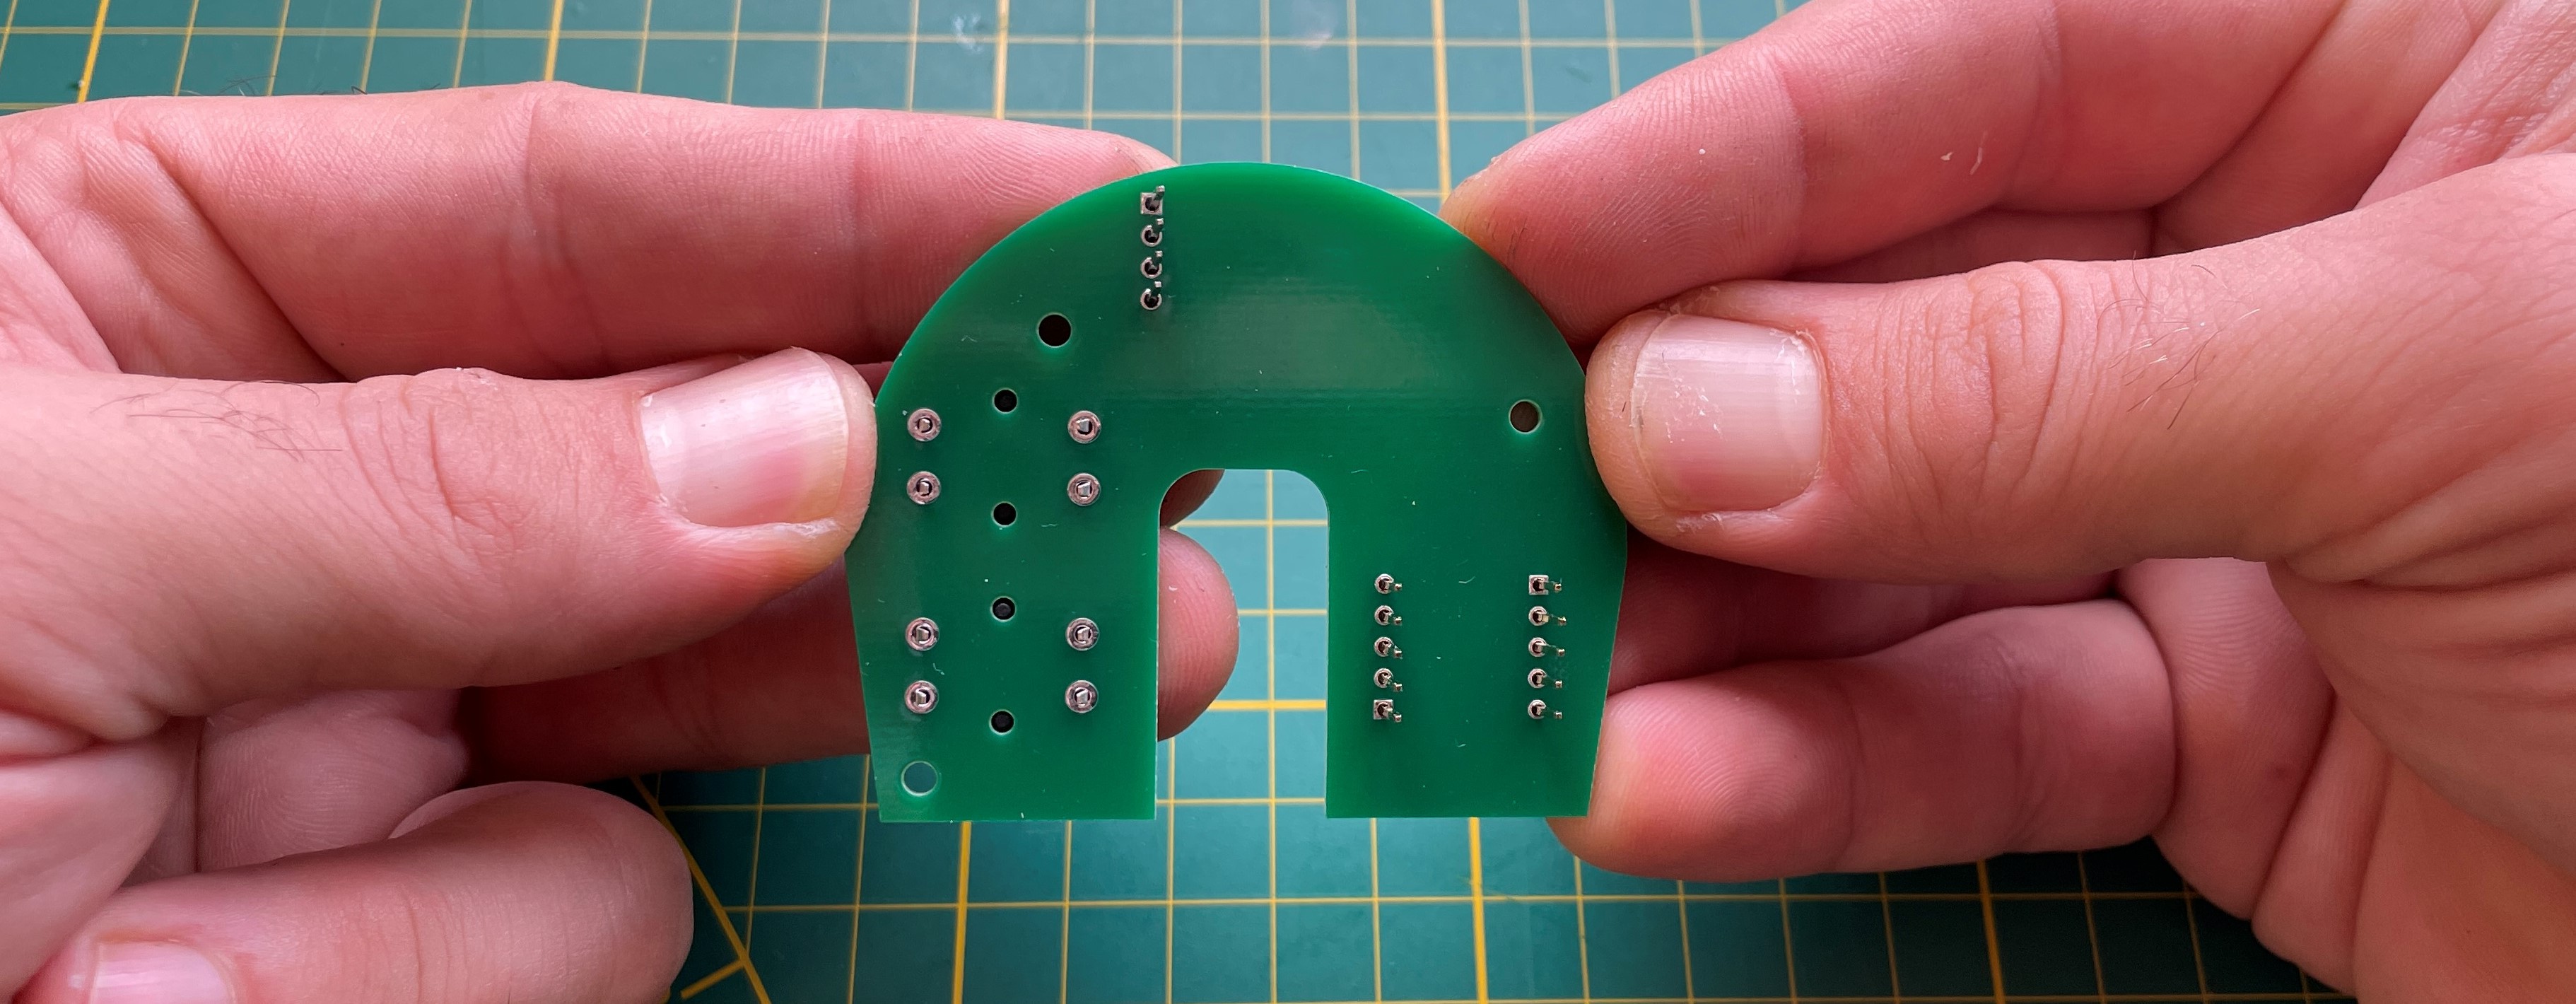
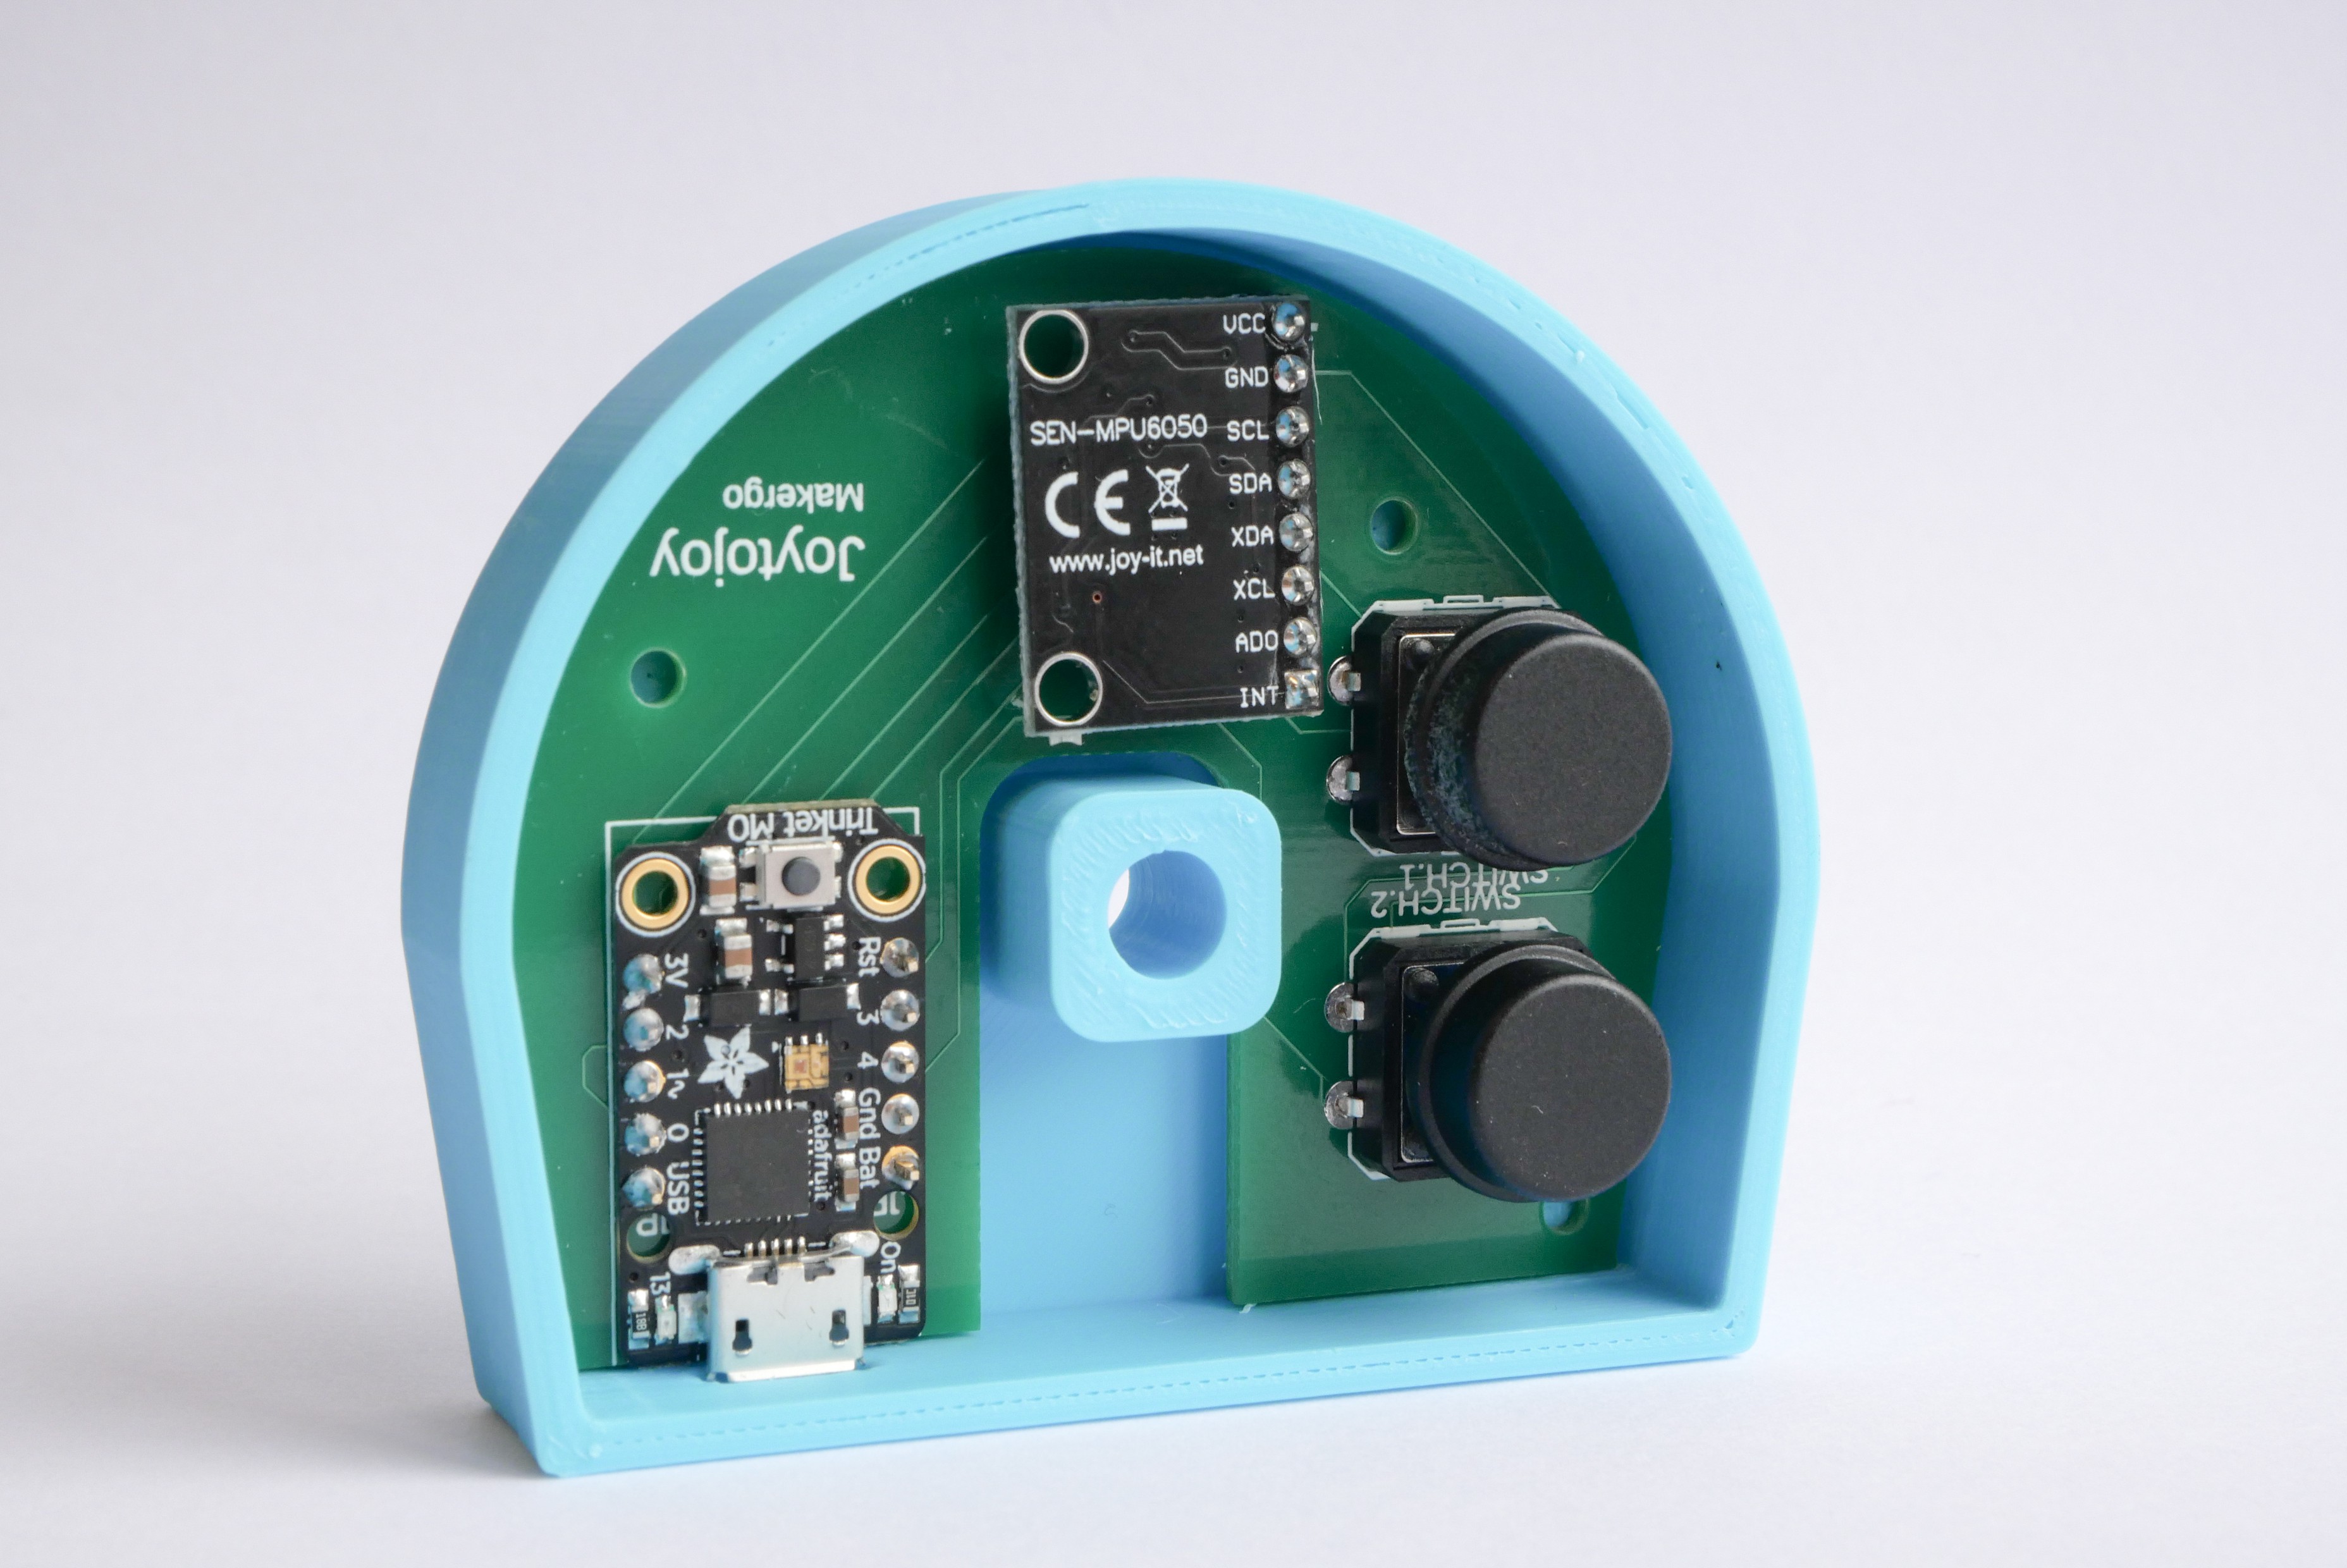
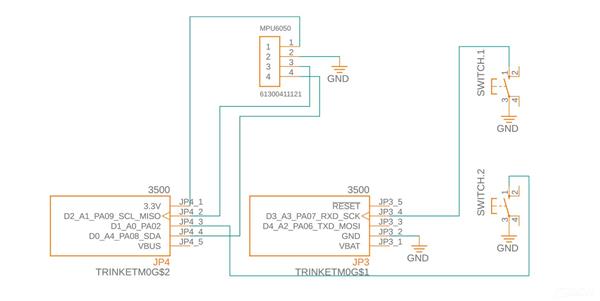
Insert the components on the PCB, following one board printed indications
- Switches
- MPU6050
- Trinket M0
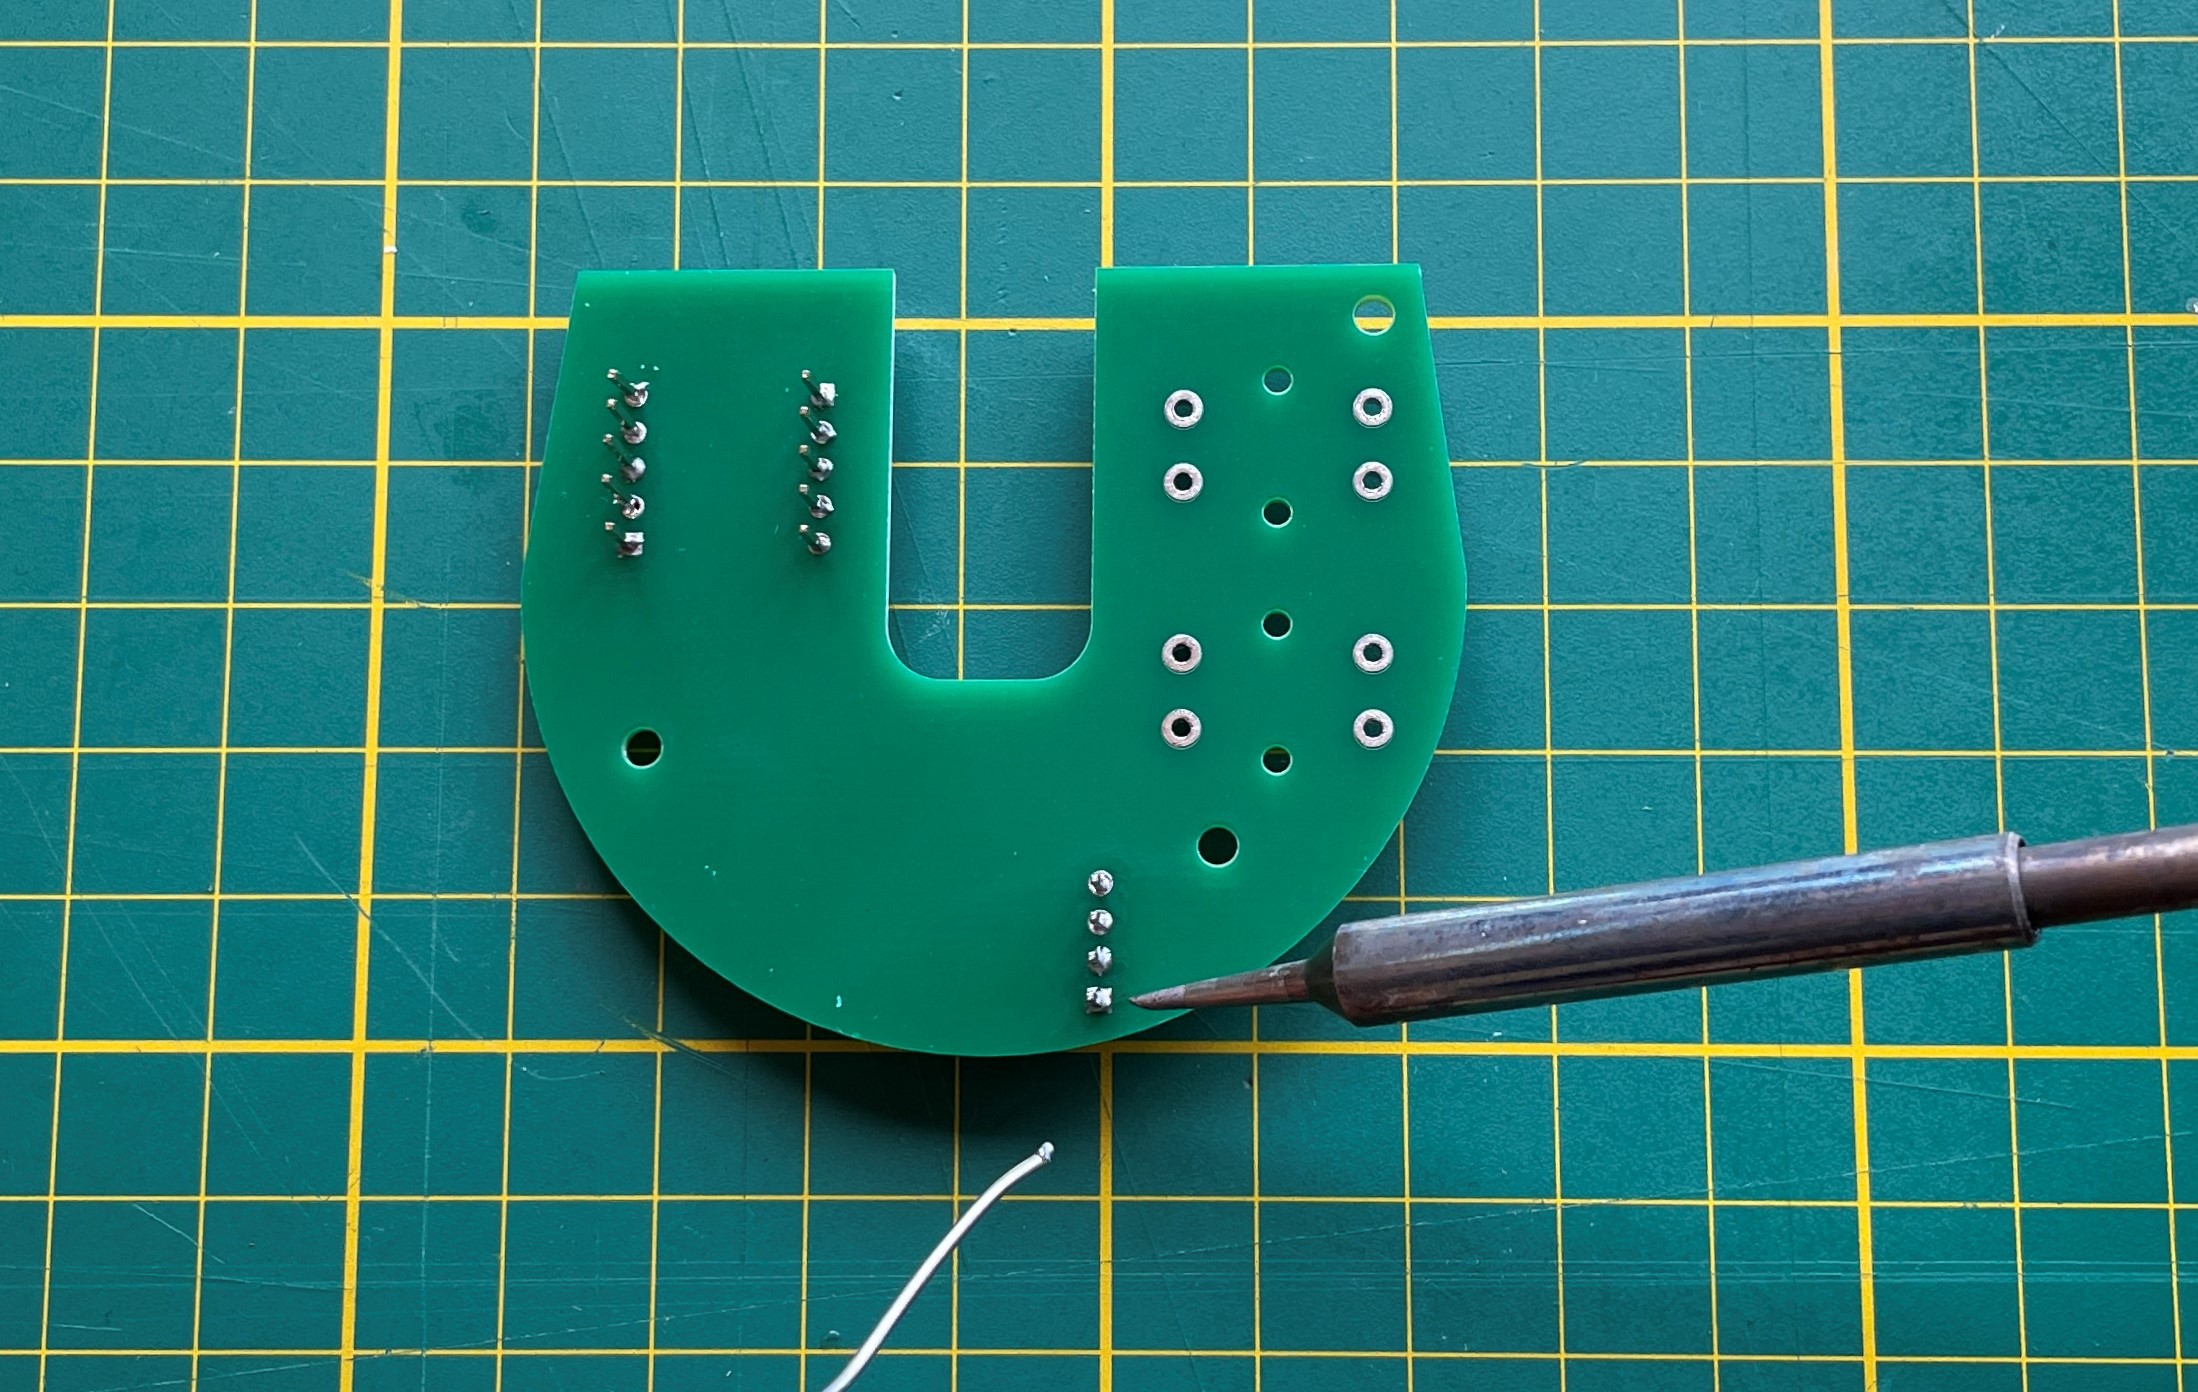
Soldering
- Turn the pcb
- Solder the different components pins
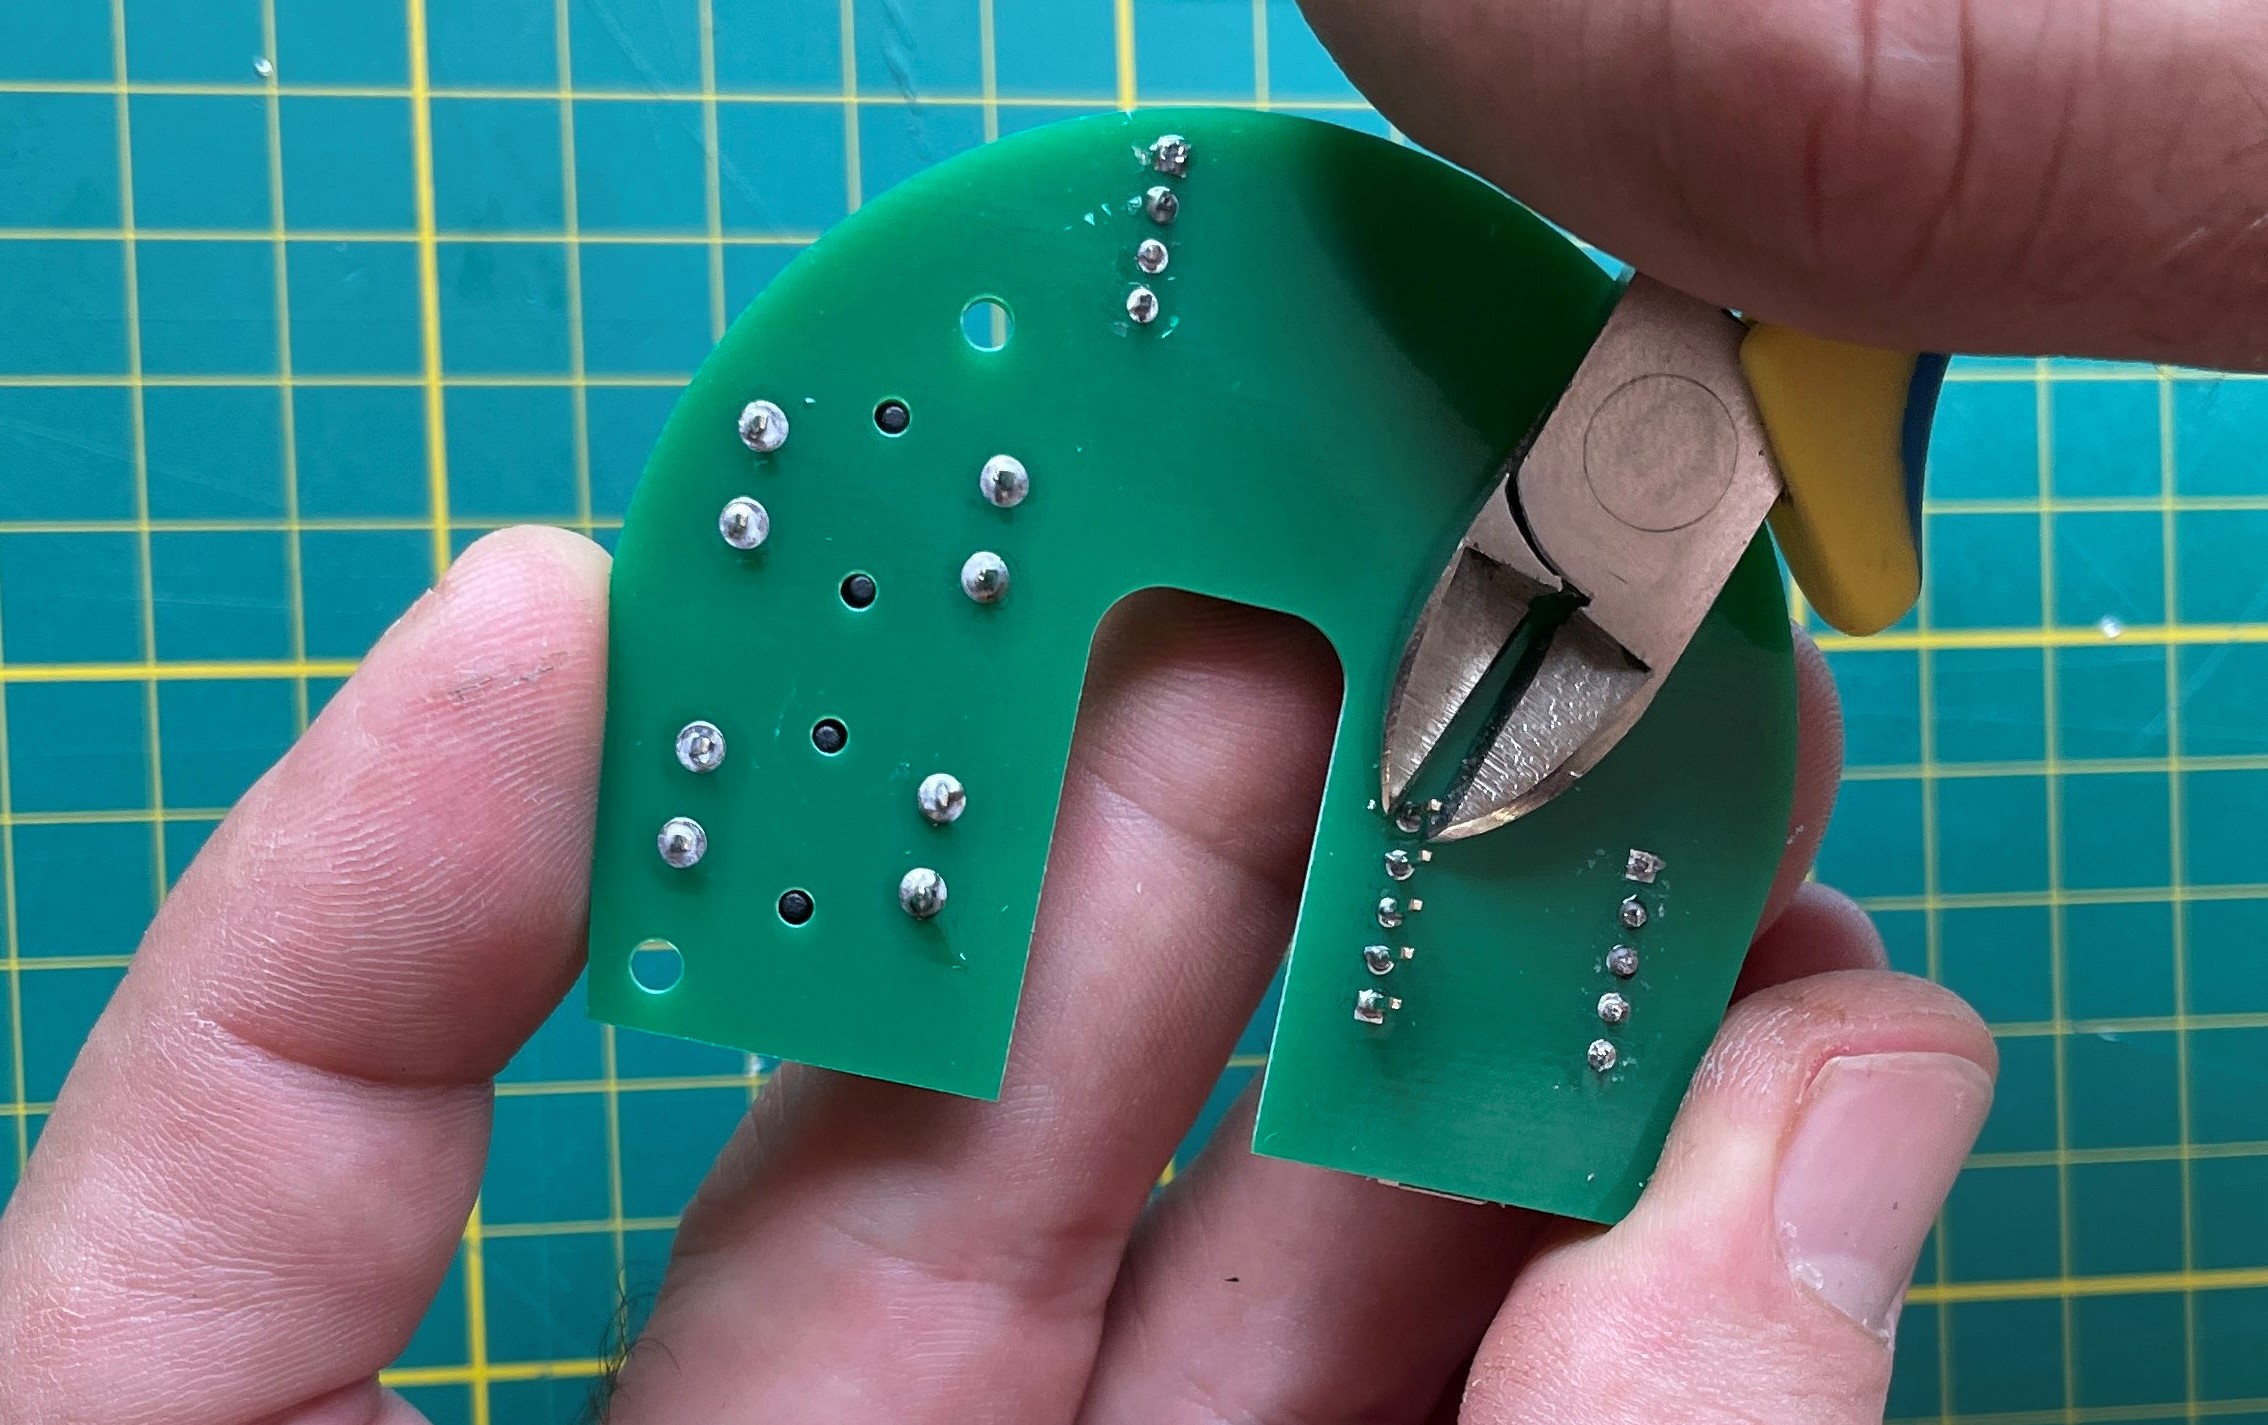
- Cut of the excess lenght of the pins
Step 4 : Mechanical Assembly

- Place button caps on switches
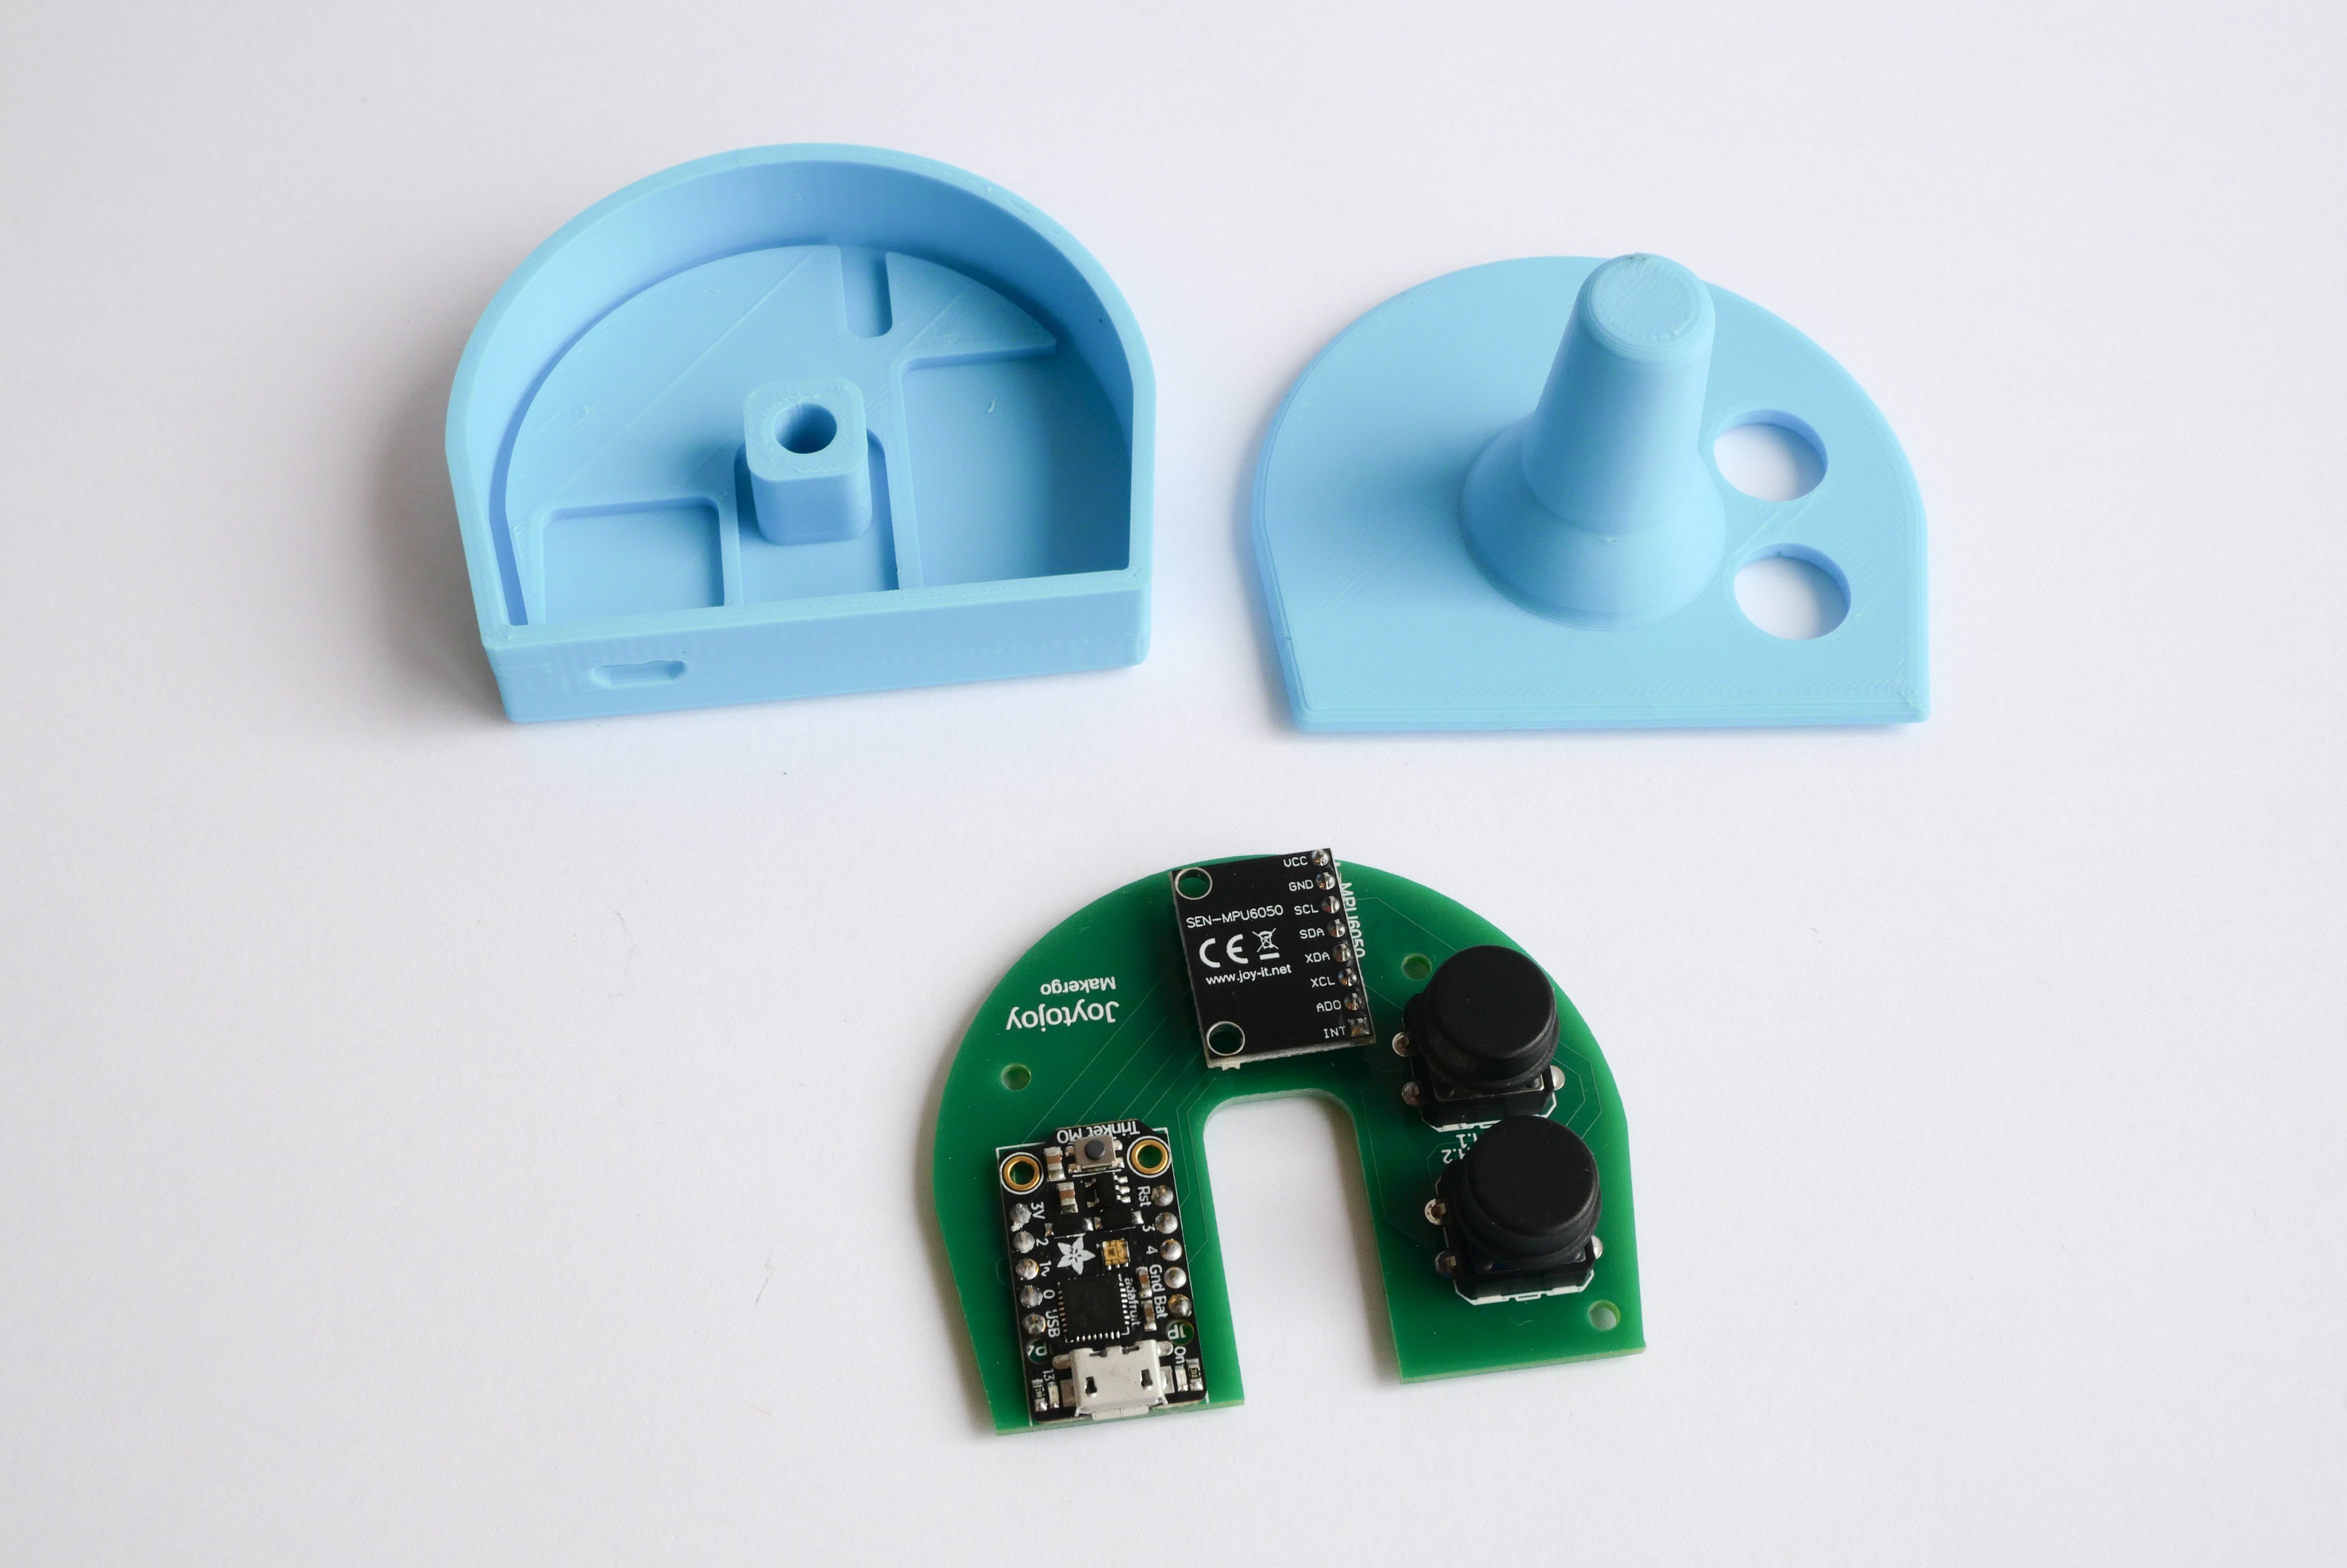
- Insert PCB onto the enclosure
- Place the top part on base part
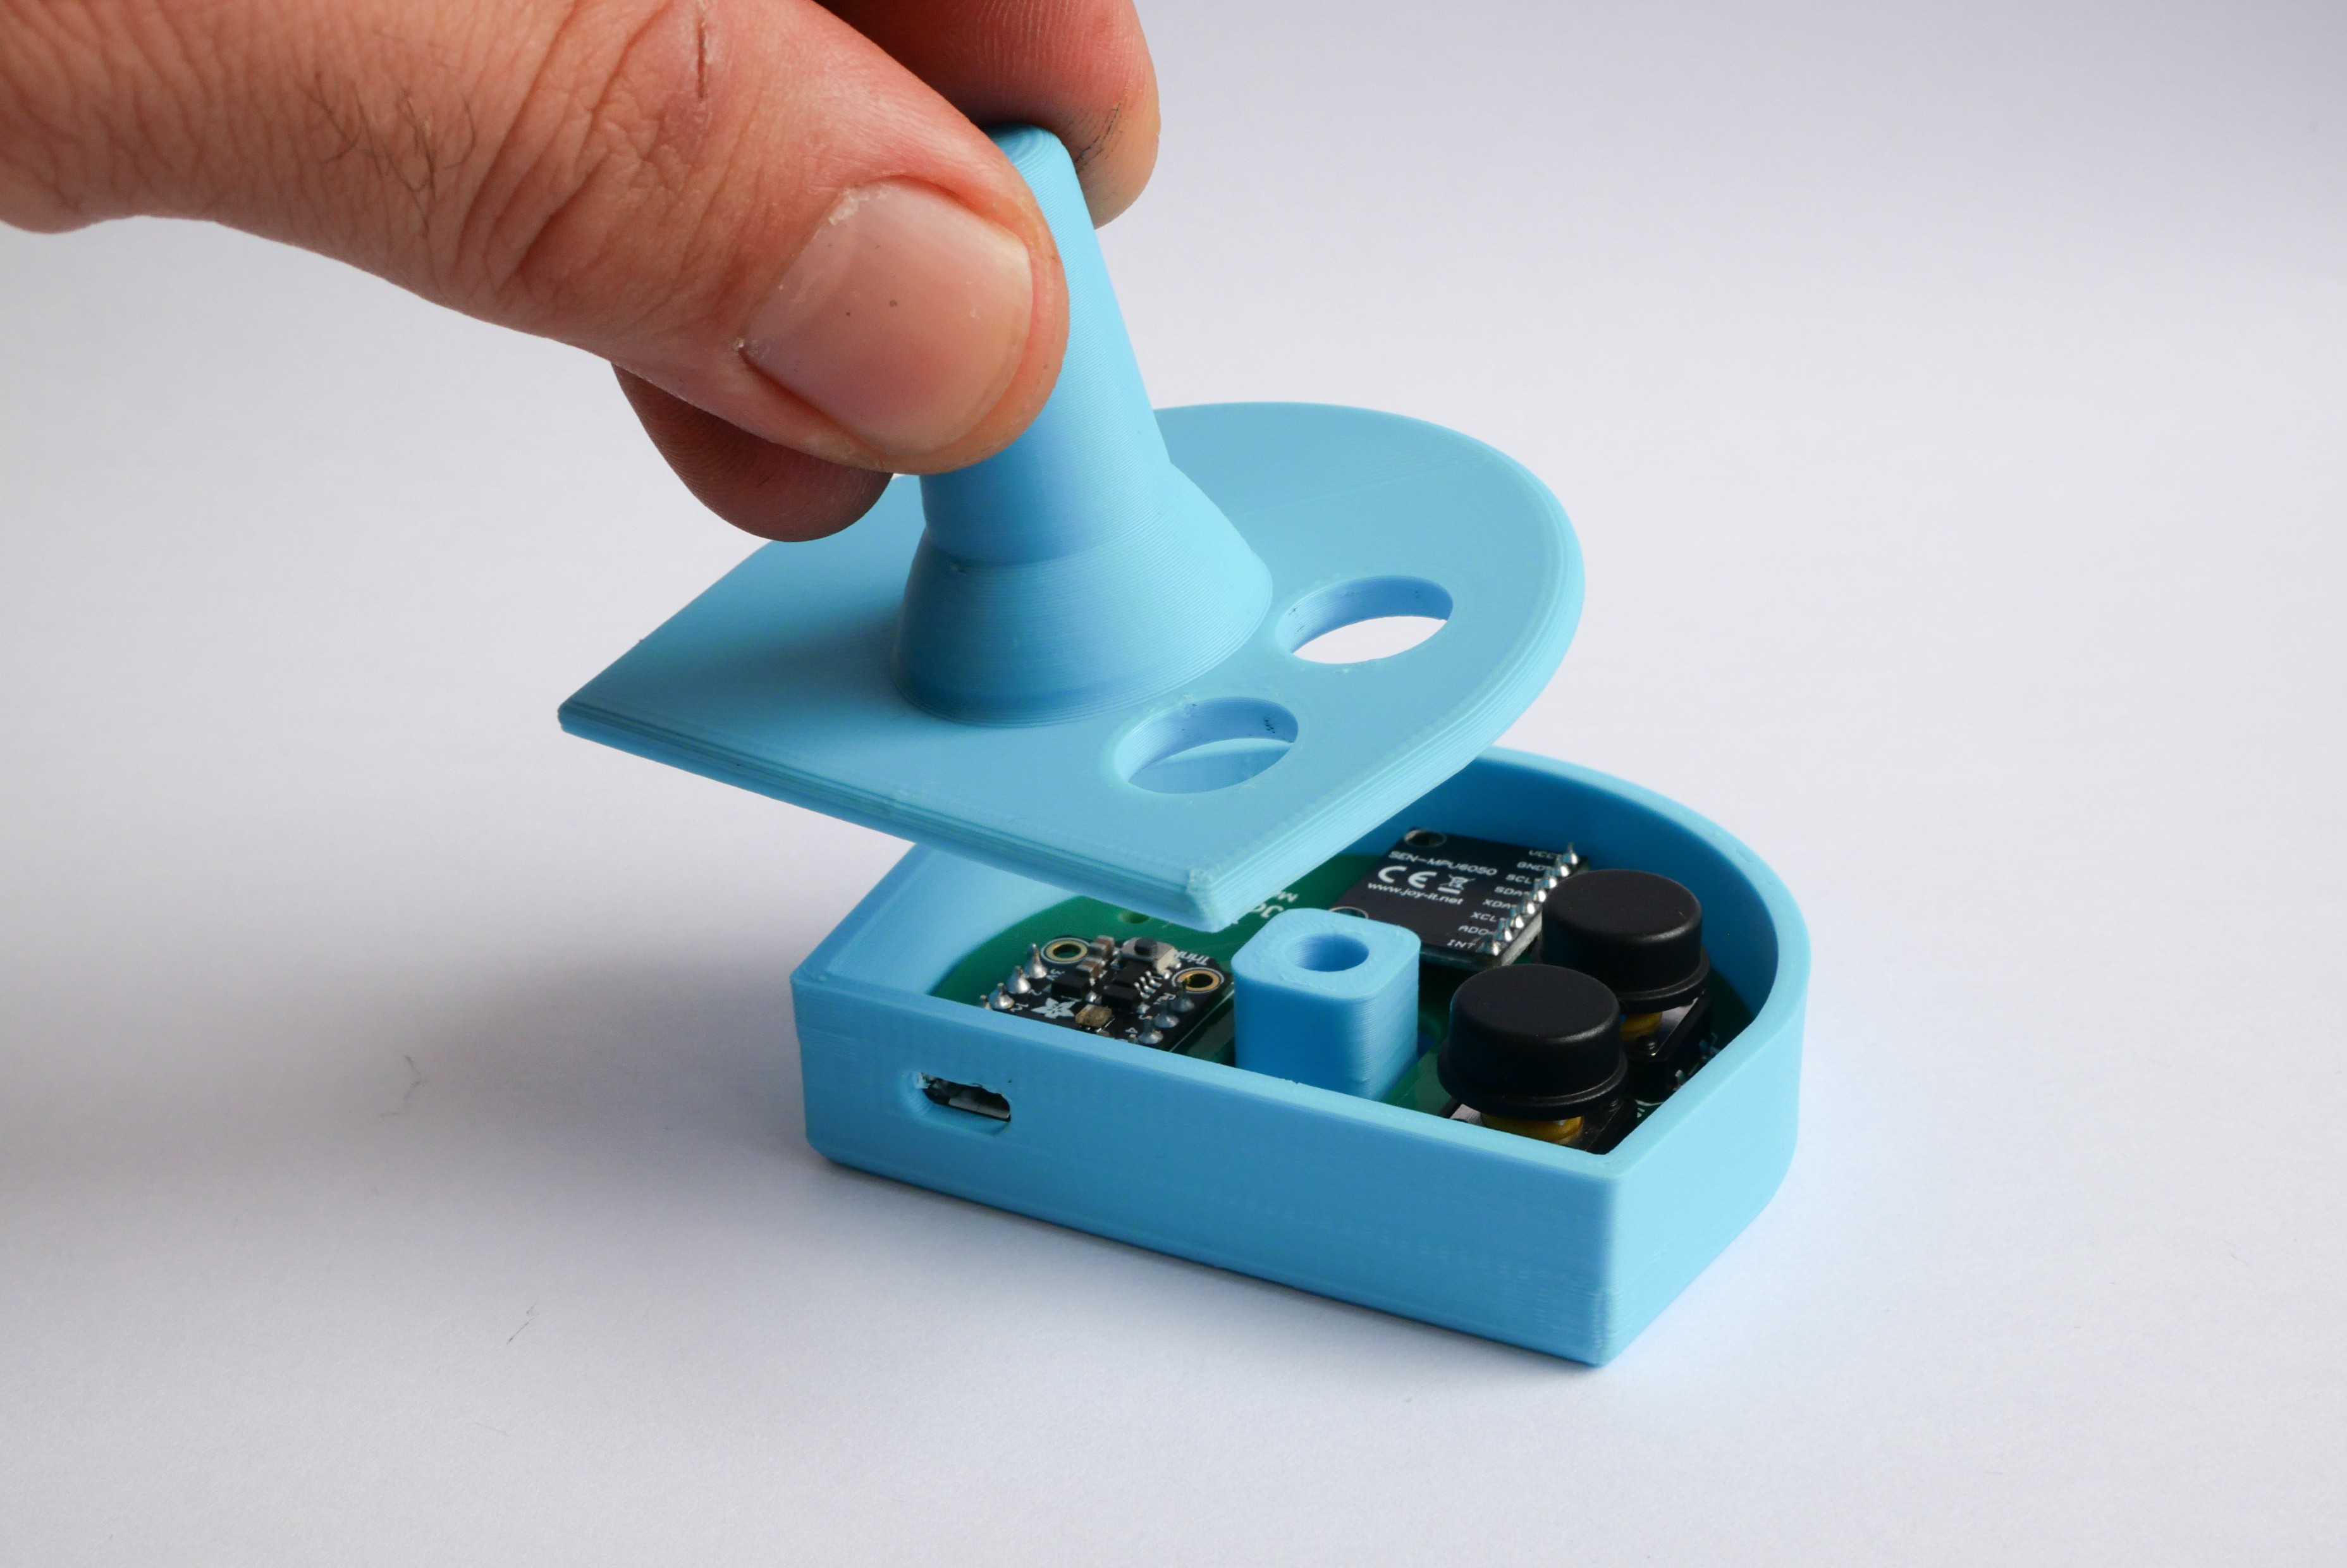
- Push it to clip the two parts
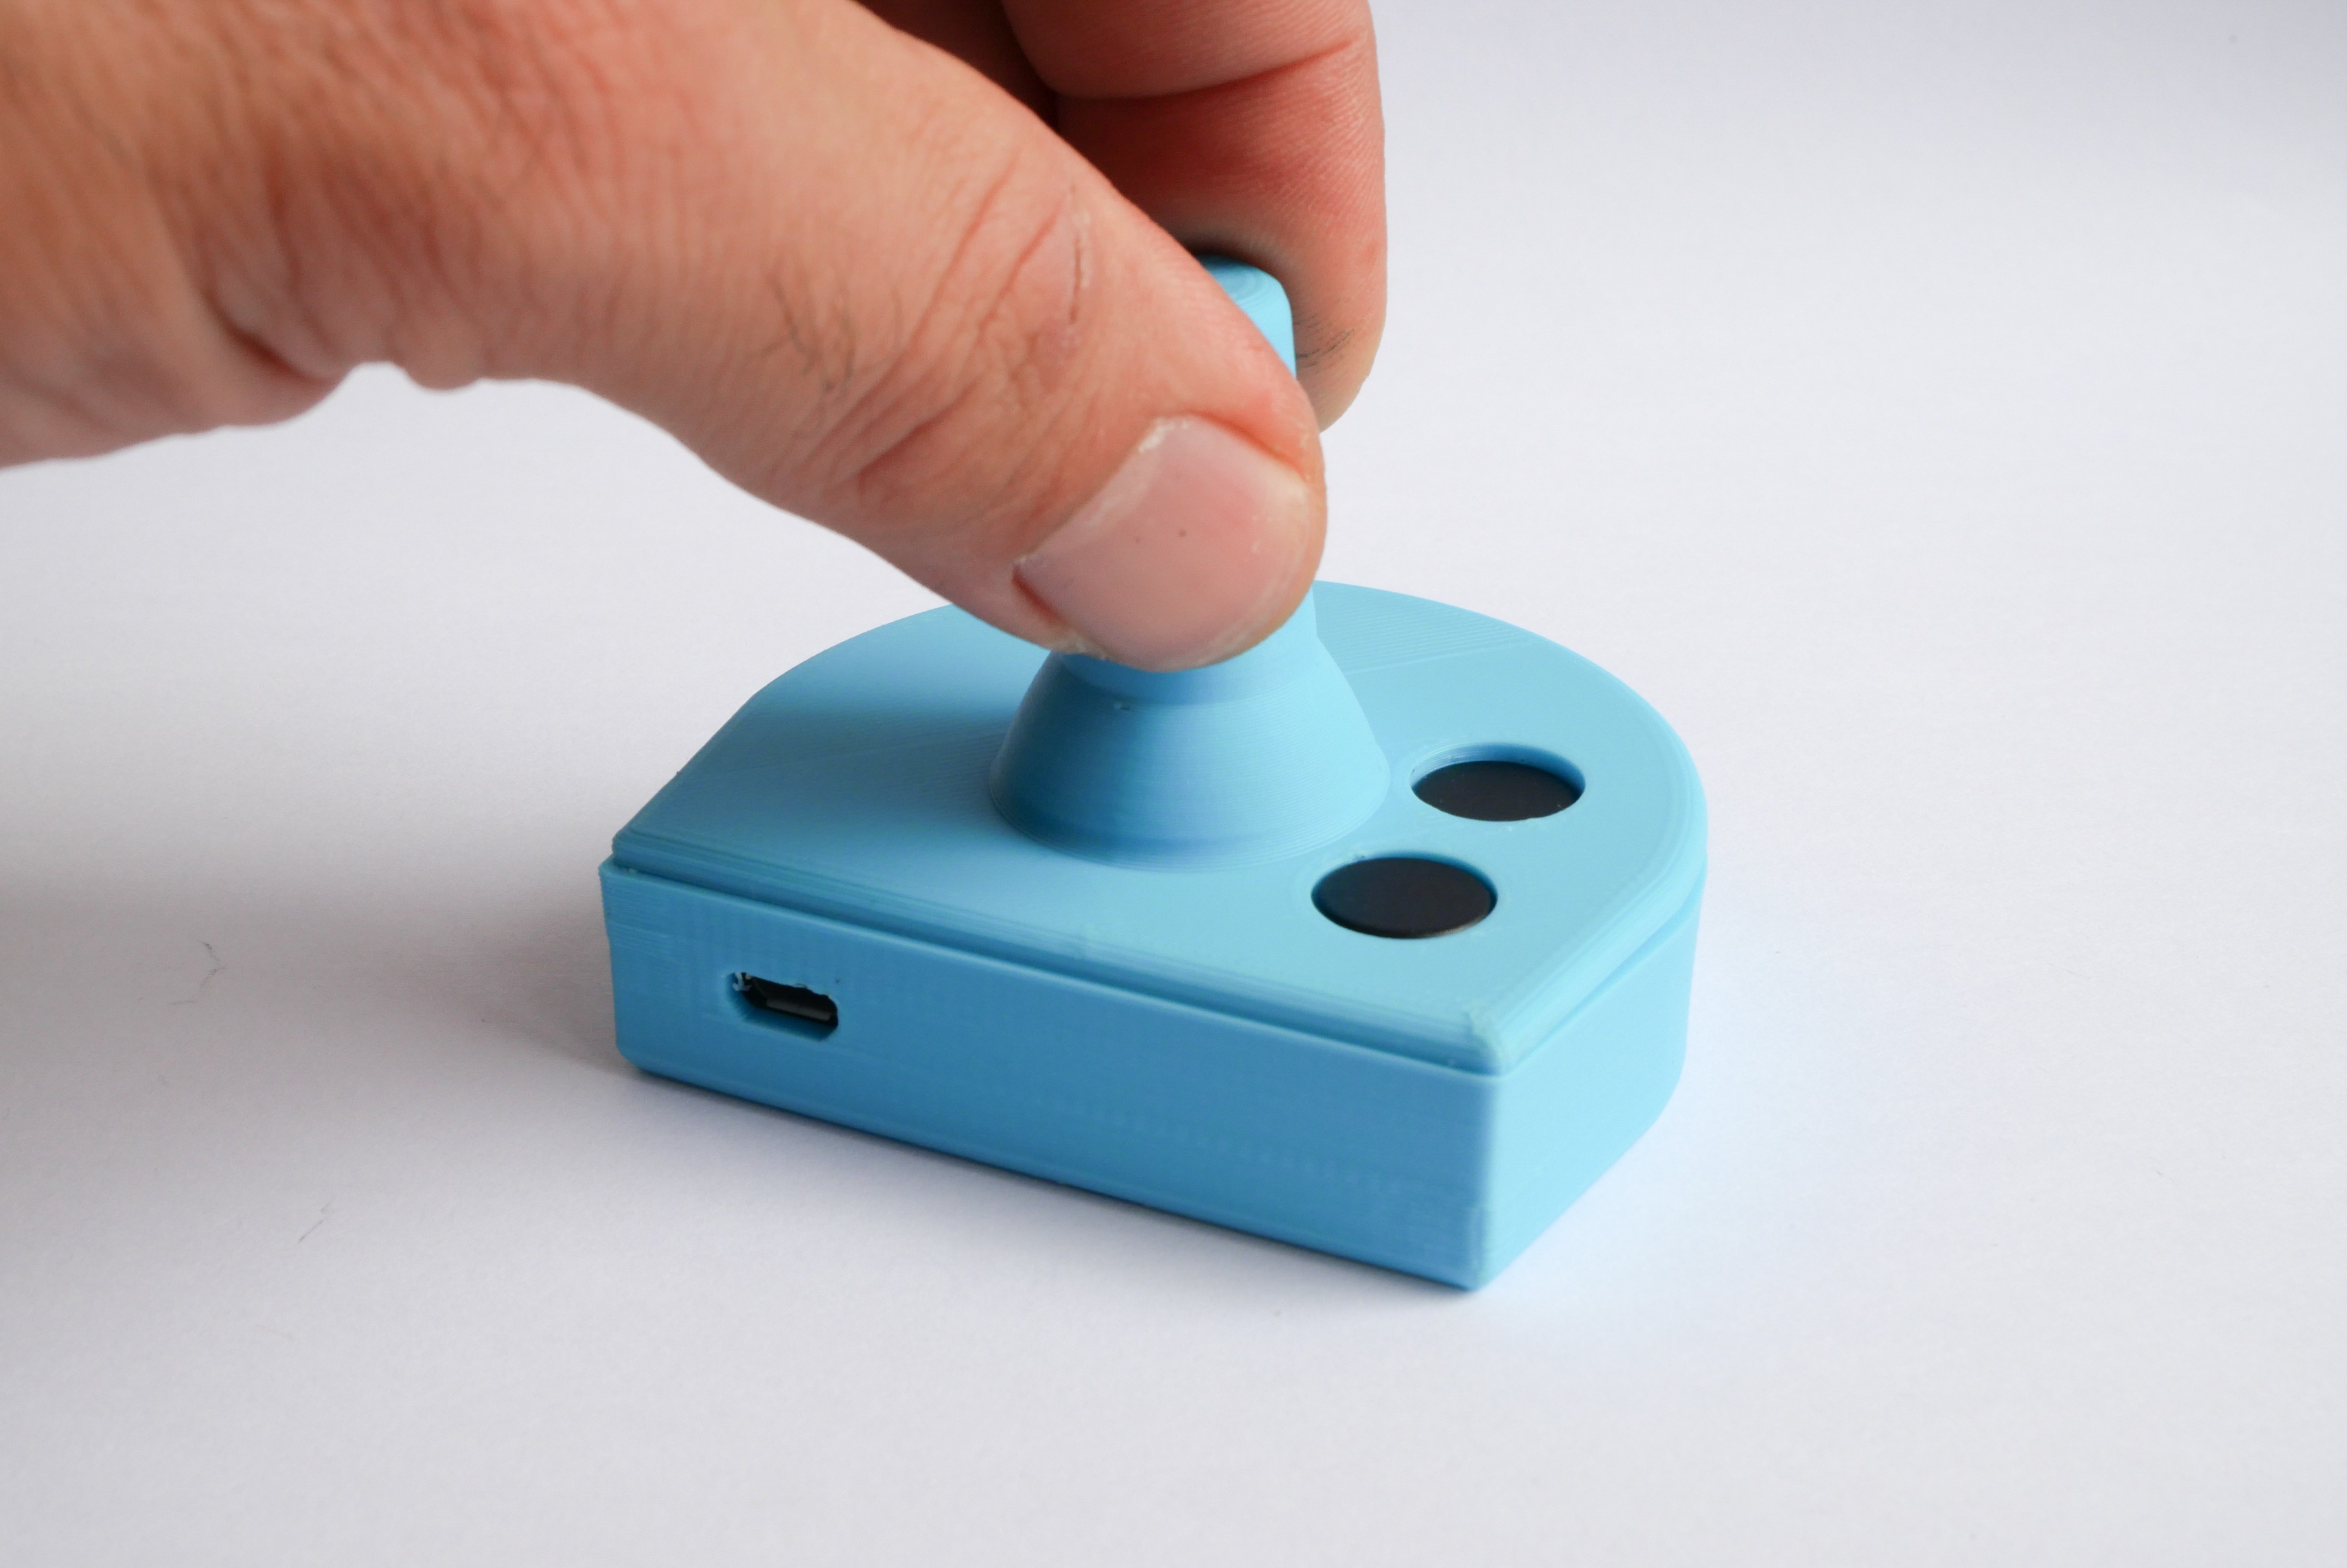

Step 5 : Programming
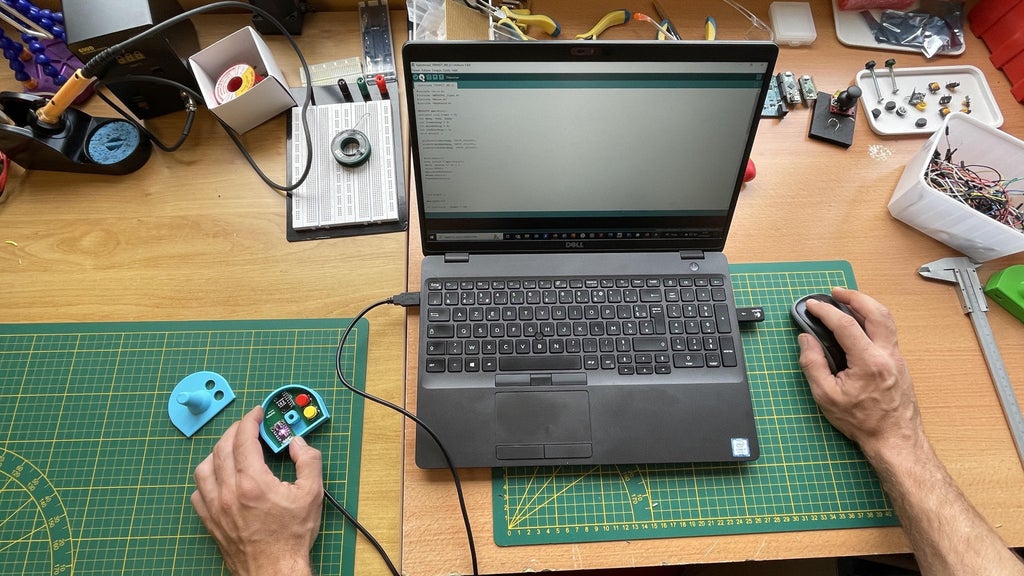
Select the right program either you need a game stick or a mouse :
FOR A GAMING STICK :
Select the arduino sketch Joytostick_TRINKET_M0_v2.ino
Set Up arduino IDE, see ADFRUIT's Trinket Information and follow instructions
Download and install theseslibraries to the arduino IDE:
MPU6050_tockn by tockn
Joystick Library for Adafruit TinyUSB by gdsports
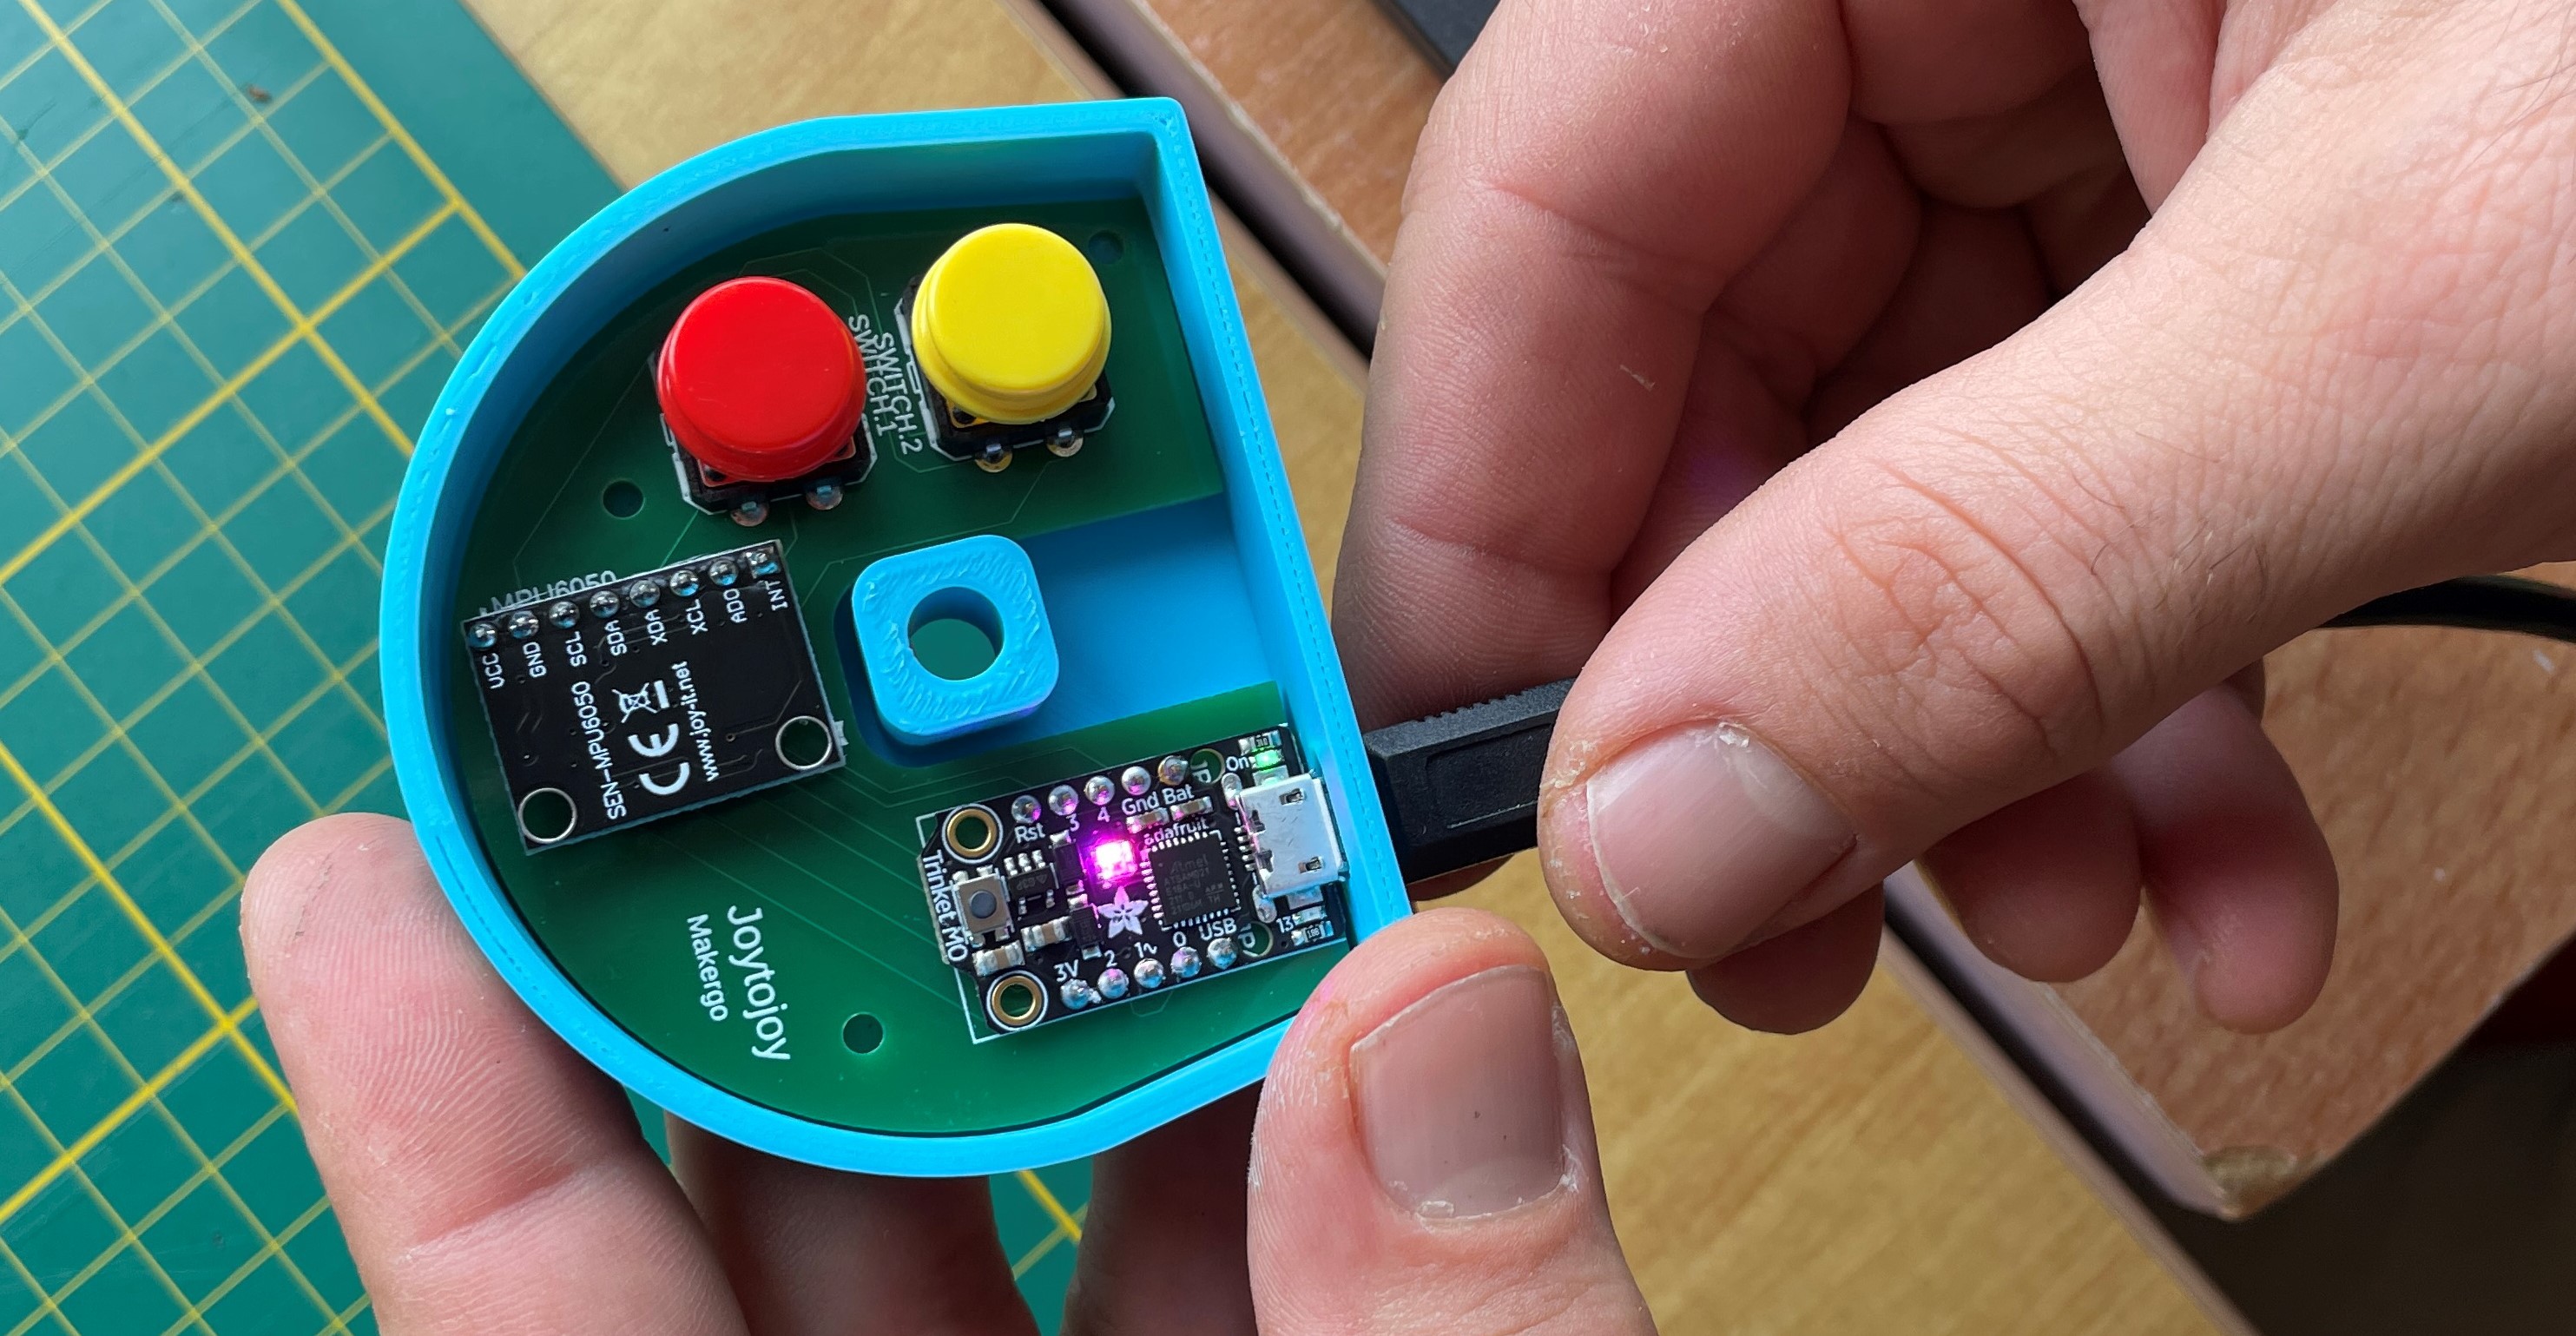
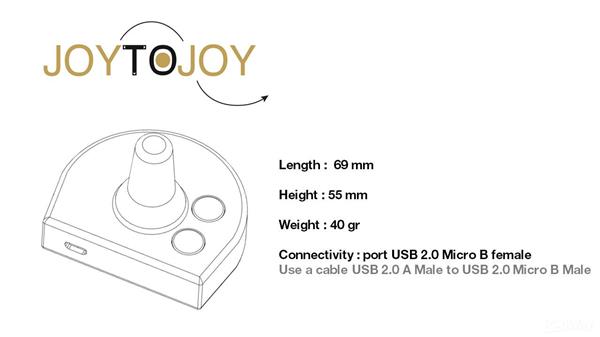
Connect the usb cable : Micro B Male on the Trinket and USB 2.0 Male in the PC
In the arduino's IDE, open the arduino sketch Joytostick_TRINKET_M0_v2.ino
Be sure to set the USB Stack to TinyUSB
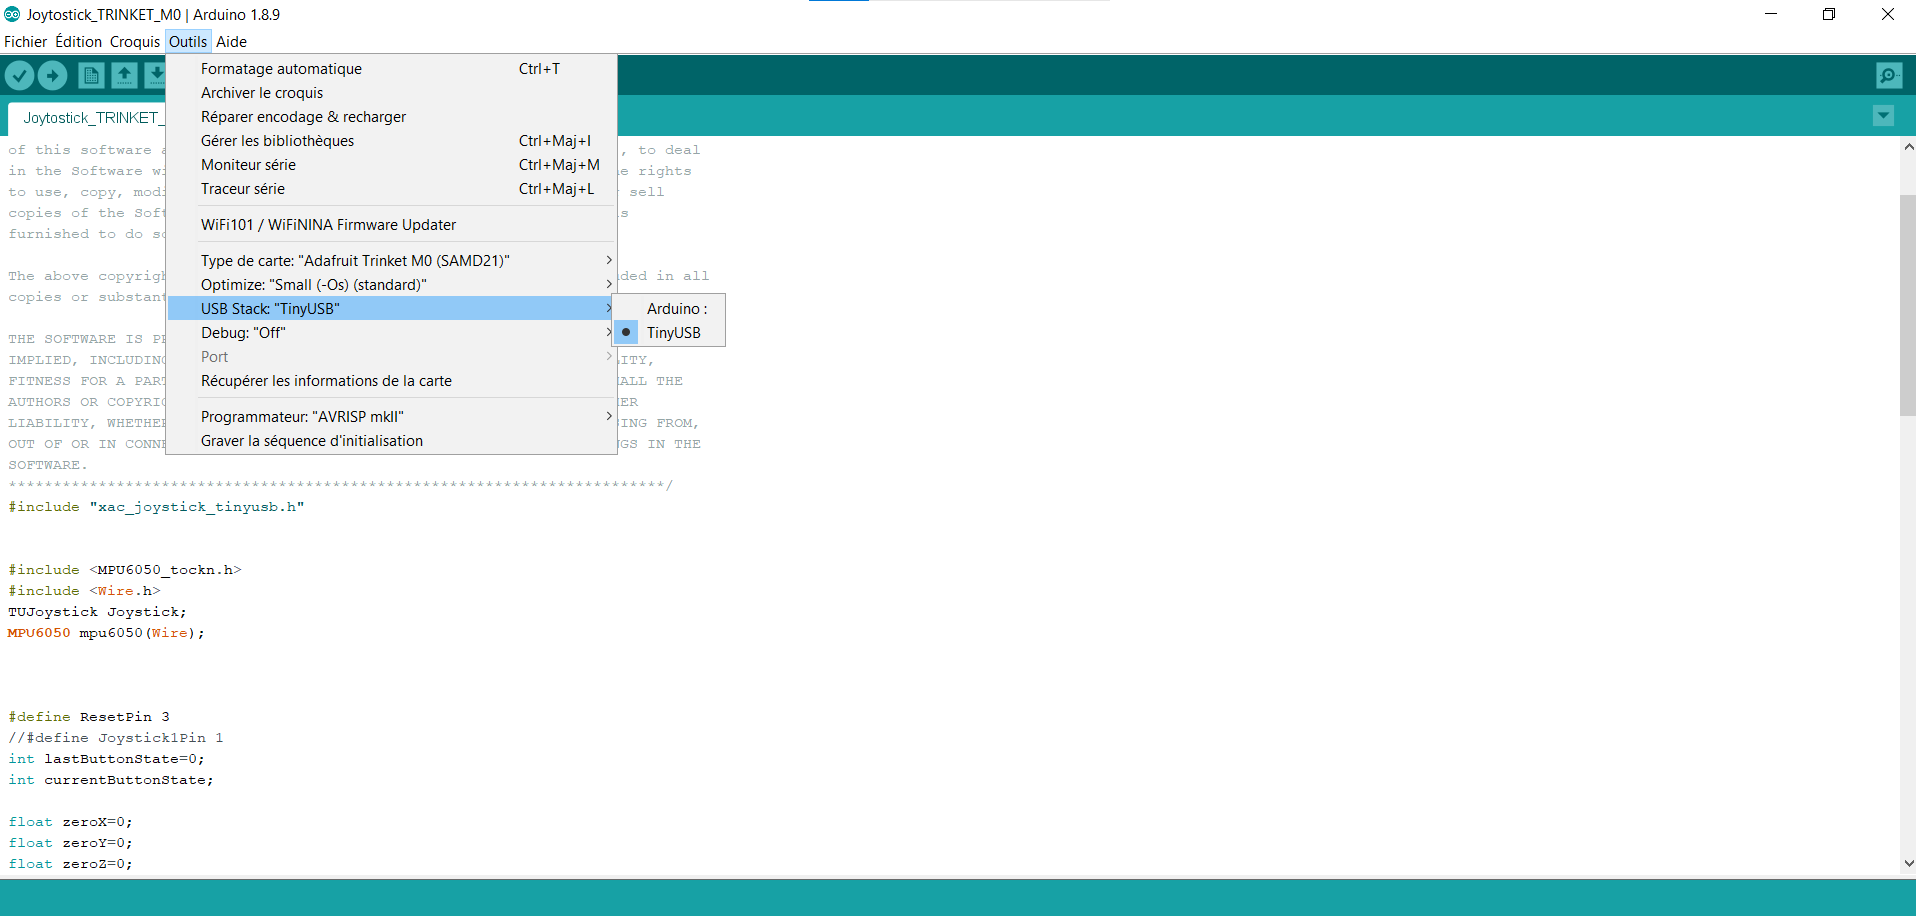
Upload the sketch to the Trinket.
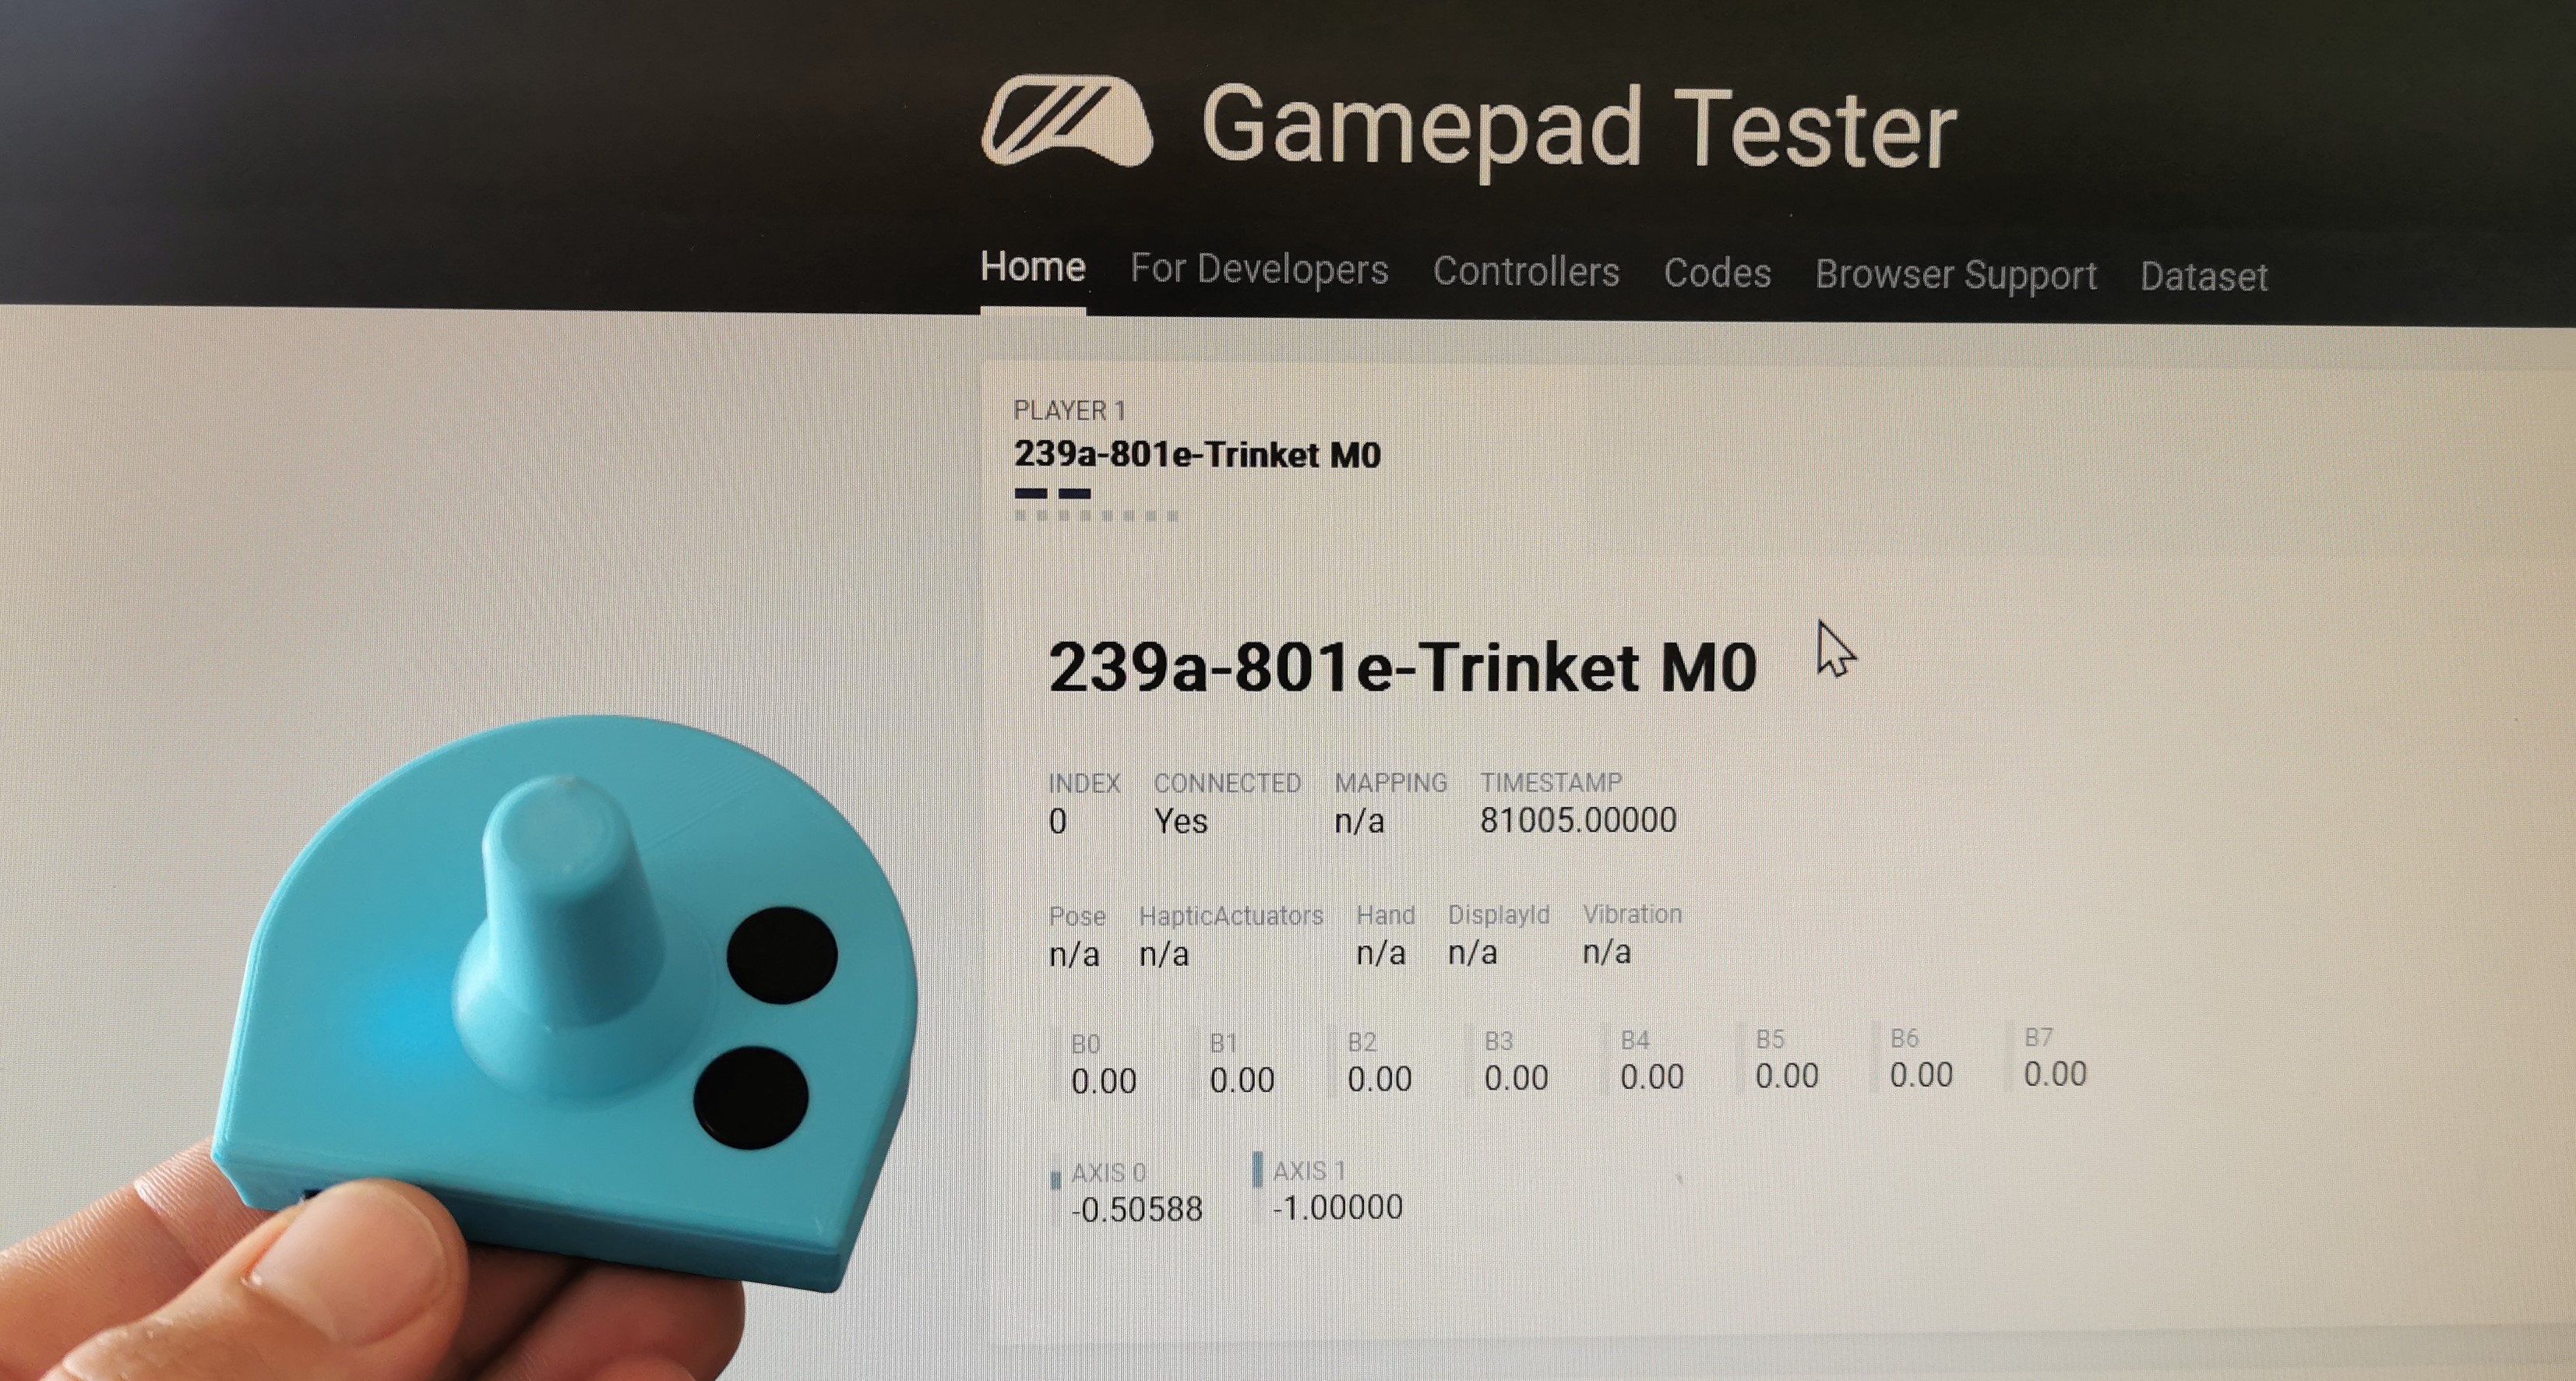
Check it proper functionning by using Gamepad tester website.
The values corresponding to AXIS 0 and AXIS 1 will vary according to the movements of the device, it means it works.
All that remains before playing is to install the box on a wheelchair controller
FOR A MOUSE:
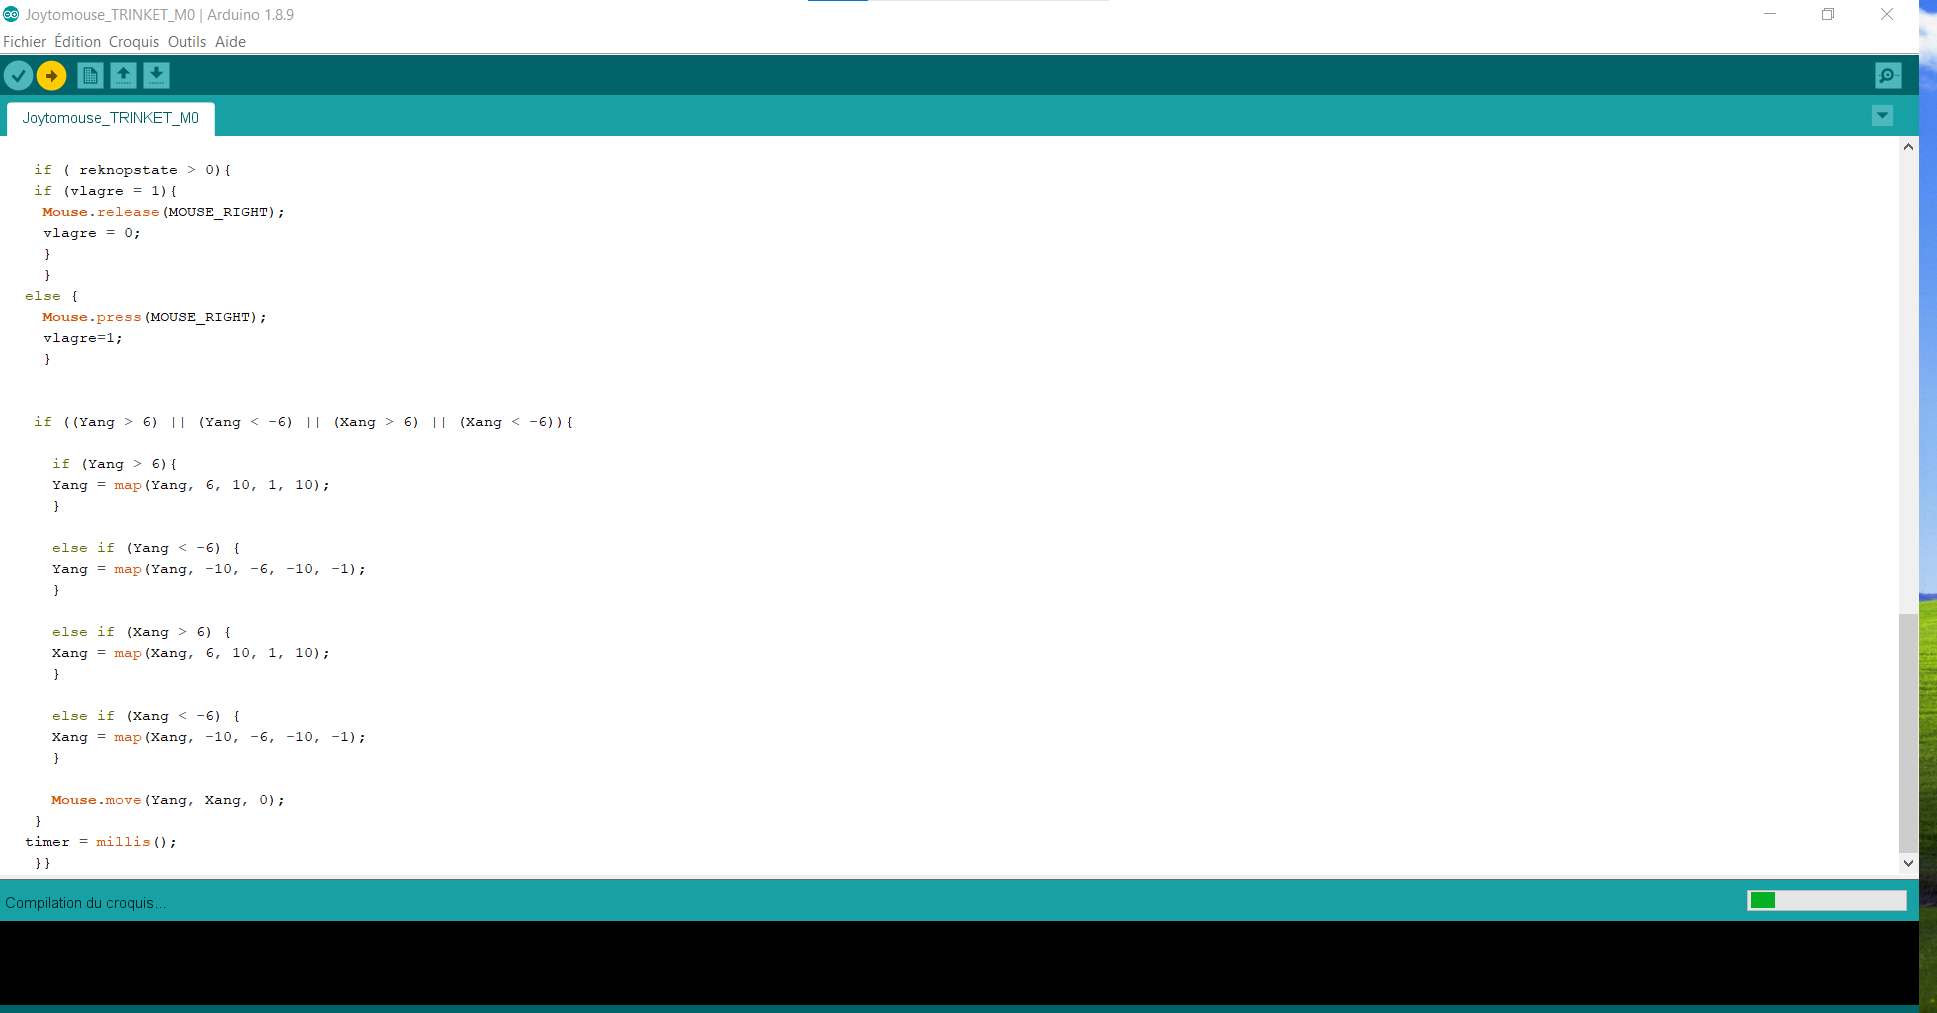
Select the arduino sketch in the files project : Joytomouse_TRINKET_M0_v2.ino
Download the MPU6050_light library in the library manager of the arduino software.
Upload the program to the Trinket
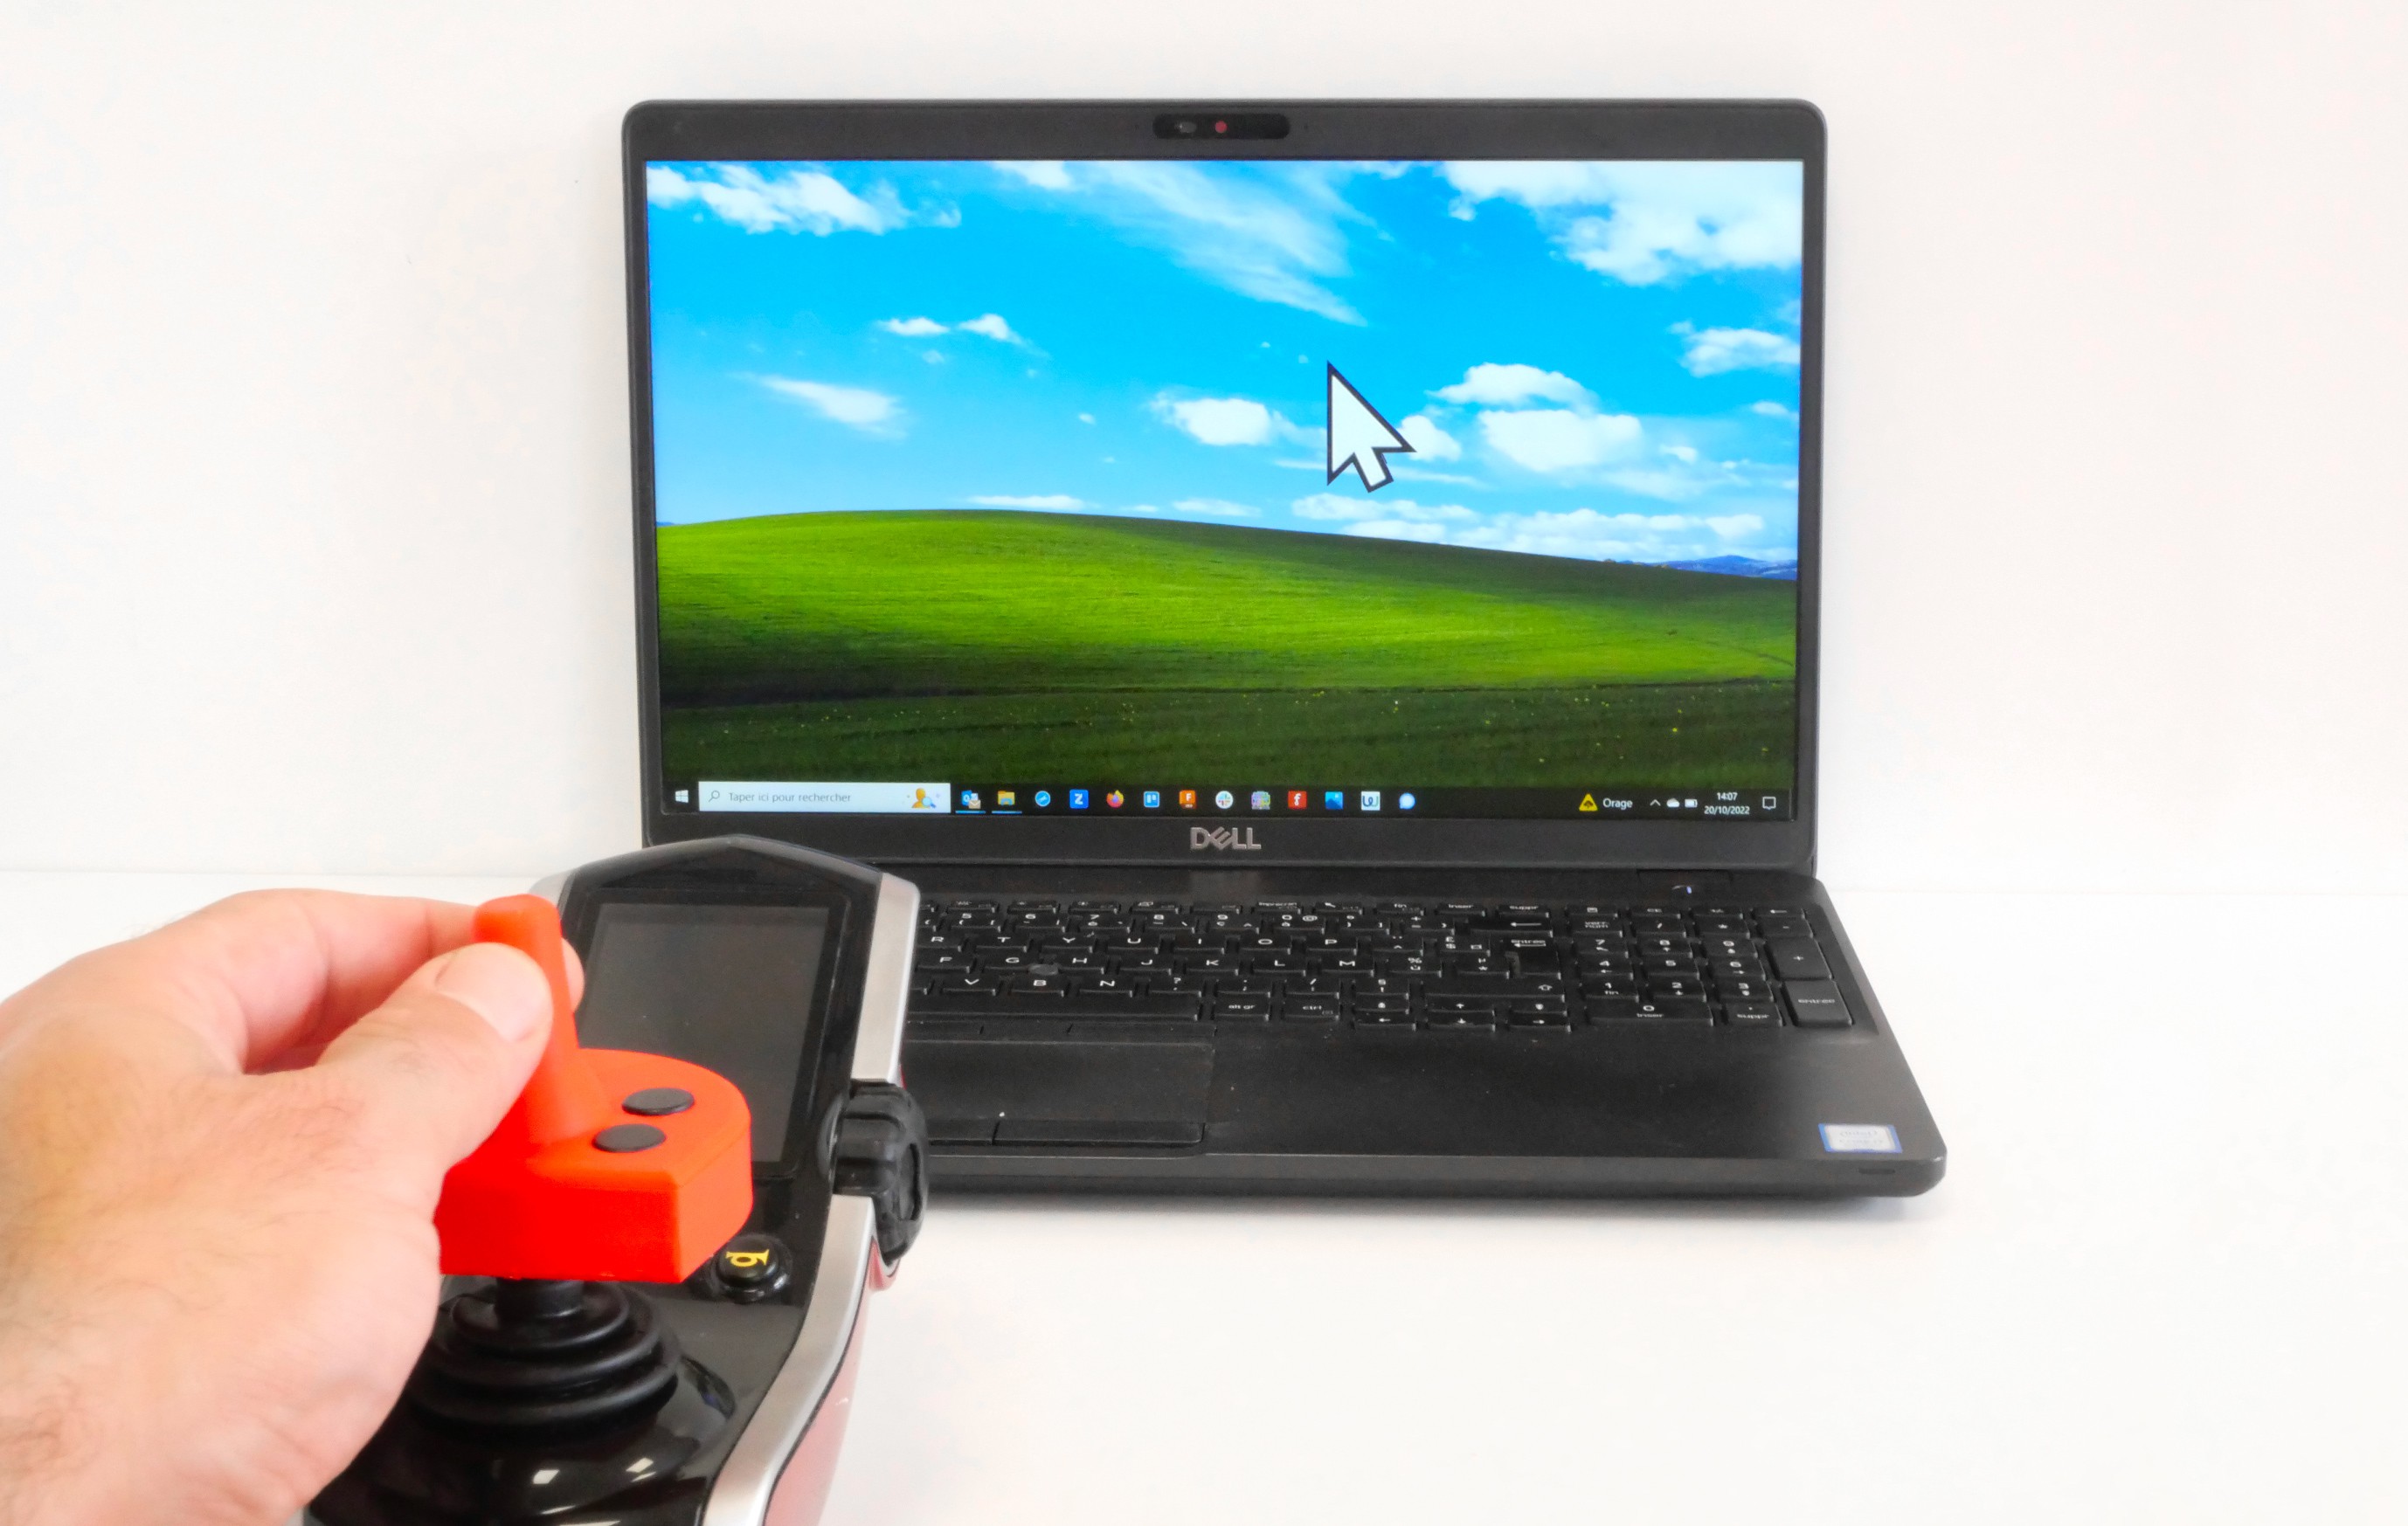
We can check its proper functioning by connecting the joystick to a PC (windows, linux, MACOS, or a smartphone)
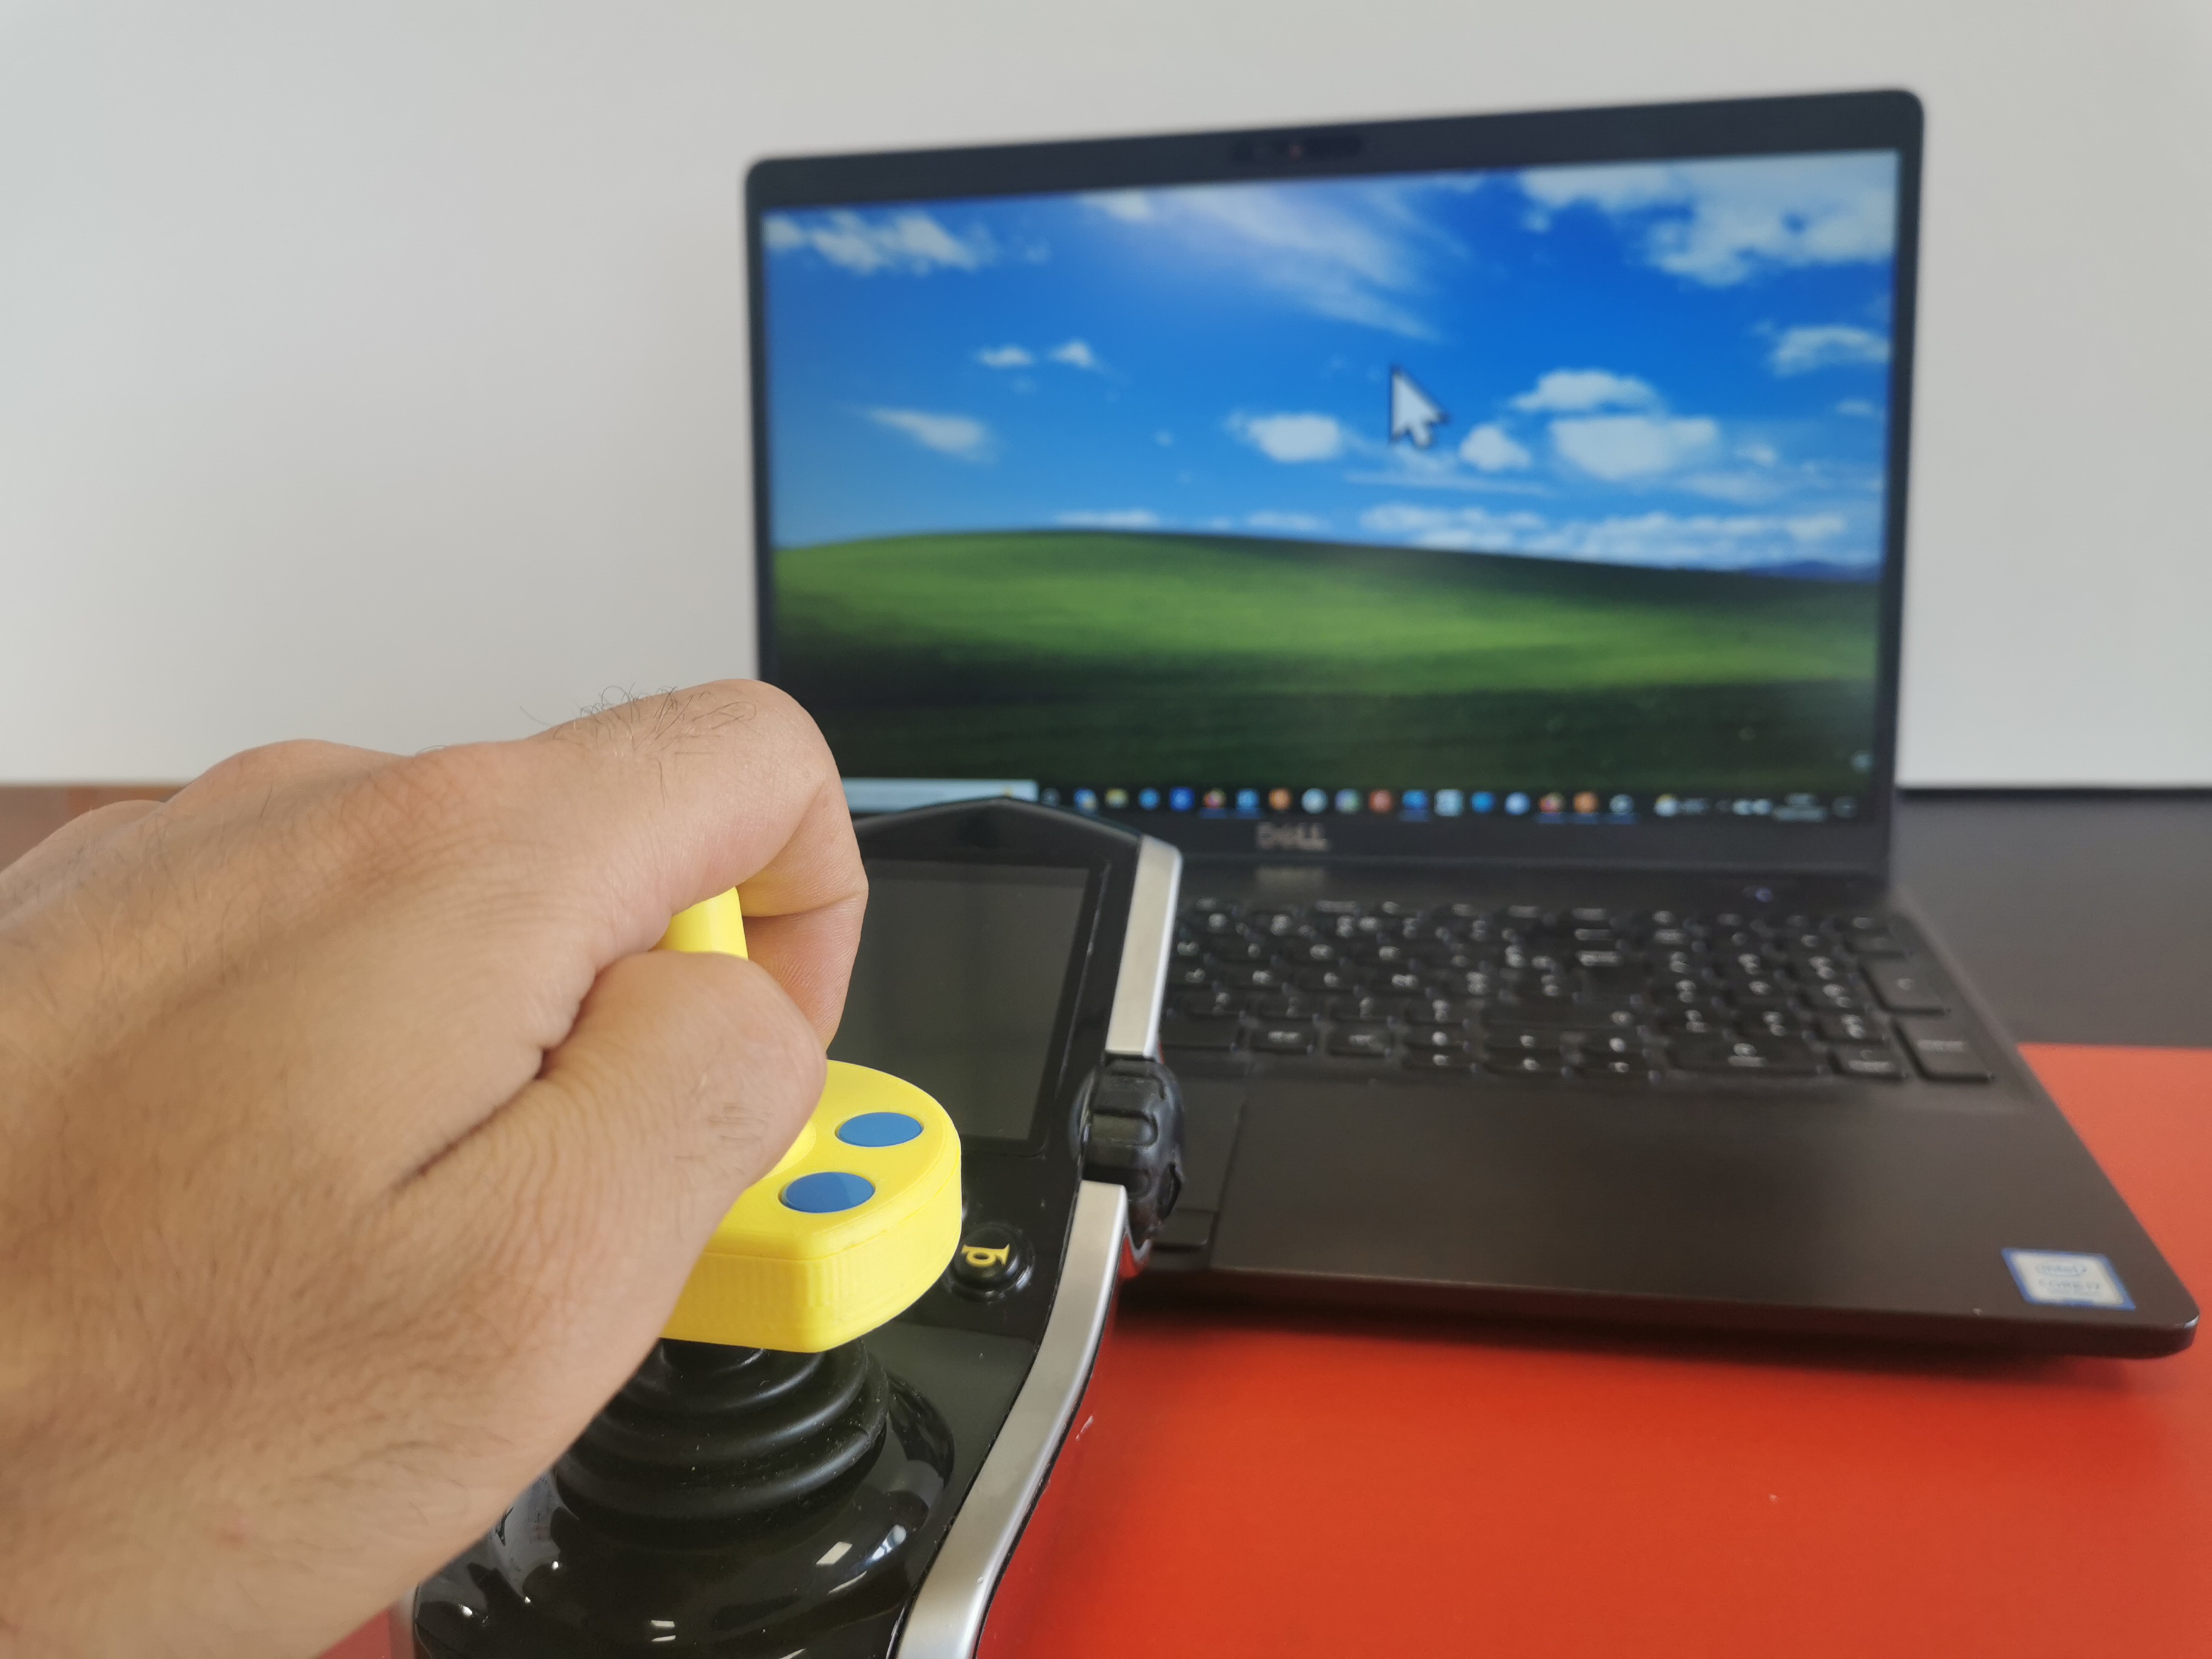
The device is recognized as a mouse device and works without further manipulation. The movements of the box move the cursor on the screen and the buttons correspond to left and right clicks.
Step 6 : Test and Use
JOYTOSTICK:
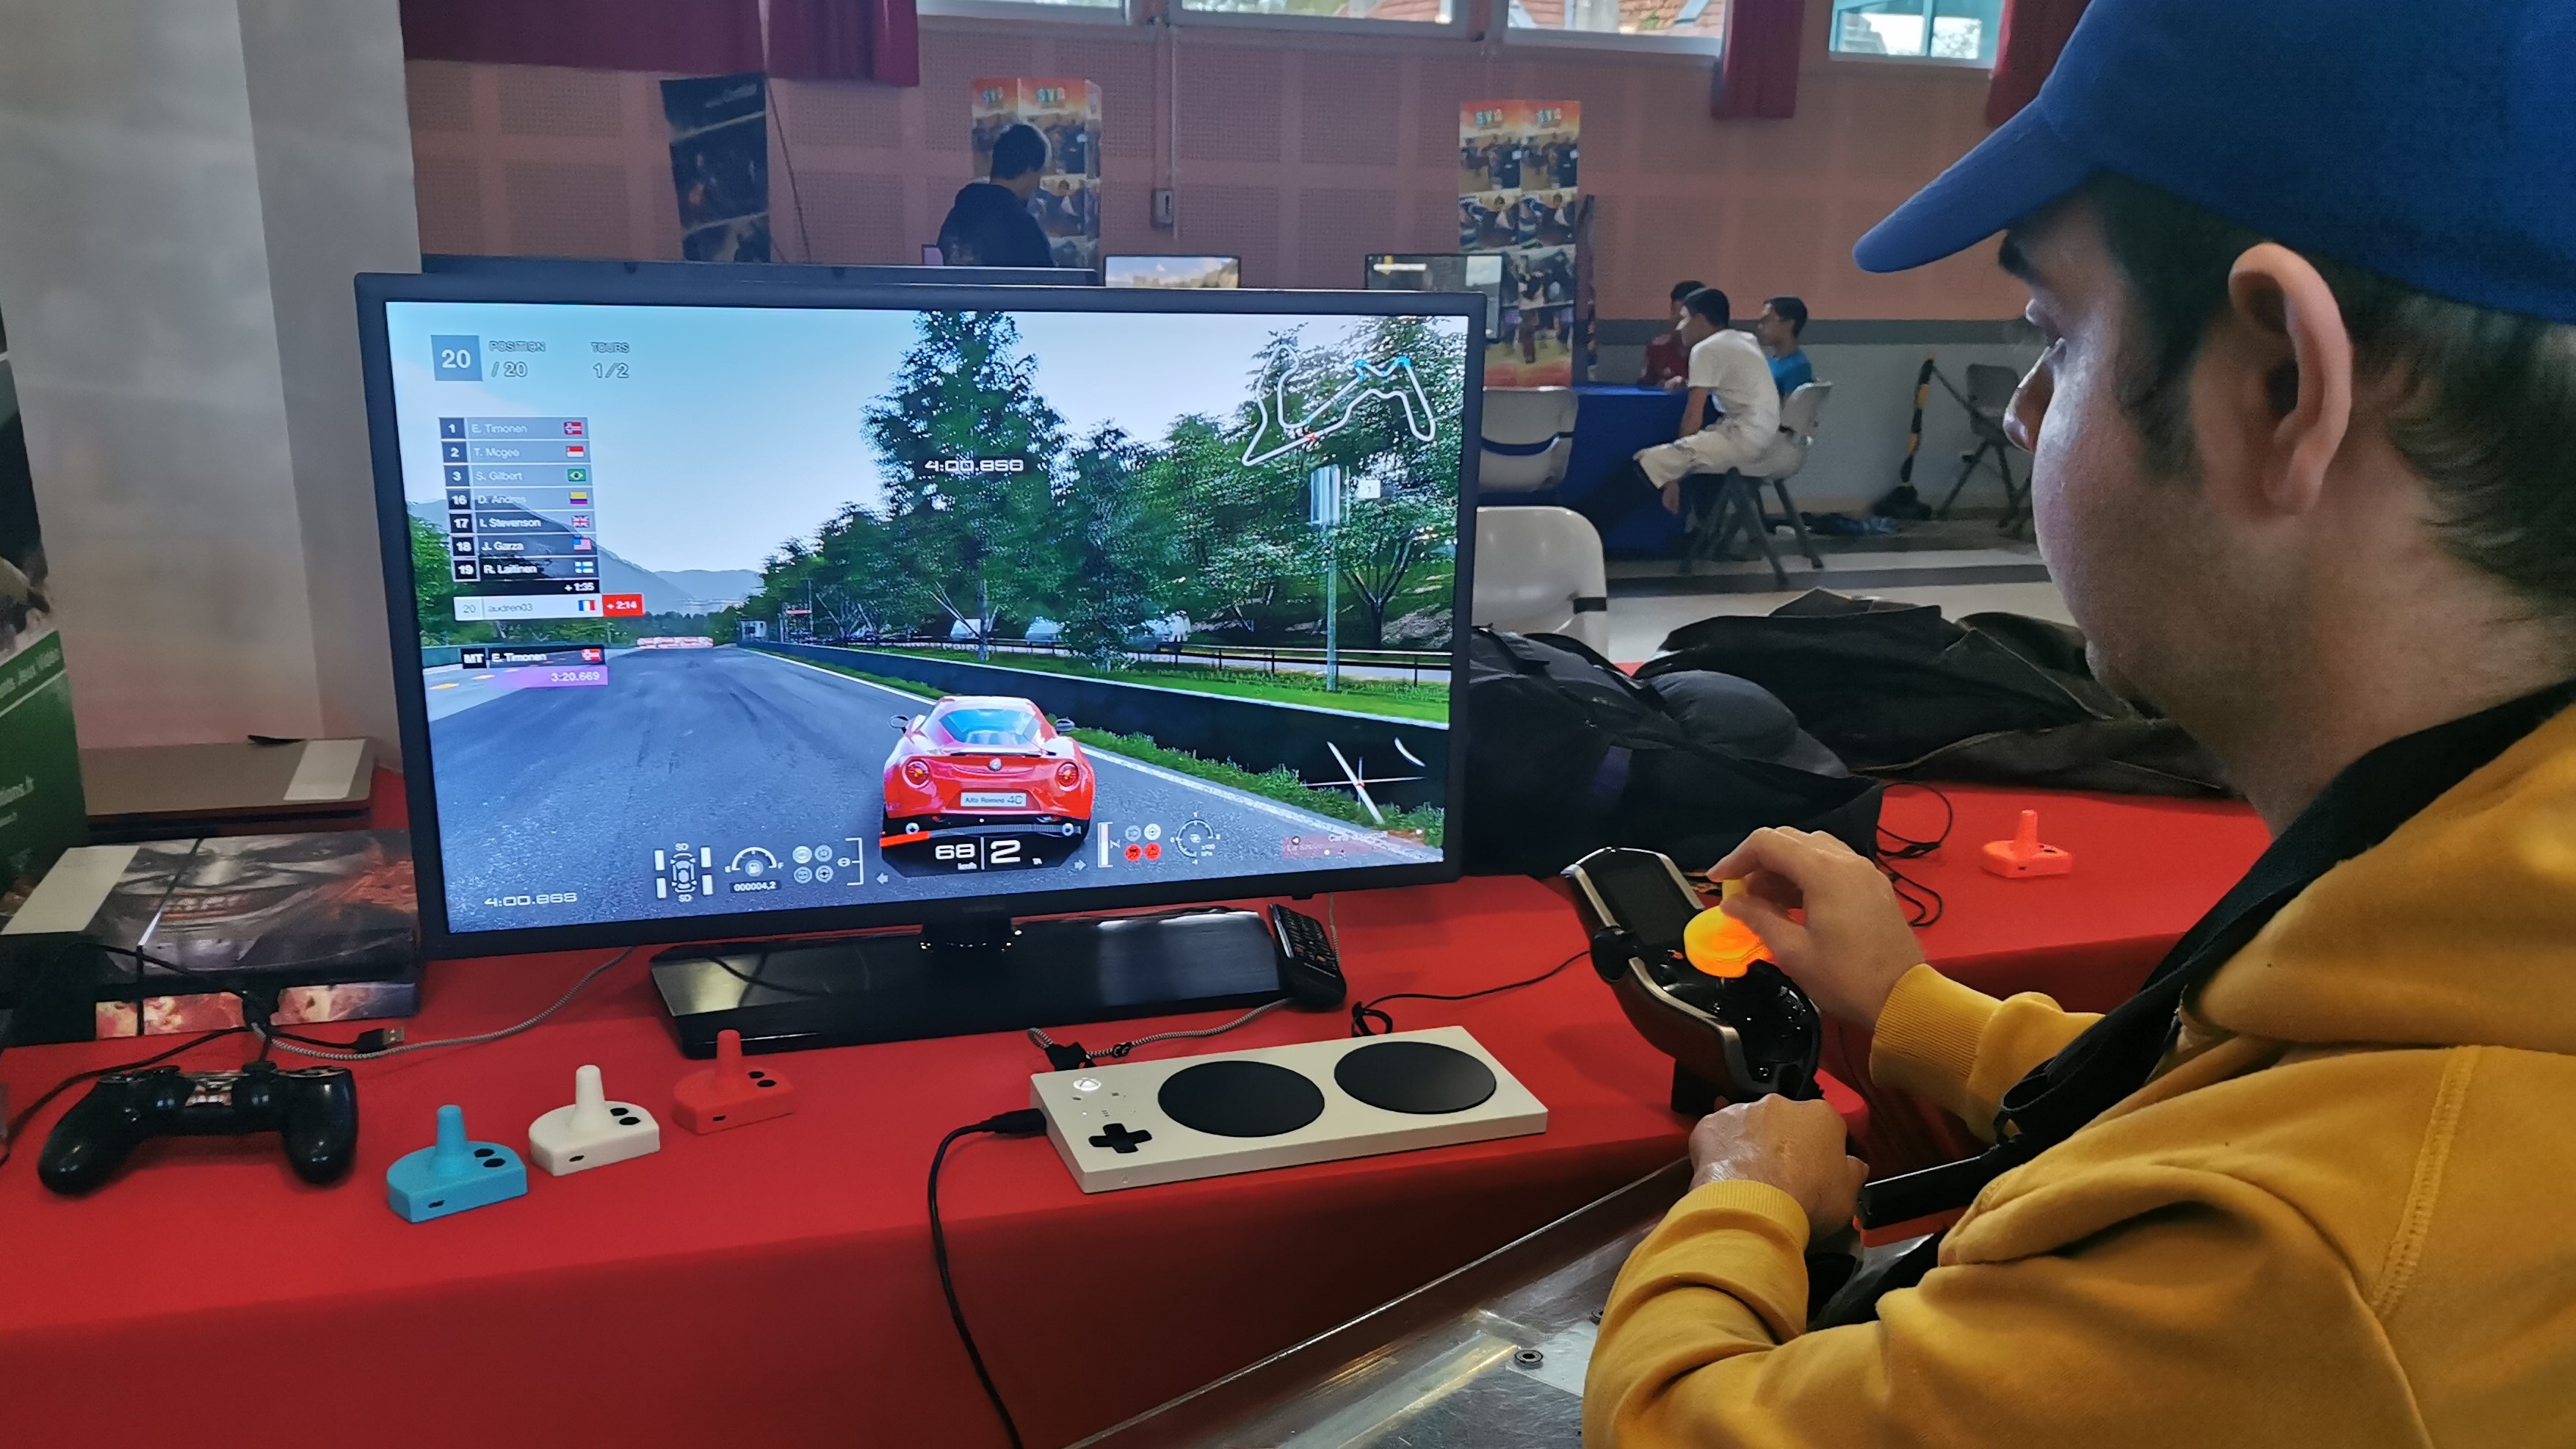
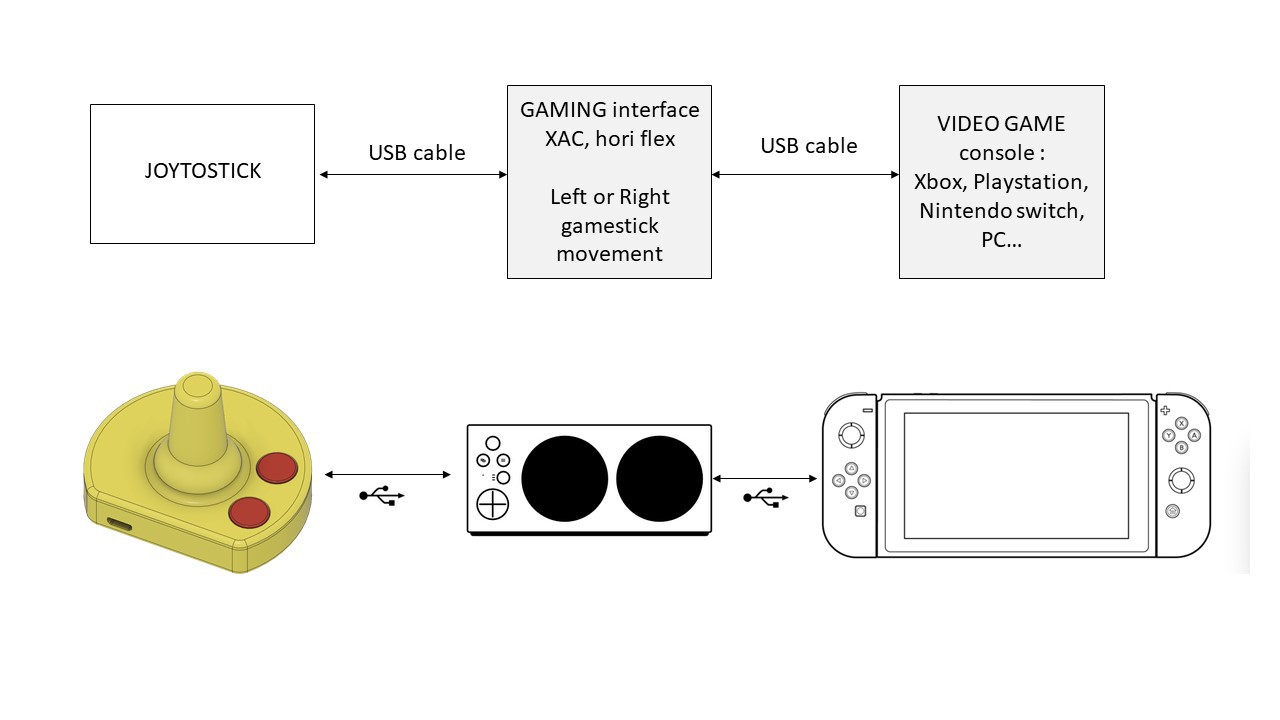
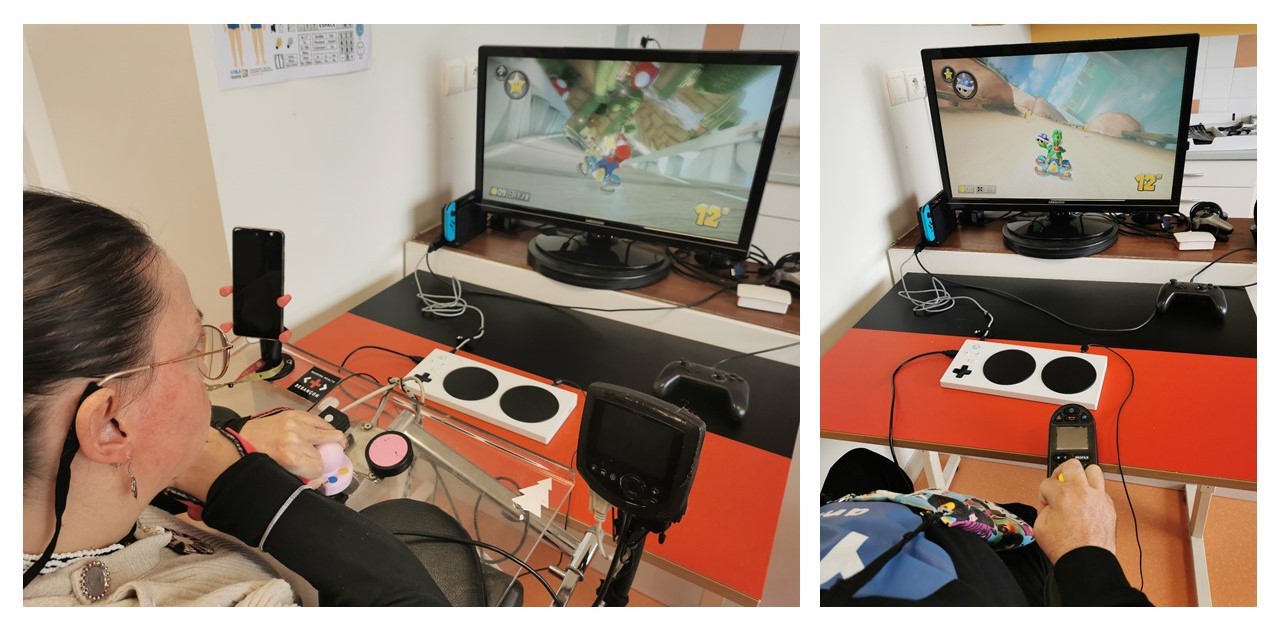
Joystostick is design to play through a video game accessibility interface. We have test it with an XBOX Adaptive controller (XAC) from Microsoft.
- Set up :
We need to plug the device into a USB port for an analog stick on the XAC (we chose the left one to control movement once in game), then connect the XAC to the console
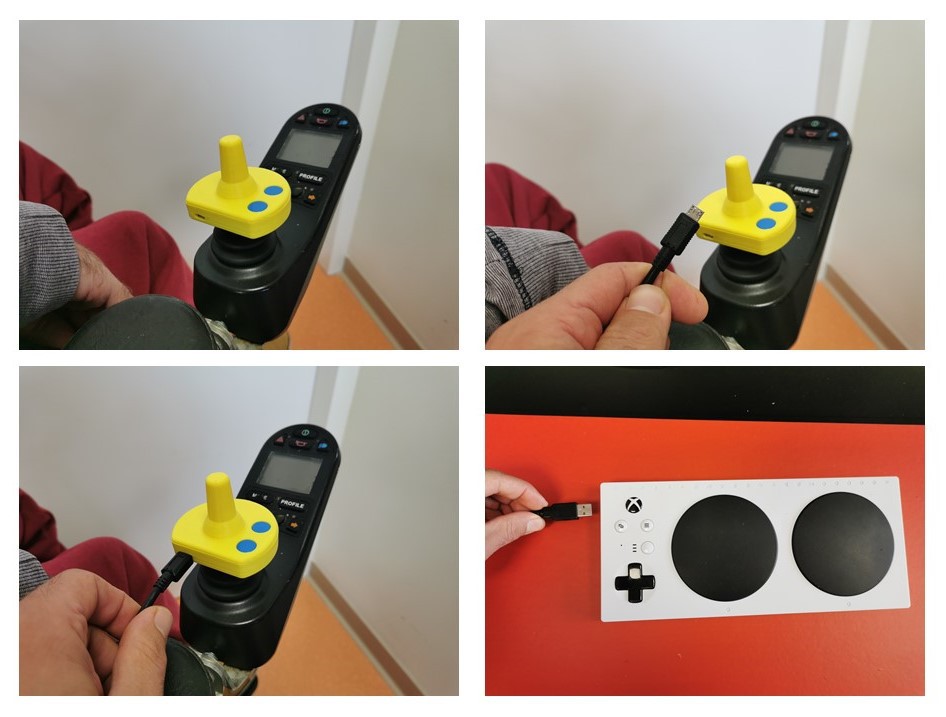
- Use :
Movements made on the joystick reproduce the movements of the stick in the video game. This allows navigation in the menus and the use of movements in game (character, vehicle…)
The red button is use to calibrate the starting position by taking a reference position for triggering the accelerometer.
To complete the set up, we use switches plugged into the XAC to activate other buttons necessary for games control.
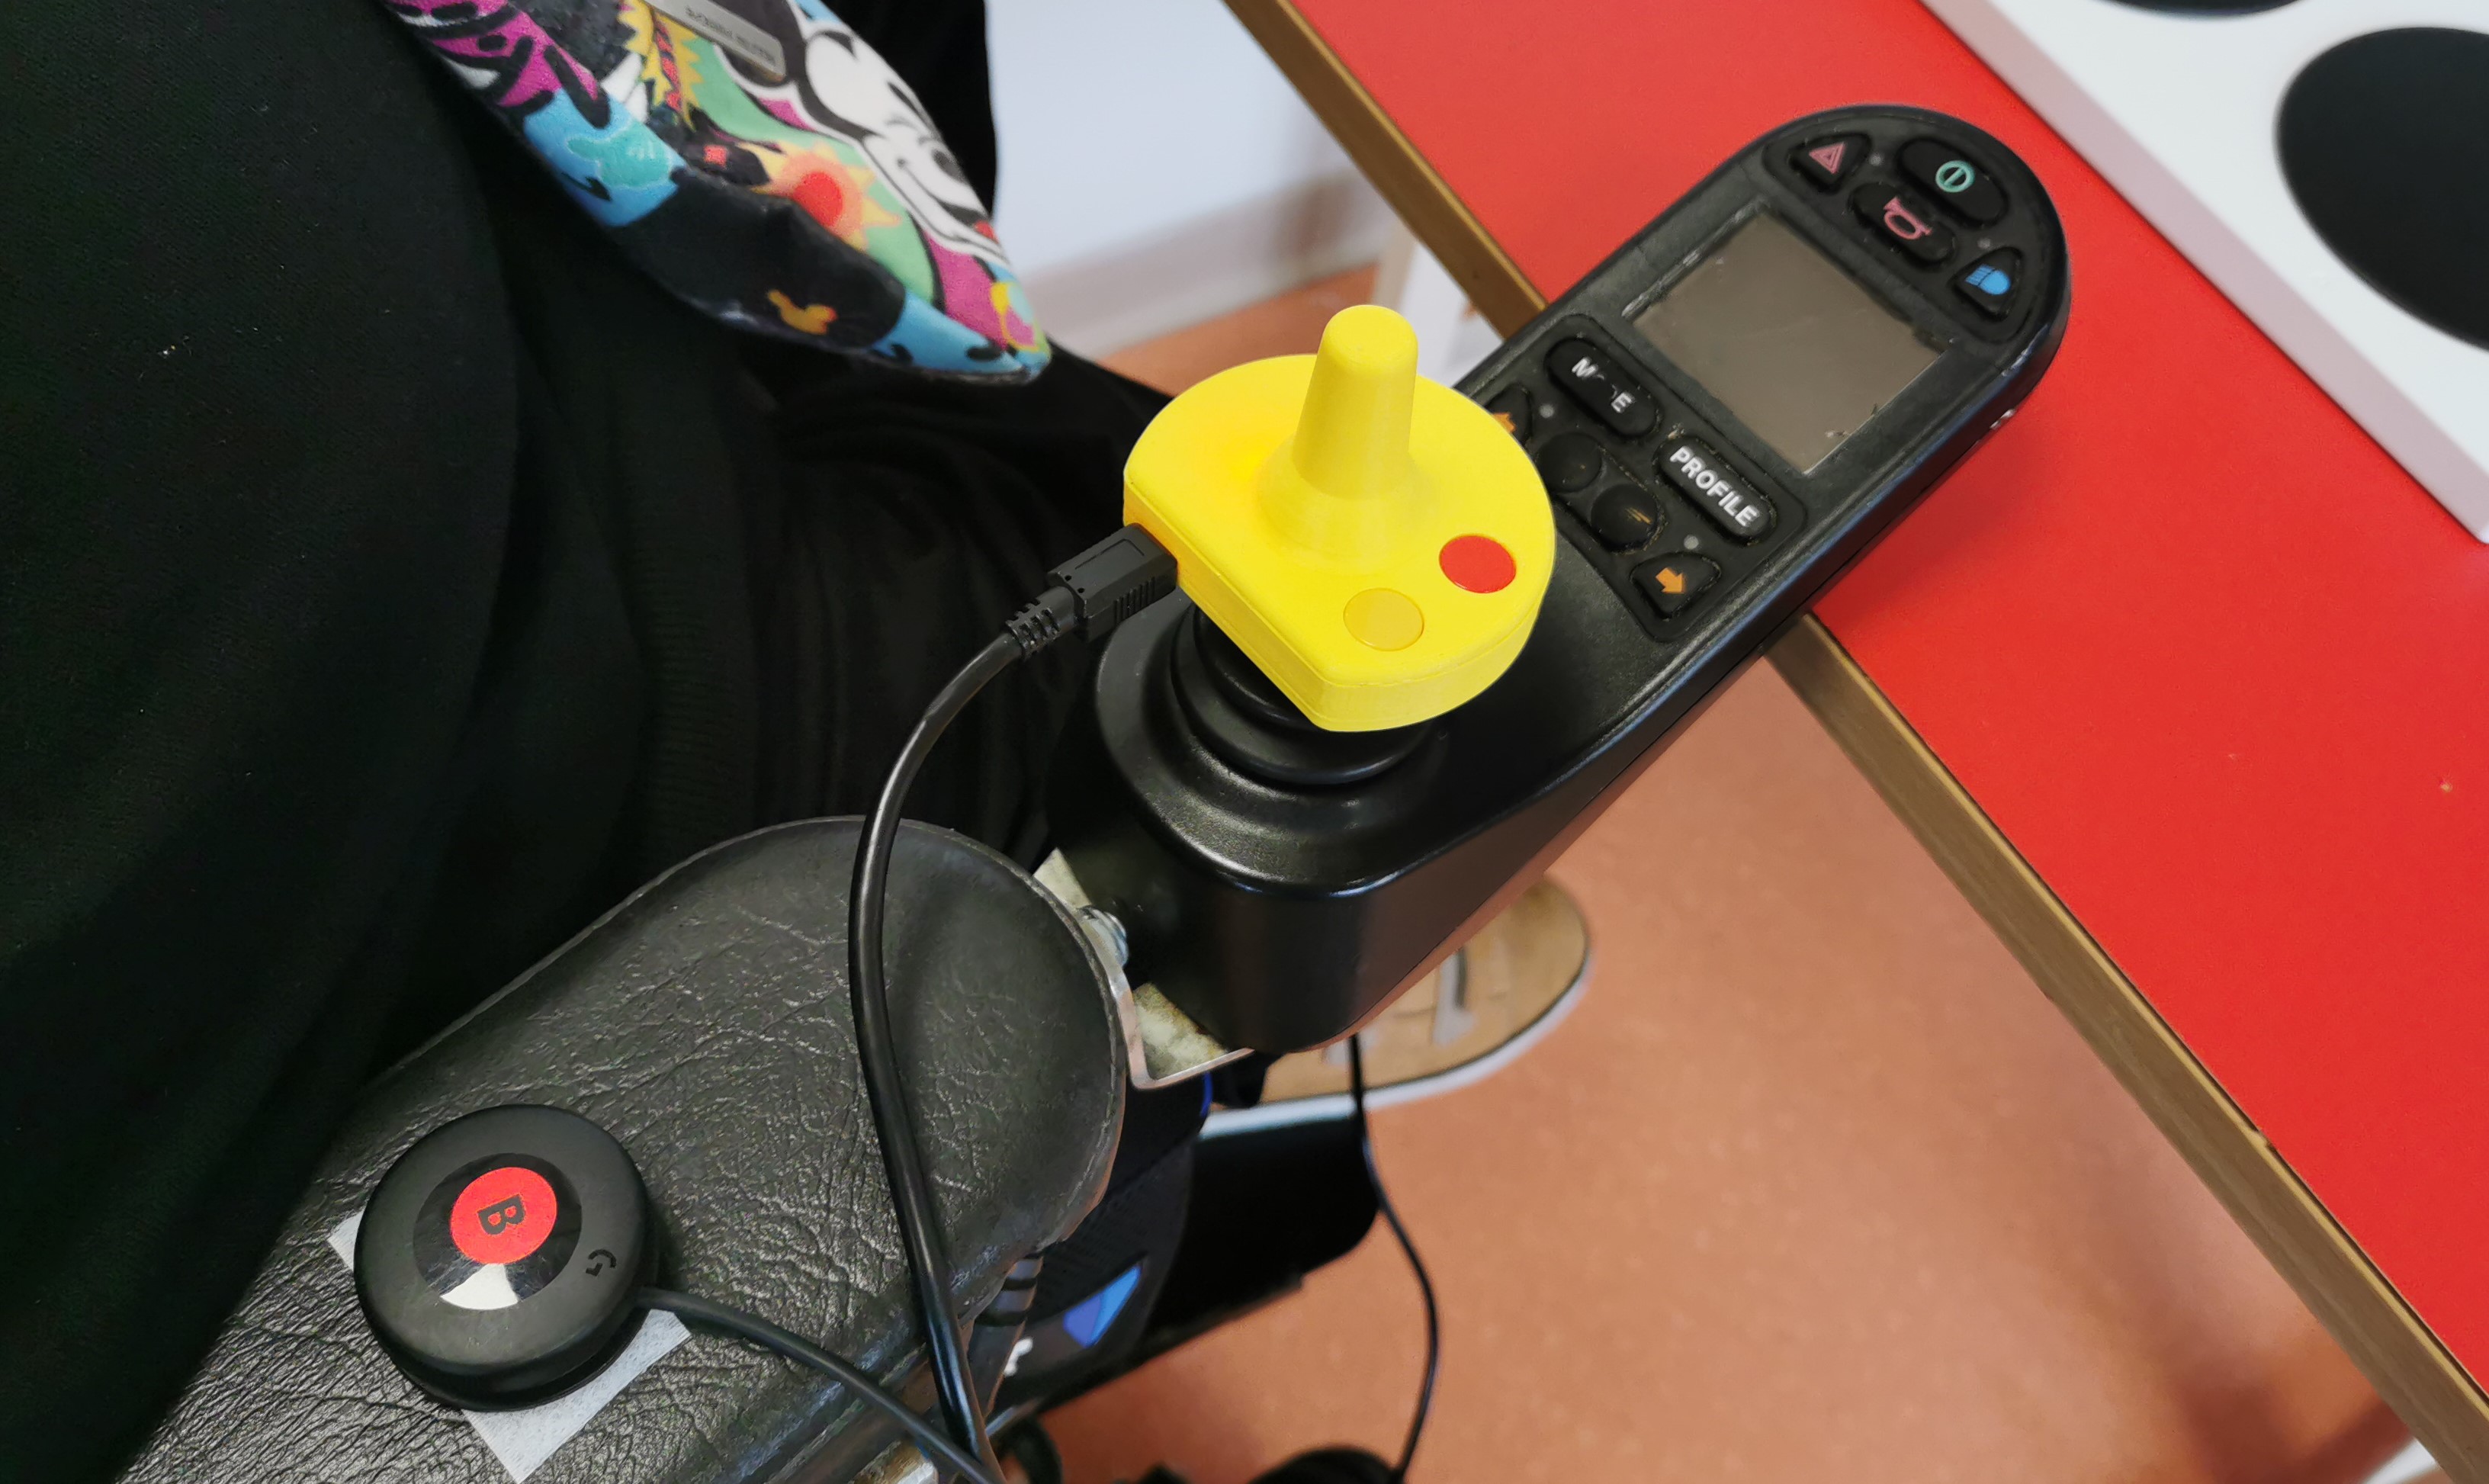
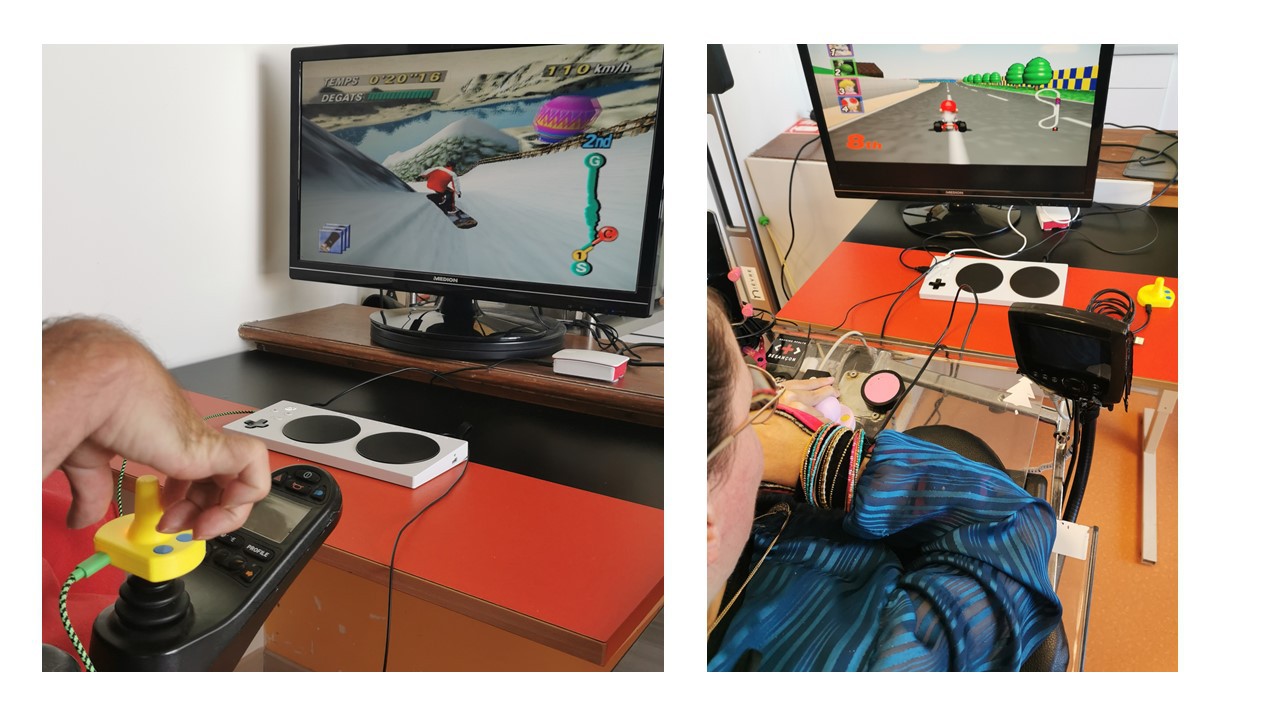
It works perfectly with a retrogaming system on Raspberrypi, for example with Recalbox
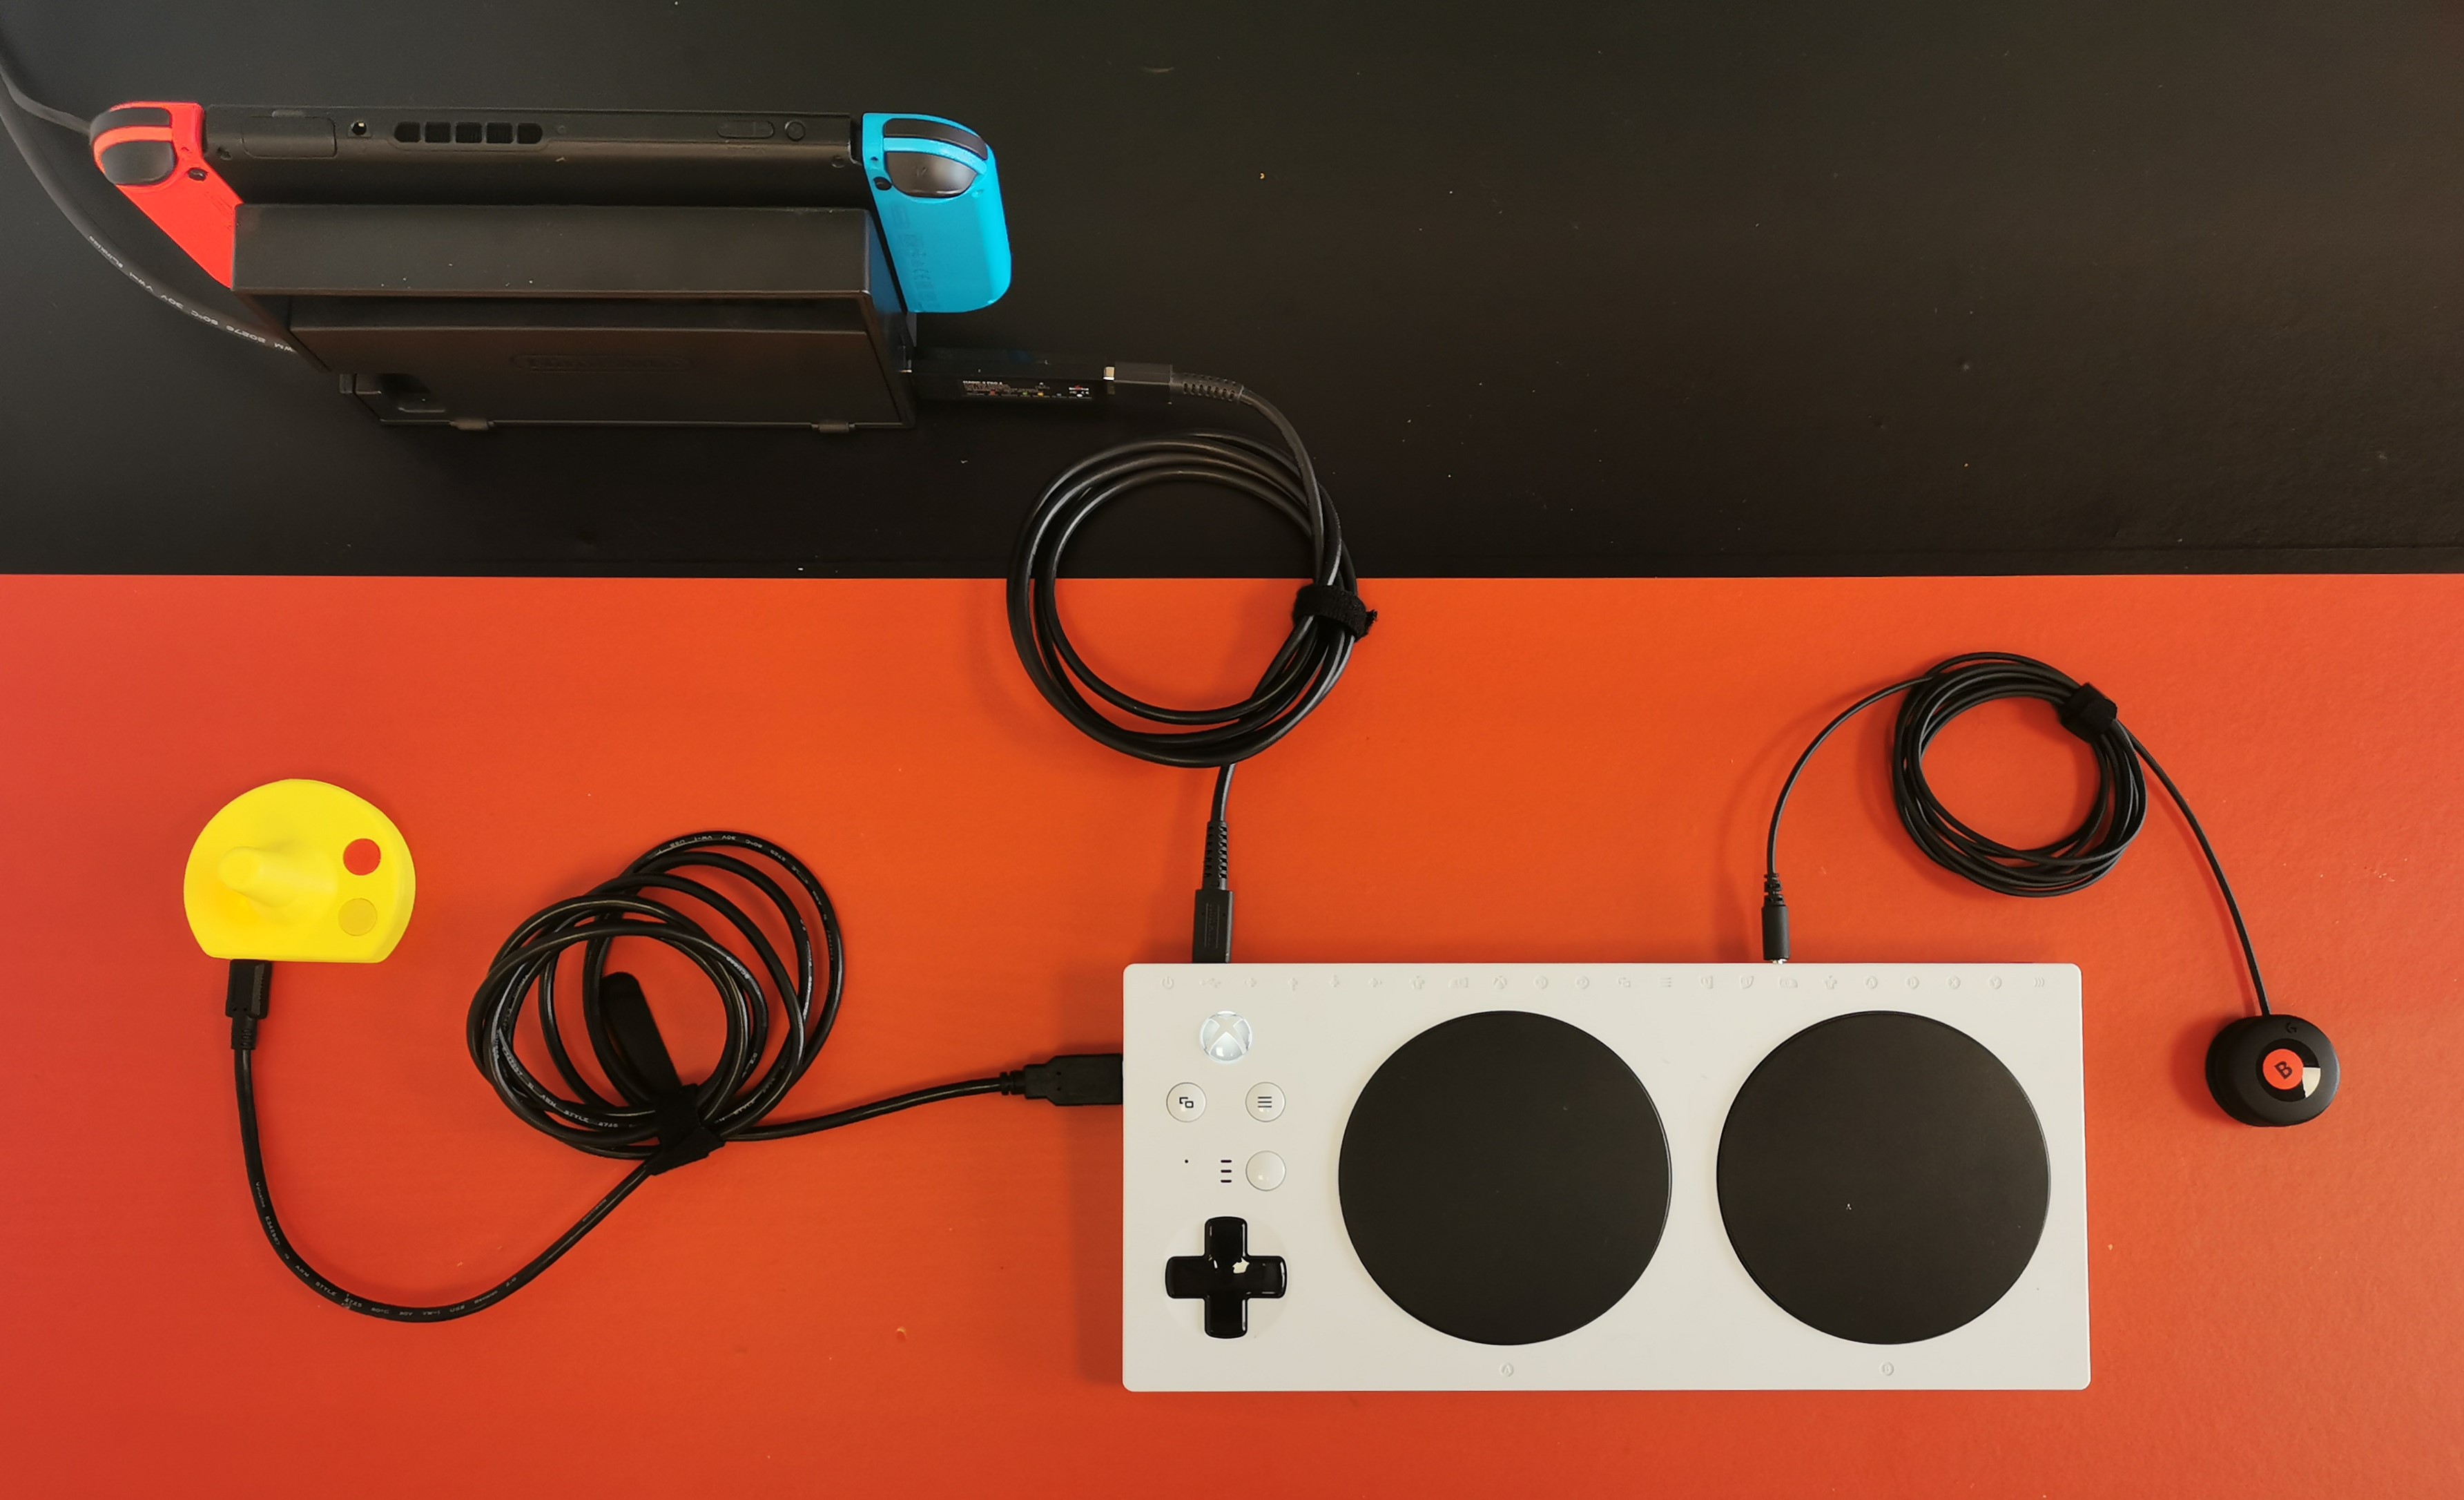
And on Nintendo Switch with an adapter placed between the XAC and the console. We used the Mayflash Magic S pro 2 which allows you to connect almost any controller to any console.
JOYTOMOUSE :
- Set up :
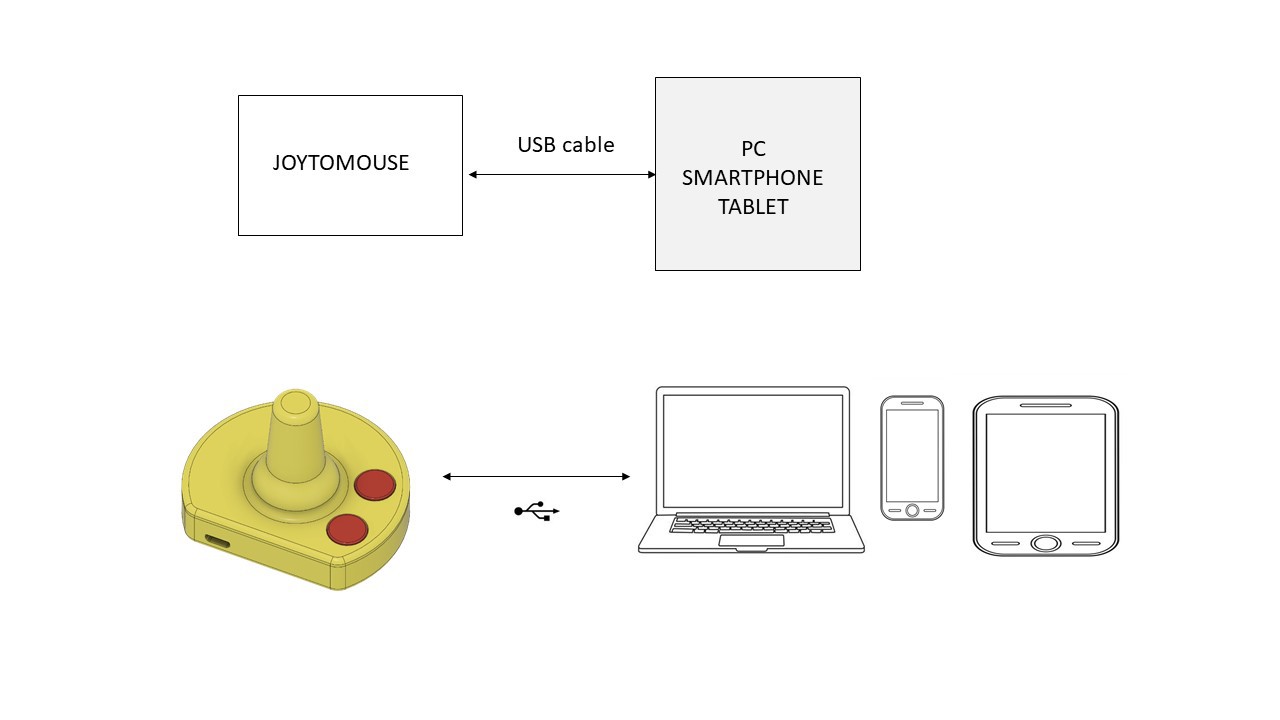
The device works very easily on PC, smartphone and tablet.
Just have to connect the box on the device to control with an USB cable
Joysticks movements allow to control the cursor on the screen, the buttons act as mouse clicks left and right.
Licence
Creative Commons Attribution-NonCommercial-ShareAlike (CC-BY-NC-SA)
Unless otherwise noted attached to a file, almost all parts of this work, code files, design files, and documentation are licensed under a Creative Commons Attribution-NonCommercial-ShareAlike 4.0 International.

This license allows reusers to distribute, remix, adapt, and build upon the material in any medium or format for noncommercial purposes only, and only so long as attribution is given to the creator. If you remix, adapt, or build upon the material, you must license the modified material under identical terms.
Joytojoy bring game stick and mouse capabilities to your power wheelchair
*PCBWay community is a sharing platform. We are not responsible for any design issues and parameter issues (board thickness, surface finish, etc.) you choose.

Raspberry Pi 5 7 Inch Touch Screen IPS 1024x600 HD LCD HDMI-compatible Display for RPI 4B 3B+ OPI 5 AIDA64 PC Secondary Screen(Without Speaker)
BUY NOW
ESP32-S3 4.3inch Capacitive Touch Display Development Board, 800×480, 5-point Touch, 32-bit LX7 Dual-core Processor
BUY NOW
Raspberry Pi 5 7 Inch Touch Screen IPS 1024x600 HD LCD HDMI-compatible Display for RPI 4B 3B+ OPI 5 AIDA64 PC Secondary Screen(Without Speaker)
BUY NOW- Comments(1)
- Likes(0)
 Log in to post comments.
 Mitch AltmanFeb 04,20230 CommentsReply
- 2 USER VOTES
- YOUR VOTE 0.00 0.00
- 1
- 2
- 3
- 4
- 5
- 6
- 7
- 8
- 9
- 10
- 1
- 2
- 3
- 4
- 5
- 6
- 7
- 8
- 9
- 10
- 1
- 2
- 3
- 4
- 5
- 6
- 7
- 8
- 9
- 10
- 1
- 2
- 3
- 4
- 5
- 6
- 7
- 8
- 9
- 10

-
10design
-
10usability
-
10creativity
-
10content

-
8design
-
7usability
-
8creativity
-
8content
 More by Julien OUDIN
-
-
-
-
Modifying a Hotplate to a Reflow Solder Station
1034 1 6 -
MPL3115A2 Barometric Pressure, Altitude, and Temperature Sensor
559 0 1 -
-
Nintendo 64DD Replacement Shell
458 0 2 -
V2 Commodore AMIGA USB-C Power Sink Delivery High Efficiency Supply Triple Output 5V ±12V OLED display ATARI compatible shark 100W
1301 4 2 -
How to measure weight with Load Cell and HX711
778 0 3


