|
|
STM32F469 DISCOVERY |
x 1 | |
|
|
ESP32-DEVKITC-VEEspressif Systems
|
x 1 | |

|
CLS0201MPCUI Devices
|
x 1 |
|
|
RT-Thread IoT OS |
|
|
|
STMicroelectronics STM32CubeMX |
|

|
Visual Studio Code |
|
|
|
Engines of Our Ingenuity |
|
|
|
ezgif.com |
|
|
|
remove.bg |
|
|
|
LVGL |
|

|
Soldering iron |
|

|
Soldering Iron Wire Welding Lead Roll |
Using RT-Thread Studio To Control ESP32 With STM32F469 Disco
Background
Long before TED Talks became popular, there was a radio program that tells the story of how our culture is formed by human creativity. That radio program, Engines of Our Ingenuity, has been featured in one of my previous projects, If The Allegations Are Not Legit, You m. AWS. t EduKit. We wanted to make a device that plays episodes with more screen space to allow for user control and for that we used STM32F469 DISCOVERY board. We didn't just want random and forward/backward navigation, we wanted to be able to jump to specific episodes and see the title and description. Also, in this project we did not use AWS so we had to figure out how to make ESP32 load large pages without crashing. Lastly, the boards had to communicate over UART.
Challenges
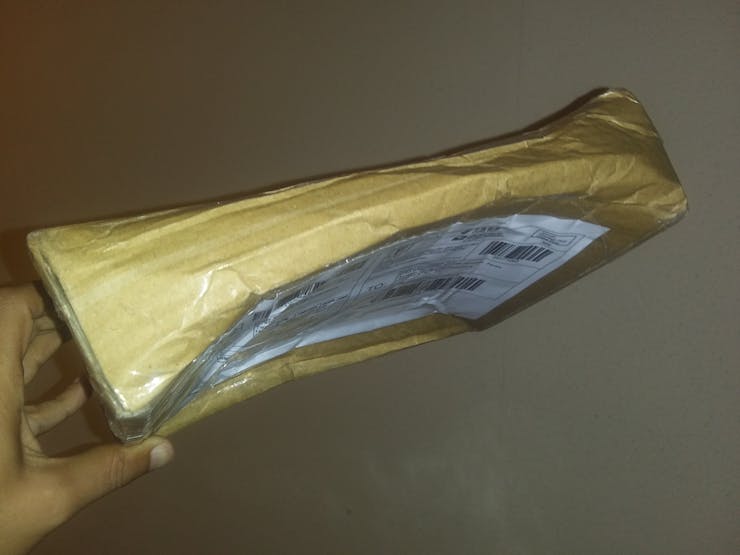
Our mail carrier used my board as booster seat. Miraculously, board still in one piece. The I2S amplifier that I ordered weeks ago has not been delivered yet. For that reason we used code from Skydive Auto Reminder - Doing More With Less to produce a lower quality audio without I2S board.
Board Support Package (BSP)
We started by downloading and extracting https://github.com/RT-Thread/rt-thread/archive/refs/heads/master.zip to get the latest BSP. According to the User Manual, we have four USART ports and, four UART ports on that board, however, only USART3 is enabled by default. Using STM32 CubeMX, we opened %userprofile%\Downloads\rt-thread-master\rt-thread-master\bsp\stm32\stm32f469-st-disco\board\CubeMX_Config\CubeMX_Config.ioc
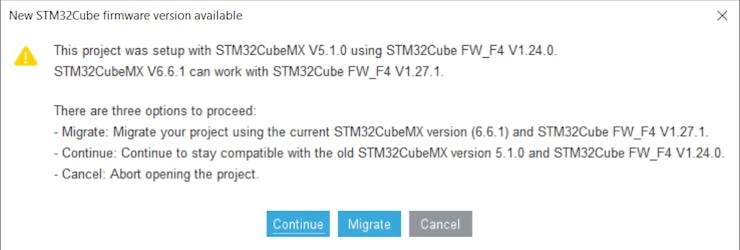
After clicking Continue, we expanded connectivity on the left pane and clicked USART6.
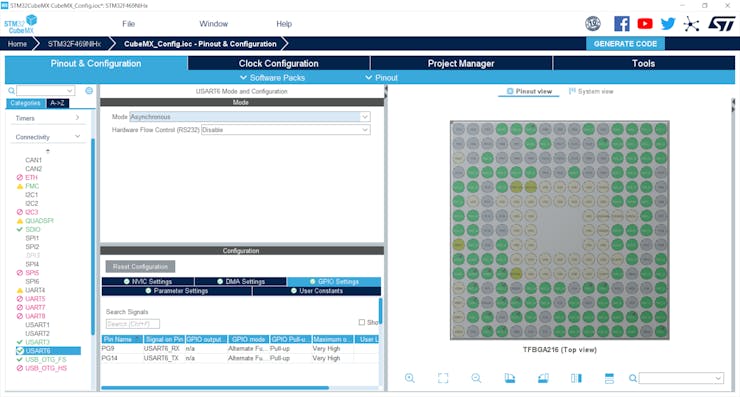
We replaced Disabled with Asynchronous in the Mode drop down menu. We then clicked Generate Code in the top right corner and closed the the application.

We located Kconfig (one folder up) and duplicated UART3 text then replaced with UART6. Now, it looks like this.
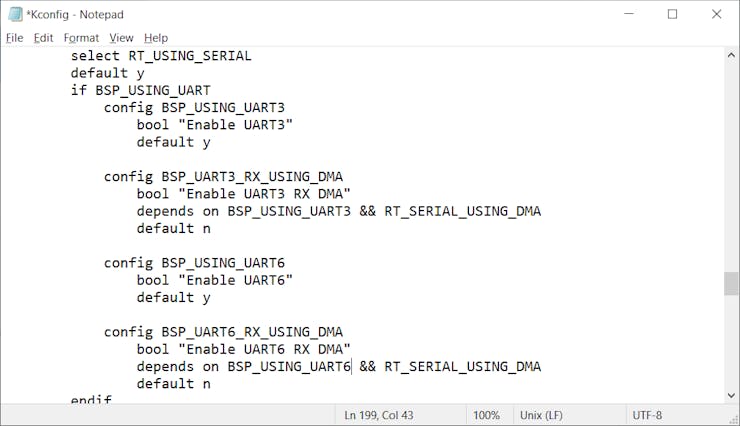
BSP is ready to be used after saving this file.
RT-Thread Studio
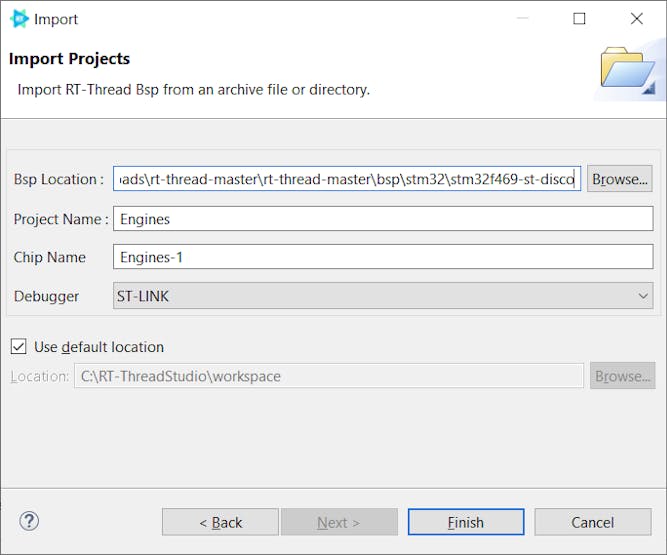
One minute into this tutorial shows how to import BSP that we just modified.
This is how our import looked.
We opened RT-Thread Settings from the left pane then clicked on the chevrons on the right.
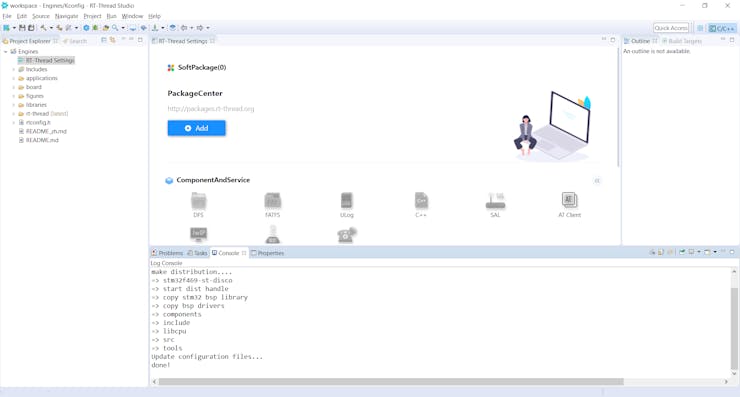
We came here to Enable LVGL for LCD which will automatically trigger all the needed toggles.

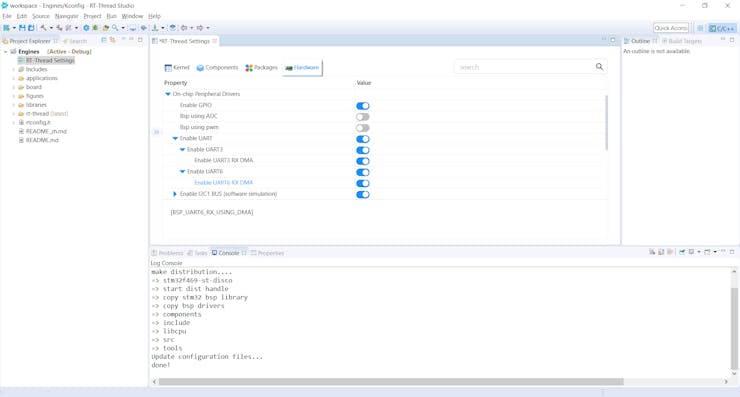
We needed to also turn on UART6 we just enabled.
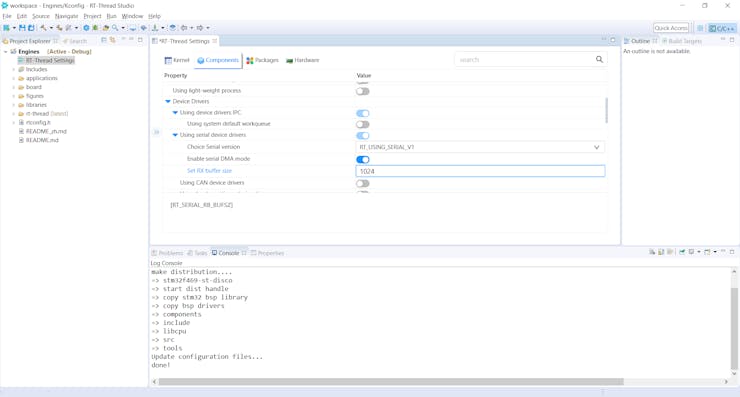
We had to increase Rx buffer size from 64 to 1024.
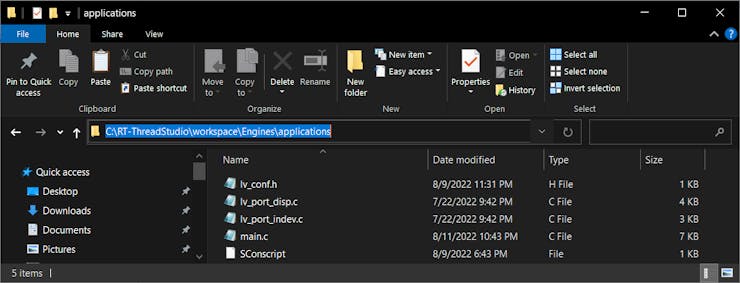
We deleted all files in applications folder then copied our files from Github.
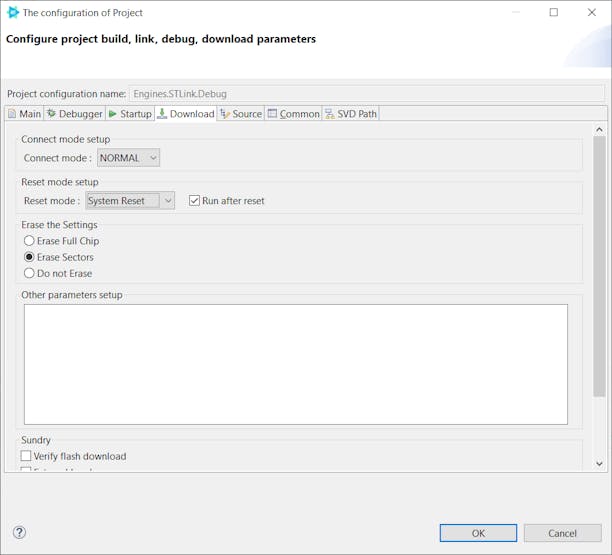
To allow auto reset after code download we needed to make this change.
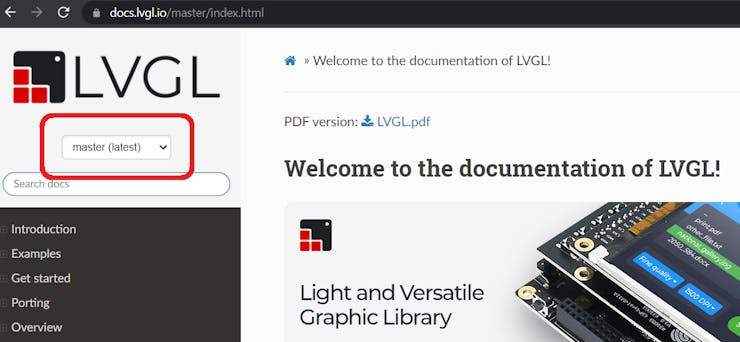
Please note that this tutorial is using LVGL v8.3.1 and if you have to look something up on their website, make sure you are looking at the correct version.
Visual Studio Code
We used mrfaptastic/WiFiConnect Lite to connect ESP32 to Wi-Fi without hard coding credentials. We also used earlephilhower/ESP8266Audio to make the board translate mp3 files to audio. Our board was too old so we had to comment out the same three lines from AudioOutputI2S.cpp and AudioOutputSPDIF.cpp.
.mclk_multiple = I2S_MCLK_MULTIPLE_DEFAULT, // Unused .bits_per_chan = I2S_BITS_PER_CHAN_DEFAULT // Use bits per sample .mck_io_num = 0, // unused
In the setup we connect to a Wi-Fi and hit the website for the first time to get the latest episode number to be used in generating a random number for initial play. In the loop we go to the episode page to retrieve the title and description then start playing the audio. If a user sends a request for a different episode, the loop will be interrupted and the new episode will play.
Hardware
We used the standard UART connection to make the boards communicate. Tx of one board is connected to Rx of the other and vice versa. We are powering ESP32 with USB cable, and powering STM32F469 DISCOVERY from ESP32. NRST of STM32F469 DISCOVERY had to be connected to EN of ESP32 to keep the boards in synch. Finally, the audio output comes from D22 and we had to use a 0.01 uf (103K) Ceramic Disc Capacitor to remove some of the noise.
Demo

Using RT-Thread Studio To Control ESP32 With STM32F469 Disco

Raspberry Pi 5 7 Inch Touch Screen IPS 1024x600 HD LCD HDMI-compatible Display for RPI 4B 3B+ OPI 5 AIDA64 PC Secondary Screen(Without Speaker)
BUY NOW
ESP32-S3 4.3inch Capacitive Touch Display Development Board, 800×480, 5-point Touch, 32-bit LX7 Dual-core Processor
BUY NOW
Raspberry Pi 5 7 Inch Touch Screen IPS 1024x600 HD LCD HDMI-compatible Display for RPI 4B 3B+ OPI 5 AIDA64 PC Secondary Screen(Without Speaker)
BUY NOW- Comments(0)
- Likes(3)
 Log in to post comments.
-
 Engineer
Nov 24,2024
-
 Dmitrij Petlyuk
Dec 21,2022
-
 abouhatab
Oct 11,2022
- 1 USER VOTES
- YOUR VOTE 0.00 0.00
- 1
- 2
- 3
- 4
- 5
- 6
- 7
- 8
- 9
- 10
- 1
- 2
- 3
- 4
- 5
- 6
- 7
- 8
- 9
- 10
- 1
- 2
- 3
- 4
- 5
- 6
- 7
- 8
- 9
- 10
- 1
- 2
- 3
- 4
- 5
- 6
- 7
- 8
- 9
- 10

-
10design
-
10usability
-
10creativity
-
10content
 More by abouhatab
-
 DIY GoPro BLE Remote Using PSoC™ 4100S Capsense Pioneer Kit
BackgroundBack in 2020, I published a project to make a Wi-Fi camera remote out of my favorite dev b...
-
 Tracking Space Stations With RT-Thread Studio
BackgroundMany of my fellow makers used Single Board Computers (SBC) and paid Application Programmin...
-
 Using RT-Thread Studio To Control ESP32 With STM32F469 Disco
BackgroundLong before TED Talks became popular, there was a radio program that tells the story of ho...
-
Commodore 64 1541-II 1581 Floppy Disk Drive C64 Power Supply Unit USB-C 5V 12V DIN connector 5.25
164 1 3 -
Easy to print simple stacking organizer with drawers
87 0 0 -
-
-
-
Modifying a Hotplate to a Reflow Solder Station
1137 1 6 -
MPL3115A2 Barometric Pressure, Altitude, and Temperature Sensor
638 0 1 -
-
Nintendo 64DD Replacement Shell
494 0 2 -
V2 Commodore AMIGA USB-C Power Sink Delivery High Efficiency Supply Triple Output 5V ±12V OLED display ATARI compatible shark 100W
1439 4 3


