Noshirt
ITALY • + Follow
Edit Project
Components

|
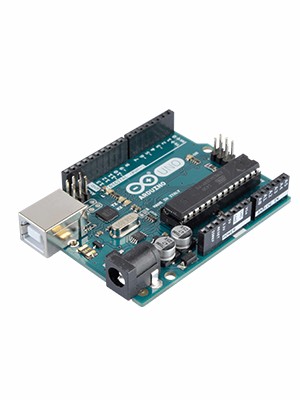
ARDUINO UNO REV3 |
x 1 | |

|
NHD-0420DZ-NSW-BBWNewhaven Display Intl
|
x 1 | |
|
|
GY-BM E/P 280 |
x 1 | |

|
FMP200JT-52-220RYAGEO
|
x 1 | |
|
|
Jumper wires (generic) |
x 17 |
Tools, APP Software Used etc.

|
arduino IDEArduino
|
Description
Arduino Weather Station v1.0 (BMP280)
First version of a very simple weather station made with an Arduino UNO, a BMP280 sensor and a LCD.
I'm already working on the v2.0 (which will be wireless), so keep up with me to stay updated! ;)
Code
Arduino Code
C/C++
#include <LiquidCrystal.h> //Library for the LCD screen #include <BMP280.h> // Library for the BMP280 sensor BMP280 bmp; //Initialize your sensor LiquidCrystal lcd(12, 11, 5, 4, 3, 2); /*Initialize your LCD, make sure you wired it correctly */ #define P0 1013.25 //Standard atmospheric pressure #define contrast 9 //9 and 10 are the pins where you wire the matching LCD pins #define brightness 10 //for contrast and brightness regulation double T = 0; //Starting temperature value double P = 0; //Starting pressure value char measure = 0; void collectData() { measure = bmp.startMeasurment(); if(measure != 0) { delay(measure); measure = bmp.getTemperatureAndPressure(T, P); if(measure != 0) { P = P + 17; // '+17' is a correction for the sensor error T = T - 0.8; // like said above lcd.clear(); lcd.print("T: "); lcd.print(T); lcd.print(" C"); lcd.setCursor(0, 1); lcd.print("P: "); lcd.print(P); lcd.print(" hPa"); } else lcd.print("Error."); } else lcd.print("Error."); } void setup() { lcd.begin(16, 2); pinMode(contrast, OUTPUT); pinMode(brightness, OUTPUT); analogWrite(contrast, 100); // '100' and '255' are the contrast and brightness analogWrite(brightness, 255); // values I suggest, but you can change them as if(!bmp.begin()) { // you prefer delay(1000); lcd.print("Init. failed."); lcd.setCursor(0, 1); delay(1000); lcd.print("Check wiring."); while(1); } else lcd.print("Init. OK."); bmp.setOversampling(4); delay(2000); collectData(); } void loop() { collectData(); delay(2000); }
Schematic and Layout

Jun 17,2022
760 views
end-flag
Arduino Weather Station v1.0 (BMP280)
This is the first version of my Arduino Weather Station, a very simple project that will give you weather information.
760
0
0
Published: Jun 17,2022
Purchase
Donation Received ($)
PCBWay Donate 10% cost To Author
Copy this HTML into your page to embed a link to order this shared project
Copy
Under the
Attribution-ShareAlike (CC BY-SA)
License.

Raspberry Pi 5 7 Inch Touch Screen IPS 1024x600 HD LCD HDMI-compatible Display for RPI 4B 3B+ OPI 5 AIDA64 PC Secondary Screen(Without Speaker)
BUY NOW
ESP32-S3 4.3inch Capacitive Touch Display Development Board, 800×480, 5-point Touch, 32-bit LX7 Dual-core Processor
BUY NOW
Raspberry Pi 5 7 Inch Touch Screen IPS 1024x600 HD LCD HDMI-compatible Display for RPI 4B 3B+ OPI 5 AIDA64 PC Secondary Screen(Without Speaker)
BUY NOW- Comments(0)
- Likes(0)
 Log in to post comments.
Upload photo
0 / 10000
It looks like you have not written anything. Please add a comment and try again.
You can upload up to 5 images!
Image size should not exceed 2MB!
File format not supported!
View More
VOTING
0 votes
- 0 USER VOTES
0.00
- YOUR VOTE 0.00 0.00
- 1
- 2
- 3
- 4
- 5
- 6
- 7
- 8
- 9
- 10
Design
1/4
- 1
- 2
- 3
- 4
- 5
- 6
- 7
- 8
- 9
- 10
Usability
2/4
- 1
- 2
- 3
- 4
- 5
- 6
- 7
- 8
- 9
- 10
Creativity
3/4
- 1
- 2
- 3
- 4
- 5
- 6
- 7
- 8
- 9
- 10
Content
4/4
 More by Noshirt
-
 IR Remote for Fan
So, I found this little Fan (it should be at least 10 years old), which was powered by some buttons ...
-
 Arduino Weather Station v1.0 (BMP280)
First version of a very simple weather station made with an Arduino UNO, a BMP280 sensor and a LCD.I...
-
 Wi-Fi Controlled Relay
One day I woke up. I thought, why can't my windows be opened from my pc?! Why I have to get up from ...
-
 Start/Stop Chronometer
Me and my friend are always in competition for something, in every sports, from ski to run, to MTB. ...
-
 Arduino Keyboard V2.0
That's an update for the older version of the project!Now you can play the keyboard on the keys from...
-
 Arduino Keyboard
Didn't know what to do as my first Arduino Project, so i thought of starting out with something litt...
You may also like
-
-
Commodore 64 1541-II 1581 Floppy Disk Drive C64 Power Supply Unit USB-C 5V 12V DIN connector 5.25
179 1 3 -
Easy to print simple stacking organizer with drawers
88 0 0 -
-
-
-
Modifying a Hotplate to a Reflow Solder Station
1151 1 6 -
MPL3115A2 Barometric Pressure, Altitude, and Temperature Sensor
643 0 1 -
-
Nintendo 64DD Replacement Shell
498 0 2 -
V2 Commodore AMIGA USB-C Power Sink Delivery High Efficiency Supply Triple Output 5V ±12V OLED display ATARI compatible shark 100W
1464 4 3


