


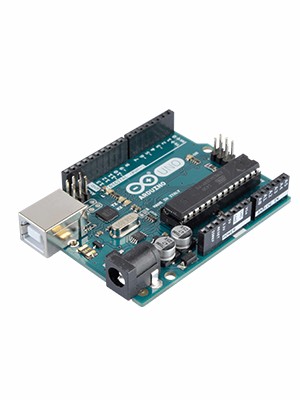
Components
|
ARDUINO UNO REV3 |
x 1 | |

|
IE122312-3DB Unlimited
|
x 1 | |

|
FMP200JT-52-220RYAGEO
|
x 1 |
Tools, APP Software Used etc.

|
arduino IDEArduino
|
|
|
|
PuTTY |
Description
Arduino Keyboard V2.0
That's an update for the older version of the project!
Now you can play the keyboard on the keys from A to J and from Q to U for # notes.
It's set on the fifth scale, but you can set it as you like by editing the code.
I recommend you not to use the Arduino Serial Monitor to play this project, because you would have to hit the "Enter" key after every note to play it.
So, you should download PuTTY from here and set the connection type as "Serial" in the first window that appear, insert your COM in the serial line (you can verify where Arduino is connected in Windows Device Manager) and then click on "Open".
A terminal windows should appear with the message set in the code.
Now you're free to play it! Hope you have fun :)
Code
Code for Arduino Keyboard 2.0
C/C++
int C[] = {N_C5}; int CS[] = {N_CS5}; int D[] = {N_D5}; int DS[] = {N_DS5}; int E[] = {N_E5}; int F[] = {N_F5}; int FS[] = {N_FS5}; int G[] = {N_G5}; int GS[] = {N_GS5}; int A[] = {N_A5}; int AS[] = {N_AS5}; int B[] = {N_B5}; int CC[] = {N_C6}; int duration(500); void setup() { pinMode(6, OUTPUT); //Digital Pin 6 is where you connect your Buzzer Serial.begin(9600); Serial.println("Welcome to the Virtual Keyboard!"); Serial.println("Notes: A-S-D-F-G-H-J"); Serial.println("#: Q-W-E-R-T-Y-U"); } void loop() { if (Serial.available()) { char ch = Serial.read(); if (ch == 'a') { for (int Note = 0; Note < 1; Note++) { tone(6, C[Note], duration); } } if (ch == 'q') { for (int Note = 0; Note < 1; Note++) { tone(6, CS[Note], duration); } } if (ch == 's') { for (int Note = 0; Note < 1; Note++) { tone(6, D[Note], duration); } } if (ch == 'w') { for (int Note = 0; Note < 1; Note++) { tone(6, DS[Note], duration); } } if (ch == 'd') { for (int Note = 0; Note < 1; Note++) { tone(6, E[Note], duration); } } if (ch == 'f') { for (int Note = 0; Note < 1; Note++) { tone(6, F[Note], duration); } } if (ch == 'r') { for (int Note = 0; Note < 1; Note++) { tone(6, FS[Note], duration); } } if (ch == 'g') { for (int Note = 0; Note < 1; Note++) { tone(6, G[Note], duration); } } if (ch == 't') { for (int Note = 0; Note < 1; Note++) { tone(6, GS[Note], duration); } } if (ch == 'h') { for (int Note = 0; Note < 1; Note++) { tone(6, A[Note], duration); } } if (ch == 'y') { for (int Note = 0; Note < 1; Note++) { tone(6, AS[Note], duration); } } if (ch == 'j') { for (int Note = 0; Note < 1; Note++) { tone(6, B[Note], duration); } } if (ch == 'u') { for (int Note = 0; Note < 1; Note++) { tone(6, CC[Note], duration); } } } }
Schematic and Layout
Schematics for Arduino Keyboard 2.0
cattura_rdvsM8mFf6.PNG

Jun 17,2022
818 views
end-flag
Arduino Keyboard V2.0
An update of the older version of the keyboard. Now it doesn't require switches on your breadboard, you can use your pc keyboard.
818
0
0
Published: Jun 17,2022
PCBWay Donate 10% cost To Author


Under the
Attribution-ShareAlike (CC BY-SA)
License.


Raspberry Pi 5 7 Inch Touch Screen IPS 1024x600 HD LCD HDMI-compatible Display for RPI 4B 3B+ OPI 5 AIDA64 PC Secondary Screen(Without Speaker)
BUY NOW
ESP32-S3 4.3inch Capacitive Touch Display Development Board, 800×480, 5-point Touch, 32-bit LX7 Dual-core Processor
BUY NOW
Raspberry Pi 5 7 Inch Touch Screen IPS 1024x600 HD LCD HDMI-compatible Display for RPI 4B 3B+ OPI 5 AIDA64 PC Secondary Screen(Without Speaker)
BUY NOW


- Comments(0)
- Likes(0)
 Log in to post comments.
Upload photo
0 / 10000
 More by Noshirt
-
 IR Remote for Fan
So, I found this little Fan (it should be at least 10 years old), which was powered by some buttons ...
IR Remote for Fan
So, I found this little Fan (it should be at least 10 years old), which was powered by some buttons ...
-
 Arduino Weather Station v1.0 (BMP280)
First version of a very simple weather station made with an Arduino UNO, a BMP280 sensor and a LCD.I...
Arduino Weather Station v1.0 (BMP280)
First version of a very simple weather station made with an Arduino UNO, a BMP280 sensor and a LCD.I...
-
 Wi-Fi Controlled Relay
One day I woke up. I thought, why can't my windows be opened from my pc?! Why I have to get up from ...
Wi-Fi Controlled Relay
One day I woke up. I thought, why can't my windows be opened from my pc?! Why I have to get up from ...
-
 Start/Stop Chronometer
Me and my friend are always in competition for something, in every sports, from ski to run, to MTB. ...
Start/Stop Chronometer
Me and my friend are always in competition for something, in every sports, from ski to run, to MTB. ...
-
 Arduino Keyboard V2.0
That's an update for the older version of the project!Now you can play the keyboard on the keys from...
Arduino Keyboard V2.0
That's an update for the older version of the project!Now you can play the keyboard on the keys from...
-
 Arduino Keyboard
Didn't know what to do as my first Arduino Project, so i thought of starting out with something litt...
Arduino Keyboard
Didn't know what to do as my first Arduino Project, so i thought of starting out with something litt...
You may also like
-
-
-
Modifying a Hotplate to a Reflow Solder Station
1003 1 6 -
MPL3115A2 Barometric Pressure, Altitude, and Temperature Sensor
543 0 1 -
-
-
V2 Commodore AMIGA USB-C Power Sink Delivery High Efficiency Supply Triple Output 5V ±12V OLED display ATARI compatible shark 100W
1272 4 2 -
How to measure weight with Load Cell and HX711
763 0 3


