


Capacimeter with Arduino
A Capacimeter is an instrument used to measure the capacitance of a capacitor. In this tutorial, we will guide you step by step to build your own Capacimeter using an Arduino board, basic components, and some code.
More info and updates in https://rogerbit.com/wprb/2024/06/capacimetro/
Electronic components of the project
Arduino Nano

The Arduino Nano is a small, complete, breadboard-compatible board based on the ATmega328 (Arduino Nano 3.x). It has more or less the same functionality of the Arduino Duemilanove, but in a different package. It only lacks a DC power connector and works with a Mini-B USB cable instead of a standard one.
A socket for arduino
female pins

Male female dupont cables

Display oled sh1106
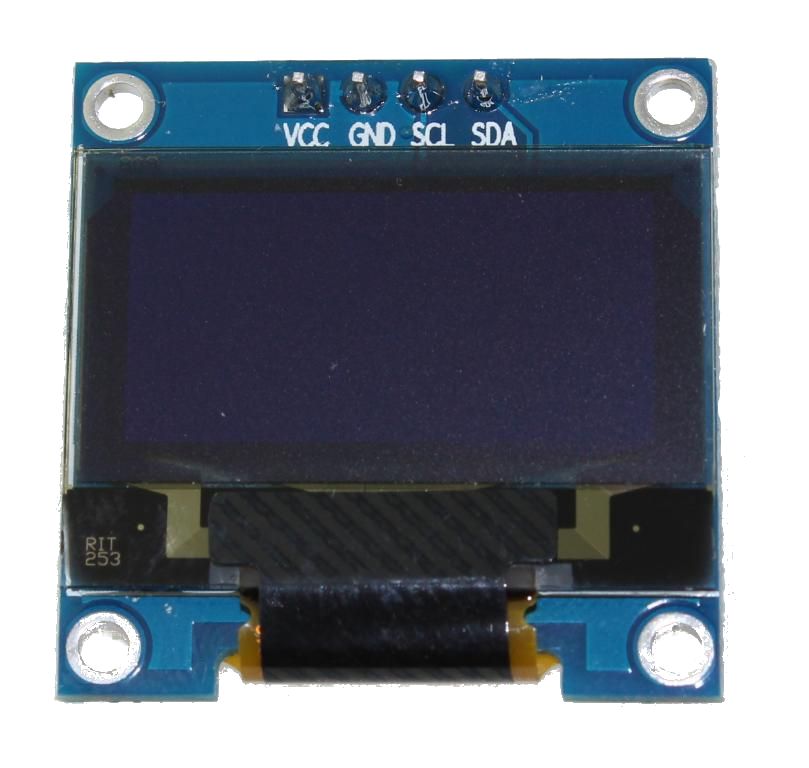
It is a 128x64 dot monochrome OLED display module with I2C interface. It has several advantages compared to LCD screens, and we can highlight its high brightness, very good contrast, a wider viewing angle, and low consumption. of energy. It is compatible with Arduino Rasberry Pi and PIC microcontrollers among others. It works with logic levels from 3.3V to 5V and has a viewing angle greater than 160 degrees. Screen Size is 1.3 inches. It is powered with a voltage of 3.3V to 5V. It can be used in applications such as smart watches, MP3s, thermometers, instruments, and various projects, etc.
Characteristics
Interface: I2C(3.3V / 5V logic level)
Resolution: 128 x 64
Angle of view: >160 degree
Display color: Blue
Display size: 1.3 inch
Driver IC: SH1106
Power supply: DC 3.3V~5V
Operating temperature: -20~70’C
Application: smart watch, MP3, thermometer, instruments, DIY projects, etc.
A KY-004 pulse module

PCB


electronic pcb diagram

Circuit

#include <Capacitor.h>
#include <U8glib.h>
#define PULSADOR_PIN 4  // Pin del pulsador
// Condensador en prueba.
// Ten en cuenta que para los electrolíticos el primer pin (en este caso D7)
// debe ser positivo, y el segundo (en este caso A2) negativo.
Capacitor condensador(7, A2);
// Configurar la pantalla OLED SH1106
U8GLIB_SH1106_128X64 oled(U8G_I2C_OPT_NONE);
void setup() {
  Serial.begin(9600);
  oled.setFont(u8g_font_6x10);  // Establecer la fuente para la pantalla OLED
  pinMode(PULSADOR_PIN, INPUT_PULLUP);  // Configurar el pin del pulsador como entrada con resistencia pull-up
  // Mostrar mensaje inicial en la pantalla OLED
  oled.firstPage();
  do {
    oled.drawStr(0, 20, "Apriete el boton");
    oled.drawStr(0, 40, "para leer el capacitor");
  } while (oled.nextPage());
}
void loop() {
  if (digitalRead(PULSADOR_PIN) == LOW) {  // Si el pulsador está presionado
    float capacitancia = condensador.Measure();  // Medir la capacitancia (en pF)
    // Convertir capacitancia a nF y uF
    float capacitancia_nF = capacitancia / 1000.0;
    float capacitancia_uF = capacitancia / 1000000.0;
    // Imprimir en el Monitor Serie
    Serial.print("Capacitancia: ");
    Serial.print(capacitancia);
    Serial.print(" pF, ");
    Serial.print(capacitancia_nF, 3);
    Serial.print(" nF, ");
    Serial.print(capacitancia_uF, 6);
    Serial.println(" uF");
    // Dibujar en la pantalla OLED
    oled.firstPage();
    do {
      oled.drawStr(0, 10, "Capacitancia:");
      // Mostrar en pF
      oled.setPrintPos(0, 30);  // Posición del texto
      oled.print(capacitancia);
      oled.print(" pF");
      // Mostrar en nF
      oled.setPrintPos(0, 45);  // Posición del texto
      oled.print(capacitancia_nF, 3);
      oled.print(" nF");
      // Mostrar en uF
      oled.setPrintPos(0, 60);  // Posición del texto
      oled.print(capacitancia_uF, 6);
      oled.print(" uF");
    } while (oled.nextPage());
    delay(1000);  // Esperar 1 segundo antes de permitir otra lectura
  }
}
Capacimeter with Arduino
*PCBWay community is a sharing platform. We are not responsible for any design issues and parameter issues (board thickness, surface finish, etc.) you choose.


- Comments(0)
- Likes(0)
More by CarlosVolt Tutoriales
-
 Infrared stepper motor control with speed control
More info and updates https://rogerbit.com/wprb/2024/09/motor-paso-a-paso-x-infrarrojo/In this proje...
Infrared stepper motor control with speed control
More info and updates https://rogerbit.com/wprb/2024/09/motor-paso-a-paso-x-infrarrojo/In this proje...
-
 Uploading BME280 Sensor Data to ThingSpeak Using ESP32
In this tutorial, we will show you how to connect a BME280 sensor to an ESP32 to read temperature, h...
Uploading BME280 Sensor Data to ThingSpeak Using ESP32
In this tutorial, we will show you how to connect a BME280 sensor to an ESP32 to read temperature, h...
-
 Water pump control for irrigation via telegram and esp32
Water Pump Control by Telegram and ESP32 is an automated system that allows you to remotely control ...
Water pump control for irrigation via telegram and esp32
Water Pump Control by Telegram and ESP32 is an automated system that allows you to remotely control ...
-
 Air conditioning on/off control via telegram and esp32
In this tutorial we will see how to control an air conditioner, with an esp32 and the telegram appli...
Air conditioning on/off control via telegram and esp32
In this tutorial we will see how to control an air conditioner, with an esp32 and the telegram appli...
-
 35 watt stereo amplifier
In this video we will see how to build an audio amplifier, with the TDA7377 integrated circuit, and ...
35 watt stereo amplifier
In this video we will see how to build an audio amplifier, with the TDA7377 integrated circuit, and ...
-
 Laser alarm with RFID module
More info and updates in https://rogerbit.com/wprb/2024/08/alarma-laser-rfid/In this project, we bui...
Laser alarm with RFID module
More info and updates in https://rogerbit.com/wprb/2024/08/alarma-laser-rfid/In this project, we bui...
-
 Control lights by voice commands and keys
In this tutorial we will see how to create a device to control lights by voice commands, with a modu...
Control lights by voice commands and keys
In this tutorial we will see how to create a device to control lights by voice commands, with a modu...
-
 Stepper motor control x bluetooth and app
In this tutorial we will see a circuit, which controls a stepper motor, with an application made in ...
Stepper motor control x bluetooth and app
In this tutorial we will see a circuit, which controls a stepper motor, with an application made in ...
-
 DFplayermini x bluetooth mp3 player control
More info and updates in https://rogerbit.com/wprb/2022/12/dfplayermini-x-bluetooth/In this tutorial...
DFplayermini x bluetooth mp3 player control
More info and updates in https://rogerbit.com/wprb/2022/12/dfplayermini-x-bluetooth/In this tutorial...
-
 Robot with WiFi control and servos driven by ESP32
More info and updates in https://rogerbit.com/wprb/2023/07/robot-wifi/A robot controlled by Wi-Fi, s...
Robot with WiFi control and servos driven by ESP32
More info and updates in https://rogerbit.com/wprb/2023/07/robot-wifi/A robot controlled by Wi-Fi, s...
-
 How to make a water level meter with uln2803
In this tutorial we will see how to make a water level meter circuit with the built-in uln2803.The p...
How to make a water level meter with uln2803
In this tutorial we will see how to make a water level meter circuit with the built-in uln2803.The p...
-
 Color Detector with Arduino and OLED display
In this tutorial we will show you how to build a color detector using the TCS3200 sensor and an SH11...
Color Detector with Arduino and OLED display
In this tutorial we will show you how to build a color detector using the TCS3200 sensor and an SH11...
-
 DTMF decoder for handy with arduino, control over several kilometers
In this tutorial we will see how to make a circuit to connect to our handy, in this case a Baofeng U...
DTMF decoder for handy with arduino, control over several kilometers
In this tutorial we will see how to make a circuit to connect to our handy, in this case a Baofeng U...
-
 Turn on light from thindspeak with esp32
In this tutorial, we will show you how to control lights over the Internet using an ESP32 and the Th...
Turn on light from thindspeak with esp32
In this tutorial, we will show you how to control lights over the Internet using an ESP32 and the Th...
-
 MP3 player control with webserver using ESP32 WIFI
In this tutorial, you will learn how to build a web server using the ESP32 to control the YX5300 mod...
MP3 player control with webserver using ESP32 WIFI
In this tutorial, you will learn how to build a web server using the ESP32 to control the YX5300 mod...
-
 Time clock with fingerprint IoT module, uploading data to thingspeak
More info in and updates in https://rogerbit.com/wprb/2022/07/reloj-de-control-fingerprint/In this t...
Time clock with fingerprint IoT module, uploading data to thingspeak
More info in and updates in https://rogerbit.com/wprb/2022/07/reloj-de-control-fingerprint/In this t...
-
 Make your own logic tip (includes printed circuit board)
In this video tutorial we will see how to make a logic tip, on a printed circuit, with the integrate...
Make your own logic tip (includes printed circuit board)
In this video tutorial we will see how to make a logic tip, on a printed circuit, with the integrate...
-
 Coil or inductor meter with Arduino and OLED display
More info and updates in https://rogerbit.com/wprb/2022/06/medidor-inductores/In this tutorial we wi...
Coil or inductor meter with Arduino and OLED display
More info and updates in https://rogerbit.com/wprb/2022/06/medidor-inductores/In this tutorial we wi...
-
-
-
-
Tester for Touch Screen Digitizer without using microcontroller
322 2 2 -
Audio reactive glow LED wristband/bracelet with NFC / RFID-Tags
306 0 1 -
-
-


