Capture photos with esp32-cam, SD card with motion detection
Capture photos with esp32-cam, SD card with motion detection
In this exciting tutorial, we'll show you how to build your own security camera using an ESP32-CAM and an AM312 PIR sensor to detect motion.
more info and updates in https://rogerbit.com/wprb/2023/10/captura-con-esp32/
In this exciting tutorial, we'll show you how to build your own security camera using an ESP32-CAM and an AM312 PIR sensor to detect motion. Best of all, the photos will be saved directly to an SD card!
Throughout this video, we will guide you through the following steps:
Hardware Connection: We will show you how to connect the ESP32-CAM and the AM312 PIR sensor to your breadboard, ensuring proper power supply.
Arduino IDE Setup: You will learn how to set up the development environment in Arduino IDE to work with the ESP32-CAM and select the appropriate board.
Programming: We will provide you with the code needed to configure the ESP32-CAM and program it to capture images when motion is detected. We will also show you how to store the images on an SD card.
Real-Life Test: You will see our motion detection system in action. We will test it in a real-life environment so you can see how it works.
Tips & Customization: We'll share some helpful tips and show you how to customize and extend this project to your needs.
This project is perfect for creating an affordable and functional security camera for your home, office, or anywhere you want to monitor.
Electronic components
Usb serial adapter
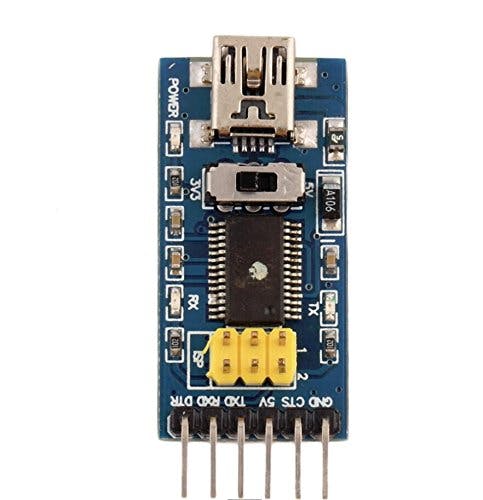
Description
FTDI Basic Program Downloader USB to TTL FT232RL 3.3V 5V DTR
This is a basic breakout board for the FTDI FT232RL USB to Serial IC. The pinout of this board matches the FTDI cable to work with official Arduino boards and cloned 5V Arduino boards. It can also be used for general serial applications. The main difference with this board is that it brings out the DTR pin instead of the RTS pin on the FTDI cable. The DTR pin allows an Arduino target to automatically reset when a new Sketch is downloaded. This is a really nice feature and allows a sketch to be downloaded without having to press the reset button. This board will automatically reset any Arduino board that has the reset pin on a 6 pin connector.
This board has TX and RX LEDs which make it a bit nicer to use over the FTDI cable. You can actually see the serial traffic on the LEDs to check if the board is working.
This board was designed to decrease the cost of Arduino development and increase ease of use (the auto reset feature is great!). Our Arduino Pro boards and LilyPads use this type of connector.
One of the nice features of this board is a jumper on the back of the board that allows the board to be configured to either 3.3V or 5V (both power output and I/O level). This board ships at 5V by default, but you can cut off the default trace and add a solder jumper if you need to switch to 3.3V.
CHARACTERISTICS
Standard interface design, compatible with a variety of Arduinos such as the Pro Mini
Original FTDI FT232 chip, stable performance
With power indicator, sending, receiving, working status LED indicators
With 3.3V and 5V TTL level supply options
USB to Serial TTL Module, Download STC SCM
Mini USB port connection
Standard interface, compliant with Arduino official controller; With power, sending, reversing indicator, With 3.3V / 5V power supply; Can be used as ordinary USB to serial TTL module, download STC singlechip
Hardware introduction
Adopt FTDI company's FT232RL chip
Lead out FT232RL chip all signal port, TTL / CMOS level
RXD/TXD send-receive communication indicator
USB power supply, can choose 5V or 3.3V interface level (if you need other level, can provide target voltage in VCC and GND pin)
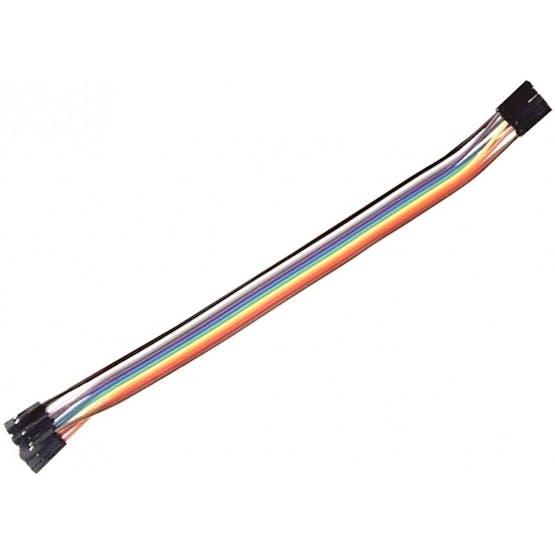
Dupont cables
Esp32Cam
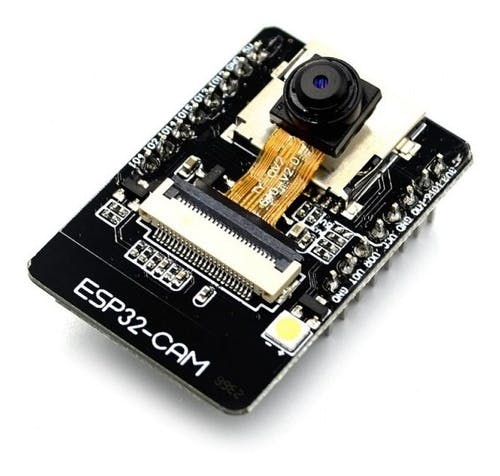
Description
Esp32 Cam Camera Module Wifi Bt Arduino Ov2640 2mp Esp 32
ESP32 CAM WiFi Module with Bluetooth and OV2640 2MP Camera is a development board that integrates a small camera that can work independently.
The OV2640 2MP camera integrates a 1/4-inch UXGA (1632*1232) CMOS image sensor. The small sensor size and low operating voltage provide all the features of a single UXGA camera and image processor. Through SCCB bus control, it can output 8/10-bit image data of various resolutions such as full frame, subsampling, zoom, and windowing.
The UXGA image of this camera can reach up to 15 frames per second (up to 30 frames for SVGA and 60 frames for CIF). Users have complete control over image quality, data format, and transmission.
All image processing functions including gamma curve, white balance, contrast, chroma, etc. can be programmed through the SCCB interface.
Omni Vision image sensors use unique sensor technology to improve image quality and deliver sharp, stable color images by reducing or eliminating optical or electronic artifacts such as fixed pattern noise, smearing and floating.
Main Features:
• Model: ESP32-CAM + OV2640 Camera
• ESP 32 CAM power supply voltage: 5V
• Wi-Fi BT 802.11b/g/n module
• Camera type: OV2640 2MP
• ESP 32CAM module has low-power dual-core 32-bit CPU
• Main frequency up to 240MHz
• Computing power up to 600 DMIPS
• Clock speed up to 160MHz
• Built-in 520Kb SRAM, 4MPSRAM external
• ESP-32 CAM module supports interfaces: UART / SPI / I2C / PWM / ADC / DAC
• ESP-32-CAM module supports OV2640 and OV7670 cameras, Built-in Flash
• ESP 32-CAM module supports micro SD TF cards (Maximum 4GB)
• ESP-32CAM module Supports WiFi image upload
• Compatible with STA / AP / STA+AP operation modes
• With PCB antenna
• The ESP32CAM module integrates u.FL and FPC connectors
Features:
– Ultra-small 802.11b/g/n Wi-Fi + BT/BLE SoC module
– Low-power dual-core 32-bit CPU for application processors
– Up to 240MHz, up to 600 DMIPS
– Built-in 520 KB SRAM, external 4M PSRAM
– Supports interfaces such as UART/SPI/I2C/PWM/ADC/DAC
– Support OV2640 and OV7670 cameras with built-in flash
– Support for images WiFI upload
-Support TF card
– Support multiple sleep modes
– Embedded Lwip and FreeRTOS
– Support STA/AP/STA+AP working mode
– Support Smart Config/AirKiss One-click distribution network
– Support for serial local upgrade and remote firmware upgrade (FOTA)
– Support secondary development
Product Specifications:
Module model: ESP32-CAM
Package: DIP-16
Size: 27*40.5*4.5(±0.2)mm
SPI Flash: default 32Mbit
RAM: internal520KB+external 4M PSRAM
bluetooth: bluetooth4.2BR/EDR and BLE standards
Wi-Fi: 802.11 b/g/n/e/i
Support interface: UART, SPI, I2C, PWM
Support TF card: Maximum support 4G
IO port: 9
Serial port rate: default 115200 bps
Image output format: JPEG (only supported by OV2640), BMP, GRAYSCALE
Spectrum range: 2412 ~ 2484MHz
Antenna form: onboard PCB antenna , gain 2dBi
Transmit power: 802.11b: 17±2 dBm (@11Mbps)
802.11g: 14±2 dBm (@54Mbps)
802.11n: 13±2 dBm (@MCS7)
Receiving sensitivity: CCK, 1 Mbps : -90dBm
CCK, 11 Mbps: -85dBm
6 Mbps (1/2 BPSK): -88dBm
54 Mbps (3/4 64-QAM): -70dBm
MCS7 (65 Mbps, 72.2 Mbps): -67dBm
Power consumption Turn off the flash: 180mA@5V
Turn on the flash and adjust the brightness to the maximum: 310mA@5V
Deep-sleep: The lowest power consumption can reach 6mA@5V
Moderm-sleep: up to 20mA@5V
Light-sleep: up to 6.7mA@5V
Security WPA/WPA2/WPA2-Enterprise/WPS
Power supply range: 5V
Operating Temperature: -20 °C ~ 85 °C
Storage environment: -40 °C ~ 90 °C, < 90%RH
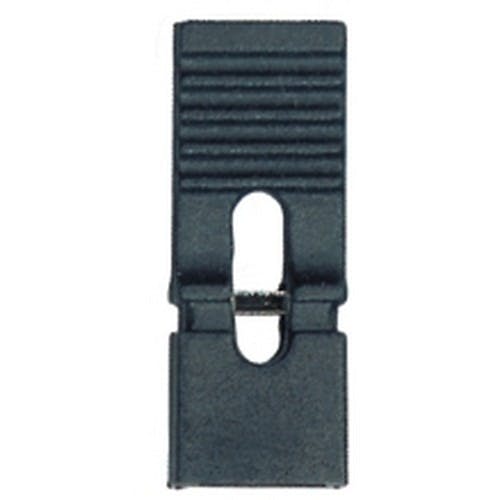
A Jumper
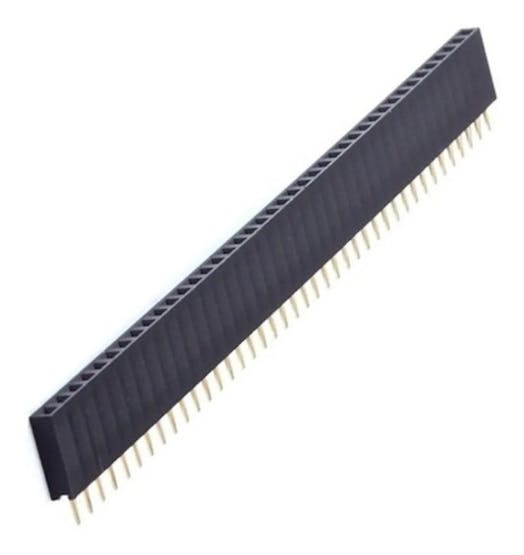
Female Pines
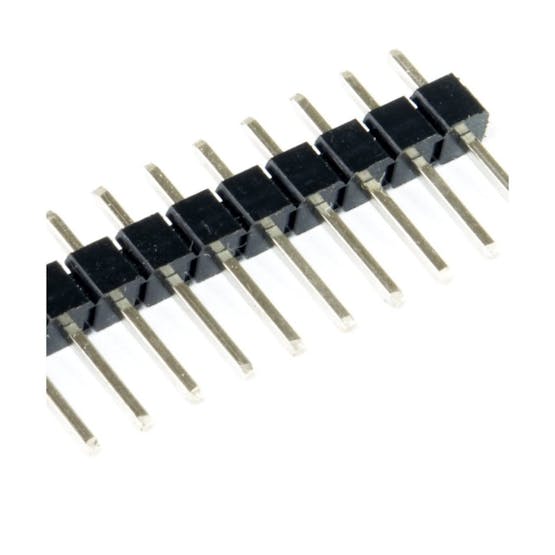
Male pins
AM312 Mini PIR Motion Sensor 12V DC
Type: Mini PIR Sensor
Model: AM312
Input voltage: 2.7V to 12V DC
Static power consumption: < 0.1mA
Output voltage VOUT: 3.3V (Enabled) / 0V (Not enabled)
Detection range: ≤100 degree cone angle
Detection distance: 3 to 5 meters approx.
Delay/Lockout Time: 2 seconds
Shooting Mode: Repeatable
Dimensions: 10.5mm x 8.2mm
Lens Size: 11.8mm (Diameter)
Weight: 2g
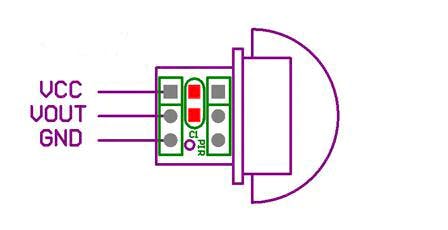
Pins:
VCC: Power supply (+) terminal
GND: Power supply (-) terminal
VOUT: Digital Output
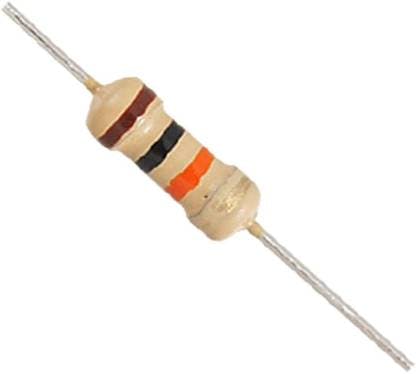
A 10K resistor
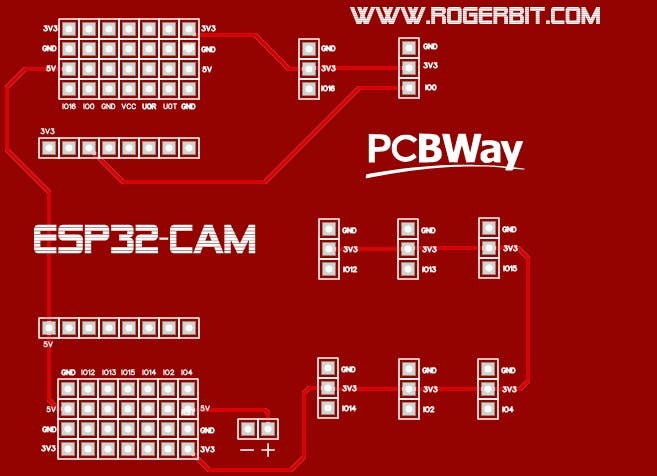
PCB
Circuit
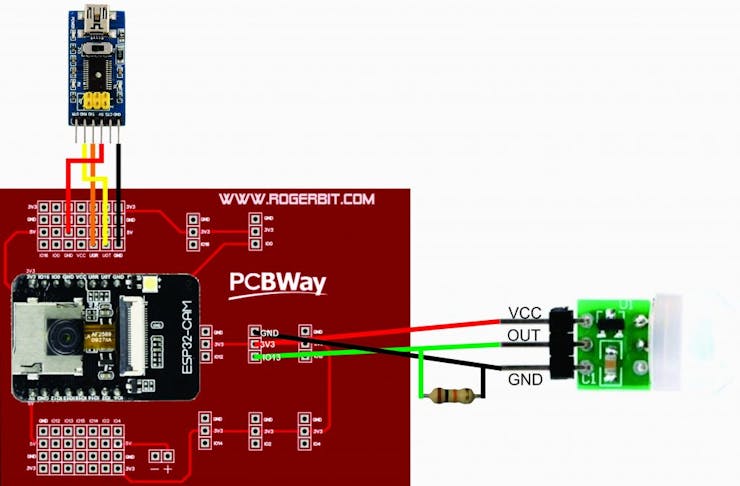
Capture photos with esp32-cam, SD card with motion detection
*PCBWay community is a sharing platform. We are not responsible for any design issues and parameter issues (board thickness, surface finish, etc.) you choose.
- Comments(0)
- Likes(2)
- 0 USER VOTES
- YOUR VOTE 0.00 0.00
- 1
- 2
- 3
- 4
- 5
- 6
- 7
- 8
- 9
- 10
- 1
- 2
- 3
- 4
- 5
- 6
- 7
- 8
- 9
- 10
- 1
- 2
- 3
- 4
- 5
- 6
- 7
- 8
- 9
- 10
- 1
- 2
- 3
- 4
- 5
- 6
- 7
- 8
- 9
- 10
 More by CarlosVolt Tutoriales
-
 Infrared stepper motor control with speed control
More info and updates https://rogerbit.com/wprb/2024/09/motor-paso-a-paso-x-infrarrojo/In this proje...
-
 Uploading BME280 Sensor Data to ThingSpeak Using ESP32
In this tutorial, we will show you how to connect a BME280 sensor to an ESP32 to read temperature, h...
-
 Water pump control for irrigation via telegram and esp32
Water Pump Control by Telegram and ESP32 is an automated system that allows you to remotely control ...
-
 Air conditioning on/off control via telegram and esp32
In this tutorial we will see how to control an air conditioner, with an esp32 and the telegram appli...
-
 35 watt stereo amplifier
In this video we will see how to build an audio amplifier, with the TDA7377 integrated circuit, and ...
-
 Laser alarm with RFID module
More info and updates in https://rogerbit.com/wprb/2024/08/alarma-laser-rfid/In this project, we bui...
-
 Control lights by voice commands and keys
In this tutorial we will see how to create a device to control lights by voice commands, with a modu...
-
 Stepper motor control x bluetooth and app
In this tutorial we will see a circuit, which controls a stepper motor, with an application made in ...
-
 DFplayermini x bluetooth mp3 player control
More info and updates in https://rogerbit.com/wprb/2022/12/dfplayermini-x-bluetooth/In this tutorial...
-
 Robot with WiFi control and servos driven by ESP32
More info and updates in https://rogerbit.com/wprb/2023/07/robot-wifi/A robot controlled by Wi-Fi, s...
-
 How to make a water level meter with uln2803
In this tutorial we will see how to make a water level meter circuit with the built-in uln2803.The p...
-
 Color Detector with Arduino and OLED display
In this tutorial we will show you how to build a color detector using the TCS3200 sensor and an SH11...
-
 DTMF decoder for handy with arduino, control over several kilometers
In this tutorial we will see how to make a circuit to connect to our handy, in this case a Baofeng U...
-
 Turn on light from thindspeak with esp32
In this tutorial, we will show you how to control lights over the Internet using an ESP32 and the Th...
-
 MP3 player control with webserver using ESP32 WIFI
In this tutorial, you will learn how to build a web server using the ESP32 to control the YX5300 mod...
-
 Time clock with fingerprint IoT module, uploading data to thingspeak
More info in and updates in https://rogerbit.com/wprb/2022/07/reloj-de-control-fingerprint/In this t...
-
 Make your own logic tip (includes printed circuit board)
In this video tutorial we will see how to make a logic tip, on a printed circuit, with the integrate...
-
 Coil or inductor meter with Arduino and OLED display
More info and updates in https://rogerbit.com/wprb/2022/06/medidor-inductores/In this tutorial we wi...
-
-
AEL-2011 Power Supply Module
515 0 2 -
AEL-2011 50W Power Amplifier
474 0 2 -
-
-
Custom Mechanical Keyboard
691 0 0 -
Tester for Touch Screen Digitizer without using microcontroller
322 2 2 -
Audio reactive glow LED wristband/bracelet with NFC / RFID-Tags
306 0 1 -
-
-


