
|
fusion360 |
Folding Table Leg Hinge
A fellow Printables user recently asked me whether I thought any of my 2020 extrusion hinges would be suitable for use as the hinges for a folding table. I don’t think I would trust any of the ones I’ve made to date for this, plus, I figured a 90 degree locking mechanism would be pretty useful.
So I decided to take a stab at a hinge specifically designed for this use case.

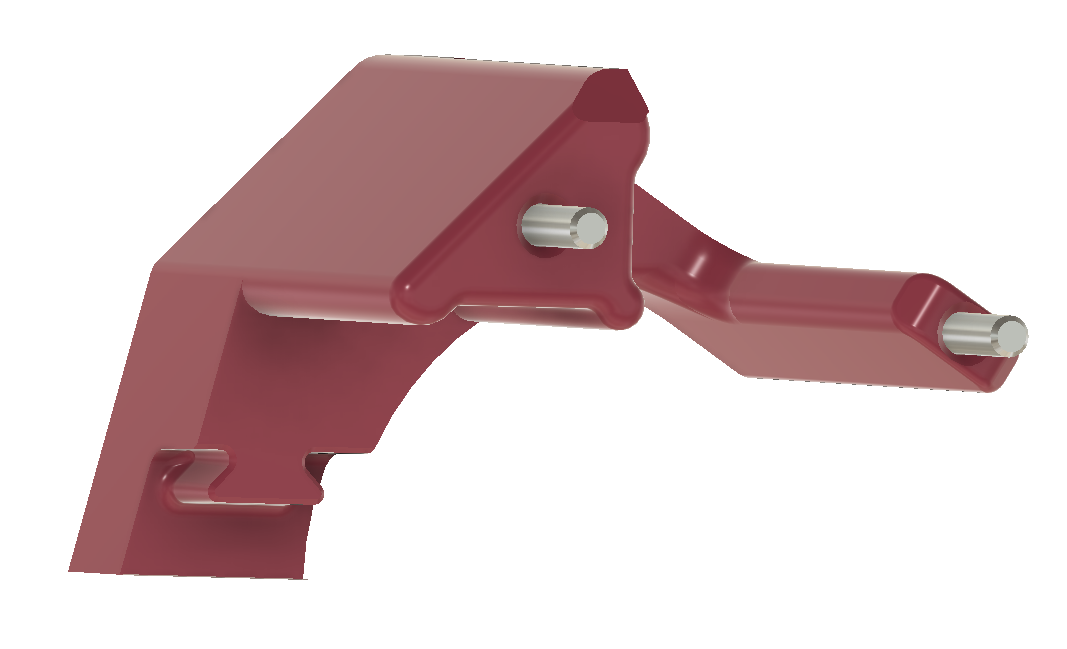
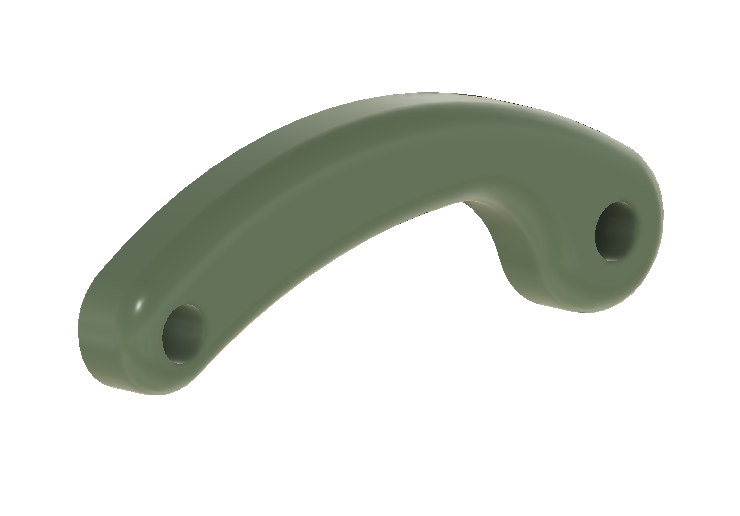
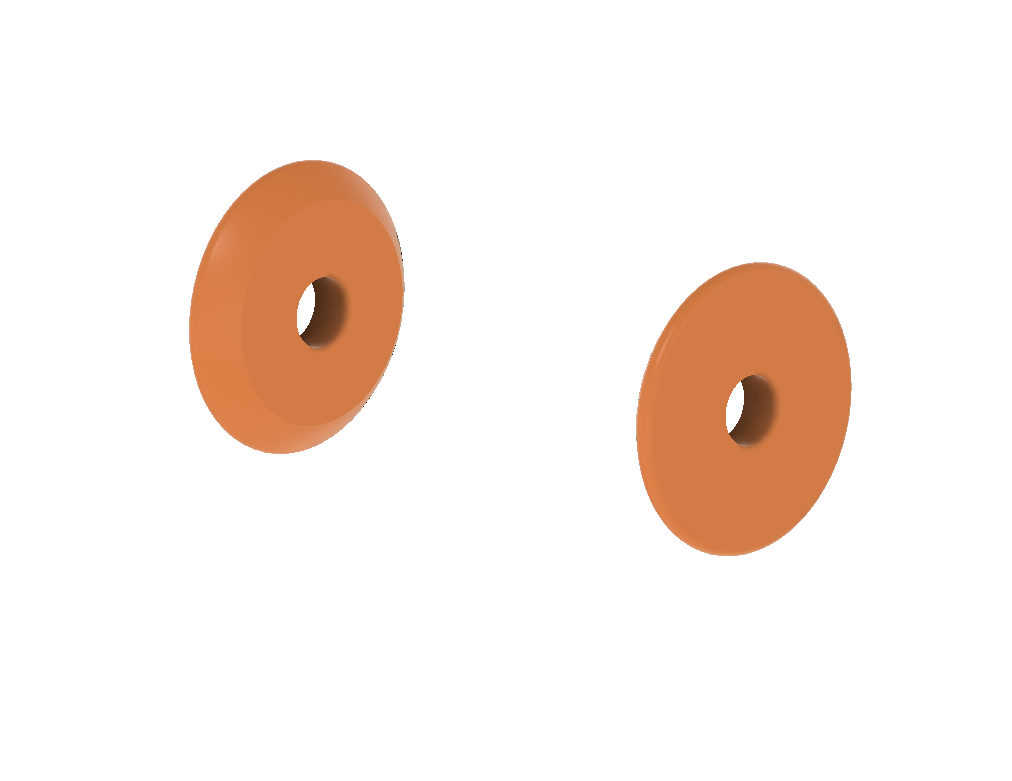
Update - Version 2 I decided to revisit this folding table hinge to see if I could improve the stiffness of the hinge a bit. For details on the V1 design, scroll on down. Build BOM Printed Parts (Qty 1) Base.stl (Qty 4) Bearing.stl* (Qty 1) LockPin.stl (Qty 1) Retainer.stl COTS (Qty 2) M5x20 BHCS - Down to 18mm length should be ok, but you want to be sure the fastener is bottoming out in the extrusion for the hinge to function properly. (Qty 2) M5 tee nut (Qty 8) 4mmx16mm Dowel pin - You can go longer, but shorter won't work well unless you're carful with how you press them. They are intended to bottom out at 10mm depth. (Qty 1) 2020 Extrusion leg - Leg length of your choice, but the longer, the wobblier :) Tools and such Sand paper - Small bit of sand paper to sand the bearings to fit. I used 120 grit. Aggressive enough to not take forever, but not so aggressive as to destroy my fingertips. Lubricant - Although not needed, some lubricant between the bearing interfaces should reduce the plastic-to-plastic adhesion and generally reduce wear. Two will need to be sized appropriately to fit. The other two are not particularly sensitive on their thickness. 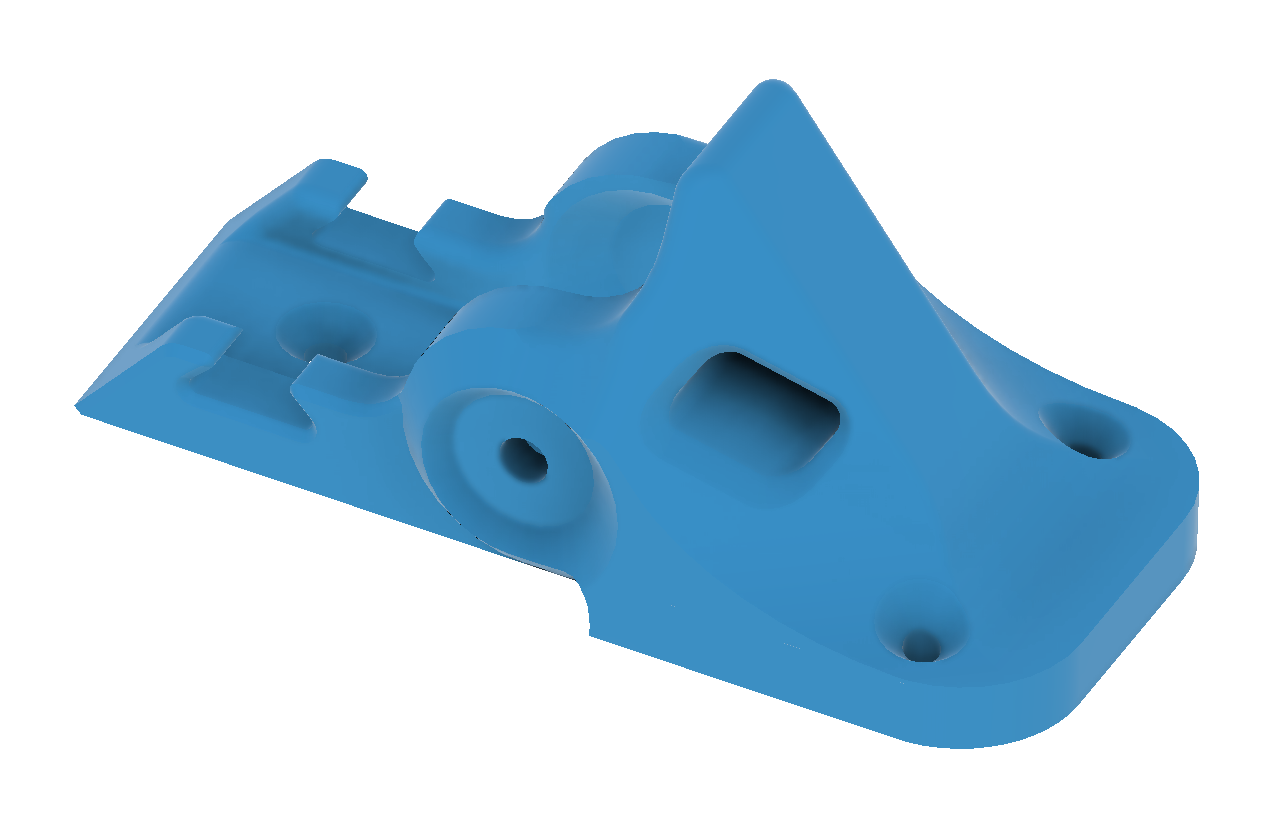
Build
The first step is to get all of the printed parts printed. I printed all of my parts from a mix of polymaker and eSun PETG. I made a few of the Bases at 40% infill, and others as low as 20%....but then didn't keep track of which is which ¯\_(ツ)_/¯, but I also haven't noticed any differences. So use that info as you will.
Once the printed parts were ready, I sized the inner bearings (I just printed pairs of all three sizes) by just test fitting the assembly. The 3.5mm thick ones gave me a smooth, but not preloaded fit, which should be good enough for this.
One optional step is to sand the contact faces of the bearings (not worth the effort on the cones in the Base). I did this by holding each bearing on an M5 fastener with a nut, and using a drill to spin 'em against some 220 grit sand paper. I'm honestly not sure that it made a huge difference, but, there ya go.
I've found that the easiest way to hold those inner bearings in place while inserting the extrusion is to 'skewer' them by just going ahead and assembling the bearings
Put the M5 BHCS through the outer bearing, flat side facing the head of the fastener
Slide the fastener, with outer bearing along for the ride, through the hole in the Base
Slide inner bearing onto fastener
Repeat on other side
Adjust both sides fasteners so that are flush, or slighly inset from the face of the inner bearing
The extrusion can then be slid in without as much trouble with the inner bearing rotating and binding.
The tee nuts can then be slid into place.
I applied a little bit of silicone oil to each bearing surface, and put a little dab of loctite blue (if your table is permanent, feel free to go Red :) ) on each fastener before tightening them down.
I decided to torque mine to 1 N/m. This definitely caused some deformation of the outer bearing, but that's kind of why I like PETG for this kind of thing. That should just result in some elastic preload in the joint, and that's ok by me.
If you're going to use the Retainers, the next step is to press fit the dowel pins into the ends of the Locking Pins.
(WIP)
Design
The general design concept for the hinge is similar to the others discussed on the 2020 Aluminum Extrusion stuff page. The cross-sections below show the basic makeup of the hinge and the intended load path. The printed 'bearing' pieces have spherical radii on the contacting surfaces, and these are mated with conical surfaces on the fixed mount (blue sections in the images.)
There is one major limitation for this revised design of the hinge, and that is due to the Mount part being a single printed component, whereas these outer races on my previous hinges were 'floating' relative to each other. This is a challenge cause it means the spacing that needs to be occupied by the extrusion and bearing is now fixed. I decided that the ease of install and improved part integrity offered by a single piece outweighed the impending assembly frustrations.
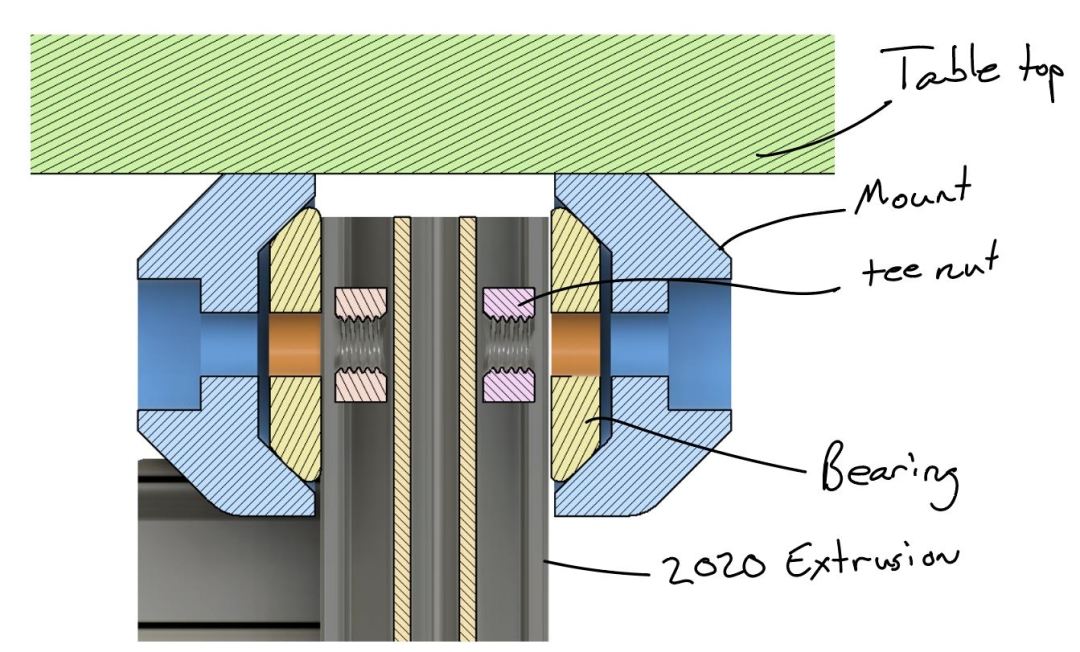
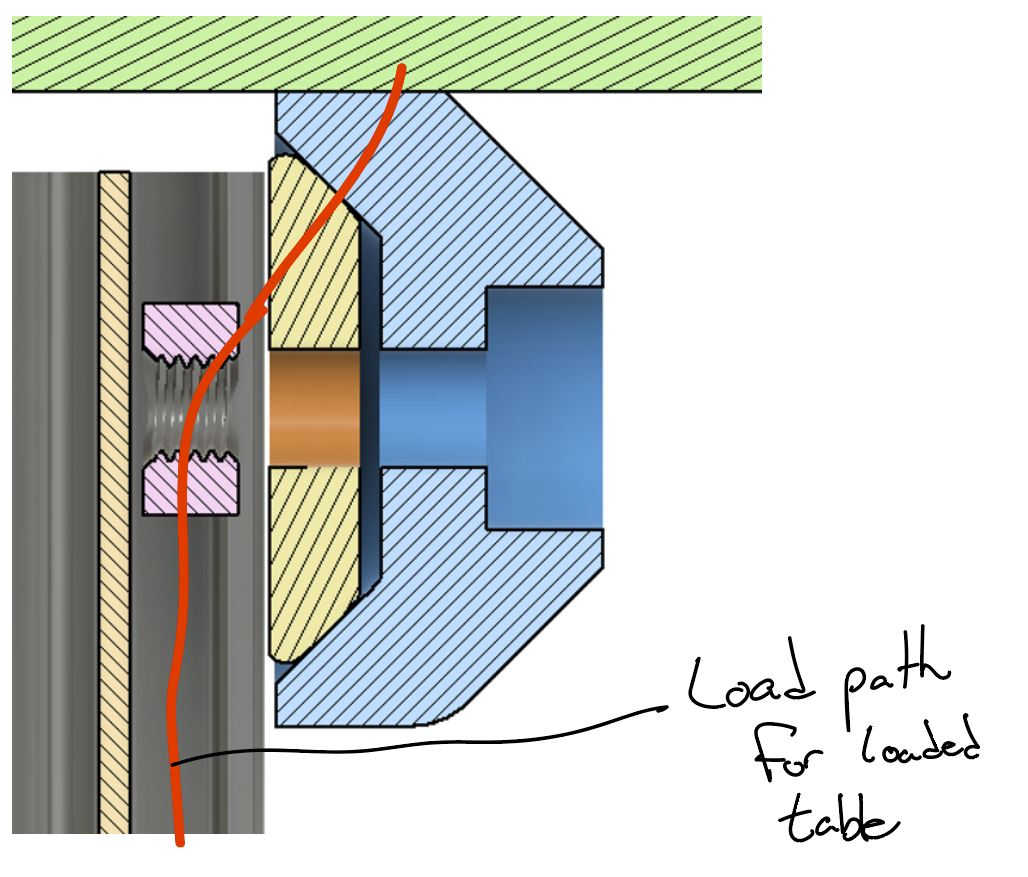
The fasteners (20mm long M5s) are threaded into tee nuts in the extrusion, and are driven all the way through to press against the extrusion. This keeps the stress in the bearing from being a function of how much the fastener is torqued and also keeps the fastener from loosening in operation.
When folded, the table is intended to rest on a well-supported, rigid portion of the mount block. The goal here is to avoid unexpected storage loads from damaging the hinge mechanism or lock pin.
Folding Table Leg Hinge
*PCBWay community is a sharing platform. We are not responsible for any design issues and parameter issues (board thickness, surface finish, etc.) you choose.
- Comments(0)
- Likes(3)
-
 Engineer
Nov 22,2025
-
 Sergio Oliveira
Jun 24,2025
-
 Engineer
Sep 29,2024
- 0 USER VOTES
- YOUR VOTE 0.00 0.00
- 1
- 2
- 3
- 4
- 5
- 6
- 7
- 8
- 9
- 10
- 1
- 2
- 3
- 4
- 5
- 6
- 7
- 8
- 9
- 10
- 1
- 2
- 3
- 4
- 5
- 6
- 7
- 8
- 9
- 10
- 1
- 2
- 3
- 4
- 5
- 6
- 7
- 8
- 9
- 10
 More by Bubs Builds
-
 3 channel valve assembly
Full build details available hereI had the Cam Retainer part printed from aluminum (and it came out ...
-
 Thermistor Driver Board
This board was made in support of the below video for getting temperature measurements using some be...
-
 8 channel valve assembly
Full build details available hereI had the Cam Retainer part printed from aluminum (and it came out ...
-
 6 channel valve assembly
Full build details available hereI had the Cam Retainer part printed from aluminum (and it came out ...
-
 High Flow Peristaltic Pump
Build BOMPrinted PartsI printed all of my parts in PETG, from a mixture of SUNLU and Polymaker fila...
-
 Displacement Sensor Flexure
As featured on Hackaday: https://hackaday.com/2024/05/18/flexures-keep-this-printed-displacement-sen...
-
 Folding Table Leg Hinge
A fellow Printables user recently asked me whether I thought any of my 2020 extrusion hinges would b...
-
 Flexure-based Fractal Vise Jaws
OverviewI, like pretty much every engineer I know, was absolutely enamored with the idea of fractal ...
-
 Bolt Sorting Sieve Shaker
Every project I work on that includes fasteners seems to end up accumulating a pile of unsorted, ran...
-
 Desktop Caliper Stand
A tidy way to keep your calipers handy. These stands were designed to hold 6 inch (150mm) or 8 inch ...
-
 Prusa Camera Mount
Original articleLike a lot of people, I love me a 3d printing time lapse. I've experimented with a f...
-
-
mammoth-3D SLM Voron Toolhead – Manual Drill & Tap Edition
174 0 0 -
-
AEL-2011 Power Supply Module
692 0 2 -
AEL-2011 50W Power Amplifier
589 0 2 -
-
-
Custom Mechanical Keyboard
788 0 0 -
Tester for Touch Screen Digitizer without using microcontroller
411 2 2 -
Audio reactive glow LED wristband/bracelet with NFC / RFID-Tags
376 0 1 -
-


