

|
arduino IDEArduino
|
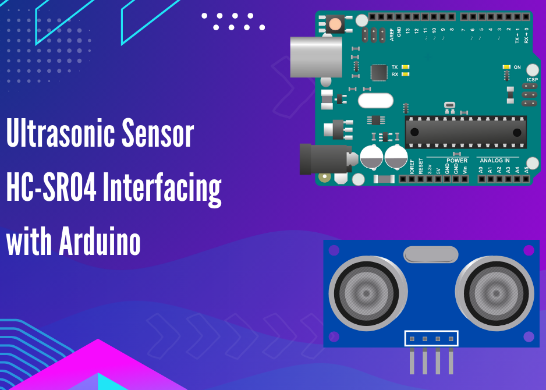
Ultrasonic Sensor HC-SR04 Interfacing with Arduino
The HC-SR04 Ultrasonic Sensor is a widely used and easy-to-implement sensor for distance measurement. Known for its high accuracy and stable readings, it has a range of 3 cm to 300 cm. This makes it an essential component in a variety of projects such as obstacle-avoiding robots, object detection, burglar alarms, smart parking systems, and more.
In this guide, we will delve into the working of the HC-SR04 ultrasonic sensor and learn how to interface it with an Arduino Uno.
What is the HC-SR04 Ultrasonic Sensor?
The HC-SR04 Ultrasonic Sensor is a module that measures distance by utilizing sound waves. It operates on the principle of sonar, emitting ultrasonic waves and detecting their echoes as they bounce back from nearby objects. These sound waves have a frequency higher than 20 kHz, making them inaudible to humans.
The sensor comprises two key components:
Ultrasonic Transmitter: Sends high-frequency sound waves.
Ultrasonic Receiver: Captures the reflected waves after they hit an object.
By calculating the time interval between sending and receiving the sound wave, the sensor determines the distance of the object.
Features of the HC-SR04 Ultrasonic Sensor
Measurement Range: 3 cm to 300 cm.
High Accuracy: Resolution of up to 0.3 cm.
Non-contact Measurement: Ideal for delicate or hard-to-reach objects.
Ease of Use: Requires only four connections for interfacing.
Compact Size: Fits seamlessly into a variety of projects.
Low Power Consumption: Operates at 5V DC with minimal current draw.
Pinout of HC-SR04 Ultrasonic Sensor

VCC: It should be connected to 5V DC.
Trig: It’s an input to sensor. High pulse of 10µs is applied to this pin.
Echo: It’s an output of sensor. High pulse at this pin indicates time taken by sound wave to travel from transmitter to object and object to receiver.
GND: This pin should be connected to ground.
Interfacing HC-SR04 Motor Driver IC with an Arduino

In the given diagram, an Arduino Uno board is connected to an Ultrasonic Sensor and a 16×2 LCD display. The Ultrasonic Sensor calculates the distance in centimeters, and the calculated value is displayed on the LCD.
The connections for the Ultrasonic Sensor are as follows:
VCC Pin (Sensor): Connected to the Arduino's 5V DC pin.
Trigger Pin (Sensor): Connected to pin 6 of the Arduino. This pin acts as the input for the sensor and output for the Arduino.
Echo Pin (Sensor): Connected to pin 7 of the Arduino. This pin acts as the output for the sensor and input for the Arduino.
GND Pin (Sensor): Connected to the Arduino's Ground (GND) pin.
To display the distance on the LCD, a 16×2 alphanumeric LCD is used. The connections between the Arduino and the LCD are as follow:

Video
To learn more checkout full article: https://playwithcircuit.com/ultrasonic-sensor-hc-sr04-interfacing-with-arduino/
/* HC-SR04 Interfacing with Arduino using the NewPing Library by www.playwithcircuit.com */ // For Ultrasonic Sensor // We are using JHD 16x2 alphanumeric LCD with HD44780 controller LiquidCrystal lcd(12, 11, 5, 4, 3, 2); // define trigger and Echo pin for Ultrasonic sensor const int trigPin = 6; const int echoPin = 7; long distance = 0; // Initialize NewPing library NewPing sonar(trigPin, echoPin, MAX_DISTANCE); void display(void) { // write column, row and counting starts from zero so 0th Colum and 1st row lcd.setCursor(0, 1); lcd.print(" "); // set the cursor to column 0, line 1 // (note: line 1 is the second row, since counting begins with 0) lcd.setCursor(0, 1); lcd.print(distance); lcd.print(" cm"); } void setup() { // set up the LCD's number of columns and rows: lcd.begin(16, 2); // Print a message to the LCD. lcd.print("Distance ="); // set the trigPin as an output and echoPin as an input pinMode(trigPin, OUTPUT); pinMode(echoPin, INPUT); digitalWrite(trigPin, LOW); // set trigger pin to LOW // provide some time for the sensor to settle delay(500); } void loop() { distance = sonar.ping_cm(); if (distance == 0) { // write column, row and counting starts from zero so 0th Colum and 1st row lcd.setCursor(0, 1); lcd.print("Out of Range "); } else { display(); // to display calculated distance } // provide some time between readings delay(100); }
Ultrasonic Sensor HC-SR04 Interfacing with Arduino


Raspberry Pi 5 7 Inch Touch Screen IPS 1024x600 HD LCD HDMI-compatible Display for RPI 4B 3B+ OPI 5 AIDA64 PC Secondary Screen(Without Speaker)
BUY NOW
ESP32-S3 4.3inch Capacitive Touch Display Development Board, 800×480, 5-point Touch, 32-bit LX7 Dual-core Processor
BUY NOW
Raspberry Pi 5 7 Inch Touch Screen IPS 1024x600 HD LCD HDMI-compatible Display for RPI 4B 3B+ OPI 5 AIDA64 PC Secondary Screen(Without Speaker)
BUY NOW
- Comments(1)
- Likes(0)
 Log in to post comments.
 Reply
Reply
More by Rachana Jain
-
 Line Follower Robot using Arduino
A Line Follower Robot (LFR) is an autonomous robot that follows a predefined path, typically a black...
Line Follower Robot using Arduino
A Line Follower Robot (LFR) is an autonomous robot that follows a predefined path, typically a black...
-
 Ultrasonic Sensor HC-SR04 Interfacing with Arduino
The HC-SR04 Ultrasonic Sensor is a widely used and easy-to-implement sensor for distance measurement...
Ultrasonic Sensor HC-SR04 Interfacing with Arduino
The HC-SR04 Ultrasonic Sensor is a widely used and easy-to-implement sensor for distance measurement...
-
 Interfacing IR Sensor Module with Arduino Nano
In this project, we will learn how to interface an Infrared (IR) sensor module with an Arduino Nano....
Interfacing IR Sensor Module with Arduino Nano
In this project, we will learn how to interface an Infrared (IR) sensor module with an Arduino Nano....
-
-
-
Modifying a Hotplate to a Reflow Solder Station
840 1 5 -
MPL3115A2 Barometric Pressure, Altitude, and Temperature Sensor
441 0 1 -
-
-
V2 Commodore AMIGA USB-C Power Sink Delivery High Efficiency Supply Triple Output 5V ±12V OLED display ATARI compatible shark 100W
1080 4 2 -
How to measure weight with Load Cell and HX711
687 0 3