|
|
EasyEDA |
W307186ASV66_Gerber_PCB_Robot-Car-Roof-Light-Unit
In this, part 3 of the “Giving new Life to an Old Toy Car” series, we will be adding some flashing lights to the toy car project. This will ultimately serve two purposes, with the most obvious being to give some life and excitement to the project ( as the final user will be a young boy of 7, the visual aspect is important). The second purpose is more obscured, and mostly only useable to programmers and coders, or those that will debug the project… The flashing lights will function as status indicators, at startup, as well as during the normal operation of the toy. Obviously, the diagnostic nature should be well obscured so as to not distract from the visual aspects.
A short test of the display unit, disguised as a “police-style” flasher unit
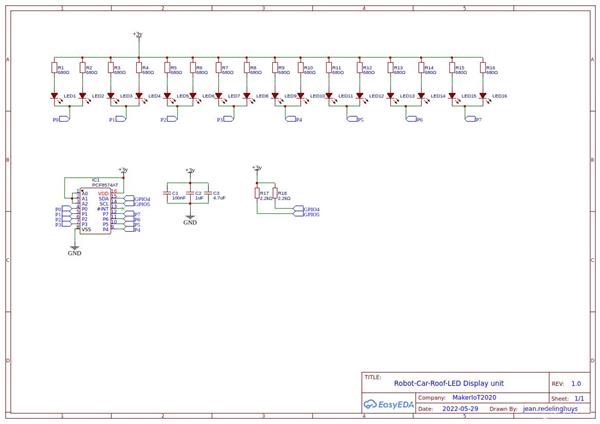
The flasher unit is made up of an extremely simple circuit, with only a PCF8574 IO expander, bypass capacitors, some LED lights, and current limiting resistors.
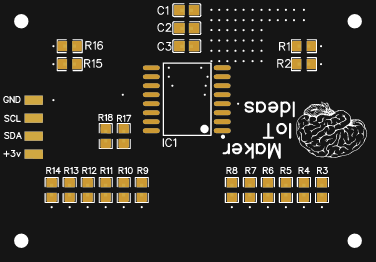
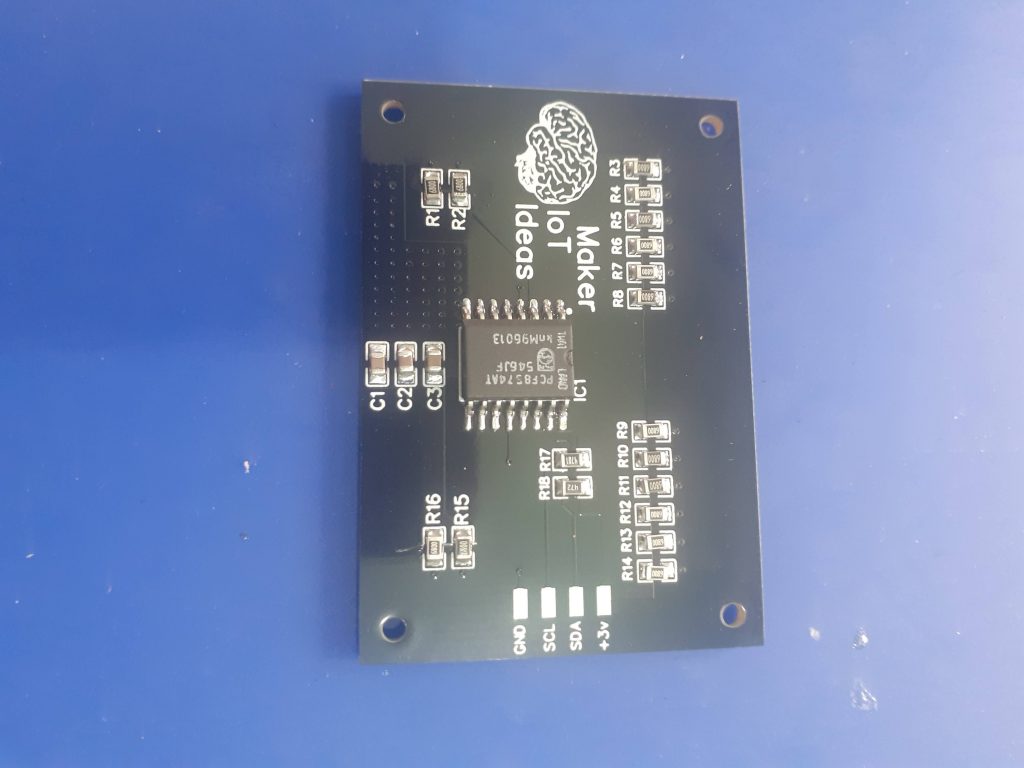 The bottom layer of the flasher unit, shows the Io expander, bypass capacitors, and current limiting resistors.
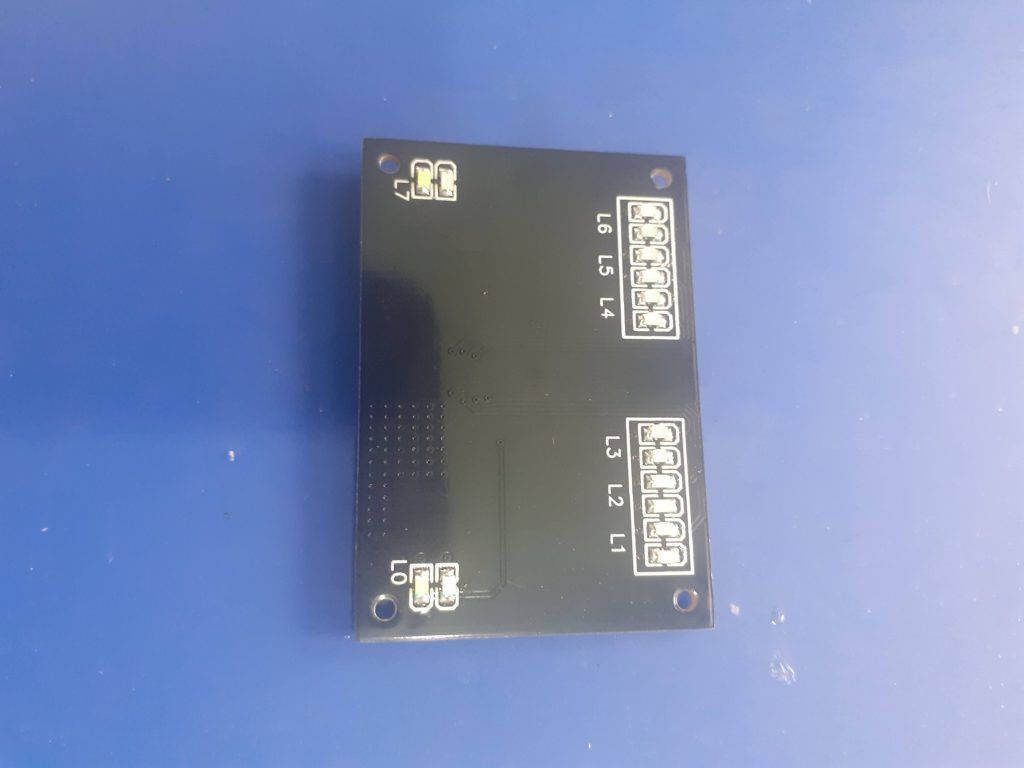 The top layer is designed to be as clean as possible, with only LEDs and some labeling
Schematic
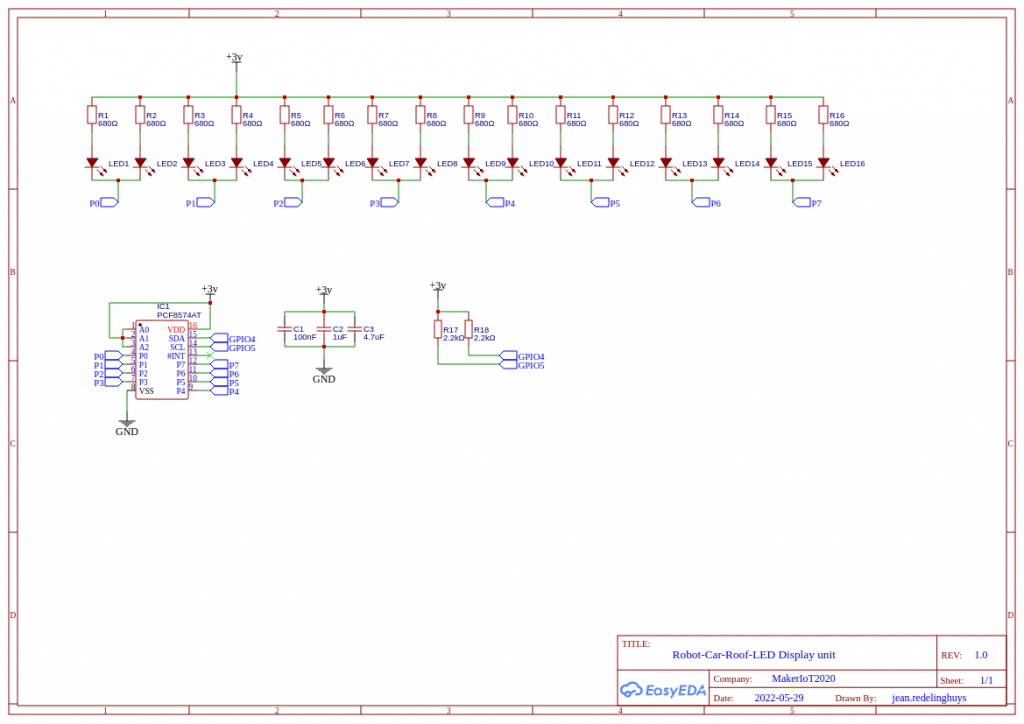 Schematic
The schematic is straightforward, with no surprises, consisting only of a few components, like the PCB8574, bypass capacitors, current limiting resistors, and of course the LEDs. It is also important to remember that I plan to use this entire robot car to teach a young boy to program microprocessors. I believe that visual is best, thus, all the lights ??
Coding
As this is still a project in quite a lot of development stages, I will not publish my exact code at this moment. You can however look forward to the future conclusion post, which will contain all my code at that stage.
For now, however, we need to keep in mind that the PCF8574 is an I2C port expander, with an 8-bit IO port.
It is thus possible to do something simple like the below:
#include <Wire.h>

void setup() {
 wire.begin();
 wire.beginTransmission(0x20);
 wire.write(0b11111111); // All LEDS off
 // our circuit is sinking current into the io expander
 wire.endTransmission();
delay(1000); // delay for illustration purposes, production code will use
// non blocking code
wire.beginTransmission(0x20);
 wire.write(0b10100101); // All blue LED on
 // our circuit is sinking current into the io expander
 wire.endTransmission();
delay(1000);
}

void loop() {
}
Obviously, this is just a very quick example and is meant to just test functionality. Your own application will ultimately determine the exact code that you would need.
#include <Wire.h>
void setup() {
wire.begin();
wire.beginTransmission(0x20);
wire.write(0b11111111); // All LEDS off
// our circuit is sinking current into the io expander
wire.endTransmission();
delay(1000); // delay for illustration purposes, production code will use
// non blocking code
wire.beginTransmission(0x20);
wire.write(0b10100101); // All blue LED on
// our circuit is sinking current into the io expander
wire.endTransmission();
delay(1000);
}
void loop() {
}
W307186ASV66_Gerber_PCB_Robot-Car-Roof-Light-Unit
*PCBWay community is a sharing platform. We are not responsible for any design issues and parameter issues (board thickness, surface finish, etc.) you choose.
- Comments(0)
- Likes(0)
- 0 USER VOTES
- YOUR VOTE 0.00 0.00
- 1
- 2
- 3
- 4
- 5
- 6
- 7
- 8
- 9
- 10
- 1
- 2
- 3
- 4
- 5
- 6
- 7
- 8
- 9
- 10
- 1
- 2
- 3
- 4
- 5
- 6
- 7
- 8
- 9
- 10
- 1
- 2
- 3
- 4
- 5
- 6
- 7
- 8
- 9
- 10
 More by Jean Redelinghuys MakerIoT2020
-
 PCB_MCP23008_2023-10-08
MCP23008 BreakoutI designed this breakout to assist me during prototyping my next version of the “RP...
-
 PCB_XiaoRP2040-Mouse-REV2
Xiao RP2040 Joystick Mouse – revision 2.00Revision 1.0 of the ProjectOver the last few months, I hav...
-
 Multi Purpose IO Card
Multi-Purpose IO CardWhen we are working on a prototype, we always need access to pushbuttons, encod...
-
 Variable Voltage Power Module
Powering electronics projects are always challenging. This Variable vol...
Variable Voltage Power Module
Variable Voltage Power ModulePowering electronics projects are always challenging. This Variable vol...
-
 I2C Matrix Keypad
An I2C Matrix KeypadThe completed I2C Matrix KeypadIn a previous post this month I introduced my 4×4...
-
 ESP32-S Development Board, in "Arduino Uno" form factor
UPDATE 24/06/2023:This board now has a Hardware Revision 2.0 available. It is the same board but wit...
-
 W307186ASC94_Gerber_PCB_USB-Ports
USB Power Supply ModuleUSB Ports are quite handy to power all our day-to-day electronic devices, but...
-
 Atmega 328P based PWM controller Card
ATMega 328P Based PWM controller CardAs part of my recent ESP-12E I2C Base Board project, I designed...
-
 W307186ASC71_Gerber_PCB_ESP-Now Remote
Today we will look at the remote control unit for the Robotic Toy Car – Part 6.The project is close ...
-
 W307186ASV69_Gerber_PCB_Robot-Car-MCU-Board Prototype
In our last project, we started working on repurposing an old toy car. In this part, Robot Toy Car –...
-
 W307186ASV62_Gerber_PCB_DUAL-H-Bridge
by makeriot2020 on May 27, 2022Many of us have old toys laying around the house, they belong to ou...
-
 CAN-BUS Breakout
Breadboard Compatible CAN-BUS Breakout ModuleWhat is this:Some of us have already used the commonly ...
-
 RA-02 Breakout with Level converters
Breadboard and beginner-friendly RA-02 Breakout ModuleMost Makers and electronics enthusiasts may al...
-
 ATMEGA328P Module with integrated LoRa and CAN Bus
ATMEGA328P Module with integrated LoRa and CAN-BUSINTRODUCTIONIn my quest to perfect my LoRa telemet...
-
 Sx127x-Ra-02-Test-Module with ATMEGA328P-AU
SX127x LoRa/FSK/OOK Prototype Radio BoardI recently had a requirement to do some automation/telemetr...
-
 USB-ASP Programmer ATMEGA8
Build your own USB-ASP Programmer CloneBymakeriot2020 FEB 21, 2022 Arduino, ASP programmerUsing mor...
-
 ATTiny1616-LIGHT-Controller-with-CAN_B_PCB_ATTiny1616-LIGHT-Controller-with-C_2024-09-11
Assembly of the ATTiny1616 Can bus controller PCBThe Assembly of the ATTiny1616 Can Bus Controller P...
-
 ATTiny1616QFN-CAN-Remote-Neopixel-Ligh_PCB_ATTiny1616QFN-CAN-Remote-Neopixel-2024-09-11_2024-09-11
NeoPixel CAN-Bus Module with local controlAs part of my current project to add NeoPixels to the cabi...
-
-
mammoth-3D SLM Voron Toolhead – Manual Drill & Tap Edition
250 0 0 -
-
AEL-2011 Power Supply Module
775 0 2 -
AEL-2011 50W Power Amplifier
642 0 2 -
-
-
Custom Mechanical Keyboard
838 0 0 -
Tester for Touch Screen Digitizer without using microcontroller
459 2 2 -
Audio reactive glow LED wristband/bracelet with NFC / RFID-Tags
406 0 1 -
-


