
|
KiCADKicad
|
|

|
arduino IDEArduino
|
Ultra-precise milliOhm meter
In this project I made a precise milliOhm meter, based on some circuit designs first published by Scullcom Hobby Electronics. I followed his circuit designs, then I designed my own PCB and developed a little code for an Arduino Nano.
The milliOhm meter uses a very simple principle: Ohm's law. We apply a know current (100 mA) on an unknown resistor, and we measure the voltage across the resistor. The know current and the measured voltage will tell us the resistance. The measurement is also known as 4-wire sensing or Kelvin sensing. The voltage measured by the AD converter is processed by an Arduino Nano and the data is sent to an OLED display as well as to the serial port.
Some tips:
Pay special attention to the polarity of the following components:
- All tantalum capacitors are polarized, so double check C2-C5, C8 and C9.
- LTC2400 and LT1634 don't have notches. The pin 1 is located where their numbering starts. Always double check this!
- The maximum resistance that you can measure is 5 Ohms. Don't go above this value, otherwise, you can damage the ADC!
Ultra-precise milliOhm meter
*PCBWay community is a sharing platform. We are not responsible for any design issues and parameter issues (board thickness, surface finish, etc.) you choose.
- Comments(5)
- Likes(13)
-
 Engineer
Apr 14,2024
-
 Frank Darity
Mar 16,2024
-
 Mitko Petrovik
Feb 16,2024
-
 Zhigarev Andrey Alexandrovich
Jun 25,2023
-
 Brian Walters
Jun 19,2023
-
 Engineer
May 09,2023
-
 Engineer
Mar 23,2023
-
 David Hanson
Jan 27,2023
-
 Flamantic
Sep 29,2022
-
 karul
Jun 28,2022
-
 Engineer
Jun 24,2022
-
 chmeldaa
Jun 24,2022
-
 Prasanna K
Apr 25,2022
- 0 USER VOTES
- YOUR VOTE 0.00 0.00
- 1
- 2
- 3
- 4
- 5
- 6
- 7
- 8
- 9
- 10
- 1
- 2
- 3
- 4
- 5
- 6
- 7
- 8
- 9
- 10
- 1
- 2
- 3
- 4
- 5
- 6
- 7
- 8
- 9
- 10
- 1
- 2
- 3
- 4
- 5
- 6
- 7
- 8
- 9
- 10
 More by Curious Scientist
-
 USB PD Breadboard Power Supply
In this article, I show you my new creation. It is a USB PD decoy-based breadboard power supply. All...
-
 ADS1256 - RP2040 Custom DAQ Front Panel with GPIO
This is just a simple PCB panel that belongs to my other project which is a high-performance DAQ.A r...
-
 ADS1256 - RP2040 Custom DAQ Front Panel without GPIO
This is just a simple PCB panel that belongs to my other project which is a high-performance DAQ.A r...
-
 10th Anniversary Badge
I designed this small badge for PCBWay's 10th anniversary.I tried to make a deeper meaning to the bo...
-
 ADS1256 - Atmega32u4 Custom DAQ board
IntroductionIn this project, I show you two things. One is a new version (v1.2) of my custom DAQ bas...
-
 Debounced rotary encoder module
In this project, I show you my approach to making a rotary encoder module.One can buy different rota...
-
 Custom ADS1256 board with ATmega32U4
I created my own ADS1256 PCB after working with this AD converter for several years. I wanted to bui...
-
 3-axis stepper motor controller with CNC pendant connectivity
In this article, I show you the updated version of my motorized microscope. In one of my older video...
-
 Light meter for analog cameras [CH32V006F8P6 + TSL2591]
In this article, I show you how I built my ow...
Light meter for analog cameras [CH32V006F8P6 + TSL2591]
Light meter for analog cameras [CH32V006F8P6 + TSL2591]In this article, I show you how I built my ow...
-
 5-way navigator PCB
In this article, I show you a genius way of handling multiple buttons with a microcontroller. I “dis...
-
 CH32V006K8U6 Development Board
IntroductionSo, I have been working with the CH32 microcontrollers and chips for a while, and I even...
-
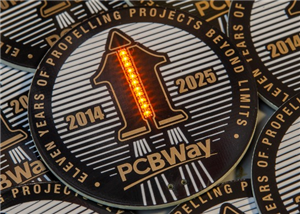 PCBWay 11-year Anniversary Badge
This visual design was created by https://www.instagram.com/guiye.perez.bongiovanni/ ; however, only...
-
 TCD1304 - STM32F401CCU6 breakout board
The recent modifications made to the circuit board design have improved its functionality and space ...
-
 TCD1304 miniature PCB rev2
The redesign of the PCB involved several key changes to improve its performance and decrease its siz...
-
 2-channel breadboard voltmeter
The project originally stems from my CH32 tutorial series. I started working with this chip not so l...
-
 ADS1256 - RP2040 Custom DAQ Rear Panel
This is just a simple PCB panel that belongs to my other project which is a high-performance DAQ.A r...
-
 ADS1256 - RP2040 Custom DAQ with GPIOs
This is my (hopefully) last iteration of the ADS1256-based DAQ board. I replaced the ATmega32U4 micr...
-
 High-performance 3-axis stepper motor control panel
In this project, I show you my new development which is a high-performance 3-axis stepper motor cont...
-
-
AEL-2011 Power Supply Module
555 0 2 -
AEL-2011 50W Power Amplifier
514 0 2 -
-
-
Custom Mechanical Keyboard
712 0 0 -
Tester for Touch Screen Digitizer without using microcontroller
341 2 2 -
Audio reactive glow LED wristband/bracelet with NFC / RFID-Tags
323 0 1 -
-
-


