WhatsApp Coronavirus Notifier Bot Running on Raspberry Pi
First of all, I hope that you and your loved ones are safe and healthy during these unprecedented times.
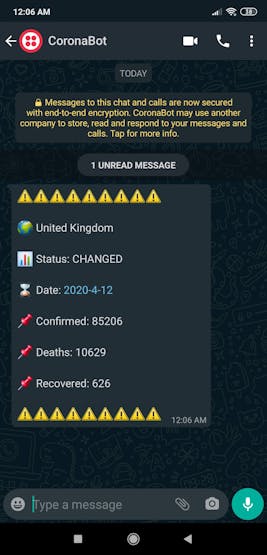
Tracking the current data on the daily impact of the coronavirus had encumbered lots of my friends' and acquaintances' thought processes due to the uncertain data update times. Hence, I developed a bot hosted by a Raspberry Pi, which notifies the user when there is a change in the daily case report of the selected country via WhatsApp, in the hope of soothing their minds even a little bit. In other words, you will get notified via WhatsApp (as notification messages) when the daily case report of your country is uploaded or updated by the data provider - The 2019 Novel Coronavirus Visual Dashboard operated by the Johns Hopkins University Center for Systems Science and Engineering (JHU CSSE) with the support of ESRI Living Atlas Team and the Johns Hopkins University Applied Physics Lab (JHU APL). Also, the notifier bot sends an information message in the given period if there is no change (STABLE).
The project in a nutshell:
To obtain the information from the data provider(JHU CSSE with JHU APL), I used a well-programmed application by Rodrigo Pombo (pomber). It collects all the required data for the bot in a JSON file.
As you may have got familiar with my previous projects, to send notification messages via WhatsApp, I used the Twilio's API for WhatsApp in PHP.
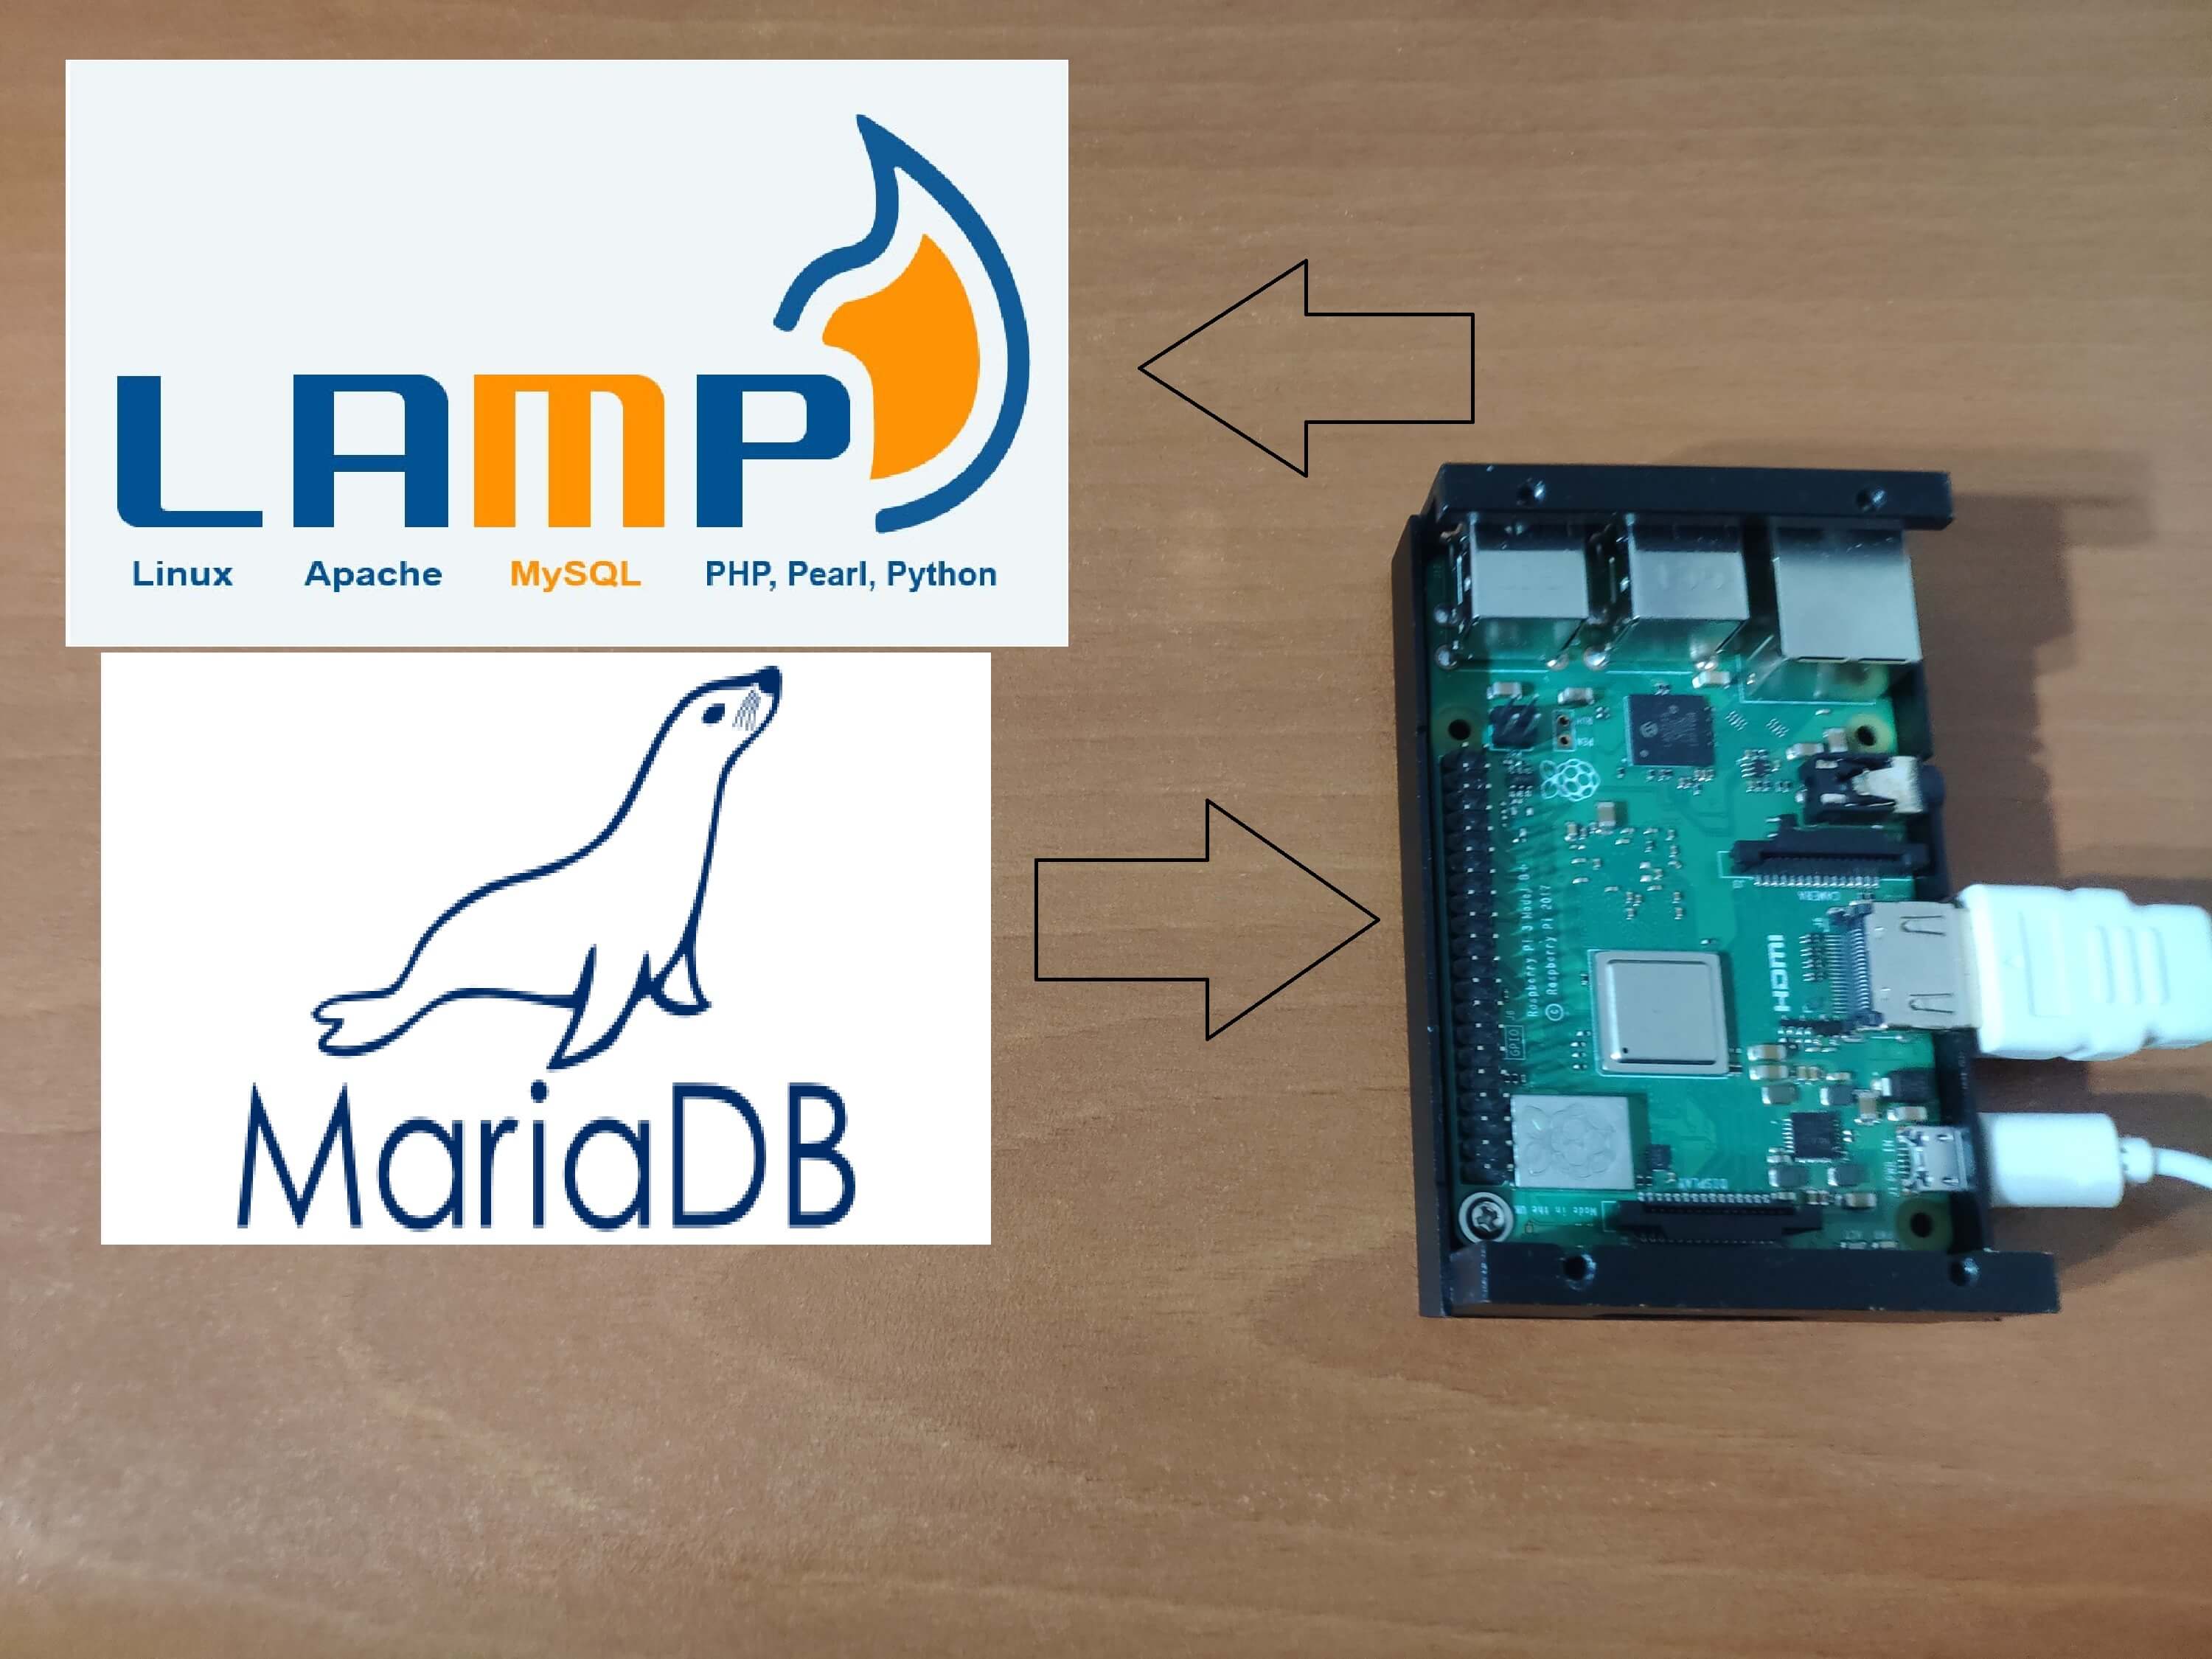
To host the coronavirus notifier bot and manage the data evaluation process automatically in PHP to detect the data status of the selected country (STABLE or CHANGED), I set up a LAMP (Linux, Apache, MySQL, PHP) server with MariaDB on Raspberry Pi.
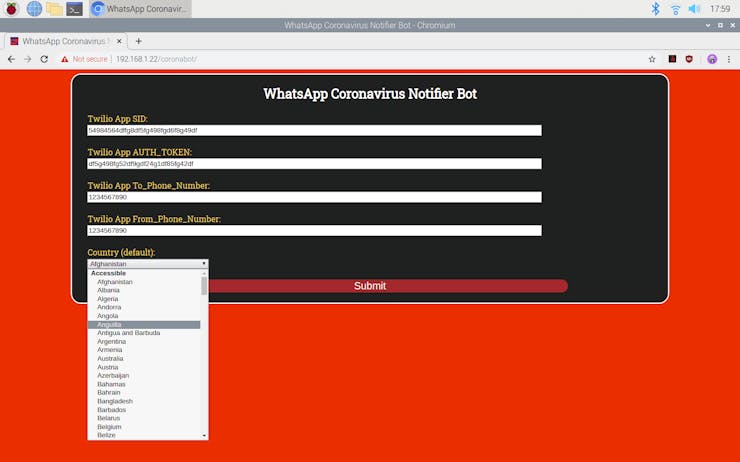
Running on the LAMP server hosted by Raspberry Pi, I designed a user-friendly interface in which you can change the country whose data is collated and enter your Twilio application settings (SID, AUTH_TOKEN, from_phone_number, to_phone_number). The interface also allows you to automatically create a database table named variables before activating the notifier bot. And thus, without needing any coding, you can observe the daily coronavirus case report of the selected country by merely using the bot interface.
By the following steps, you can replicate the WhatsApp coronavirus notifier bot project to run it on your Raspberry Pi or your personal computer as the localhost.
Preview: What You Will Learn
- How to create a Twilio application
- How to install and configure Apache, PHP, and MySQL to create a LAMP web server on Raspberry Pi
- How to install CURL on Raspberry Pi
- How to define a new user and create a new database with MariaDB on Raspberry Pi
- How to develop a web application (bot) in PHP to send WhatsApp notification or information messages depending on the incoming data from an external server
- How to install the bot on Raspberry Pi
- How to activate the bot terminal in a loop on Raspberry Pi
Step 1: Creating a Twilio application
To send WhatsApp messages through Twilio's API, the only thing you need to do is to sign up for a Twilio Trial Account.
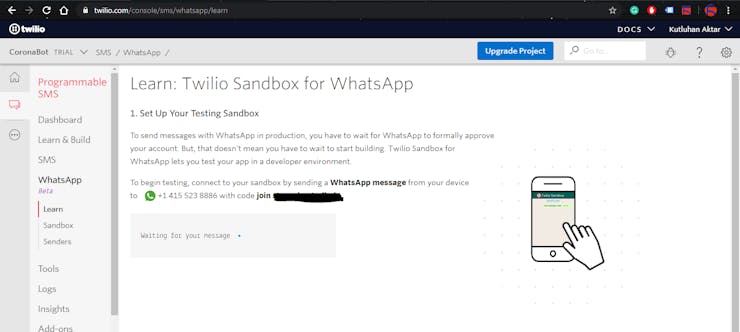
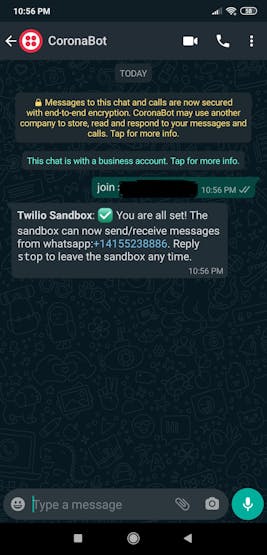
After signing up, with your SID and Auth Token, you can use Twilio's API for WhatsApp without any charge. As explained on Twilio, you need to join a shared phone number with your phone in order to verify your phone number and initiate the Twilio's API for WhatsApp.
For more information and learn how to create a new account, click the link below.
You can sign up for Twilio with my referral code here.
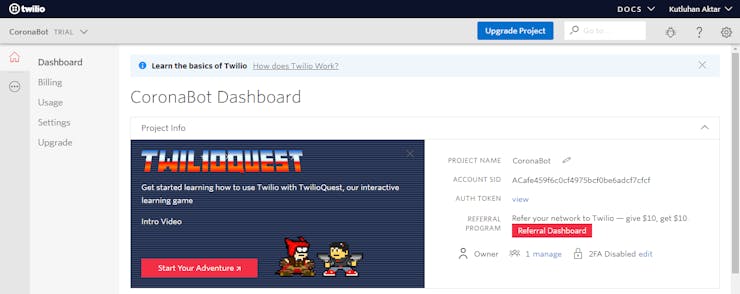
1) Create a new application
2) Go to the Sandbox to get the code
3) Connect your phone to your application with the code
Step 2: Setting up a LAMP web server on Raspberry Pi
If you are a novice in programming with Raspberry Pi, you can inspect well-explained instructions and tutorials on the official Raspberry Pi website.
To go to the official Raspberry Pi setting up tutorial, click here.
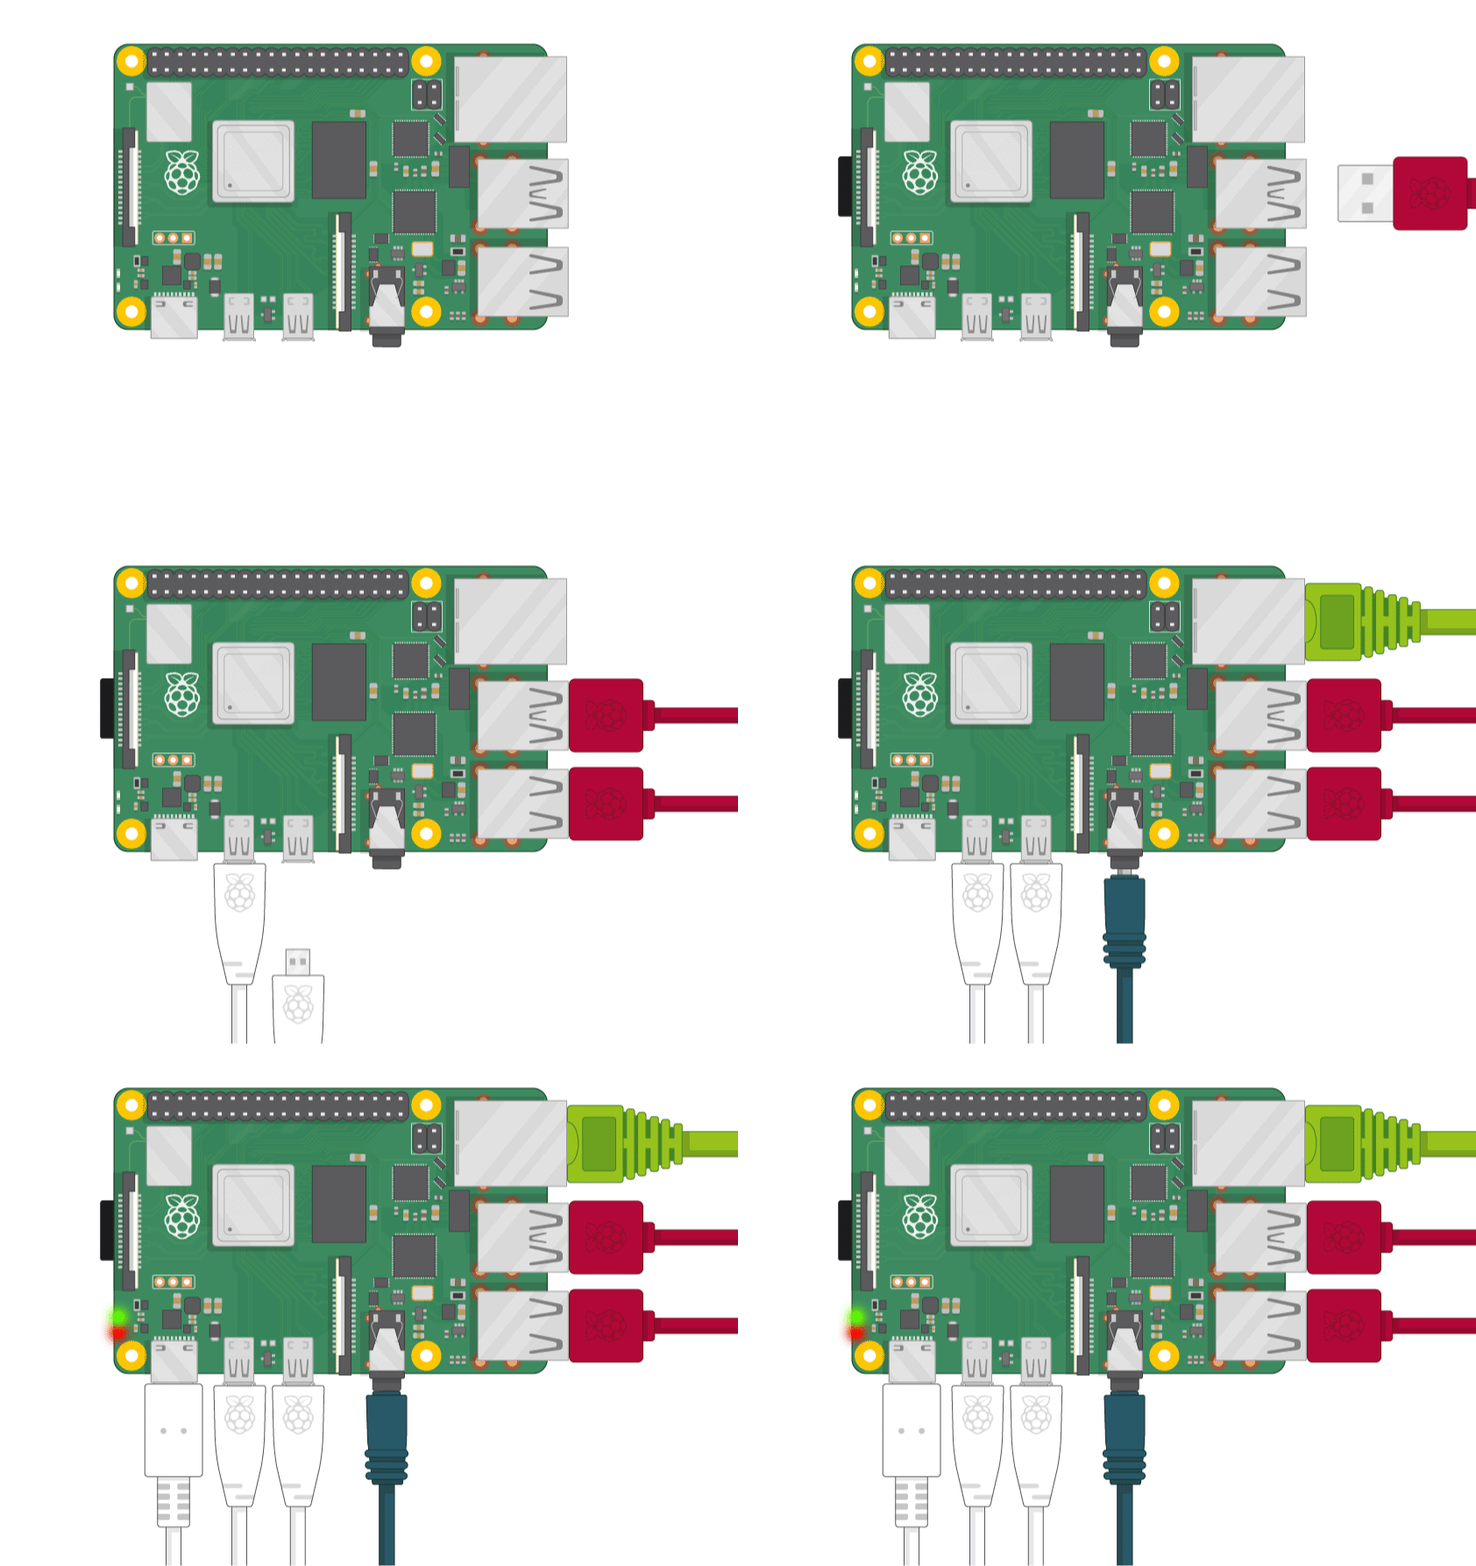
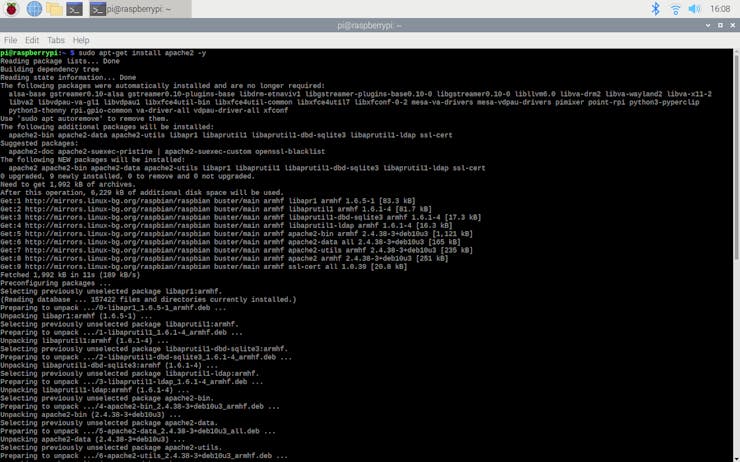
- Open a terminal window by selecting Accessories > Terminal from the menu.
- Install the apache2 package by typing the following command into the terminal and pressing Enter:
sudo apt-get install apache2 -y
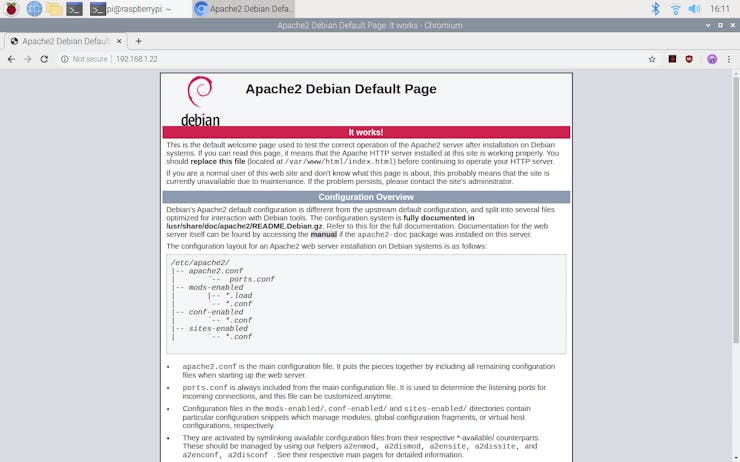
- To test the server, open Chromium by selecting Internet > Chromium Web Browser from the menu and enter http://localhost.
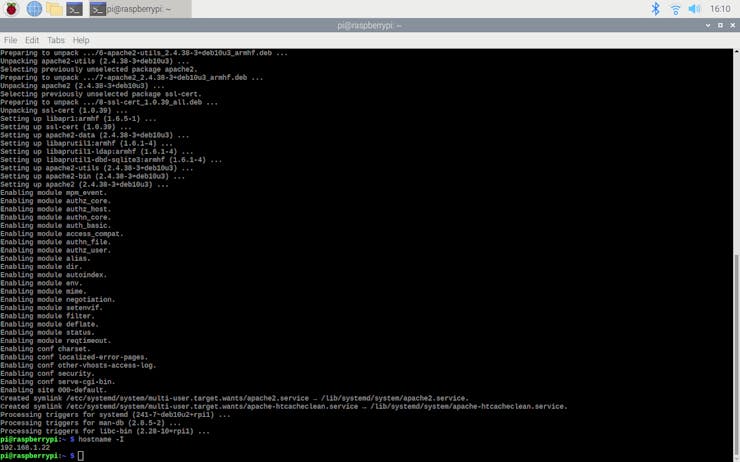
- If you want, you can use the IP address of your Raspberry Pi as well.
hostname -I
- Install the PHP package with the following command:
- Do not forget to update the Pi.
sudo apt-get update
sudo apt-get install php -y
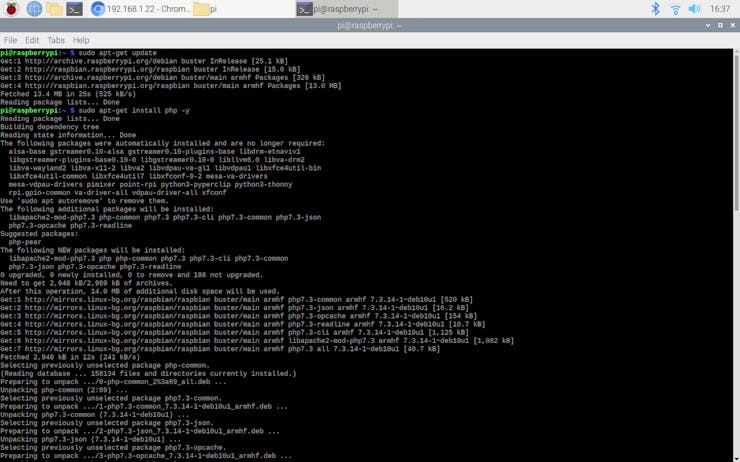
- Install the MySQL Server (MariaDB) and PHP-MySQL packages by entering the following command into the terminal window:
sudo apt-get install mariadb-server php-mysql -y
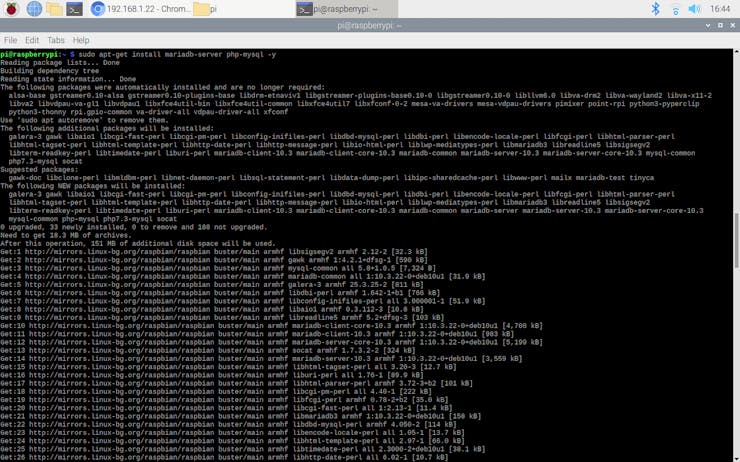
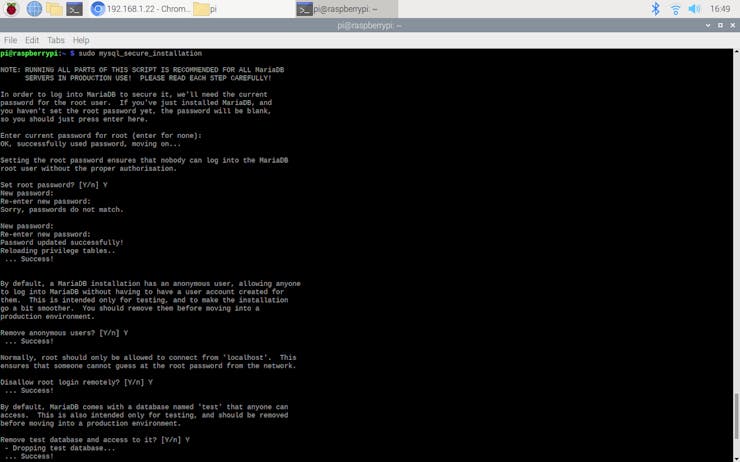
- To create a new user, run the MySQL secure installation command in the terminal window.
sudo mysql_secure_installation
- You will be asked Enter current password for root (enter for none): — press Enter.
- Type in Y and press Enter to Set root password.
- Type in bot at the New password: prompt, and press Enter.
- Type in Y to Remove anonymous users.
- Type in Y to Disallow root login remotely.
- Type in Y to Remove test database and access to it.
- Type in Y to Reload privilege tables now.
- When complete, you will see the message All done! and Thanks for using MariaDB!.
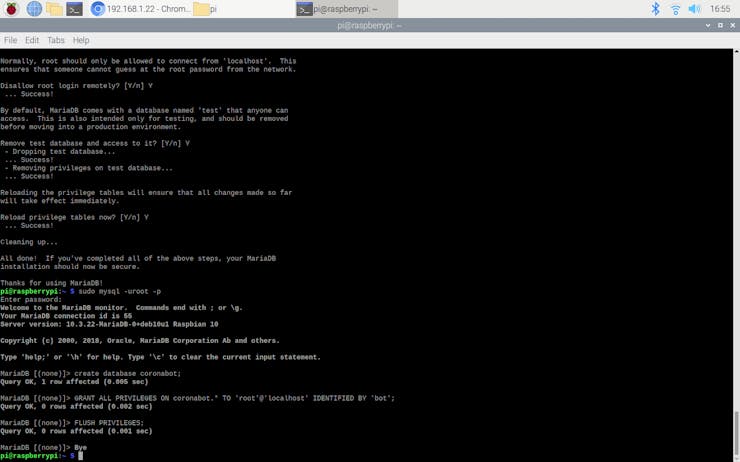
- To create a database (coronabot), run mysql in the terminal window:
sudo mysql -uroot -p
- Enter the root password - bot
- You will be greeted by the message Welcome to the MariaDB monitor.
- Create the database for the coronavirus notifier bot, named as coronabot, at the MariaDB [(none)]> prompt using:
create database coronabot;

GRANT ALL PRIVILEGES ON coronabot.* TO 'root'@'localhost' IDENTIFIED BY 'bot';

FLUSH PRIVILEGES;
- Exit the MariaDB prompt with Ctrl + D.
- To be able to run the Twilio's API on the localhost, install the php-curl package:
sudo apt-get install php-curl
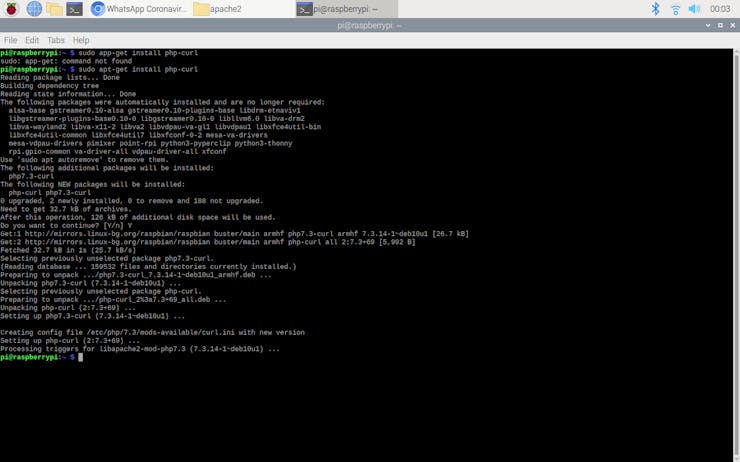
- Then, restart the apache server to be able to use the installed packages on the localhost:
sudo service apache2 restart
Step 3: Developing the coronavirus notifier bot and installing it on Raspberry Pi
I developed the coronavirus notifier bot (coronabot) in PHP and explained the source code of the bot in the Code Explanation section below for those who are interested.
However, if you are not fond of web development, you can skip the Code Explanation section since the bot is ready to install and run.
Install:
If you have completed Step 1 and Step 2, you can run the bot interface to enter settings (SID, AUTH_TOKEN, To_Number, From_Number, Country) without needing any coding on your Raspberry Pi by installing the coronabot on the localhost. All database and user settings are pre-filled.
By the following steps, install the coronabot on the localhost:
- Download the bot with all code and asset files, including the Twilio's API for WhatsApp, in a zipped folder (coronabot) in Downloads.
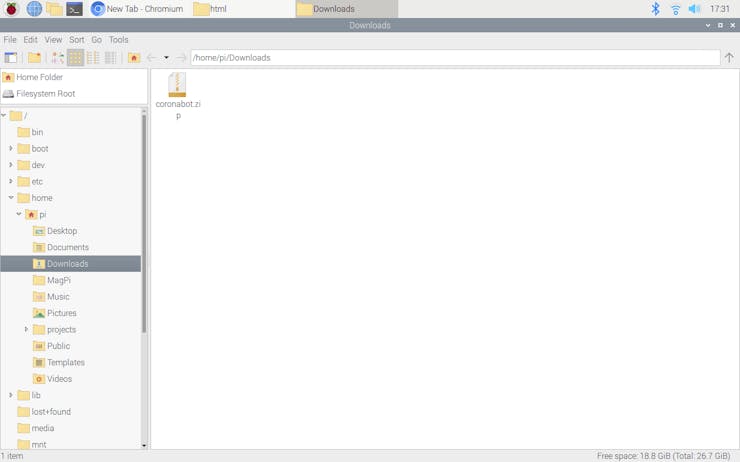
- Extract the coronabot.zip.
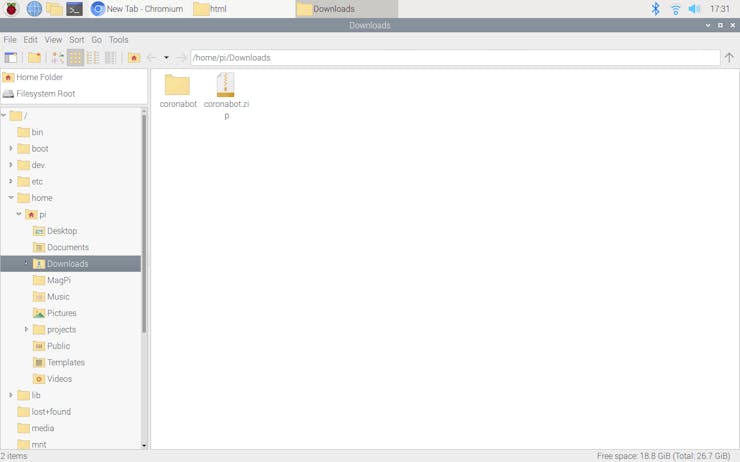
- Move the coronabot folder from Downloads to the server (/var/www/html) by using the terminal because the apache server is a protected location.
sudo mv /home/pi/Downloads/coronabot/ /var/www/html/
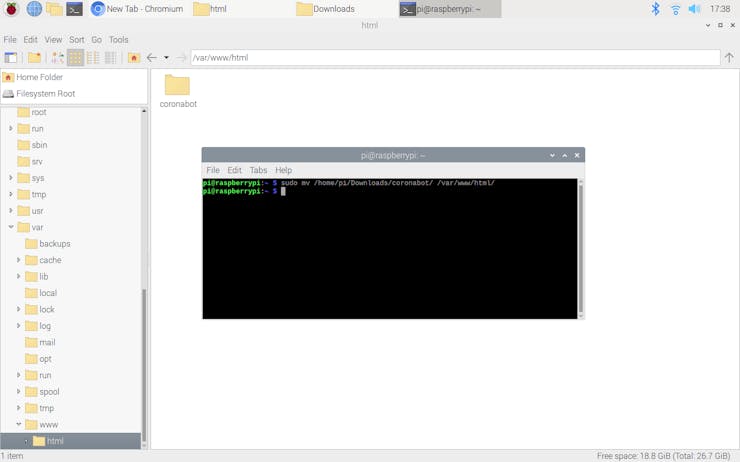
- Go to the bot interface:
Features:
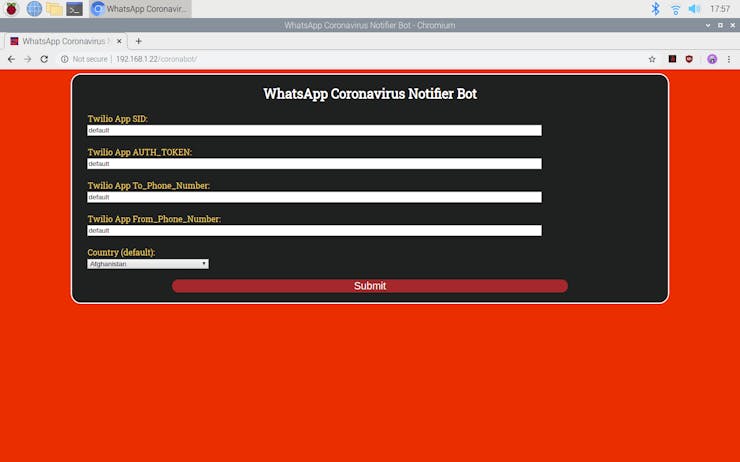
1) Open the bot interface to create a table named as variables in the coronabot database. You should see the default variables if the bot is working properly after installation.
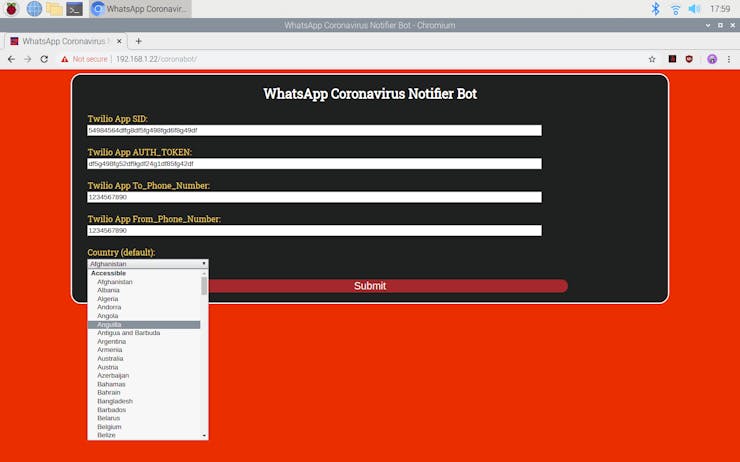
2) Enter the required settings for the bot - SID, AUTH_TOKEN, To_Phone_Number, From_Phone_Number, Country. All accessible countries are provided. Note: Refrain from entering phone numbers with '+' at the beginning.
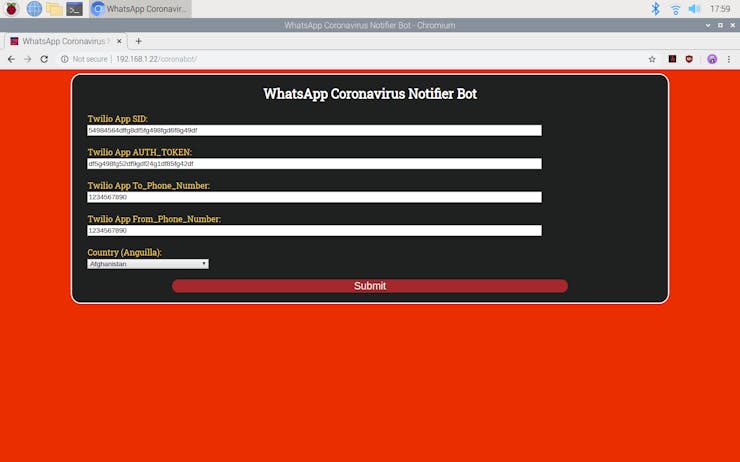
3) Display the current settings in the table (variables) and change them even though you activated the terminal to get WhatsApp messages.
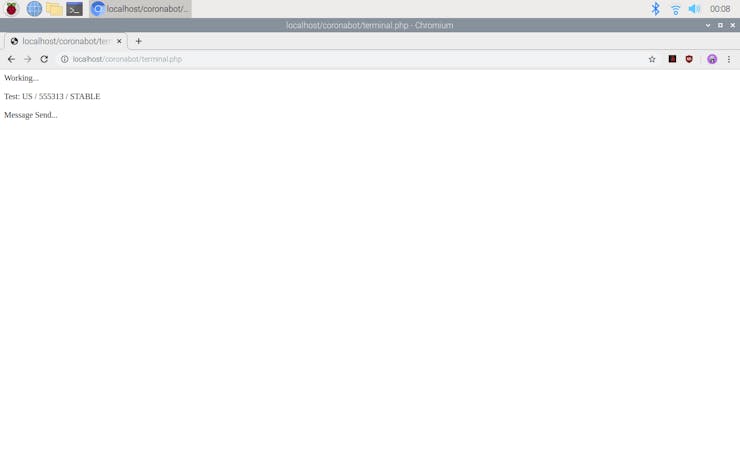
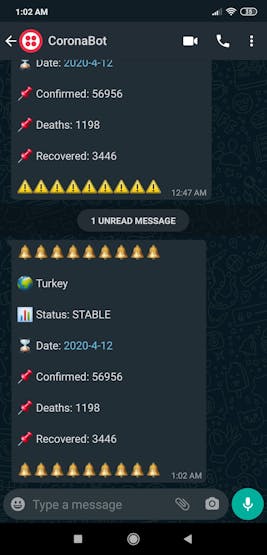
4) Via the terminal, according to the settings in the table (variables), get the daily case report of the selected country from the data provider and send WhatsApp notification or information messages depending on the data status (CHANGED or STABLE). If there is a change in date, confirmed, or recovered variables, the bot defines the data status as CHANGED.
http://localhost/coronabot/terminal.php

Code Explanation (Optional):
In this section, I will explain how I developed the coronavirus notifier in PHP.
1) index.php
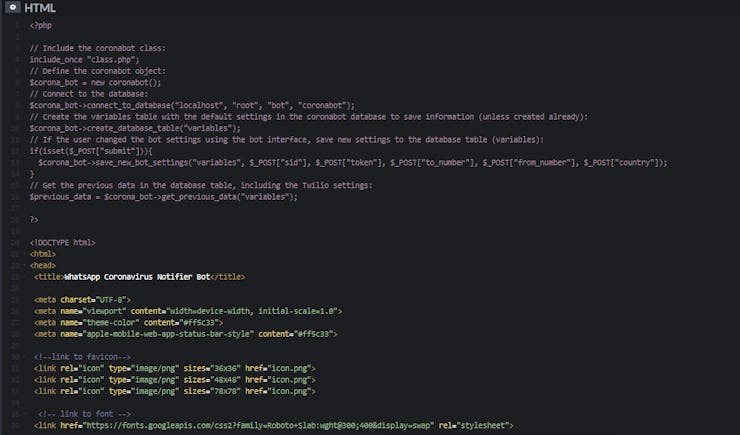
- Include the coronabot class.
- Define the coronabot object.
- Connect to the database. If you completed Step 1 and Step 2, the settings should be "localhost", "root", "bot", "coronabot".
- Create the variables table with the default settings in the coronabot database to save information (unless already created).
- If the user changed the bot settings using the bot interface, save new settings to the database table (variables).
- Get the previous data in the database table, including the Twilio settings.
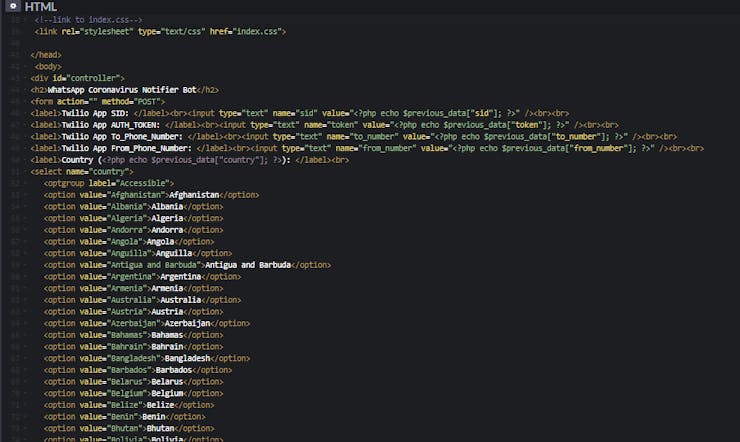
- Print the previous user data in the database table (variables) and create a form with accessible countries.
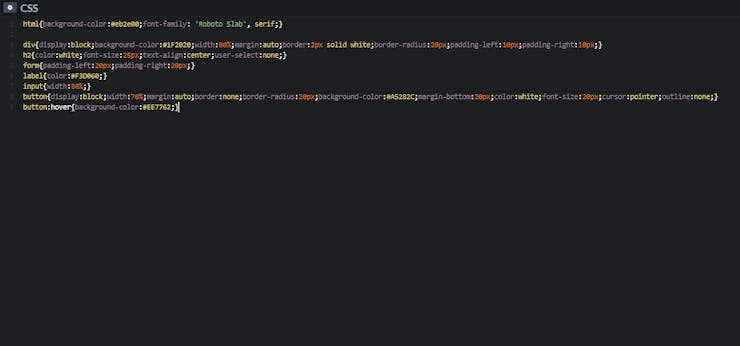
2) index.css
- Design the bot interface.
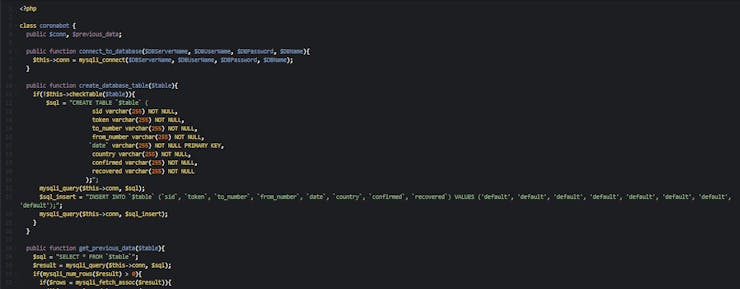
3) class.php
- Create a class named as coronabot.
- In the connect_to_database function, connect to the database depending on the entered settings.
- In the create_database_table function, create a database table with the given name and insert the default variables unless already created.
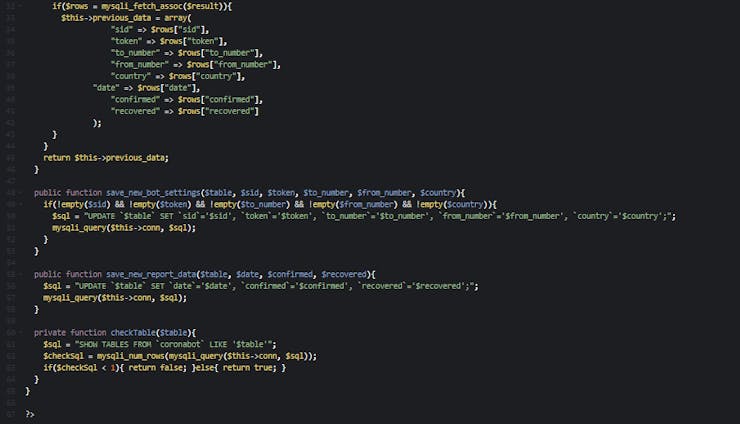
- In the get_previous_data function, get previous data from the database table.
- In the save_new_bot_settings function, if the user changes the bot settings, save the new settings to the database.
- In the save_new_report_data function, save the daily report data of the selected country to the database table.
- In the checkTable function, check whether there is a table with the given name in the database (coronabot).
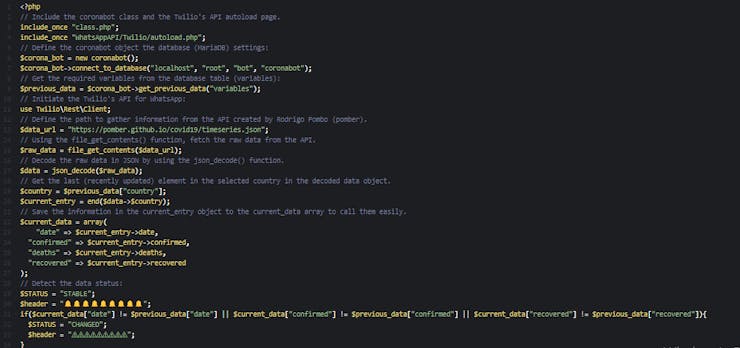
4) terminal.php
Note: If you have completed Step 1 and Step 2, do not change any values.
- Include the coronabot class and the Twilio's API autoload page.
- Define the coronabot object and the database (MariaDB) settings - "localhost", "root", "bot", "coronabot".
- Get the required variables from the database table (variables).
- Initiate the Twilio's API for WhatsApp.
- Define the path to gather information from the application created by Rodrigo Pombo (pomber).
- Using the file_get_contents() function, fetch the raw data from the application.
- Decode the raw data in JSON by using the json_decode() function.
- Get the last (recently updated) element in the selected country in the decoded data object.
- Save the information in the current_entry object to the current_data array to call them easily.
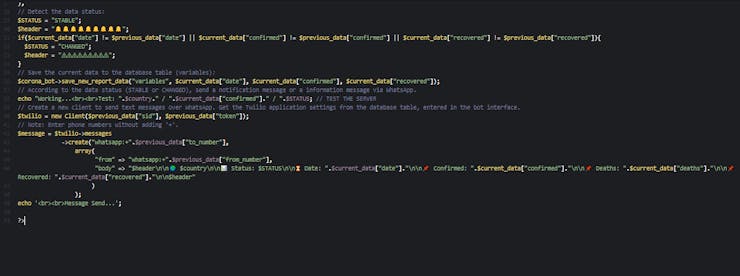
- Detect the data status (CHANGED or STABLE).
- Save the current data to the database table (variables).
- According to the data status (STABLE or CHANGED), send a notification message or an information message (?) via WhatsApp.
- Create a new client to send text messages over WhatsApp. Get the Twilio application settings from the database table, entered via the bot interface.
Step 4: Programming Raspberry Pi to create a loop
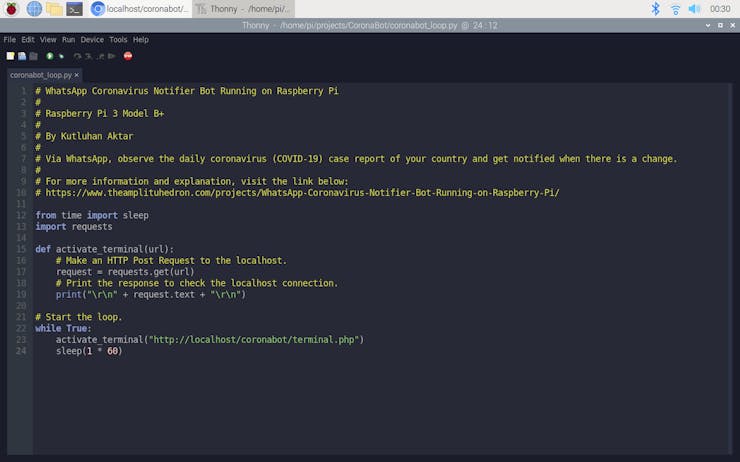
Download the requests library to make HTTP requests in Python.
pip install requests
- Include the required libraries - requests and sleep.
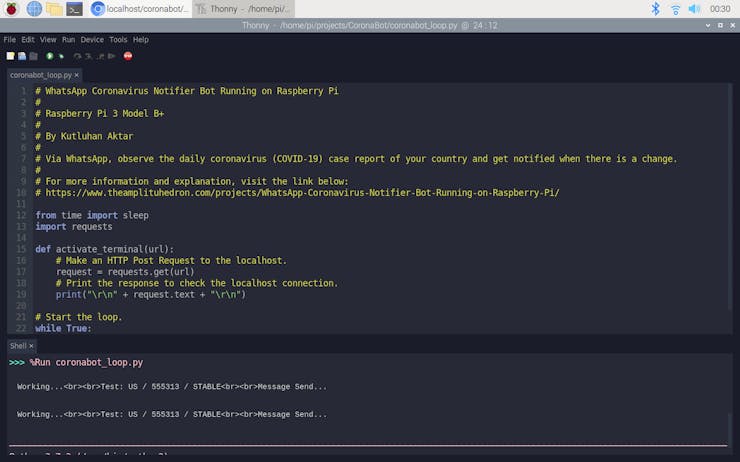
- In activate_terminal function, make an HTTP Get request to the terminal and print the response text.
- Start the loop and execute the activate_terminal function in the given period - 15 minutes.
Note: I chose to get update messages via WhatsApp every 15 minutes, but you can change the period in the code - 15 * 60.
Features
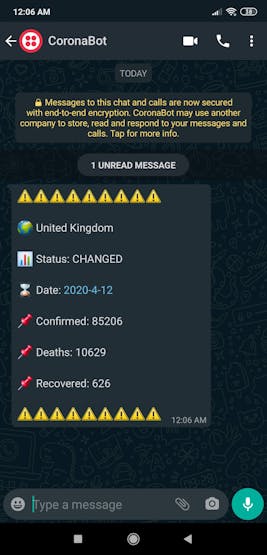
1) Get notified when there is a change in date, confirmed, or recovered values in the daily case report.
2) Change the selected country via the bot interface on Raspberry Pi to obtain information about different countries via WhatsApp.
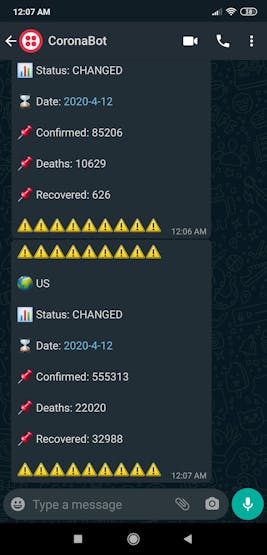
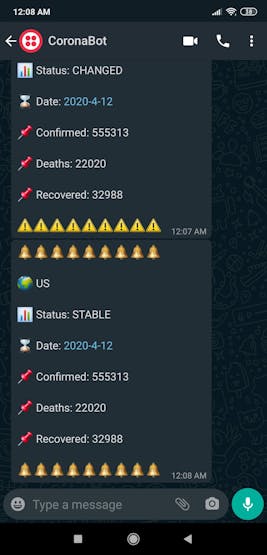
3) Observe the daily coronavirus (COVID-19) case report of your country in the given period (15 minutes) via WhatsApp.
Videos
Schematics
Code Files and Downloads
WhatsApp Coronavirus Notifier Bot Running on Raspberry Pi

Raspberry Pi 5 7 Inch Touch Screen IPS 1024x600 HD LCD HDMI-compatible Display for RPI 4B 3B+ OPI 5 AIDA64 PC Secondary Screen(Without Speaker)
BUY NOW
ESP32-S3 4.3inch Capacitive Touch Display Development Board, 800×480, 5-point Touch, 32-bit LX7 Dual-core Processor
BUY NOW
Raspberry Pi 5 7 Inch Touch Screen IPS 1024x600 HD LCD HDMI-compatible Display for RPI 4B 3B+ OPI 5 AIDA64 PC Secondary Screen(Without Speaker)
BUY NOW- Comments(0)
- Likes(1)
 Log in to post comments.
-
 Kutluhan Aktar
May 11,2021
- 0 USER VOTES
- YOUR VOTE 0.00 0.00
- 1
- 2
- 3
- 4
- 5
- 6
- 7
- 8
- 9
- 10
- 1
- 2
- 3
- 4
- 5
- 6
- 7
- 8
- 9
- 10
- 1
- 2
- 3
- 4
- 5
- 6
- 7
- 8
- 9
- 10
- 1
- 2
- 3
- 4
- 5
- 6
- 7
- 8
- 9
- 10
 More by Kutluhan Aktar
-
 WhatsApp Coronavirus Notifier Bot Running on Raspberry Pi
First of all, I hope that you and your loved ones are safe and healthy during these unprecedented ti...
-
 WhatsApp Surveillance Video Camera with IR Proximity Sensor
As you can see in my previous electronics projects, I am fond of developing web applications showing...
-
 Marvel and DC Weekly New Comics Release List Tracker
I am a huge comic book fan and collect issues of my favorite titles every week. Therefore, I check w...
-
 Arduino-Based (ATmega32U4) Mouse and Keyboard Controller
For a long time, I needed a simple device allowing me to send varying mouse and keyboard commands to...
-
 Bluetooth-enabled Snowman Weather and Air Quality Gift Card
Although it is struggling for me to create a brand-new design while paying homage to the classic Chr...
-
 WhatsApp Halloween-Themed RFID Talking Doorbell w/ RGB Eyes
Despite the fact that making a hilarious yet not deceitful joke with a jack-o'-lantern on Halloween ...
-
 Joker Remote Hazardous Gas Station and Monitor
For a long time, I wanted to create a unique device to observe the presence of varying hazardous gas...
-
 Darth Vader IoT Cryptocurrency Tracker and Display w/ Raspberry Pi Pico
Instead of using a mobile or web application, I decided to develop a brand-new device to track and d...
-
 Bluetooth Mobile Remote Lamp with Weather Station
I have created an electronics project named Remote Lamp two years ago, as my new room lighting syste...
-
 Multi-Model AI-Based Mechanical Anomaly Detector w/ BLE
Mechanical anomaly detection is critical in autonomous manufacturing processes so as to prevent equi...
-
 AI-assisted Pipeline Diagnostics and Inspection w/ mmWave
StorySince the beginning of the industrial revolution, accurate pipeline system maintenance has been...
-
 IoT AI-driven Smart Grocery Cart w/ Edge Impulse
Especially after the recent success of Amazon Go cashierless convenience stores, there is a surge in...
-
 BLE Mobile Star Wars Remote Lamp w/ Weather & Gas Station
As you may have seen, I have created a similar remote Bluetooth-enabled lighting system for my room....
-
 IoT Bookmark and Reading (Book Ratings) Tracker w/ Qubitro
While reading books or comics, I am fond of recording my ratings on a daily basis to track any surge...
-
 Iron Man Walkie-Talkie (Two-Way Radio) for Texting w/ LoRa
For a long time, I have wanted to experiment with LoRa (short for long-range), which is a spread spe...
-
 Jigglypuff IoT Carbon Dioxide and Dust Monitor (Tracker) w/ Telegram
The dust density and the carbon dioxide (CO2) density affect my sleep quality and health detrimental...
-
 IoT Heart Rate (BPM) Monitor and Tracker w/ Tuya Smart
Heart rate, or pulse, is the number of times your heart beats each minute (BPM). While the heart cir...
-
 Raspberry Pi Adjustable Air Quality Detector Running on GUI
I had been working on a project with which I could collate air quality information from an MQ-135 Ai...
-
 WhatsApp Coronavirus Notifier Bot Running on Raspberry Pi
First of all, I hope that you and your loved ones are safe and healthy during these unprecedented ti...
-
 WhatsApp Surveillance Video Camera with IR Proximity Sensor
As you can see in my previous electronics projects, I am fond of developing web applications showing...
-
 Marvel and DC Weekly New Comics Release List Tracker
I am a huge comic book fan and collect issues of my favorite titles every week. Therefore, I check w...
-
 Arduino-Based (ATmega32U4) Mouse and Keyboard Controller
For a long time, I needed a simple device allowing me to send varying mouse and keyboard commands to...
-
 Bluetooth-enabled Snowman Weather and Air Quality Gift Card
Although it is struggling for me to create a brand-new design while paying homage to the classic Chr...
-
 WhatsApp Halloween-Themed RFID Talking Doorbell w/ RGB Eyes
Despite the fact that making a hilarious yet not deceitful joke with a jack-o'-lantern on Halloween ...
-
 Joker Remote Hazardous Gas Station and Monitor
For a long time, I wanted to create a unique device to observe the presence of varying hazardous gas...
-
 Darth Vader IoT Cryptocurrency Tracker and Display w/ Raspberry Pi Pico
Instead of using a mobile or web application, I decided to develop a brand-new device to track and d...
-
 Bluetooth Mobile Remote Lamp with Weather Station
I have created an electronics project named Remote Lamp two years ago, as my new room lighting syste...
-
 Multi-Model AI-Based Mechanical Anomaly Detector w/ BLE
Mechanical anomaly detection is critical in autonomous manufacturing processes so as to prevent equi...
-
 AI-assisted Pipeline Diagnostics and Inspection w/ mmWave
StorySince the beginning of the industrial revolution, accurate pipeline system maintenance has been...
-
 IoT AI-driven Smart Grocery Cart w/ Edge Impulse
Especially after the recent success of Amazon Go cashierless convenience stores, there is a surge in...
-
-
Commodore 64 1541-II 1581 Floppy Disk Drive C64 Power Supply Unit USB-C 5V 12V DIN connector 5.25
168 1 3 -
Easy to print simple stacking organizer with drawers
87 0 0 -
-
-
-
Modifying a Hotplate to a Reflow Solder Station
1137 1 6 -
MPL3115A2 Barometric Pressure, Altitude, and Temperature Sensor
639 0 1 -
-
Nintendo 64DD Replacement Shell
495 0 2 -
V2 Commodore AMIGA USB-C Power Sink Delivery High Efficiency Supply Triple Output 5V ±12V OLED display ATARI compatible shark 100W
1442 4 3


