


Cute Little Valentine's Day Gift
It’s almost Valentine’s Day. This year, instead of giving her a rose bouquet, I wanted to express my love by gifting her an electronic breathing heart. This is yet another "cheap DIY kit" intended for educational purpose. There are a few variations of the breathing LED projects with similar setup, however the one with blue LEDs attracted me a lot.
#valentinesDayGift #ArduinoGiftIdea #ElectronicsValentinesDay
Video: https://youtu.be/cq6fEPNtxn4
Unpacking The Kit
Same as any other cheap DIY kit, this one came in a zip lock bag without any instructions. However, the component values and polarities are vey well denoted on the board, so I did not had Google at all.
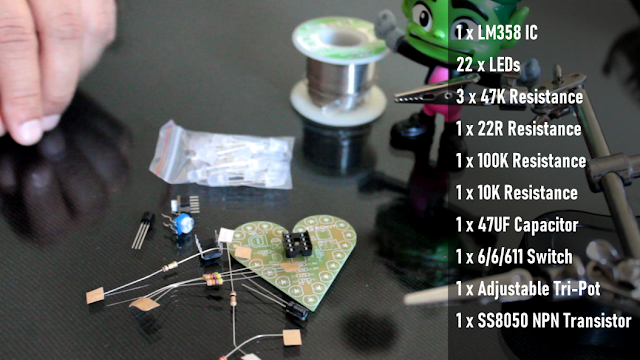
Inside the zip lock bag you will find:
1 LM358 IC
22 LEDs
6 Resistors
1 47uf Capacitor
1 Push ButtonSwitch
1 Adjustable Tri-Pot and
1 SS8050 NPN Transistor
There is no IC base present in this package. However, I would highly recommended using one for your IC.
How This Circuit Works
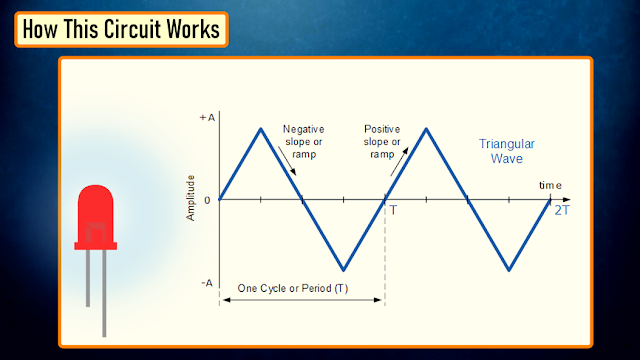
To get the fading effect we need to generate a series of triangular waves.
Because of the triangular waves, the LED starts glowing slowly and then slowly dims off and the cycle continues.
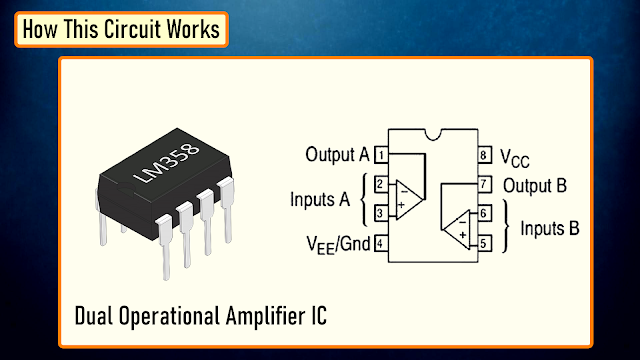
This setup is done using the LM358 IC. LM358 is a dual operational amplifier (Op-Amp) IC, integrated with two op-amps powered by a common power supply. Pins 1, 2, and 3 are one op-amp channel, and pins 5, 6, and 7 are the 2nd op-amp channel.
As the capacitor charges and discharges the state of the PIN 3 switches from high to low and based on that the PIN 2 of the op-amp obtains the desire output. If you want to know more about this IC, please check out my "Tutorial No 21 : DIY - IR Module" : https://youtu.be/_M8FQIPi1qk.
So, basically the op-amp here is used for voltage level detection. In this circuit, we are applying a voltage on positive pin (PIN-3) and the voltage to be detected is applied at negative pin (PIN-2).
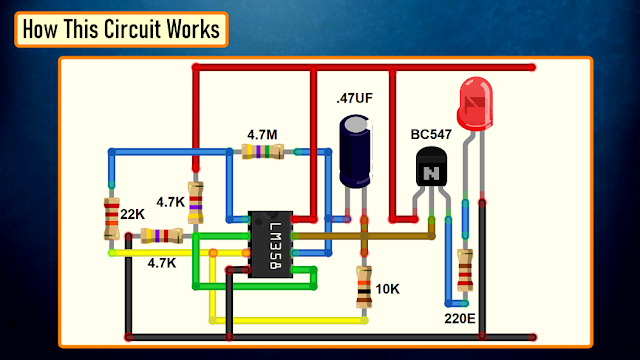
The transistor acts as a signal amplifier. You will need this if you are attaching a cluster of LEDs however for just 1 LED you can simply remove it.
Soldering

Soldering the components to the board was pretty straightforward and relatively trouble free. I just had to pay a bit of attention to the directions of the components when soldering them to the board.
I started the project by soldering the IC base to the board followed by the capacitor, transistor, pot and the push button switch.
Next, I soldered all the resistors to the board. After that, I soldered all the LEDs to the board, due to the repetitive nature of the LED installation the installation may slightly be tedious. However once you finish soldering all the components, I bet you will feel proud of yourself.
Not to mention, the zip lock bag contains few spare LEDs, umm.. a thoughtful addition.
Quick Test
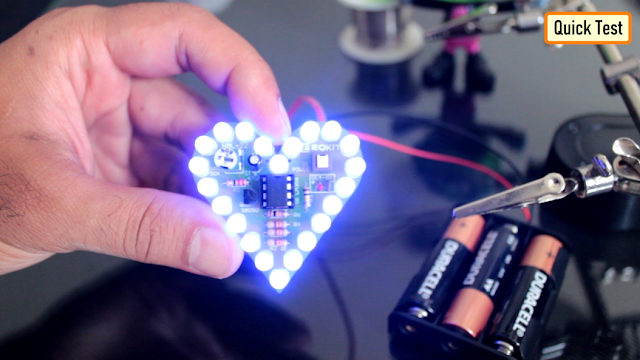
So this is how it looks like. The effect is a blue heart that increases and decreases in brightness in a cyclical fashion. The speed/depth can be adjusted using the onboard pot. To be very frank, the diffused LEDs make it quite appealing and less glary when you look at it.
Cutting The Heart

Now that I have all the electronics bit sorted, it was time for me to add the accessories to it.
Something just clicked in my mind and I went ahead and cut a "heart shape" from a piece of pallet. I will later stick the circuit board to this heart shaped pallet plank. Sanding the plank well, and adding a bit of olive oil gave the heart shape a shiny, nice and smooth texture.

Items Required
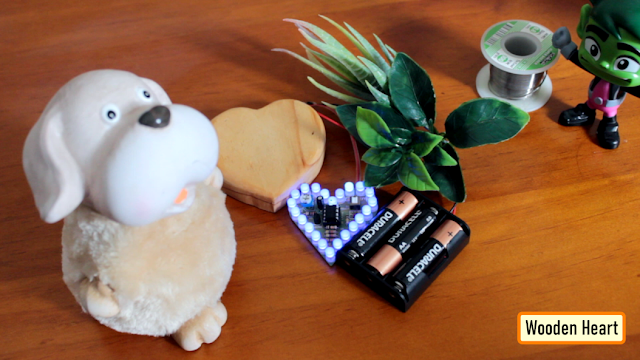
For the rest of the project I am using a dog made of clay and some broken pieces of artificial plants.
It totally depends on you, what you want to add to give your project a super sexy look.
Preparing the base

Now to house all the bits and pieces that I gathered so far, I need to create a base. For that, I am cutting a 6" x 3.5" pallet plank. All the bits and pieces will be glued to this pallet plank.
Assembling The Heart
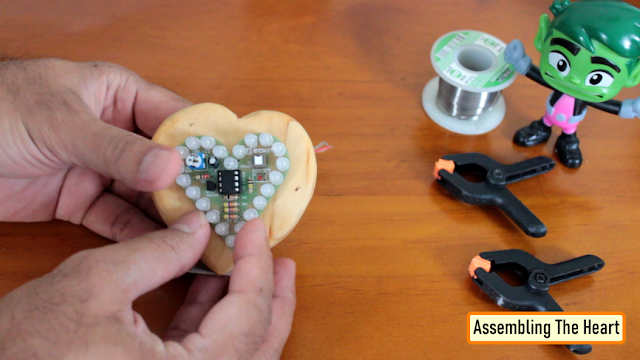
I drilled a hole in the middle of the wooden heart. Through this hole I will pass the wire that will power the circuit board.
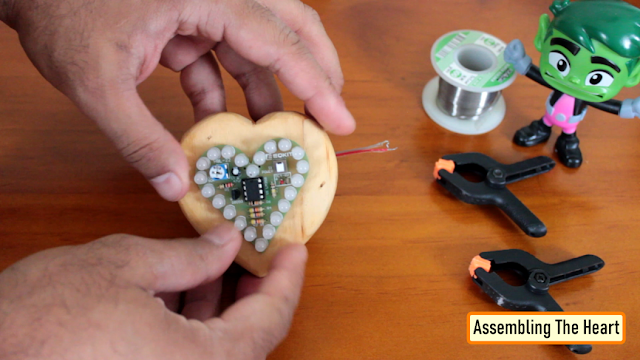
The power supply to this board is between 4v-6v DC. Any USB interface, or three ordinary dry cells can be used to power this board. The supply voltage to the red LED version is slightly lower than that all other colored LEDs. A 4v power supply can power the Red version; however, other colors need voltage between 4v 5v 6v.
Putting All The Bits Together
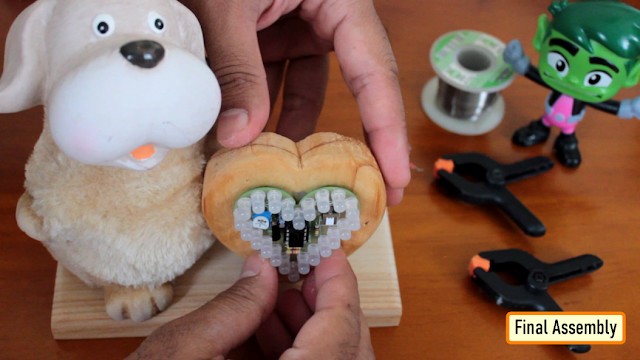
All right, so now its just a matter of gluing all the bits and pieces one by one to the base pallet plank.
Demo

When you are young and restless, Valentines Day plays a significant role in your life. However, if you are deeply in love with someone who you are going to spend your rest of the life with, everyday becomes Valentines Day for you.
Thanks
Thanks again for checking my post. I hope it helps you.
If you want to support me subscribe to my YouTube Channel: https://www.youtube.com/user/tarantula3
Blog Posts: https://diyfactory007.blogspot.com/2022/02/Valentine-2022.html
Video: https://youtu.be/cq6fEPNtxn4
LED Fader: https://youtu.be/IIUsdICycOw
DIY - IR Module : https://youtu.be/_M8FQIPi1qk
Cos.TV: https://cos.tv/videos/play/34112835833860096
Odysee: https://odysee.com/@Arduino:7/yt5s.com-Cute-Little-Valentine's-Day-Gift:3
Support My Work:
BTC: 1M1PdxVxSTPLoMK91XnvEPksVuAa4J4dDp
LTC: MQFkVkWimYngMwp5SMuSbMP4ADStjysstm
DOGE: DDe7Fws24zf7acZevoT8uERnmisiHwR5st
ETH: 0x939aa4e13ecb4b46663c8017986abc0d204cde60
BAT: 0x939aa4e13ecb4b46663c8017986abc0d204cde60
LBC: bZ8ANEJFsd2MNFfpoxBhtFNPboh7PmD7M2
Thanks, ca again in my next tutorial.
Cute Little Valentine's Day Gift


- Comments(0)
- Likes(0)
More by Ashish Adhikari
-
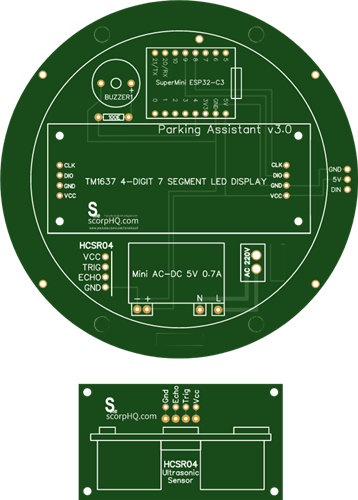 Arduino Parking Assistant V3
The ESP32-C3 Based Parking Assistant is an advanced parking sensor system that utilizes the ESP32-C3...
Arduino Parking Assistant V3
The ESP32-C3 Based Parking Assistant is an advanced parking sensor system that utilizes the ESP32-C3...
-
 100 LED Chaser Circuit Using IC555 and CD4017
A Chaser Circuit consists of a clocked IC or other electronic unit like an Arduino that drives an ar...
100 LED Chaser Circuit Using IC555 and CD4017
A Chaser Circuit consists of a clocked IC or other electronic unit like an Arduino that drives an ar...
-
 Cute Medusa 3D Printed Humidifier
Humidifiers add moisture to the air. They can help people with dry skin, allergies, and respiratory ...
Cute Medusa 3D Printed Humidifier
Humidifiers add moisture to the air. They can help people with dry skin, allergies, and respiratory ...
-
 4x4x4 PCB LED CUBE
Note from PCBWay: This project includes two PCBs, if both need to be produced, please inform your sa...
4x4x4 PCB LED CUBE
Note from PCBWay: This project includes two PCBs, if both need to be produced, please inform your sa...
-
 Getting Started With Raspberry Pi Pico
Couple of months ago, I bought a "Raspberry Pi Pico" to get some hands-on experience of it and to cr...
Getting Started With Raspberry Pi Pico
Couple of months ago, I bought a "Raspberry Pi Pico" to get some hands-on experience of it and to cr...
-
 All About PC817 Optocoupler
An Optocoupler also known as Photocoupler or Optical Isolator is a component that transfers electric...
All About PC817 Optocoupler
An Optocoupler also known as Photocoupler or Optical Isolator is a component that transfers electric...
-
 Make Your Own 3D Printed Diwali Diyas at Home
Diyas are the heart of major Indian festivals, most notably Diwali, the "Festival of Lights." Lighti...
Make Your Own 3D Printed Diwali Diyas at Home
Diyas are the heart of major Indian festivals, most notably Diwali, the "Festival of Lights." Lighti...
-
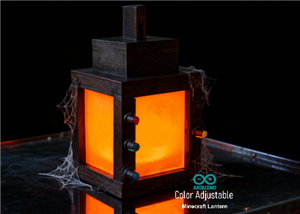 Arduino Based 3D Printed Color Adjustable Minecraft Lantern
For this Halloween, I'm fusing the creative blocky world of Minecraft with the spooky glow of the co...
Arduino Based 3D Printed Color Adjustable Minecraft Lantern
For this Halloween, I'm fusing the creative blocky world of Minecraft with the spooky glow of the co...
-
 3D Printed Breathing IC555 LED Trophy
This project features a custom 3D-printed 'Mortal Kombat' trophy shell paired with a basic NE555 tim...
3D Printed Breathing IC555 LED Trophy
This project features a custom 3D-printed 'Mortal Kombat' trophy shell paired with a basic NE555 tim...
-
 Destiny Internet Ghost - Internet Notifier
The Internet has changed the way we live our lives. From communication, education, banking, entertai...
Destiny Internet Ghost - Internet Notifier
The Internet has changed the way we live our lives. From communication, education, banking, entertai...
-
 Liquid level indicator Using ULN2003
A water level indicator detects and indicates the level of water in an overhead tank and relays the ...
Liquid level indicator Using ULN2003
A water level indicator detects and indicates the level of water in an overhead tank and relays the ...
-
 All About IC UNL2003
The UNL2003 IC contains 7 High Voltage, High Current NPN Darlington Transistor Arrays each rated at ...
All About IC UNL2003
The UNL2003 IC contains 7 High Voltage, High Current NPN Darlington Transistor Arrays each rated at ...
-
 NodeMCU Based: 3D Printed Indoor Gauge Thermometer
Had some time this weekend and a desire to create something new and interesting, so went ahead and c...
NodeMCU Based: 3D Printed Indoor Gauge Thermometer
Had some time this weekend and a desire to create something new and interesting, so went ahead and c...
-
 Rechargeable Gothic Lantern
A Gothic Lantern is a captivating piece of lighting that brings the allure of the Victorian Era into...
Rechargeable Gothic Lantern
A Gothic Lantern is a captivating piece of lighting that brings the allure of the Victorian Era into...
-
 555 Adjustable Delay On Off Timer Circuit
The 555 timer IC is an integrated circuit (IC) that is used in a variety of timer, delay, pulse gene...
555 Adjustable Delay On Off Timer Circuit
The 555 timer IC is an integrated circuit (IC) that is used in a variety of timer, delay, pulse gene...
-
 3D Printed Arduino Halloween Décor
When the full moon is shining and the wolves are howling, it's time for Halloween's spooky spectacle...
3D Printed Arduino Halloween Décor
When the full moon is shining and the wolves are howling, it's time for Halloween's spooky spectacle...
-
 All About RCWL-0516 Microwave Radar Motion Sensor
Proximity sensing is a very common application in electronics.There are several ways to accomplish t...
All About RCWL-0516 Microwave Radar Motion Sensor
Proximity sensing is a very common application in electronics.There are several ways to accomplish t...
-
 Transformers PCB BADGE
It's been a while, the Autobots have appeared on the silver screen. Finally they are returning to th...
Transformers PCB BADGE
It's been a while, the Autobots have appeared on the silver screen. Finally they are returning to th...
-
-
mammoth-3D SLM Voron Toolhead – Manual Drill & Tap Edition
257 0 0 -
-
-
-
Tester for Touch Screen Digitizer without using microcontroller
468 2 2 -
Audio reactive glow LED wristband/bracelet with NFC / RFID-Tags
414 0 1 -
-


