|
Raspberry Pi Pico |
x 1 |
Getting Started With Raspberry Pi Pico
Couple of months ago, I bought a "Raspberry Pi Pico" to get some hands-on experience of it and to create some amazing projects using it. But since then, it has just been sitting on my desk, collecting dust. Today after a very long wait, I finally have decided to create a short video tutorial to show you guys how to get started with the Raspberry Pi Pico.
Topics Covered
In this tutorial, I am going to discuss:
1. What is a Raspberry Pi Pico?
2. The technical specifications of the board
3. How to program Pico using C/C++ and MicroPython
a. Programming Raspberry Pi Pico using "Arduino IDE"
i. Preparing the Arduino IDE
ii. Loading the Blink Example
iii. Demo
b. Programming Raspberry Pi Pico using "Tonny Python IDE"
i. Installing MicroPython on Pico
ii. Installing Tonny Python IDE
iii. Loading the Blink Example
iv. Demo
4. Difference between Raspberry Pi Pico and Arduino
5. Advantages and Disadvantages of this board
What is Raspberry Pi Pico?
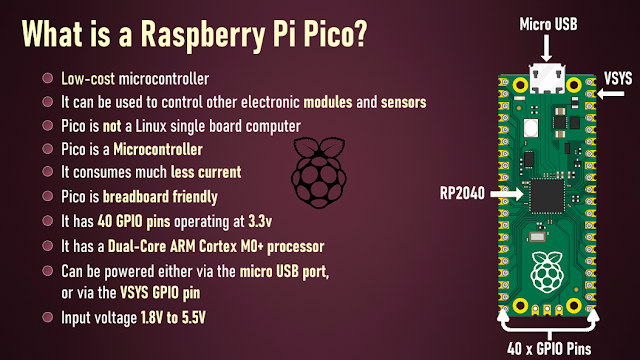
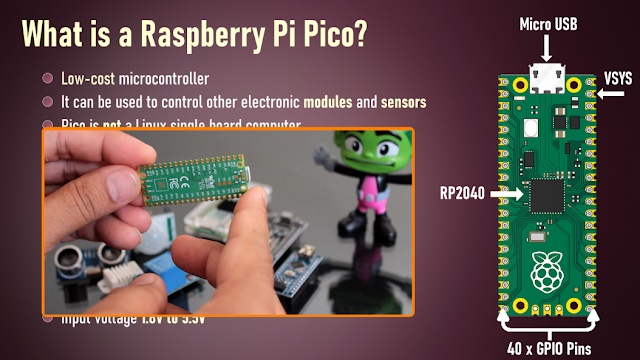
Raspberry Pi Pico is a low-cost microcontroller. It can be used to control other electronic modules and sensors same as any other microcontroller.
Pico is not a Linux single board computer, rather it is a microcontroller like Arduino. Since, its a microcontroller it doesn't come with all the overheads that a computer brings and hence consumes much less current. actually it is more like Arduino than Raspberry Pi.
Pico is not a rival of Raspberry Pi Zero, it actually can work in conjunction with the regular Pi's.
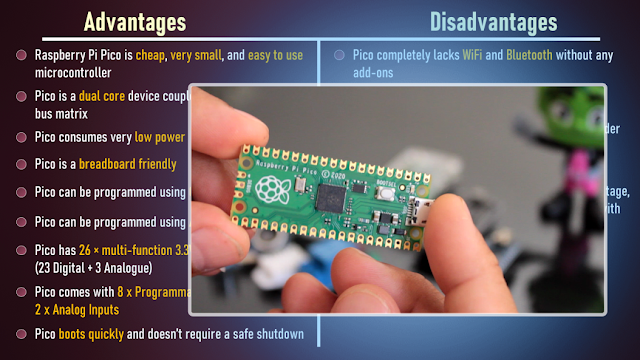
Pico is breadboard friendly and has 40 GPIO pins operating at 3.3v (20 on each side). It has a Dual-Core ARM Cortex M0+ processor. Pico's brain - the RP2040 microcontroller chip is designed by Raspberry Pi in United Kingdom.
It can be powered either via the micro USB port, or via the VSYS GPIO pin by providing voltage between the range of 1.8V to 5.5V.
Technical Specifications of Pico
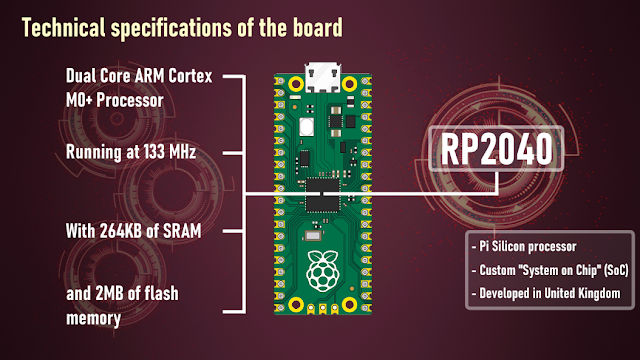
Raspberry Pi Pico is absolutely different from all other Raspberry Pi models. Pico is one of the first microcontrollers to use the RP2040 "Pi Silicon" processor. It is a custom "System on Chip" (SoC) developed by the Raspberry Pi team in UK which features a dual core Arm Cortex M0+ processor running at 133 MHz, 264KB of SRAM and 2MB of flash memory for storing files on it.
Specifications:
- Microcontroller: RP2040 designed by Raspberry Pi in the UK
- Processor: Dual-Core Arm Cortex-M0+ processor, flexible clock running up to 133 MHz
- Input power: 1.8 - 5.5 V DC
- Operating temperature: -20°C to +85°C
- Dimensions: 51.0 x 21.0 mm
- Onboard Sensors: Temperature Sensor
- Memory: 264KB of on-chip internal SRAM and can support up to 16MB of off-chip Flash
2MB on-board QSPI Flash (Adafruit's Feather RP2040, features 16MB of storage)
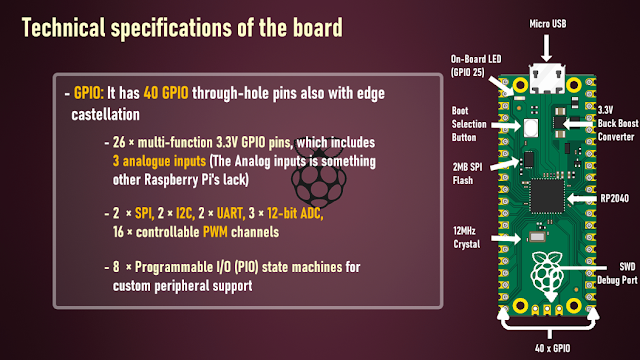
- GPIO: It has 40 GPIO through-hole pins also with edge castellation
- 26 × multi-function 3.3V GPIO pins, which includes 3 analogue inputs (The Analog inputs is something other Raspberry Pi's lack. They use variable voltages to connect to devices like a potentiometers, joystick or a LDR)
- 2 × SPI, 2 × I2C, 2 × UART, 3 × 12-bit ADC, 16 × controllable PWM channels
- 8 × Programmable I/O (PIO) state machines for custom peripheral support that can offload many kinds of timing-critical processes from the CPU
- Other Features:
- 1 × Contains 1 × USB 1.1 controller and PHY, with host and device support
- Accurate clock and timer on-chip
- Low-Power sleep and dormant modes
- Accelerated integer and floating-point libraries on-chip
- Works with Windows, Mac, Linux machines and Raspberry Pi Computers
- Provides drag-and-drop programming using mass storage over USB
The one biggest disadvantage of the Raspberry Pi Pico is that there is no WiFi or Bluetooth on it. ESP32 and ESP8266 which you can buy for similar price comes with WiFi and Bluetooth (ESP32). Surely we can add wireless connectivity via external components, however that would require a little bit more knowledge and experience to get it working.
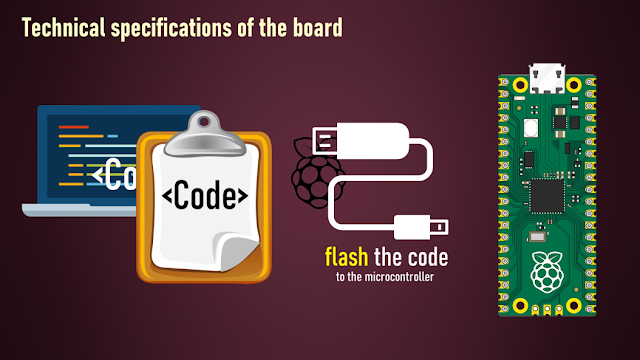
Since Pico is not a computer, we need to write our codes on a different machine using an external application and then "flash" the code onto the microcontroller over USB.
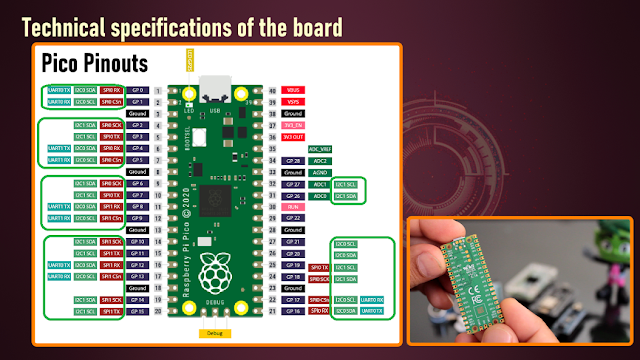
Pinout Diagram:
Here is the top view of the pinouts on the Raspberry Pi Pico. The pin-labels are on the bottom side of the board.
How to program Pico using C/C++ and MicroPython
Pi Foundation officially supports MicroPython and C/C++, however high-level programming language like CircuitPython (A fork of MicroPython created by Adafruit), and Drag and Drop Python Editor like Pico Piper which adds further enhancements and can be used to program the Pico boards.
Programming Raspberry Pi Pico using Arduino IDE
Python and C/C++ are both great for programming Picos. However, being able to program a Pico just like an Arduino would help us to integrate the Pico into the Arduino ecosystem. One of the best reasons to do this is because of the availability of libraries to integration of modules, sensors, and other complex stuff without having to write the entire code from scratch.
i. Preparing the Arduino IDE
To start, let go to Tools > Boards > Boards Manager and search for "Pico", select "Arduino Mbed OS RP2040 Boards" and hit the install button.
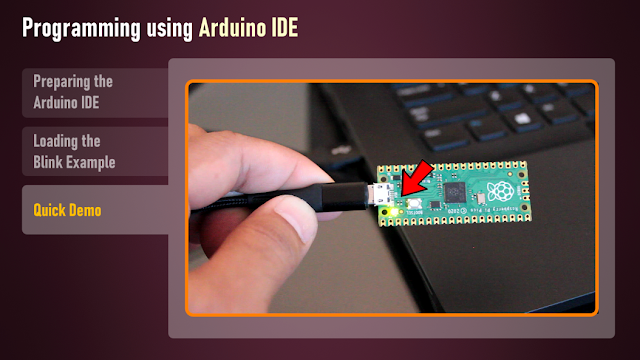
Connect the micro USB cable to the Pico and then press and hold the "BOOTSEL" button before plugging the USB cable into the computer. Release BOOTSEL once the drive RPI-RP2 appears on your computer.
Now, go to Tools > Port and you will now be able to see the number of the COM Port.
ii. Loading the Blink Example
Go to Files > Examples > Basics > Blink and click on Upload, this will load the code to the Pico board.
iii. Demo
After the IDE finished uploading the code, you will see the Pico's onboard LED blinking.
You can now use your Pico like an Arduino and program it using the Arduino IDE.
Programming Raspberry Pi Pico using Tonny Python IDE
You can program your Pico using MicroPython by connecting it to a computer via USB and then dragging and dropping files to it.
i. Installing MicroPython on Pico
Installation of MicroPython on Pico requires a "UF2" file to be copied onto it. A UF2 file is a "binary data file" which contains a program that can be transferred from a PC to a microcontroller, such as an Arduino or Pico circuit board.
To load MicroPython on Pico:
1. Download "MicroPython UF2 file" from the link provided in the description below.
2. Connect the micro USB cable to the Pico and then press and hold the "BOOTSEL" button before plugging the USB cable into the computer. Release BOOTSEL once the drive RPI-RP2 appears on your computer.
3. Drag and drop the UF2 file onto the RPI-RP2 volume.
4. Your Pico will reboot. That's it, you are now running MicroPython on your Pico.
ii. Installing Tonny Python IDE
To write code and save files to Pico we are going to use the "Thonny Python IDE". Thonny comes with built-in Python 3.7, so just one simple installer is what you need to learn programming. To get started:
1. Download and install "Thonny" free from the Thonny website for your version of OS. The website's link is in the description below.
Note: If you are running "Raspberry Pi OS" then Thonny is already installed on it, but may need to update it to the latest version
sudo apt update && sudo apt upgrade -y
2. Connect the Raspberry Pi Pico to your computer. Then, in Thonny go to Tools > Options and click on the "Interpreter" tab. From the interpreter dropdown list select "MicroPython (Raspberry Pi Pico)". The port dropdown menu can be left to "automatically detect the Pico". Click "OK" to close.
3. A Python Shell called "REPL" (Read, Eval, Print, Loop) will popup to show that the Pico is connected and working.
iii. Loading the Blink Example
1. Click in the main editor pane of Thonny and enter the following code to toggle the onboard LED.
from machine import Pin, Timer
led = Pin(25, Pin.OUT)
timer = Timer()
def blink(timer):
led.toggle()
timer.init(freq=2.5, mode=Timer.PERIODIC, callback=blink)
2. Click the "Run" button to execute the code.
3. Thonny will ask whether you want to save the file on "This computer" or the "MicroPython device". Choose "MicroPython device". Enter "blink.py" as the file name. Make sure you enter ".py" as the file extension so that Thonny recognizes it as a Python file.
iv. Demo
You should now see the onboard LED switching between on and off until you click the Stop button.
Difference between Raspberry Pi Pico and Arduino
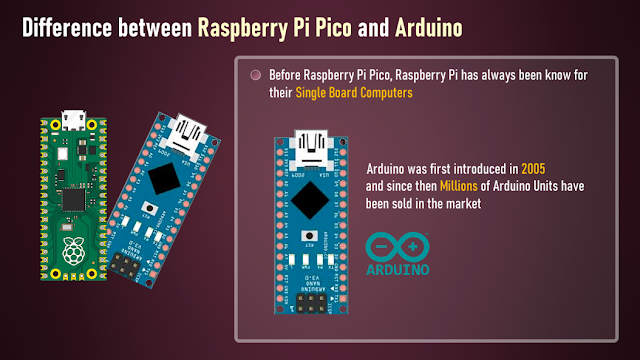
* Before Raspberry Pi Pico, Raspberry Pi has always been know for their single board computers.
However, in 2021 Raspberry Pi Foundation stepped a few steps forward and launched the Raspberry Pi Pico giving a head-to-head challenge to Arduino and all other board based microcontrollers.
* Arduino was first introduced in 2005 and since then Millions of Arduino Units have been sold in the market. Compared to that, the response Pico received after its initial launch in 2021 is absolutely mind-blowing.
* Both units are made for automating applications that don’t involve human intervention.
* Pico can be used alone or in combination with Arduino for Automation and AI purposes.
* Both modules are different in terms of power consumption, value, functionality, and price.
* Pico boards come unsoldered however Arduino comes pre-soldered or unsoldered.
* Pico module supports MicroPython and C/C++, while Arduino codes are written in C/C++ using Arduino.IDE.
So which one to go for… Pico or Arduino?
Advantages and Disadvantages
Now lets have a look at the Pros and Cons of this microcontroller board.
Advantages:
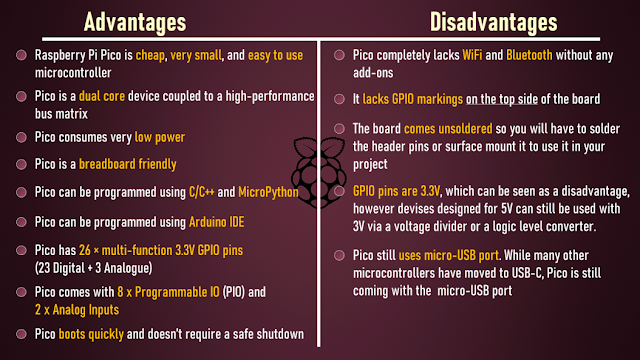
* Raspberry Pi Pico is cheap, very small, and easy to use microcontroller
* Pico is a dual core device coupled to a high-performance bus matrix, which means its both cores can give you the full performance concurrently
* Pico consumes very low power
* Pico is a breadboard friendly
* Pico can be programmed using C/C++ and MicroPython
* Pico can be programmed using Arduino IDE
* Pico has 26 × multi-function 3.3V GPIO pins (23 Digital + 3 Analogue)
* Pico comes with 8 x Programmable IO (PIO) and 2 x Analog Inputs
* Pico boots quickly and doesn’t require a safe shutdown
Disadvantages:
* Pico completely lacks WiFi and Bluetooth without any add-ons
* It lacks the GPIO markings on the top side of the board
* The board comes unsoldered so you will have to solder the header pins or surface mount it to use it in your project
* GPIO pins are 3.3V, which could be seen as a disadvantage, however devises designed for 5V can still be used with 3V via a voltage divider or a logic level converter.
* Pico still uses micro-USB port. While many other microcontrollers have moved to USB-C, Pico is still coming with the micro-USB port
If you have a Windows, Apple, Linux or even a Raspberry Pi, then you are already well in your way to program the small, cute, and gorgeous Raspberry Pi Pico in your next project. I bet, there must be a lot of project ideas going in your mind, so get your supplies and start coding. And, what are you waiting for???
Thanks
Thanks again for checking my post. I hope it helps you.
If you want to support me subscribe to my YouTube Channel: https://www.youtube.com/user/tarantula3
Blog Posts: https://diyfactory007.blogspot.com/2022/01/getting-started-with-raspberry-pi-pico.html
Video: https://youtu.be/vO_2XWJDF70
Other Resources:
RP2040 Datasheet : https://datasheets.raspberrypi.com/rp2040/rp2040-datasheet.pdf
Hardware design with RP2040 : https://datasheets.raspberrypi.com/rp2040/hardware-design-with-rp2040.pdf
Raspberry Pi Pico Datasheet : https://datasheets.raspberrypi.com/pico/pico-datasheet.pdf
Getting started with Raspberry Pi Pico : https://datasheets.raspberrypi.com/pico/getting-started-with-pico.pdf
MicroPython UF2 : https://micropython.org/download/rp2-pico/rp2-pico-latest.uf2
Thonny website : https://thonny.org/
Piper Make: https://make.playpiper.com/
CircuitPython 7.1.0: https://circuitpython.org/board/raspberry_pi_pico/
Support My Work:
BTC: 1M1PdxVxSTPLoMK91XnvEPksVuAa4J4dDp
LTC: MQFkVkWimYngMwp5SMuSbMP4ADStjysstm
DOGE: DDe7Fws24zf7acZevoT8uERnmisiHwR5st
ETH: 0x939aa4e13ecb4b46663c8017986abc0d204cde60
BAT: 0x939aa4e13ecb4b46663c8017986abc0d204cde60
LBC: bZ8ANEJFsd2MNFfpoxBhtFNPboh7PmD7M2
Thanks, ca again in my next tutorial.
Getting Started With Raspberry Pi Pico

Raspberry Pi 5 7 Inch Touch Screen IPS 1024x600 HD LCD HDMI-compatible Display for RPI 4B 3B+ OPI 5 AIDA64 PC Secondary Screen(Without Speaker)
BUY NOW
ESP32-S3 4.3inch Capacitive Touch Display Development Board, 800×480, 5-point Touch, 32-bit LX7 Dual-core Processor
BUY NOW
Raspberry Pi 5 7 Inch Touch Screen IPS 1024x600 HD LCD HDMI-compatible Display for RPI 4B 3B+ OPI 5 AIDA64 PC Secondary Screen(Without Speaker)
BUY NOW- Comments(0)
- Likes(2)
 Log in to post comments.
-
 Engineer
Jan 05,2025
-
 David Hill
Feb 14,2022
- 1 USER VOTES
- YOUR VOTE 0.00 0.00
- 1
- 2
- 3
- 4
- 5
- 6
- 7
- 8
- 9
- 10
- 1
- 2
- 3
- 4
- 5
- 6
- 7
- 8
- 9
- 10
- 1
- 2
- 3
- 4
- 5
- 6
- 7
- 8
- 9
- 10
- 1
- 2
- 3
- 4
- 5
- 6
- 7
- 8
- 9
- 10

-
10design
-
10usability
-
10creativity
-
10content
 More by Ashish Adhikari
-
 Transformers PCB BADGE
It's been a while, the Autobots have appeared on the silver screen. Finally they are returning to th...
-
 LED Fader Using 555 Timer IC
Wanted to generate a LED fading effect (fade-in and fade-out) for my upc...
LED Fader Using 555 Timer IC
LED Fader Using 555 Timer ICWanted to generate a LED fading effect (fade-in and fade-out) for my upc...
-
 Arduino Based Concrete Clock With Touchless Night Lamp
When you mix creativity with electronics, it becomes a masterpiece.Producing something original and ...
-
 DIY - PCB Christmas Forest
Created a small "PCB Christmas Forest" which is going to light up my study table this Christmas.In t...
-
 PCB Christmas Forest
A small Christmas Village For Someone You Love
-
 TM1637 Digit Display with Arduino
IntroIn my hand is a 4-Digit 7-Segment display module.The heart of this module is an inexpensive Ser...
-
 100 LED Chaser Circuit Using IC555 and CD4017
A Chaser Circuit consists of a clocked IC or other electronic unit like an Arduino that drives an ar...
-
 Cute Medusa 3D Printed Humidifier
Humidifiers add moisture to the air. They can help people with dry skin, allergies, and respiratory ...
-
 4x4x4 PCB LED CUBE
Note from PCBWay: This project includes two PCBs, if both need to be produced, please inform your sa...
-
 Getting Started With Raspberry Pi Pico
Couple of months ago, I bought a "Raspberry Pi Pico" to get some hands-on experience of it and to cr...
-
 Destiny Internet Ghost - Internet Notifier
The Internet has changed the way we live our lives. From communication, education, banking, entertai...
-
 Liquid level indicator Using ULN2003
A water level indicator detects and indicates the level of water in an overhead tank and relays the ...
-
 All About IC UNL2003
The UNL2003 IC contains 7 High Voltage, High Current NPN Darlington Transistor Arrays each rated at ...
-
 NodeMCU Based: 3D Printed Indoor Gauge Thermometer
Had some time this weekend and a desire to create something new and interesting, so went ahead and c...
-
 Rechargeable Gothic Lantern
A Gothic Lantern is a captivating piece of lighting that brings the allure of the Victorian Era into...
-
 555 Adjustable Delay On Off Timer Circuit
The 555 timer IC is an integrated circuit (IC) that is used in a variety of timer, delay, pulse gene...
-
 3D Printed Arduino Halloween Décor
When the full moon is shining and the wolves are howling, it's time for Halloween's spooky spectacle...
-
 All About RCWL-0516 Microwave Radar Motion Sensor
Proximity sensing is a very common application in electronics.There are several ways to accomplish t...
-
 Transformers PCB BADGE
It's been a while, the Autobots have appeared on the silver screen. Finally they are returning to th...
-
 LED Fader Using 555 Timer IC
Wanted to generate a LED fading effect (fade-in and fade-out) for my upc...
LED Fader Using 555 Timer IC
LED Fader Using 555 Timer ICWanted to generate a LED fading effect (fade-in and fade-out) for my upc...
-
 Arduino Based Concrete Clock With Touchless Night Lamp
When you mix creativity with electronics, it becomes a masterpiece.Producing something original and ...
-
 DIY - PCB Christmas Forest
Created a small "PCB Christmas Forest" which is going to light up my study table this Christmas.In t...
-
 PCB Christmas Forest
A small Christmas Village For Someone You Love
-
 TM1637 Digit Display with Arduino
IntroIn my hand is a 4-Digit 7-Segment display module.The heart of this module is an inexpensive Ser...
-
 100 LED Chaser Circuit Using IC555 and CD4017
A Chaser Circuit consists of a clocked IC or other electronic unit like an Arduino that drives an ar...
-
 Cute Medusa 3D Printed Humidifier
Humidifiers add moisture to the air. They can help people with dry skin, allergies, and respiratory ...
-
 4x4x4 PCB LED CUBE
Note from PCBWay: This project includes two PCBs, if both need to be produced, please inform your sa...
-
 Getting Started With Raspberry Pi Pico
Couple of months ago, I bought a "Raspberry Pi Pico" to get some hands-on experience of it and to cr...
-
 Destiny Internet Ghost - Internet Notifier
The Internet has changed the way we live our lives. From communication, education, banking, entertai...
-
 Liquid level indicator Using ULN2003
A water level indicator detects and indicates the level of water in an overhead tank and relays the ...
-
Commodore 64 1541-II Floppy Disk Drive C64 Power Supply Unit USB-C 5V 12V DIN connector 5.25
136 1 2 -
Easy to print simple stacking organizer with drawers
77 0 0 -
-
-
-
Modifying a Hotplate to a Reflow Solder Station
1118 1 6 -
MPL3115A2 Barometric Pressure, Altitude, and Temperature Sensor
629 0 1 -
-
Nintendo 64DD Replacement Shell
484 0 2 -
V2 Commodore AMIGA USB-C Power Sink Delivery High Efficiency Supply Triple Output 5V ±12V OLED display ATARI compatible shark 100W
1406 4 3


