


|
|
Arduino Nano R3 |
x 1 | |
|
|
LCD 128x64 with ST7565 driver |
x 1 | |
|
|
1N4148WQ-7-FDiodes inc.
|
x 1 | |
|
|
Resistor 10k ohm |
x 1 | |
|
|
Pushbutton |
x 1 | |
|
|
Capacitor 470 µF |
x 1 | |
|
|
capacitor 470 nF |
x 1 |

|
arduino IDEArduino
|
|

|
Soldering Iron Kit |
DIY Arduino Morse code Decoder and Trainer
The Morse Code is a language that people use to communicate with each other through telegraph, radio, satellite, or with light. The language is a series of short and long bursts that are heard or seen. The short bursts of sound or light are called “dit”, and the long bursts are called “dah”. Visually, they are written as dots and dashes.

HAM Operators typically use a telegraph key or paddle to manually input Morse code, which is then transmitted via radio waves. The Morse code is received and decoded on the other end by another operator. Learning to read Morse code is quite tedious - and thanks to this device, it is not even necessary. The signal from the receiver converts dots and dashes of Morse code into letters and characters, which are then displayed on LCD display. Presented device can receives characters at a speed of up to 60 w/m.
Although the decoder is basically designed to work with a ham radio receiver, it can also be used to learn how to type Morse code signs.

The device can be easily made and consists of only a few components:
- Arduino Nano microcontroller board
- LCD Dispaly 128x64 dots with ST7565 driver chip
- two capacitors
- 10k resistor
- and 1N4148 small signal diode

The components are mounted on a small universal PCB for compactness and better functionality of the device. The signal from the receiver is brought to the input of the device, and it should have a level greater than 1Vpp. If we use this device as a morse code trainer, we need to connect a telegraph key, or an ordinary switch to (these) inputs for functionality testing.

This project is sponsored by PCBWay. They has all the services you need to create your project at the best price, whether is a scool project, or complex professional project. On PCBWay you can share your experiences, or get inspiration for your next project. They also provide completed Surface mount SMT PCB assemblY service at a best price, and ISO9001 quality control. Visit pcbway.com for more services.

And now let's see how the device works in real conditions: First of all let me tell you that I have no experience at all in this area, so I made audio files on an online text to morse code converter with which I will simulate CW reception. Text "Morse" appears on the display when the device is turned on and when it is ready. Next, we need to bring an audio signal to the input, noting that the voltage of this signal should be greater than 1Vpp to function normally. On te upper right part of the screen is displayed the typing speed expressed in words per second, and in the middle of the screen, the decoded text.

From the examples it can be seen that the decoding is 100 percent performed without error, which in real communication also depends on the experience of the radio operator who transmits the signal.
This device can also be successfully used as a trainer for learning Morse code. For this purpose, we need to connect a telegraph key to the SW inputs. I am using an arcade button that I made for a previous project of mine. And of course I'll try to type a simple message, like SOS, which consists of three dots, three dashes, and three dots again. Or the letter M, T, H, etc...

And finally a short conclusion. Morse code remains an essential skill among amateur radio operators. It facilitates global communication, enabling enthusiasts to connect with others worldwide. Despite the availability of modern digital modes, many HAM operators continue to use Morse code as a reliable and efficient means of communication.The device presented in this video is especially useful for HAM radio beginners, and also for so-called SW listeners who can monitor CW communications without knowing Morse code.
In one of the following videos I will describe a device with a reverse function, which will convert any text typed on a PC keyboard into a Morse code signal, and this signal will be able to be sent to the transmitter through a 5V relay whose contacts will be connected in place on telegraph key.
The device is embedded in a suitable box made of PVC board and lined with colored self-adhesive wallpaper.

/*
 *  Morse code receiver
 */

#include <U8g2lib.h>
#include <TimerOne.h>

U8G2_ST7565_ERC12864_1_4W_SW_SPI u8g2 ( U8G2_R0, /* scl=*/  13 , /* si=*/  11 , /* cs=*/  10 , /* rs=*/  9 , /* rse=*/  8 ) ;

byte inPin1 = 0;                  //analog input to telegraph key or radio output
byte P1, P2;                      //button states
int readPin1;                     //telegraph key or radio output variableradia
int k, i;                         //iloop index
int kropka;                       //dot length
int z, s;                         //character pulses
int p, r;                         //break pulses
int wpm;                          //word per minute
String znak_M;
String litera_M;
char S_str[6];
char P_str[6];
char wpm_str[2];
char* znak;
char* wiersz[12];                                 //char workline*
char* wiersz1[12];                                //top line char*


const byte index_key = 48;                        //number of characters in the array 48
const char* Z_char[index_key] = {
"a","b","c","d","e","f","g","h","i","j","k","l","m",
"n","o","p","q","r","s","t","u","v","w","x","y","z",
"0","1","2","3","4","5","6","7","8","9",
"!","(",")","+",",","-",".","/","=","?","_"};

const String Morse[index_key] = {                 //Morse code
".-","-...","-.-.","-..",".","..-.","--.","....","..",".---","-.-",".-..","--",
"-.","---",".--.","--.-",".-.","...","-","..-","...-",".--","-..-","-.--","--..",
"-----",".----","..---","...--","....-",".....","-....","--...","---..","----.",
"-.-.--","-.--.","-.--.-",".-.-.","--..--","-....-",".-.-.-","-..-.","-...-","..--..","..--.-"};
/*
' (single apostrophe) • — — — — •
" (quote) • — • • — •
: (colon) — — — • • •
; (semicolon) — • — • — •
@ (monkey or at)  • — — • — •
*/

void setup() {

  Serial.begin(9600);
  u8g2.begin();
  u8g2.setContrast(210);
  Timer1.initialize(1000);
  Timer1.attachInterrupt(Zliczaj);
}

void loop() {
  //Serial.println(s);
  //delay(100);
  Display();
}

void Display() {
  //sprintf(S_str,"%d", s);
  //sprintf(P_str,"%d", r);
  u8g2.setFontMode(1);
  u8g2.setFont(u8g2_font_10x20_tr);
  u8g2.firstPage();
  do {
     u8g2.drawStr(0, 15, "Morse");
     u8g2.drawStr(75, 15, wpm_str);
     u8g2.drawStr(98, 15, "w/m");
     //u8g2.drawStr(75, 30, S_str);
     //u8g2.drawStr(105, 30, P_str);
     for (k = 0; k < 12; k++){
       u8g2.drawStr(k*10, 40, wiersz1[k] );   //top line
       u8g2.drawStr(k*10, 60, wiersz[k] );    //workline
     }
  } while ( u8g2.nextPage() );
  delay(10);
}

void Zliczaj(){
  readPin1 = analogRead(inPin1);
  if (readPin1 > 10 ) {             //key is pressed
    z++;
    if (z == 1){
      r = p;
      //Display();                    //Displays the length of the last pause
      //delay(5);
      p = 0;
    }
  }
  if (readPin1 <= 10) {             //key released
    p++;
    if (p == 1) {
      s = z;
      if ( kropka == 0){
         kropka = s ;
         //wpm = 1200/s;
         //sprintf(wpm_str,"%d", wpm);
      }
      if ( z > 5 && z < 1.5 * kropka){ znak_M = "."; kropka = z ;}
      if ( z > 2 * kropka ){ znak_M = "-";}
      if ( r < 2 * kropka){ litera_M += znak_M;}
      if ( litera_M.length() == 0 ) {litera_M = znak_M;}
      z = 0;
    }
    if (p == 2 * kropka) {
      wpm = 1200/kropka;
      if (wpm > 90) {wpm = 0 ; z = 0;}
      sprintf(wpm_str,"%d", wpm);
      if ( litera_M.length() > 0 ) {
        ZnajdzZnak();
        i++;
        wiersz[i-1] = znak;
        if (i > 11) {
          for (int k = 0; k < 12; k++) {
            wiersz1[k] = " ";                        //delete the top line
            wiersz1[k] = wiersz[k];                  //rewriting characters from the working line to the top line
            wiersz[k] = " ";                         //delete work line
          }
          i = 0;
        }
      }
      Display();                                   //displays the read characters
   }
    if (p == 100 * kropka && i > 0) {
       for (int k = 0; k < 12; k++) {
          wiersz1[k] = " ";                        //rewriting characters from the working line to the top line
          wiersz1[k] = wiersz[k];                  //rewriting characters from the working line to the top line
          wiersz[k] = " ";                         //delete work line
        }
        i = 0;
        Display();                                //Displays the characters read
    }
  }
}

void ZnajdzZnak(){
  znak = "";
  for (k = 0; k <= index_key; k++){
     if (Morse[k] == litera_M) {
        znak = Z_char[k];            //converting the key code to a letter
        break;
     }
  }
  k = 0;
  litera_M = "";
}

DIY Arduino Morse code Decoder and Trainer


- Comments(0)
- Likes(1)
More by Mirko Pavleski
-
 Arduino 3D Printed self Balancing Cube
Self-balancing devices are electronic devices that use sensors and motors to keep themselves balanc...
Arduino 3D Printed self Balancing Cube
Self-balancing devices are electronic devices that use sensors and motors to keep themselves balanc...
-
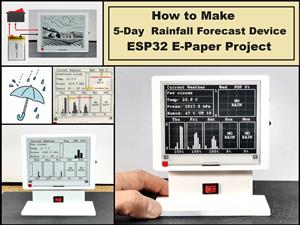 DIY 5-Day Rainfall Forecast Device - ESP32 E-Paper Project
In several of my previous projects I have presented ways to make weather stations, but this time I ...
DIY 5-Day Rainfall Forecast Device - ESP32 E-Paper Project
In several of my previous projects I have presented ways to make weather stations, but this time I ...
-
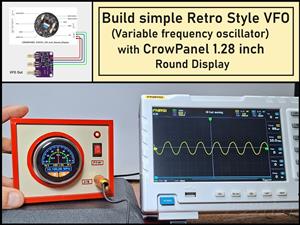 Build simple Retro Style VFO (Variable frequency oscillator) with Crowoanel 1.28 inch Round Display
Today I received a shipment with a Small round LCD display from Elecrow. The device is packed in tw...
Build simple Retro Style VFO (Variable frequency oscillator) with Crowoanel 1.28 inch Round Display
Today I received a shipment with a Small round LCD display from Elecrow. The device is packed in tw...
-
 Human vs Robot – Rock Paper Scissors with MyCobot 280 M5Stack
Today I received a package containing the few Elephant Robotics products. The shipment is well pack...
Human vs Robot – Rock Paper Scissors with MyCobot 280 M5Stack
Today I received a package containing the few Elephant Robotics products. The shipment is well pack...
-
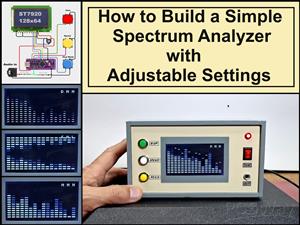 How to Build a Simple Audio Spectrum Analyzer with Adjustable Settings
An audio spectrum analyzer is an electronic device or software tool that measures and visually disp...
How to Build a Simple Audio Spectrum Analyzer with Adjustable Settings
An audio spectrum analyzer is an electronic device or software tool that measures and visually disp...
-
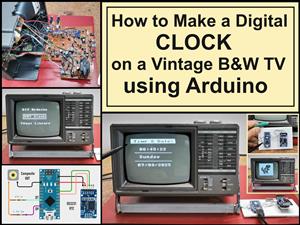 How to Make a Digital Clock on a Vintage B&W TV using Arduino
These days I accidentally came across this small retro Black and White TV with a built-in Radio, so ...
How to Make a Digital Clock on a Vintage B&W TV using Arduino
These days I accidentally came across this small retro Black and White TV with a built-in Radio, so ...
-
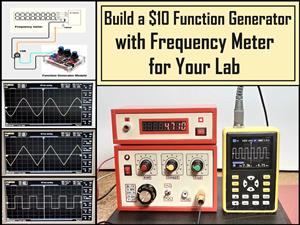 Build a $10 Function Generator with Frequency Meter for Your Lab
A function generator is a piece of electronic test equipment used to generate various types of elec...
Build a $10 Function Generator with Frequency Meter for Your Lab
A function generator is a piece of electronic test equipment used to generate various types of elec...
-
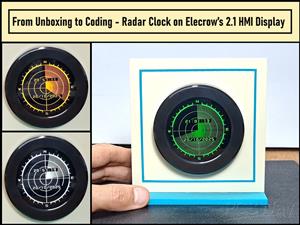 From Unboxing to Coding - Radar Clock on Elecrow’s 2.1 HMI Display
Today I received a shipment with a large round LCD display from Elecrow. The device is packed in two...
From Unboxing to Coding - Radar Clock on Elecrow’s 2.1 HMI Display
Today I received a shipment with a large round LCD display from Elecrow. The device is packed in two...
-
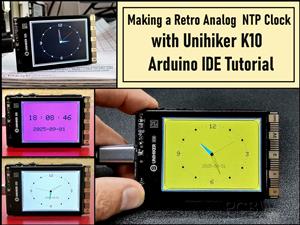 Making a Retro Analog NTP Clock with Unihiker K10 - Arduino IDE Tutorial
Some time ago I presented you a way to use standard Arduino libraries on the Unihiker k10 developme...
Making a Retro Analog NTP Clock with Unihiker K10 - Arduino IDE Tutorial
Some time ago I presented you a way to use standard Arduino libraries on the Unihiker k10 developme...
-
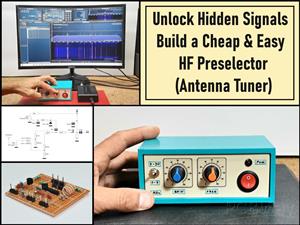 Build a Cheap & Easy HF Preselector - Antenna Tuner
HF antenna preselector is an electronic device connected between an HF radio antenna, and a radio r...
Build a Cheap & Easy HF Preselector - Antenna Tuner
HF antenna preselector is an electronic device connected between an HF radio antenna, and a radio r...
-
 DIY Static Charge Monitor - Electrostatic Field Detector (Arduino & TL071)
A Static Charge Monitor also known as a Static Field Meter or Electrostatic Voltmeter is a device u...
DIY Static Charge Monitor - Electrostatic Field Detector (Arduino & TL071)
A Static Charge Monitor also known as a Static Field Meter or Electrostatic Voltmeter is a device u...
-
 XHDATA D-219 Radio Short Review with complete disassembly
Some time ago I received an offer from XHDATA to be one of the first test users of their new radio m...
XHDATA D-219 Radio Short Review with complete disassembly
Some time ago I received an offer from XHDATA to be one of the first test users of their new radio m...
-
 How to make Simplest ever Oscilloscope Clock
An oscilloscope clock is a unique and creative way to display the time using an oscilloscope, which...
How to make Simplest ever Oscilloscope Clock
An oscilloscope clock is a unique and creative way to display the time using an oscilloscope, which...
-
 DIY Digital Barograph with BME280 and ESP32 - 24 Hour Pressure Trends
A barograph is a self-recording barometer that continuously measures and records atmospheric pressu...
DIY Digital Barograph with BME280 and ESP32 - 24 Hour Pressure Trends
A barograph is a self-recording barometer that continuously measures and records atmospheric pressu...
-
 Build a Raspberry Pi Pico SDR Radio with Waterfall Display
Software-defined radio (SDR) is a radio communication system where components that have traditional...
Build a Raspberry Pi Pico SDR Radio with Waterfall Display
Software-defined radio (SDR) is a radio communication system where components that have traditional...
-
 DIY Magnet Polarity Detector - How to Identify Poles with a Hall Sensor from a PC Fan
Recently, while working on a project, I needed to determine the polarity of several permanent magne...
DIY Magnet Polarity Detector - How to Identify Poles with a Hall Sensor from a PC Fan
Recently, while working on a project, I needed to determine the polarity of several permanent magne...
-
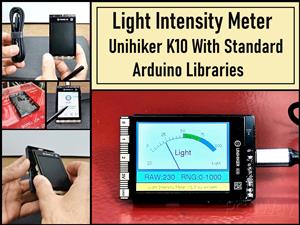 Light Meter Project - Making Dfrobot Unihiker K10 Work with Standard Arduino Libraries
The other day I received a shipment with a UNIHIKER K10 development board from DFRobot, which I rec...
Light Meter Project - Making Dfrobot Unihiker K10 Work with Standard Arduino Libraries
The other day I received a shipment with a UNIHIKER K10 development board from DFRobot, which I rec...
-
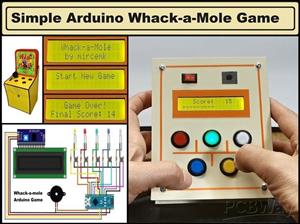 DIY Simple Arduino Whack-a-Mole Game
A "Whack-a-Mole" game is a classic arcade-style game where moles pop up randomly from holes, and th...
DIY Simple Arduino Whack-a-Mole Game
A "Whack-a-Mole" game is a classic arcade-style game where moles pop up randomly from holes, and th...
-
-
-
-
Tester for Touch Screen Digitizer without using microcontroller
322 2 2 -
Audio reactive glow LED wristband/bracelet with NFC / RFID-Tags
306 0 1 -
-
-


