
|
Arduino UNO R3 development sensor expansion board |
x 1 | |

|
Mini Breadboard |
x 1 |
|
|
Laser Cutter Machinne |
|

|
3D Printer (generic) |
Mini Arduino Laboratory
I have worked in teaching laboratories for over 10 years. One of the great difficulties in these spaces is the creation of teaching kits for classes in order to improve the quality of teaching. Many times the material of practical classes was delivered and, due to the improper handling of many students, they had errors during the classes.
This presents two problems: material disorganization and increased costs with the purchase of new devices.
One way to solve this problem is through the use of the Arduino mini lab. It is shown in the figure below.
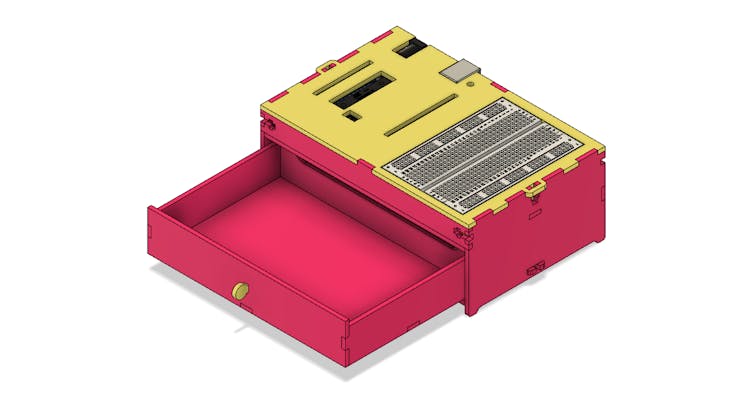
This educational lab was developed to help you build Arduino projects at home, schools and colleges.
In addition, this kit provides 3 advantages:
- It has a drawer with dimensions of 12.9 cm x 8.5 cm x 2 cm to store the main electronic components;
- Avoid direct contact of the Arduino board with metallic or wet parts, and
- It has a breadboard.
Do you want to learn how to build this little lab with Arduino and breadboard?
In this article, developed in partnership with PCBWay, we will teach you step by step how to build this kit and we will provide you with the file for you to print or laser cut the parts.
Access the link and register on the PCBWay website. You will be able to download all the files and assemble your project.
Arduino Mini Lab
The Arduino Mini Lab is formed by an Arduino UNO and a small 400-point breadboard. See its structure in the figure below.
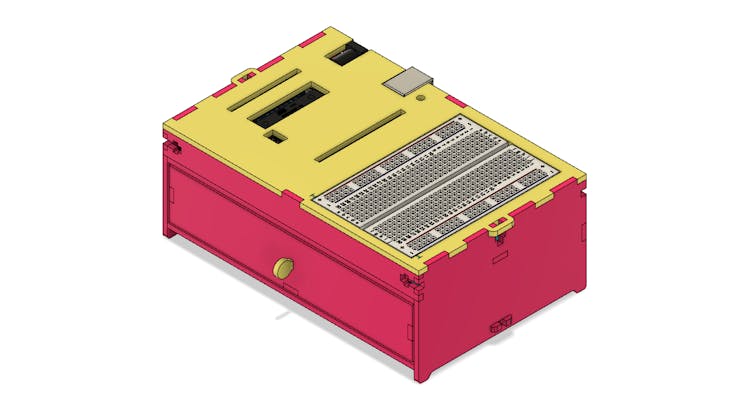
Its structure was modeled to be easy to assemble by anyone. Parts can be produced using laser cutting technology or 3D printing. The entire project is available at this article.
Next we have the internal structure with the Arduino UNO and the breadboard fixed in its structure.

To fix the breadboard, a structure was created, which is presented below.
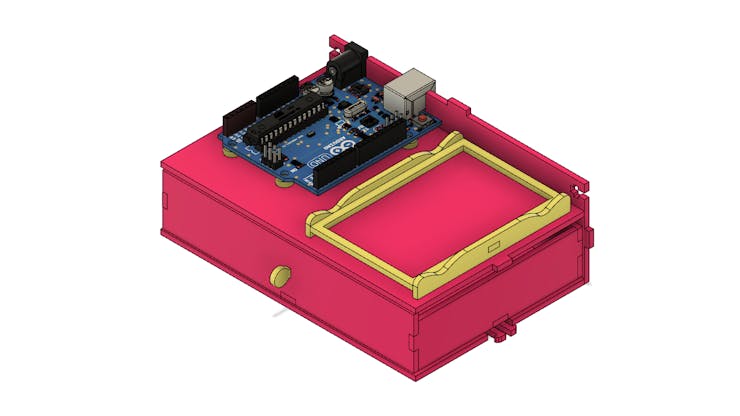
The Arduino is fixed to the structure using M3 screws. Supports were used to improve the alignment and installation of the electronic board.
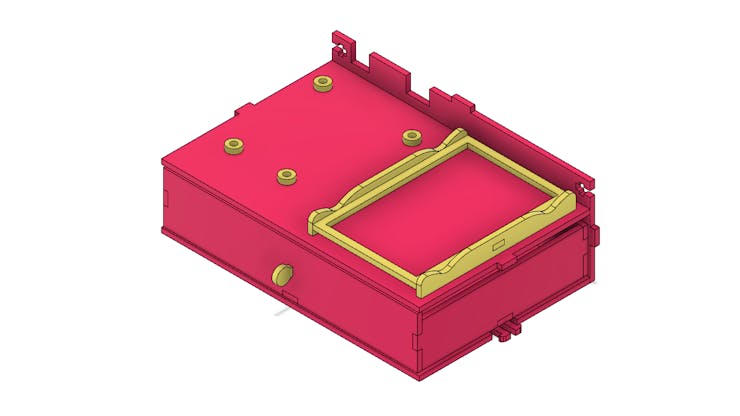
During the construction of the project, the Arduino was positioned with the USB port and power to the back of the mini lab. See the figure below.

This is for the purpose of organizing the connection of power and programming cables.
Below we have the presentation of all the parts of the structure. You can laser cut them with 2.5mm thick material or use a 3D printer. All parts can be downloaded from this article.
The frame uses a total of 6 M3 x 10mm screws with 2.4mm thick 5.5mm hex nuts for fixing.
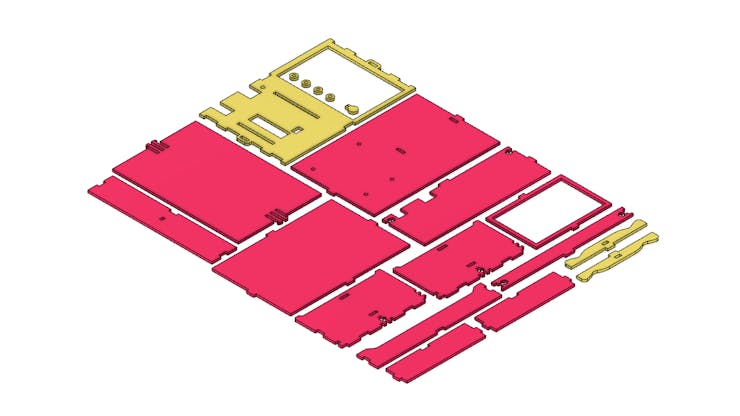
How to assemble the Arduino lab?
Arduino Mini Lab Assembly
First get the Arduino base piece and the 4 rings.
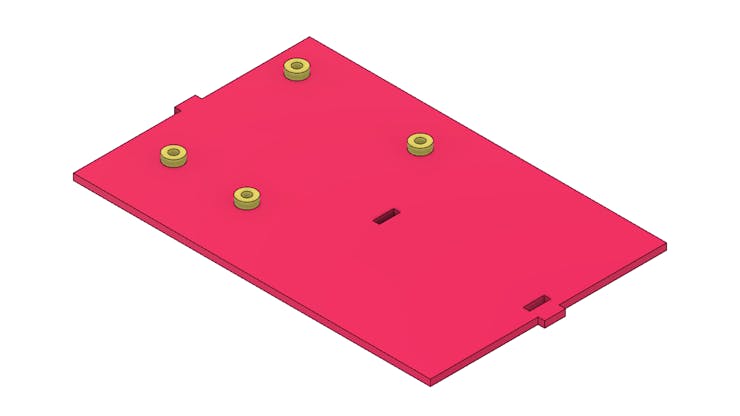
After that, align the Arduino holes over the holes in each ring and apply the screws and nuts for fixing to the base.
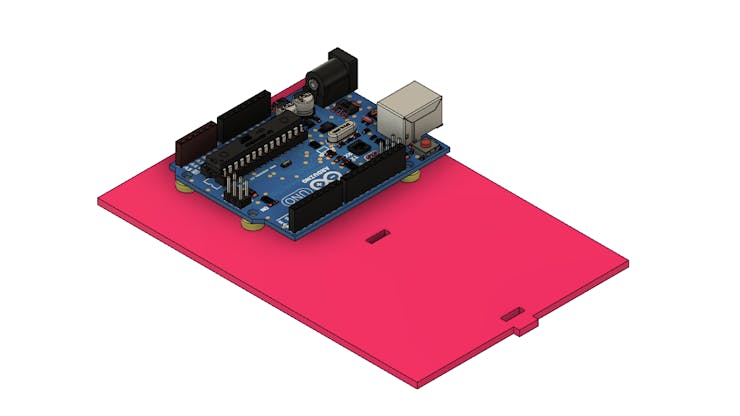
Then you must use two pieces: the base piece and the left side piece. Below we have the image of the two pieces mentioned.
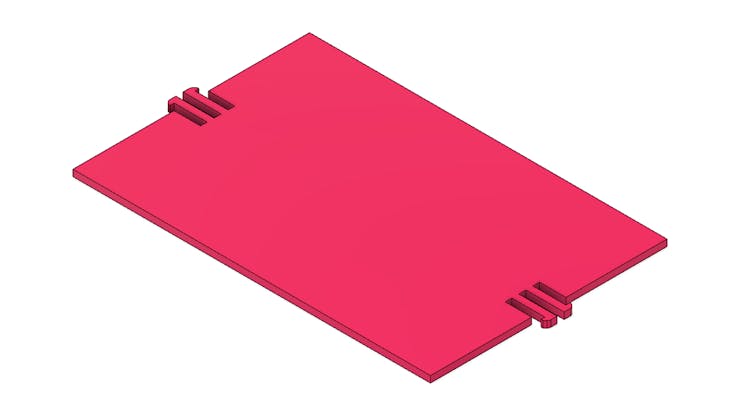
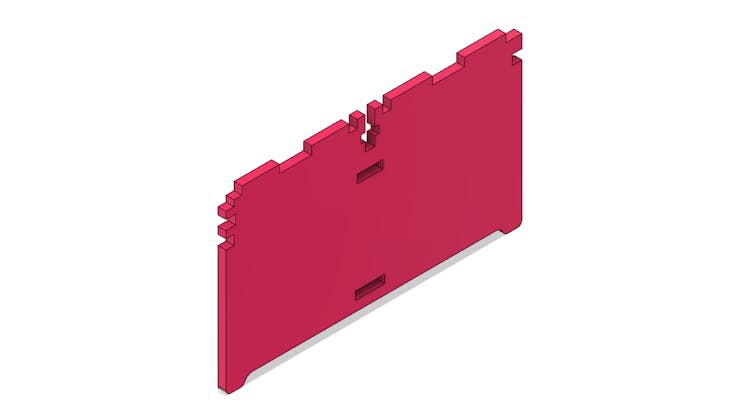
Carry out the fit between the pieces and you will get the result below.
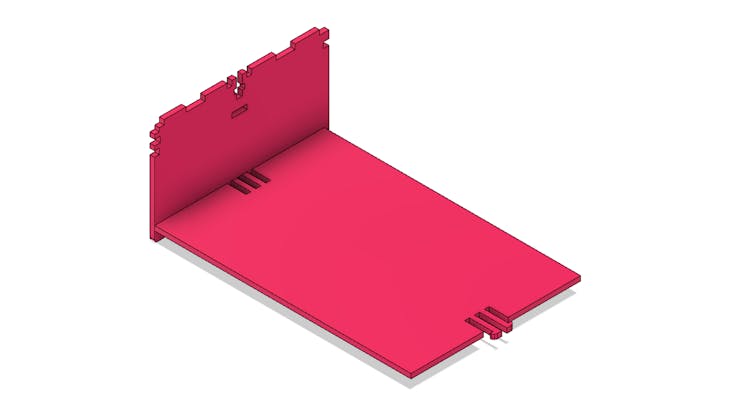
Then, make the fitting of the Arduino support base with the left side piece. See the result in the figure below.
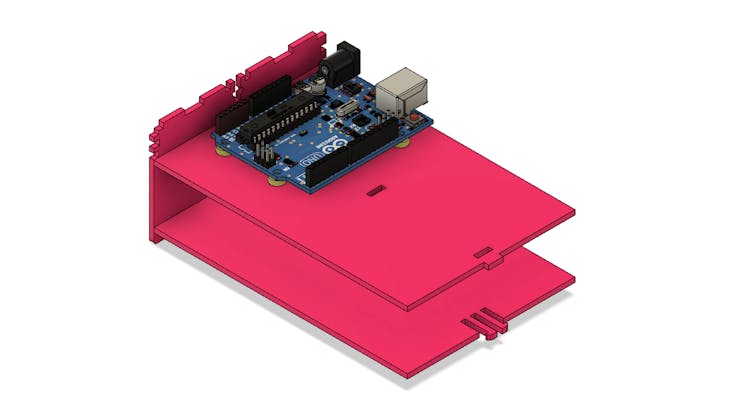
In the next step you must assemble the breadboard support base. Use the 3 pieces below to assemble the frame.
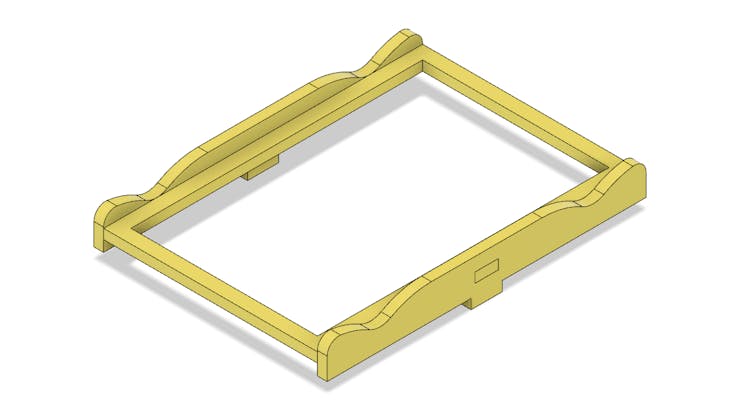
Then you must fit the breadboard support structure to the base. The result is shown below.
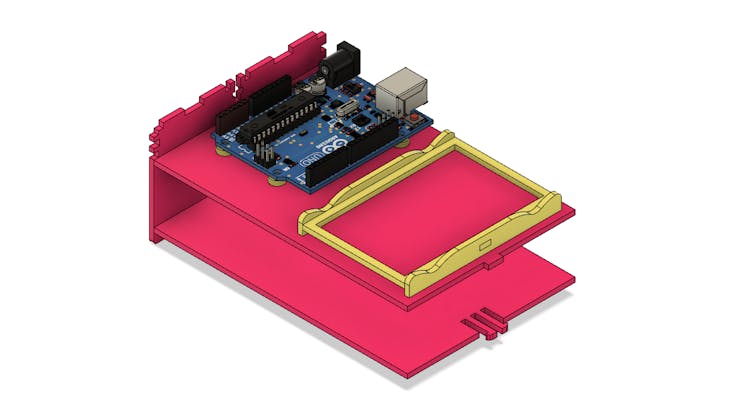
Finally, insert the breadboard into the support base. See the figure below.

In the next step you must fit the right side piece. See the assembly result in the figure below.
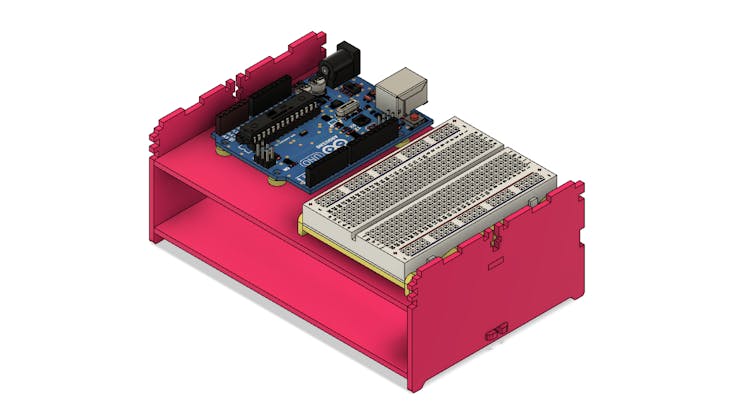
The next piece to assemble is the lab cover. See the result in the figure below.

In the next step you must fit the back part of the mini lab.
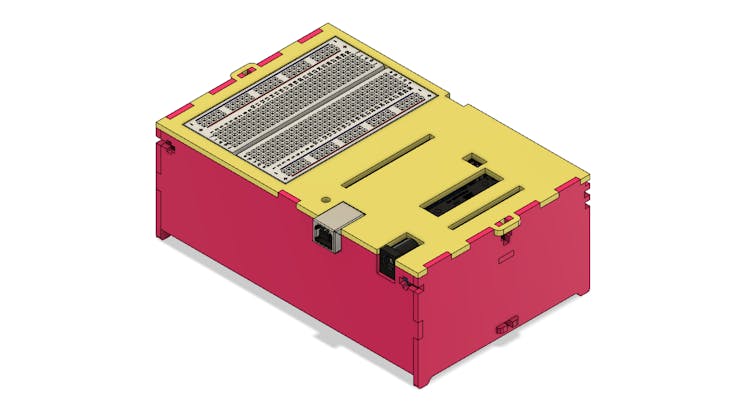
After that, insert the front part of the lab.
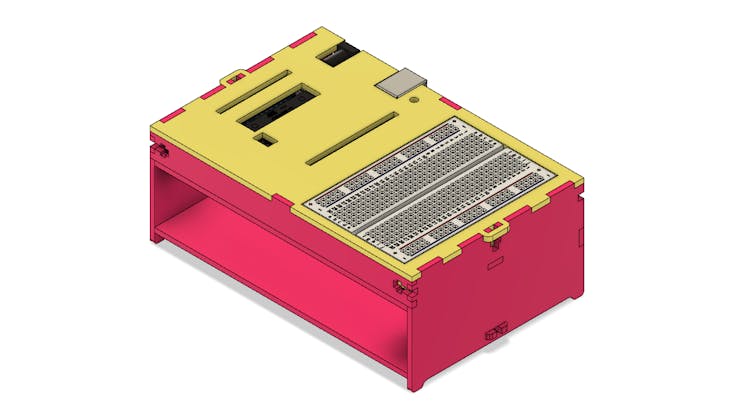
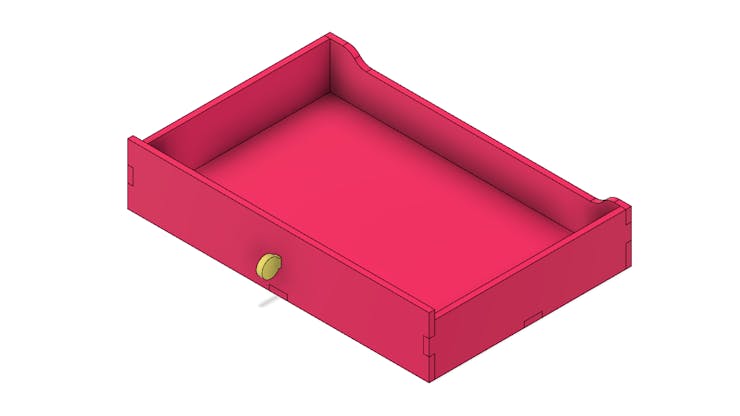
Finally, you must join the drawer pieces with glue. See the result in the figure below.
Insert the drawer into the mini lab frame and use it to store the main components you use in your projects. See the result in the figure below.
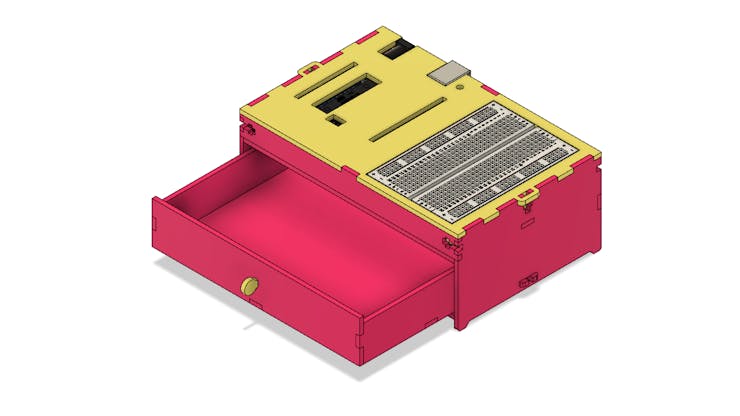
The Arduino Lab can be used to develop many projects and bench tests. In addition, it facilitates the organization of your projects and protects your Arduino board.
You can download the project and build your own. Download now!
Acknowledgment
Thanks to the PCBWay for support and produce and assembly PCBs with better quality.
Mini Arduino Laboratory
*PCBWay community is a sharing platform. We are not responsible for any design issues and parameter issues (board thickness, surface finish, etc.) you choose.
- Comments(0)
- Likes(0)
- 0 USER VOTES
- YOUR VOTE 0.00 0.00
- 1
- 2
- 3
- 4
- 5
- 6
- 7
- 8
- 9
- 10
- 1
- 2
- 3
- 4
- 5
- 6
- 7
- 8
- 9
- 10
- 1
- 2
- 3
- 4
- 5
- 6
- 7
- 8
- 9
- 10
- 1
- 2
- 3
- 4
- 5
- 6
- 7
- 8
- 9
- 10
 More by Silícios Lab silicioslab
-
 How to measure weight with Load Cell and HX711
IntroductionThe purpose of this project is to develop a printed circuit board (PCB) that allows weig...
-
 Electronic Enclosure applied for electronic projects
IntroductionWhen designing electronics, the enclosure plays a crucial role that is often overlooked....
-
 IoT Indoor system with ESP32 to monitor Temperature, Humidity, Pressure, and Air Quality
IntroductionAir quality, temperature, humidity and pressure are essential elements to ensure healthy...
-
 WS2812B RGB LED Controller with ESP8266 via WiFi
IntroductionWS2812b addressable RGB LEDs are devices widely used in lighting projects. They are foun...
-
 Electronic Board for Cutting Electrical Power to Devices and Machines
IntroductionAn energy saving system for cutting electrical energy in machines is a fundamental piece...
-
 PCB Board Home Automation with ESP8266
IntroductionThe incorporation of the ESP8266 module into home automation represents a significant ad...
-
 Dedicated Control Board for Mobile Robots with Wheels
IntroductionFor a long time we developed several prototypes and teaching kits of mobile robots and w...
-
 Traffic turn signal for bicycles
IntroductionDoes every project with electronic logic need a Microcontroller or Arduino to be develop...
-
 Mini Arduino with ATTINY85
Do you know the ATTINY85 microcontroller? This article has news and a gift for you. Many people deve...
-
 Christmas Tree
The tree used to signal light of Christmas.
-
 IoT Access control and communication system with Raspberry Pi/PC using ESP32
IntroductionIn the world of automation and the Internet of Things (IoT), access control systems have...
-
 Electronic Enclosure applied for electronic devices
IntroductionWhen designing electronics, the enclosure plays a crucial role that is often overlooked....
-
 Electronic Enclosure for Programmable Logic Controller
The housing developed for programmable logic controllers is a practical and efficient solution for t...
-
 Payment PCB for machines and services
IntroductionIn many commercial establishments, hospitals and other places, there are video game equi...
-
 Relay High Power Printed Circuit Board
IntroductionEfficient management of electrical loads is essential for optimizing performance and saf...
-
 Weather gadget with clock through ESP8266
IntroductionImagine a device that combines technology with an elegant design, bringing functionality...
-
 ESP32 MPU6050 Monitor
IntroductionVarious industrial equipment is essential for the adequate production of products, parts...
-
 Digital Speedometer for Bicycles
IntroductionCycling, increasingly popular both as a recreational activity and as a means of transpor...
-
-
AEL-2011 Power Supply Module
515 0 2 -
AEL-2011 50W Power Amplifier
475 0 2 -
-
-
Custom Mechanical Keyboard
691 0 0 -
Tester for Touch Screen Digitizer without using microcontroller
323 2 2 -
Audio reactive glow LED wristband/bracelet with NFC / RFID-Tags
306 0 1 -
-
-


