P-Channel Mosfet Driver Breakout
A quick P-MOS MOSFET Driver Board

Introduction

A driver is needed to switch a P-Channel MOSFET because the gate of a P-Channel MOSFET needs to be driven to a voltage that is more negative than the source in order to turn it on. This can be difficult to do with low-voltage logic, such as 5V or 3.3V. A driver can provide the necessary voltage and current to turn on the P-Channel MOSFET, even when the logic voltage is low.
Here are some of the benefits of using a driver to switch a P-Channel MOSFET:
Increased switching speed: A driver can provide the necessary current to charge and discharge the gate capacitance of the P-Channel MOSFET quickly, which results in faster switching speeds.
Reduced power consumption: A driver can help to reduce power consumption by providing the necessary current in a short pulse, rather than a continuous stream of current.
Improved noise immunity: A driver can help to improve noise immunity by providing a clean and isolated signal to the gate of the P-Channel MOSFET.
If you are using a P-Channel MOSFET in your circuit, it is a good idea to use a driver to switch it. This will help to ensure that the MOSFET is switched quickly and efficiently and that it is protected from noise.
Here are some of the different types of drivers that can be used to switch P-Channel MOSFETs:
Logic level drivers: These drivers are designed to work with low-voltage logic, such as 5V or 3.3V. They typically have a high output voltage, which can be used to drive the gate of a P-Channel MOSFET.
High-side drivers: These drivers are designed to provide a high voltage to the gate of a P-Channel MOSFET. They are often used in circuits where the P-Channel MOSFET is used to switch a high-voltage rail.
Isolated drivers: These drivers provide an isolated signal to the gate of the P-Channel MOSFET. This is useful in circuits where it is important to prevent noise from entering the circuit.
Why did I decide to design this prototype?
The Story behind the prototype
This driver PCB is part of a solution for a project involving a set of 6v LED lights.
Each of the LED lights requires +/- 300mA @ 6v to operate efficiently.
I want to control these from a Microcontroller, either an ESP32 or even the XIAO RP2040 or similar. The current sink capability of an individual GPIO pin on these microcontrollers is limited, in the case of the RP2040 it is limited to 3mA per pin.
This prototype is an attempt to test out some basic driver ideas that might perform correctly for my particular needs, being
To stay within the limitations of the particular microcontroller GPIO current specifications
To be able to use any of the particular microcontrollers, without having to design a specific solution tailored to a specific device
The Schematic
I decided to keep things extremely simple to start with, using a very simple circuit consisting of only 4 components per channel. These are :
– an S9013 NPN BJT Transistor, capable of switching up to 500mA of current
– a SI2301 P-Channel Logic Level MOSFET, capable of switching up to 2.3A
– 10k pullup-resitor
– 1k resistor on the base of the BJT

The theory of operation is as follows:
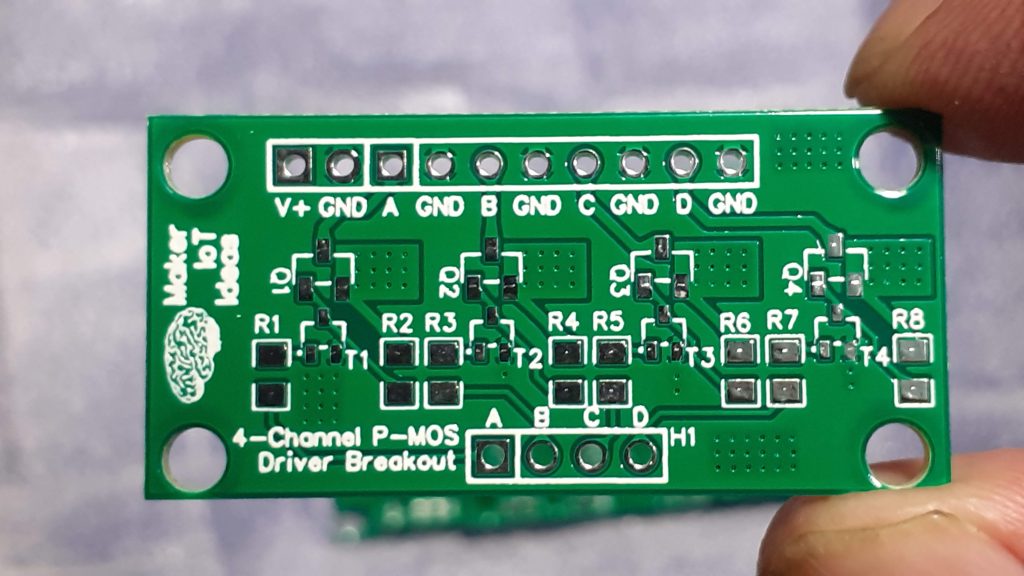
The pullup resistor, R8, keeps the gate of the MOSFET (Q4) positive, thus ensuring that Q4 stays turned off when T4 is turned off. A HIGH signal at B4 will turn on T4, which will in turn pull the gate of Q4 to ground, turning Q4 on in the process.
That will in turn turn on the load ( connected at 4+ and 4- ).
It is important to note here that the value of R8, 10K at the moment, is not finalised, and may change to increase the performance of the circuit.
The PCB
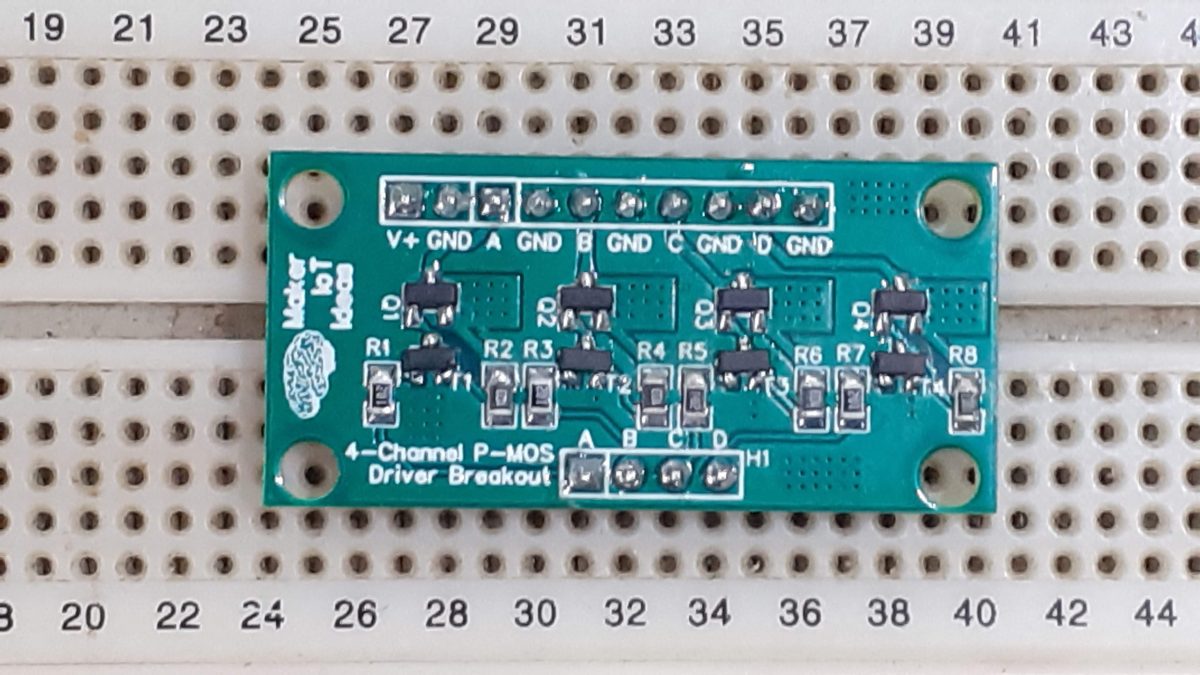
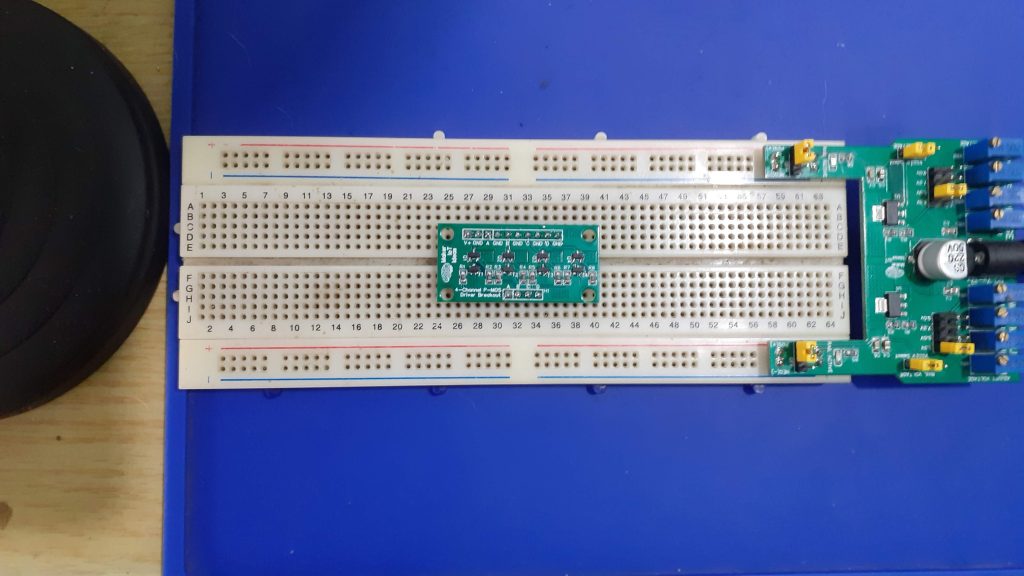
The board was made to fit on a standard breadboard or be used as a standalone module, depending on the position of the male header pins.


Manufacturing
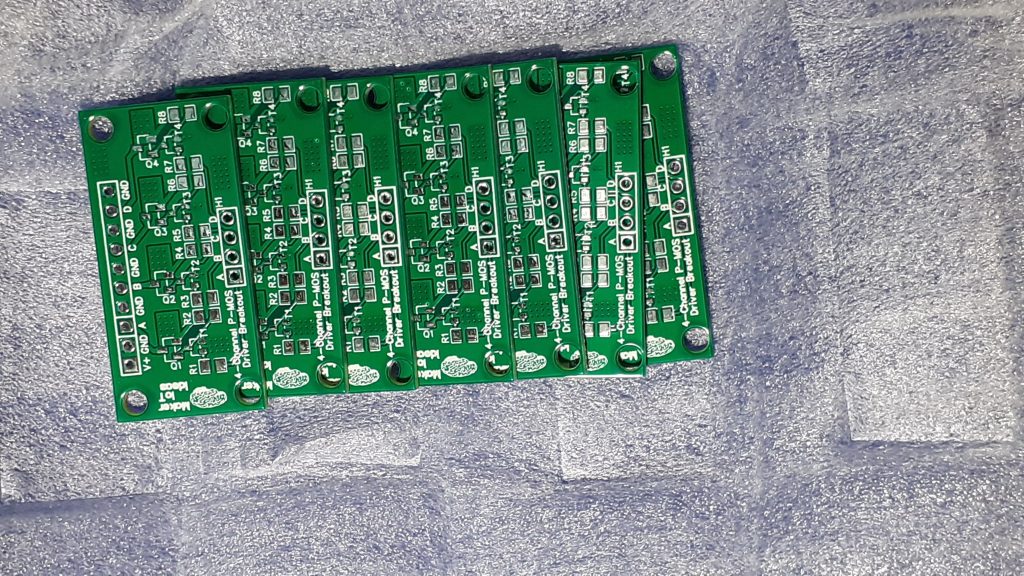
I choose PCBWay for my PCB manufacturing.
This month, PCBWay is also celebrating its 9th anniversary, and that means that there are quite a lot of very special offers available.
Why? What makes them different from the rest?
PCBWay‘s business goal is to be the most professional PCB manufacturer for prototyping and low-volume production work in the world. With more than a decade in the business, they are committed to meeting the needs of their customers from different industries in terms of quality, delivery, cost-effectiveness and any other demanding requests. As one of the most experienced PCB manufacturers and SMT Assemblers in China, they pride themselves to be our (the Makers) best business partners, as well as good friends in every aspect of our PCB manufacturing needs. They strive to make our R&D work easy and hassle-free.
How do they do that?
PCBWay is NOT a broker. That means that they do all manufacturing and assembly themselves, cutting out all the middlemen, and saving us money.
PCBWay’s online quoting system gives a very detailed and accurate picture of all costs upfront, including components and assembly costs. This saves a lot of time and hassle.
PCBWay gives you one-on-one customer support, that answers you in 5 minutes ( from the Website chat ), or by email within a few hours ( from your personal account manager). Issues are really resolved very quickly, not that there are many anyway, but, as we are all human, it is nice to know that when a gremlin rears its head, you have someone to talk to that will do his/her best to resolve your issue as soon as possible.
Find out more here


Assembly
The assembly of the PCB does not require any special tools, and can be done completely by hand if you choose. A very fine-tipped soldering iron should be perfect.
I chose to go the hot-air and solder-paste route, as it is faster, and looks neater in the end. The use of a stencil was not required.
The total assembly took about 5 minutes in total.

Testing
Testing the completed PCB module was performed with one of the LED light modules connected to each MOSFET Channel in turn, and then applying a voltage signal, or ground, to the control pin ( marked A to D on the picture above)
That was followed by connecting an Oscilloscope and Signal Generator to the control pins, as well as the outputs, and observing the waveforms during operation. A square wave output from the signal generator provided the switching signal.
Conclusion
The module works as expected, but the pullup resistor value needs to be fine-tuned to provide a better switching response on the MOSFET at high frequency.
I am however happy with the initial performance, and can now move on to improving the circuit to perform to my specifications.
This is a hardware only project. As such you do not need any specific code to use it It is however good to know how it works: As example, a simple blink sketch can be used to illustrate the operation of this board. Connect VCC ( 3.3v up to 20V DC) to the VCC pin and Ground to the GND pin. Your load connects at one of the A,B,C,D pins on the SAME row as the Vcc Pin. Tie the ground either to the GND pin next to A,B,C,D or connect it to the main circuit ground. The single 4 pin header connector is your control. A low signal here switches off the load, with a high switching it on. Lets use an Arduino as example // Arduino Code Follows int ChannelA = 10; void setup() { digitalWrite(ChannelA,LOW); Set the pin to LOW immediately, forcing the load OFF pinMode(ChannelA,OUTPUT); } void loop() { digitalWrite(ChannelA,!digitalRead(ChannelA)); delay(1000); // This will cycle the load once a second - I assume you have connected an LED // type light to the load... }

P-Channel Mosfet Driver Breakout
*PCBWay community is a sharing platform. We are not responsible for any design issues and parameter issues (board thickness, surface finish, etc.) you choose.

Raspberry Pi 5 7 Inch Touch Screen IPS 1024x600 HD LCD HDMI-compatible Display for RPI 4B 3B+ OPI 5 AIDA64 PC Secondary Screen(Without Speaker)
BUY NOW
ESP32-S3 4.3inch Capacitive Touch Display Development Board, 800×480, 5-point Touch, 32-bit LX7 Dual-core Processor
BUY NOW
Raspberry Pi 5 7 Inch Touch Screen IPS 1024x600 HD LCD HDMI-compatible Display for RPI 4B 3B+ OPI 5 AIDA64 PC Secondary Screen(Without Speaker)
BUY NOW- Comments(0)
- Likes(0)
 Log in to post comments.
- 0 USER VOTES
- YOUR VOTE 0.00 0.00
- 1
- 2
- 3
- 4
- 5
- 6
- 7
- 8
- 9
- 10
- 1
- 2
- 3
- 4
- 5
- 6
- 7
- 8
- 9
- 10
- 1
- 2
- 3
- 4
- 5
- 6
- 7
- 8
- 9
- 10
- 1
- 2
- 3
- 4
- 5
- 6
- 7
- 8
- 9
- 10
 More by Jean Redelinghuys MakerIoT2020
-
 RA-02 Breakout with Level converters
Breadboard and beginner-friendly RA-02 Breakout ModuleMost Makers and electronics enthusiasts may al...
-
 ATMEGA328P Module with integrated LoRa and CAN Bus
ATMEGA328P Module with integrated LoRa and CAN-BUSINTRODUCTIONIn my quest to perfect my LoRa telemet...
-
 Sx127x-Ra-02-Test-Module with ATMEGA328P-AU
SX127x LoRa/FSK/OOK Prototype Radio BoardI recently had a requirement to do some automation/telemetr...
-
 USB-ASP Programmer ATMEGA8
Build your own USB-ASP Programmer CloneBymakeriot2020 FEB 21, 2022 Arduino, ASP programmerUsing mor...
-
 ATTiny1616-LIGHT-Controller-with-CAN_B_PCB_ATTiny1616-LIGHT-Controller-with-C_2024-09-11
Assembly of the ATTiny1616 Can bus controller PCBThe Assembly of the ATTiny1616 Can Bus Controller P...
-
 ATTiny1616QFN-CAN-Remote-Neopixel-Ligh_PCB_ATTiny1616QFN-CAN-Remote-Neopixel-2024-09-11_2024-09-11
NeoPixel CAN-Bus Module with local controlAs part of my current project to add NeoPixels to the cabi...
-
 PCB_MCP23008_2023-10-08
MCP23008 BreakoutI designed this breakout to assist me during prototyping my next version of the “RP...
-
 PCB_XiaoRP2040-Mouse-REV2
Xiao RP2040 Joystick Mouse – revision 2.00Revision 1.0 of the ProjectOver the last few months, I hav...
-
 Multi Purpose IO Card
Multi-Purpose IO CardWhen we are working on a prototype, we always need access to pushbuttons, encod...
-
 Variable Voltage Power Module
Powering electronics projects are always challenging. This Variable vol...
Variable Voltage Power Module
Variable Voltage Power ModulePowering electronics projects are always challenging. This Variable vol...
-
 I2C Matrix Keypad
An I2C Matrix KeypadThe completed I2C Matrix KeypadIn a previous post this month I introduced my 4×4...
-
 ESP32-S Development Board, in "Arduino Uno" form factor
UPDATE 24/06/2023:This board now has a Hardware Revision 2.0 available. It is the same board but wit...
-
 W307186ASC94_Gerber_PCB_USB-Ports
USB Power Supply ModuleUSB Ports are quite handy to power all our day-to-day electronic devices, but...
-
 Atmega 328P based PWM controller Card
ATMega 328P Based PWM controller CardAs part of my recent ESP-12E I2C Base Board project, I designed...
-
 W307186ASC71_Gerber_PCB_ESP-Now Remote
Today we will look at the remote control unit for the Robotic Toy Car – Part 6.The project is close ...
-
 W307186ASV69_Gerber_PCB_Robot-Car-MCU-Board Prototype
In our last project, we started working on repurposing an old toy car. In this part, Robot Toy Car –...
-
 W307186ASV62_Gerber_PCB_DUAL-H-Bridge
by makeriot2020 on May 27, 2022Many of us have old toys laying around the house, they belong to ou...
-
 CAN-BUS Breakout
Breadboard Compatible CAN-BUS Breakout ModuleWhat is this:Some of us have already used the commonly ...
-
 RA-02 Breakout with Level converters
Breadboard and beginner-friendly RA-02 Breakout ModuleMost Makers and electronics enthusiasts may al...
-
 ATMEGA328P Module with integrated LoRa and CAN Bus
ATMEGA328P Module with integrated LoRa and CAN-BUSINTRODUCTIONIn my quest to perfect my LoRa telemet...
-
 Sx127x-Ra-02-Test-Module with ATMEGA328P-AU
SX127x LoRa/FSK/OOK Prototype Radio BoardI recently had a requirement to do some automation/telemetr...
-
 USB-ASP Programmer ATMEGA8
Build your own USB-ASP Programmer CloneBymakeriot2020 FEB 21, 2022 Arduino, ASP programmerUsing mor...
-
 ATTiny1616-LIGHT-Controller-with-CAN_B_PCB_ATTiny1616-LIGHT-Controller-with-C_2024-09-11
Assembly of the ATTiny1616 Can bus controller PCBThe Assembly of the ATTiny1616 Can Bus Controller P...
-
 ATTiny1616QFN-CAN-Remote-Neopixel-Ligh_PCB_ATTiny1616QFN-CAN-Remote-Neopixel-2024-09-11_2024-09-11
NeoPixel CAN-Bus Module with local controlAs part of my current project to add NeoPixels to the cabi...
-
 PCB_MCP23008_2023-10-08
MCP23008 BreakoutI designed this breakout to assist me during prototyping my next version of the “RP...
-
 PCB_XiaoRP2040-Mouse-REV2
Xiao RP2040 Joystick Mouse – revision 2.00Revision 1.0 of the ProjectOver the last few months, I hav...
-
 Multi Purpose IO Card
Multi-Purpose IO CardWhen we are working on a prototype, we always need access to pushbuttons, encod...
-
 Variable Voltage Power Module
Powering electronics projects are always challenging. This Variable vol...
Variable Voltage Power Module
Variable Voltage Power ModulePowering electronics projects are always challenging. This Variable vol...
-
 I2C Matrix Keypad
An I2C Matrix KeypadThe completed I2C Matrix KeypadIn a previous post this month I introduced my 4×4...
-
 ESP32-S Development Board, in "Arduino Uno" form factor
UPDATE 24/06/2023:This board now has a Hardware Revision 2.0 available. It is the same board but wit...
-
-
-
Commodore 64 1541-II 1581 Floppy Disk Drive C64 Power Supply Unit USB-C 5V 12V DIN connector 5.25
460 1 4 -
-
-
-
-
-
-
-
Modifying a Hotplate to a Reflow Solder Station
1314 1 6 -
MPL3115A2 Barometric Pressure, Altitude, and Temperature Sensor
739 0 1


