Gerber_PCB_Updated-I2S Shield
Stereo I2S Shield – The next iteration…
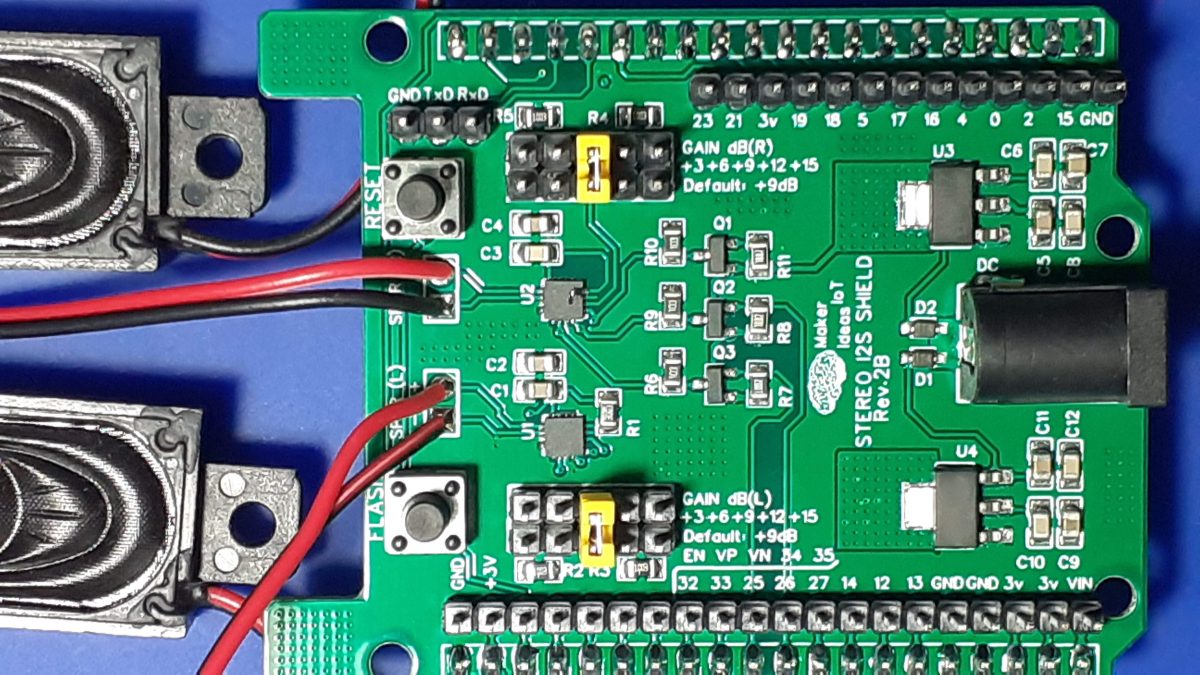
Last month I started working on a Stereo I2S Audio shield for my ESP32-S development board. Those of you that saw that post will remember that I made some mistakes on the initial prototype, and had to repair it with a few “greenwire” connections.
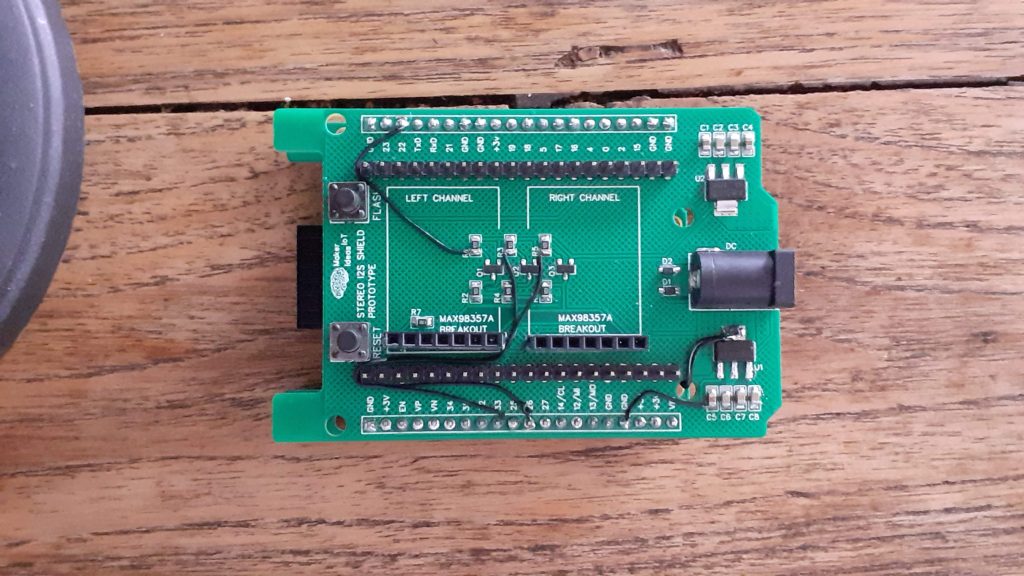
The prototype shield also required the use of commercial I2S modules to be plugged into it, making for quite a cumbersome first iteration.
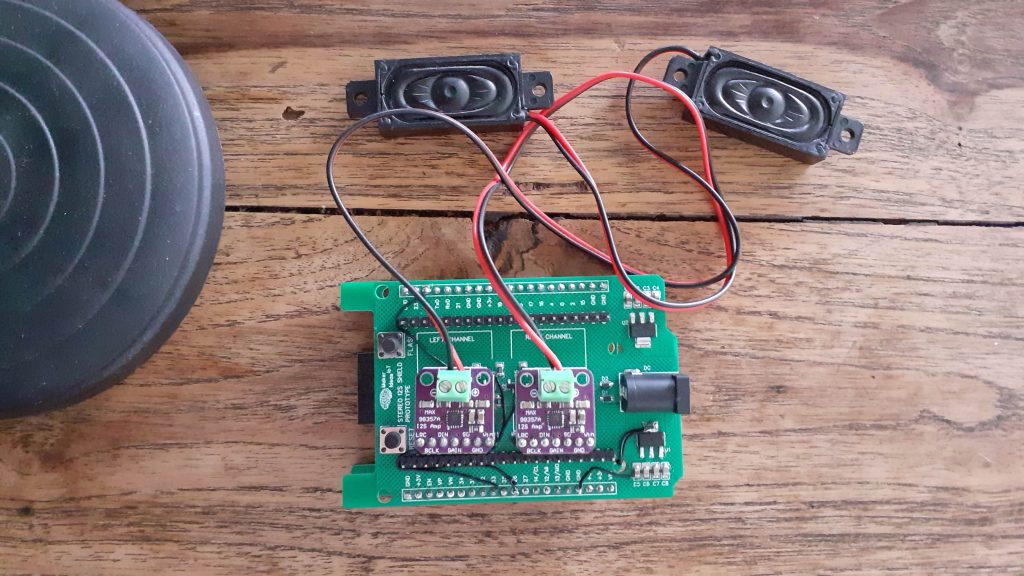 Stereo I2S shield stacked onto esp32-S dev board
I decided to do something about that, as the long-term use of this particular shield, as internet radio, with a further “dream” of using it as a remote media player for use from Home Assistant, is moving along well, with progress on the firmware being made slowly but surely.
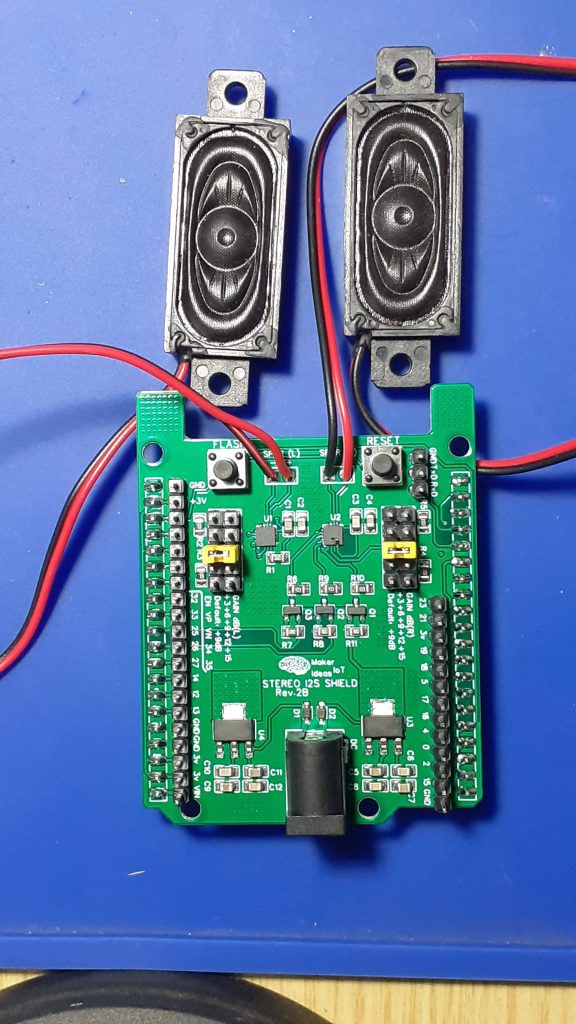
I decided that, since the Audio Chips seem to be quite easily available, and are modestly priced, getting rid of the plug-in modules, and placing the chips directly on the shield seemed like the next logical step. I also broke out the gain pins of each chip and made provision for easily changing said gain with a jumper, individually for the left and right channels of the I2S Audio shield.
I decided to keep the logic level conversion circuit, as it worked well, as well as provided another layer of protection to the ESP32-S that drives the whole shield. ( These have recently been discontinued by AI-Thinker, but the Espressif version is still begin manufactured and supported).
The power supply section of the board remains the same as the previous version, with a dedicated 5v regulator feeding the Audio section, and a 3v regulator the logic level converters. (I may change this in future, as the ESP32-S board can easily supply the 3v required without overloading the regulator on the CPU board.
Current issues that are carried over from the initial prototype still remain though. The two I2S Audion chips seem to be QUITE power-hungry, pulling almost 2A of current from a 12v supply, with a modest volume of 10 out of a possible 100. This has been reduced down from an earlier 4A to 6A when using a different pair of 4ohm 3W speakers.
This is also one of the reasons for the separate voltage regulators on the shield.
Assembly
This project once again called for a stencil, as the QFN packages of the Audio chips are super tiny, with super tiny tracks and pads. A high-quality stencil definitely goes a long way in ensuring that just the right amount of solder paste is added to each pad. This also reduces the requirements for reworking a board with hot air to fix any solder bridges that might have formed.
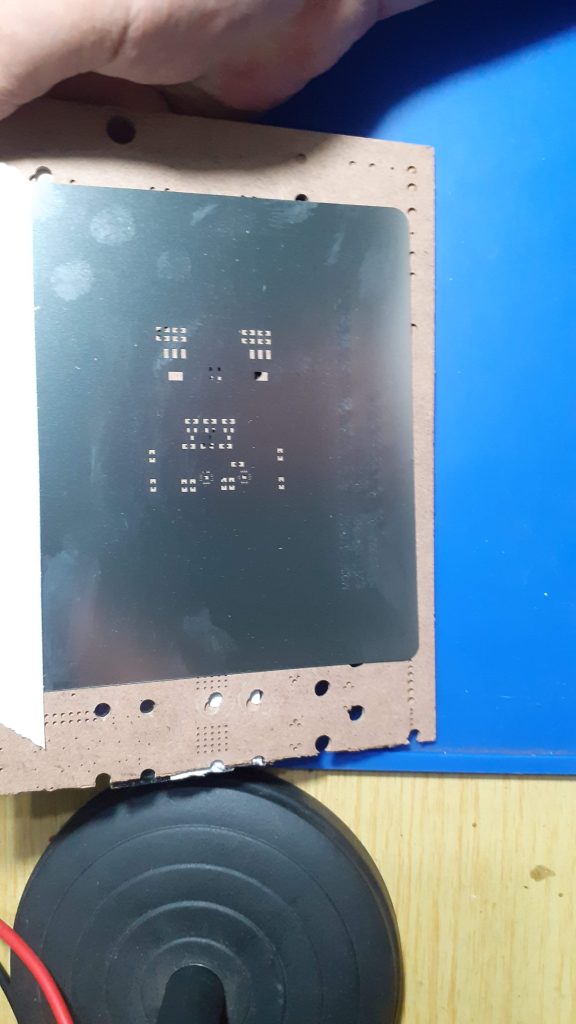
The quality of a stencil says a lot about your PCB manufacturer, and in my case, I am extremely happy to say that PCBWay definitely delivers quality. Having used their services for close to 3 years now, I have not received a single faulty PCB or stencil at all. Yes, some PCB’s has had errors, but those were all MY errors. Design errors, not manufacturing errors.
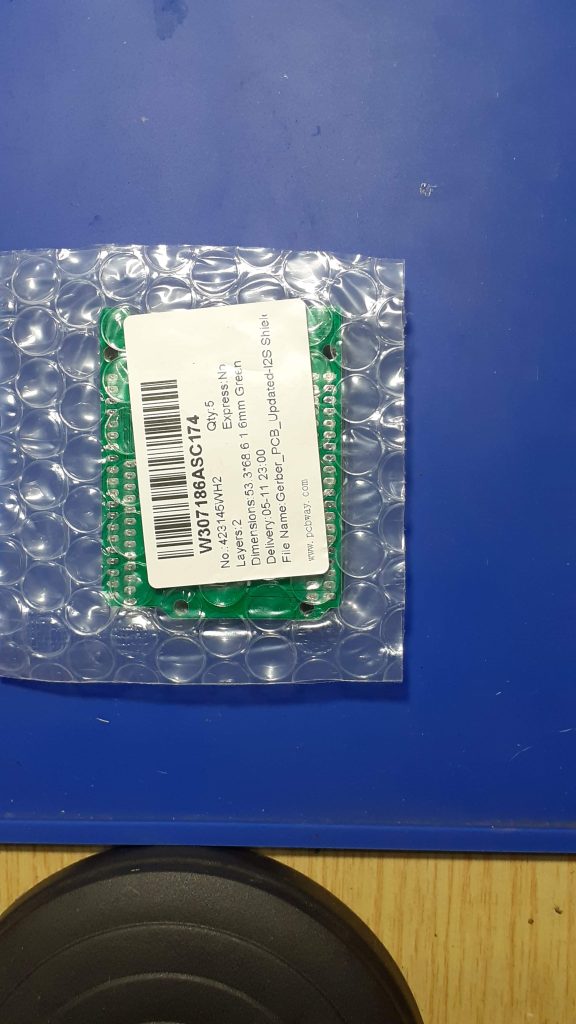
Let us return to the assembly of this PCB, shall we…
As usual, the PCBs arrived very well packaged, and after a quick inspection and some random tests with a multimeter, It was time for solder paste and placing components, while listening to a piece of relaxing music… my way of relaxing…
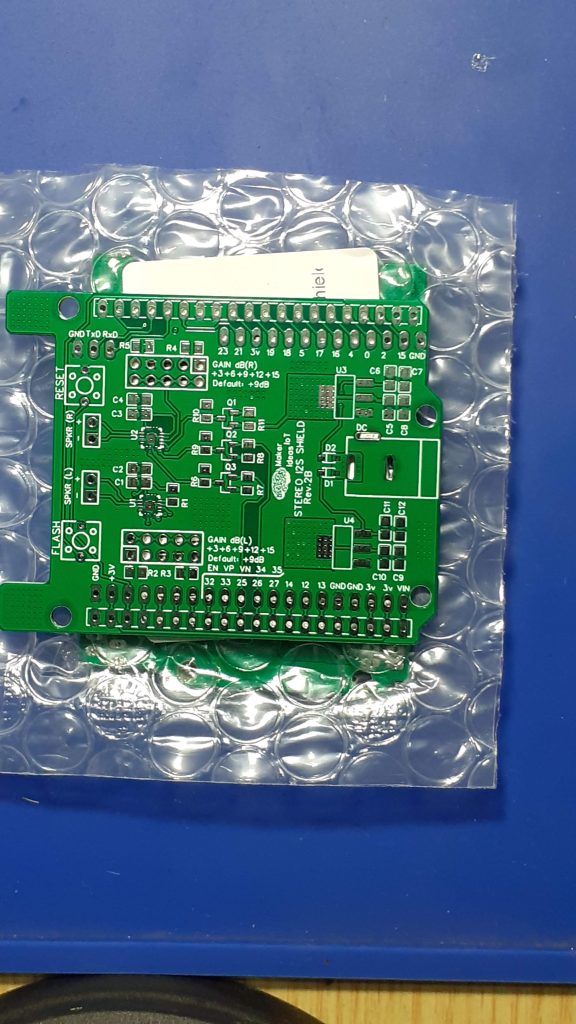
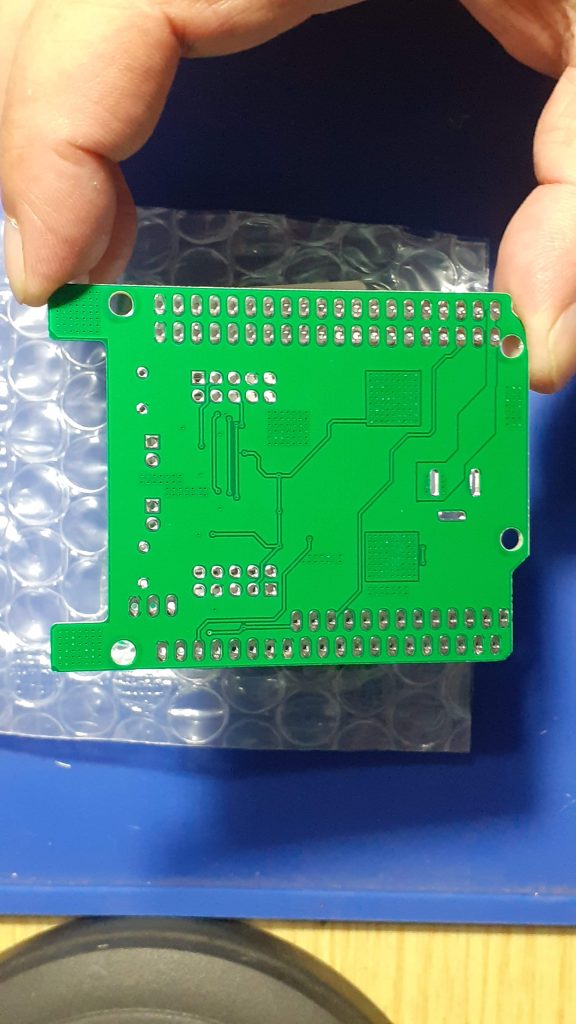
After about 20 minutes of intense concentration, we have a PCB with all of the components correctly placed onto their respective pads, ready for reflow soldering.
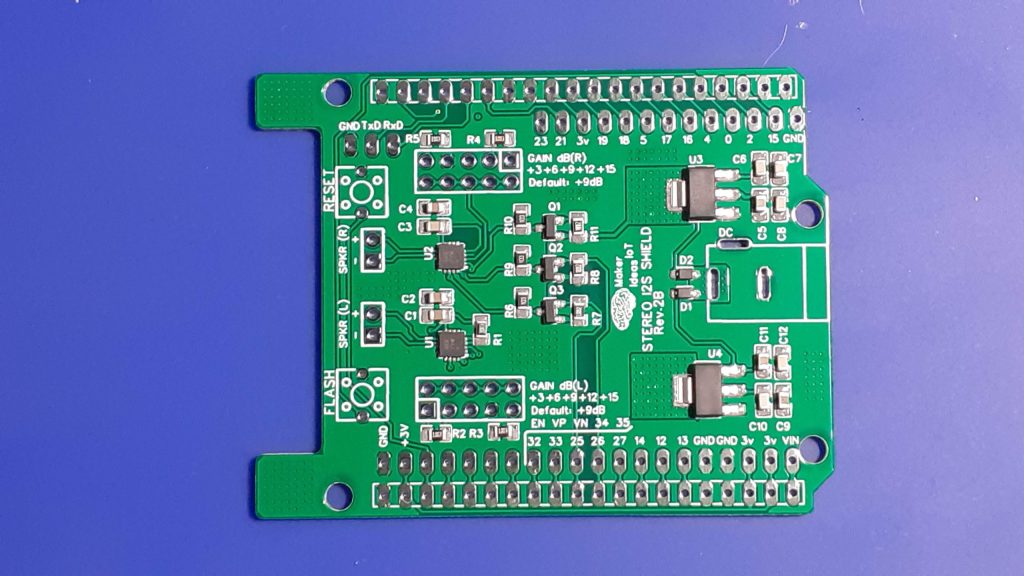
I did things differently this time, by placing the QFN Audio chips in their positions at the same time as all the others. ( I usually drop them in place when the solder is in a liquid state, but with these, I was confident in the stencil, and as these chips were quite a bit more expensive than my usual projects [ over 3 USD each ], I wanted them to slowly get up to temperature, and spend as little time as possible at temperature as well. )
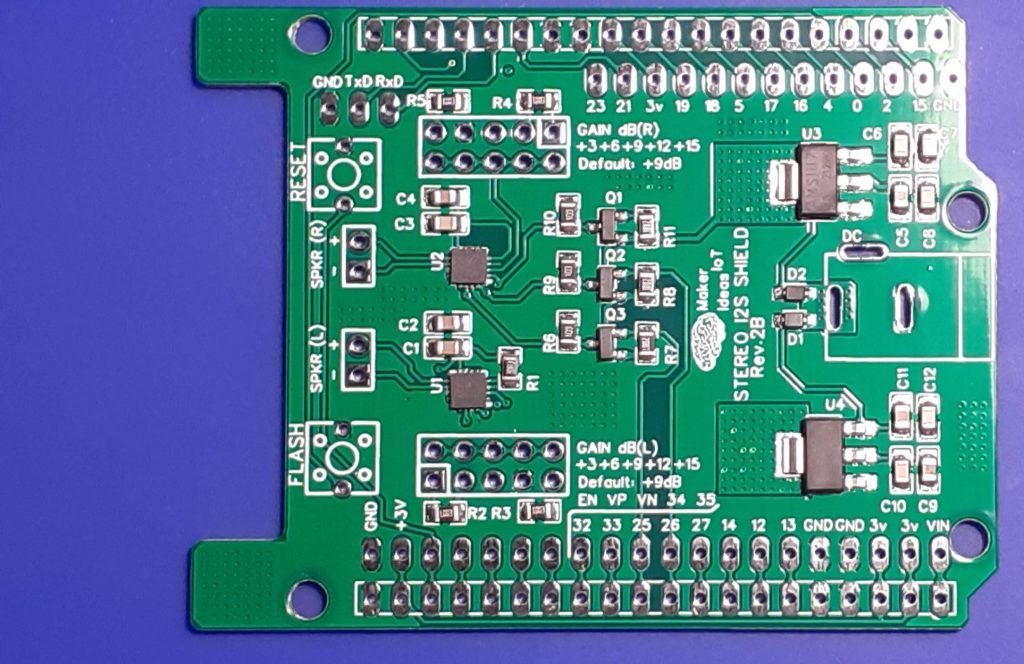
Reflowing was a success, and after inspection, no solder bridges were found. A detailed diagnostic with a multimeter with fine-tipped needle probes confirmed that there were no short circuits or bridges, and I could thus continue with the rest of the assembly – the various through-hole components, being mostly header pins, switches and a DC barrel jack socket.
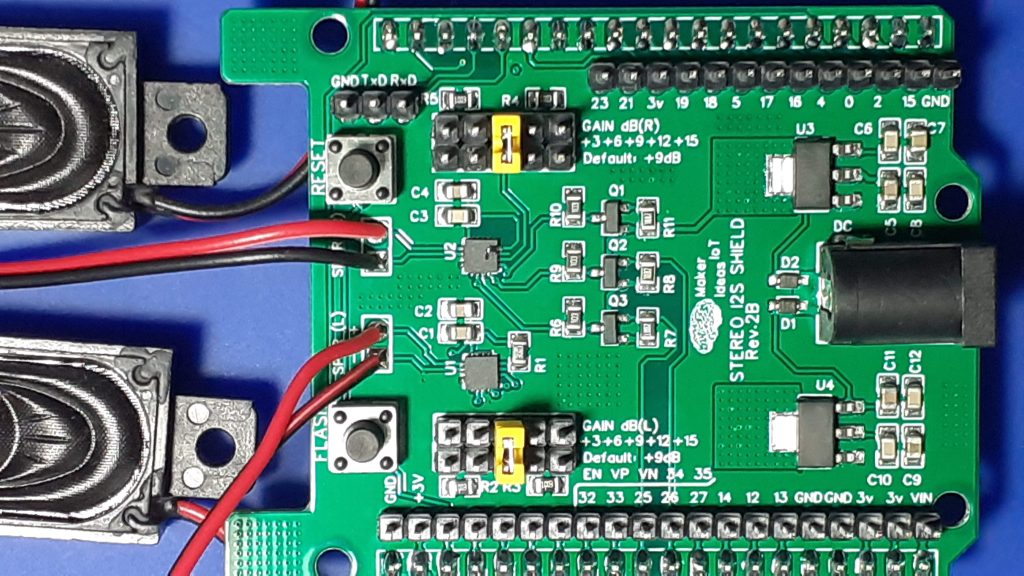
The speaker wires were soldered directly to the PCB, due to the fact that being a prototype, I did not see the need to raise the cost even more by adding connectors onto a board that may not be used very long if it turns out that there is a problem somewhere.
Testing
The next stage was testing, using the software provided in the initial Stereo I2S Shield post. All went well, but, as mentioned above, I encountered the same high current draw issue, which resolved itself ( in a manner of speaking ) after I reduced the initial startup volume of the unit, and limited the maximum volume in the software.
I can now continue with firmware development, and sort out things like the rotary encoders for the volume and station selection, as well as look at adding an i2c display, and possibly a sd-card for stored music files.
Conclusion
The project is getting along quite well, and this iteration of the prototype did not have any design faults or errors. I am extremely impressed with the reliability of my PCB manufacturer, as their consistent quality products allow me to focus on design, and trust that whatever comes back from the factory will be exactly as I designed it.
While there are still quite a few issues to sort out on this project, I am confident that in the end, it will all turn out the way that I want it to.
/* Simple Internet Radio Demo esp32-i2s-simple-radio.ino Simple ESP32 I2S radio Uses MAX98357 I2S Amplifier Module Uses ESP32-audioI2S Library - https://github.com/schreibfaul1/ESP32-audioI2S */ // Include required libraries #include "Arduino.h" #include "WiFi.h" #include "Audio.h" #include "ESPmDNS.h" #include "time.h" // Define I2S connections #define I2S_DOUT 22 #define I2S_BCLK 26 #define I2S_LRC 25 // Create audio object Audio audio; // Wifi Credentials String ssid = "<your ssid here>"; String password = "<your password here>"; void audioTask(void *pvParameters) { while(1) { audio.loop(); } } void setup() { // Start Serial Monitor Serial.begin(115200); // Setup WiFi in Station mode WiFi.disconnect(); WiFi.mode(WIFI_STA); WiFi.begin(ssid.c_str(), password.c_str()); while (WiFi.status() != WL_CONNECTED) { delay(500); Serial.print("."); } // WiFi Connected, print IP to serial monitor Serial.println(""); Serial.println("WiFi connected"); Serial.println("IP address: "); Serial.println(WiFi.localIP()); Serial.println(""); // Connect MAX98357 I2S Amplifier Module audio.setPinout(I2S_BCLK, I2S_LRC, I2S_DOUT); // Set thevolume (0-100) audio.setVolume(10); // Connect to an Internet radio station (select one as desired) //audio.connecttohost("http://vis.media-ice.musicradio.com/CapitalMP3"); //audio.connecttohost("mediaserv30.live-nect MAX98357 I2S Amplifier Module //audio.connecttohost("www.surfmusic.de/m3u/100-5-das-hitradio,4529.m3u"); //audio.connecttohost("stream.1a-webradio.de/deutsch/mp3-128/vtuner-1a"); //audio.connecttohost("www.antenne.de/webradio/antenne.m3u"); //audio.connecttohost("0n-80s.radionetz.de:8000/0n-70s.mp3"); //audio.connecttohost("http://live.webhosting4u.gr:1150/stream"); audio.connecttohost("0n-80s.radionetz.de:8000/"); disableCore0WDT(); xTaskCreatePinnedToCore(audioTask,"audiotask",10000,NULL,15,NULL,0); } void loop() { // Run audio player //audio.loop(); } // // Audio status functions void audio_info(const char *info) { Serial.print("info "); Serial.println(info); } void audio_id3data(const char *info) { //id3 metadata Serial.print("id3data "); Serial.println(info); } void audio_eof_mp3(const char *info) { //end of file Serial.print("eof_mp3 "); Serial.println(info); } void audio_showstation(const char *info) { Serial.print("station "); Serial.println(info); } void audio_showstreaminfo(const char *info) { Serial.print("streaminfo "); Serial.println(info); } void audio_showstreamtitle(const char *info) { Serial.print("streamtitle "); Serial.println(info); } void audio_bitrate(const char *info) { Serial.print("bitrate "); Serial.println(info); } void audio_commercial(const char *info) { //duration in sec Serial.print("commercial "); Serial.println(info); } void audio_icyurl(const char *info) { //homepage Serial.print("icyurl "); Serial.println(info); } void audio_lasthost(const char *info) { //stream URL played Serial.print("lasthost "); Serial.println(info); } void audio_eof_speech(const char *info) { Serial.print("eof_speech "); Serial.println(info); }

Gerber_PCB_Updated-I2S Shield
*PCBWay community is a sharing platform. We are not responsible for any design issues and parameter issues (board thickness, surface finish, etc.) you choose.

Raspberry Pi 5 7 Inch Touch Screen IPS 1024x600 HD LCD HDMI-compatible Display for RPI 4B 3B+ OPI 5 AIDA64 PC Secondary Screen(Without Speaker)
BUY NOW
ESP32-S3 4.3inch Capacitive Touch Display Development Board, 800×480, 5-point Touch, 32-bit LX7 Dual-core Processor
BUY NOW
Raspberry Pi 5 7 Inch Touch Screen IPS 1024x600 HD LCD HDMI-compatible Display for RPI 4B 3B+ OPI 5 AIDA64 PC Secondary Screen(Without Speaker)
BUY NOW- Comments(0)
- Likes(1)
 Log in to post comments.
-
 Engineer
May 19,2024
- 0 USER VOTES
- YOUR VOTE 0.00 0.00
- 1
- 2
- 3
- 4
- 5
- 6
- 7
- 8
- 9
- 10
- 1
- 2
- 3
- 4
- 5
- 6
- 7
- 8
- 9
- 10
- 1
- 2
- 3
- 4
- 5
- 6
- 7
- 8
- 9
- 10
- 1
- 2
- 3
- 4
- 5
- 6
- 7
- 8
- 9
- 10
 More by Jean Redelinghuys MakerIoT2020
-
 RA-02 Breakout with Level converters
Breadboard and beginner-friendly RA-02 Breakout ModuleMost Makers and electronics enthusiasts may al...
-
 ATMEGA328P Module with integrated LoRa and CAN Bus
ATMEGA328P Module with integrated LoRa and CAN-BUSINTRODUCTIONIn my quest to perfect my LoRa telemet...
-
 Sx127x-Ra-02-Test-Module with ATMEGA328P-AU
SX127x LoRa/FSK/OOK Prototype Radio BoardI recently had a requirement to do some automation/telemetr...
-
 USB-ASP Programmer ATMEGA8
Build your own USB-ASP Programmer CloneBymakeriot2020 FEB 21, 2022 Arduino, ASP programmerUsing mor...
-
 ATTiny1616-LIGHT-Controller-with-CAN_B_PCB_ATTiny1616-LIGHT-Controller-with-C_2024-09-11
Assembly of the ATTiny1616 Can bus controller PCBThe Assembly of the ATTiny1616 Can Bus Controller P...
-
 ATTiny1616QFN-CAN-Remote-Neopixel-Ligh_PCB_ATTiny1616QFN-CAN-Remote-Neopixel-2024-09-11_2024-09-11
NeoPixel CAN-Bus Module with local controlAs part of my current project to add NeoPixels to the cabi...
-
 PCB_MCP23008_2023-10-08
MCP23008 BreakoutI designed this breakout to assist me during prototyping my next version of the “RP...
-
 PCB_XiaoRP2040-Mouse-REV2
Xiao RP2040 Joystick Mouse – revision 2.00Revision 1.0 of the ProjectOver the last few months, I hav...
-
 Multi Purpose IO Card
Multi-Purpose IO CardWhen we are working on a prototype, we always need access to pushbuttons, encod...
-
 Variable Voltage Power Module
Powering electronics projects are always challenging. This Variable vol...
Variable Voltage Power Module
Variable Voltage Power ModulePowering electronics projects are always challenging. This Variable vol...
-
 I2C Matrix Keypad
An I2C Matrix KeypadThe completed I2C Matrix KeypadIn a previous post this month I introduced my 4×4...
-
 ESP32-S Development Board, in "Arduino Uno" form factor
UPDATE 24/06/2023:This board now has a Hardware Revision 2.0 available. It is the same board but wit...
-
 W307186ASC94_Gerber_PCB_USB-Ports
USB Power Supply ModuleUSB Ports are quite handy to power all our day-to-day electronic devices, but...
-
 Atmega 328P based PWM controller Card
ATMega 328P Based PWM controller CardAs part of my recent ESP-12E I2C Base Board project, I designed...
-
 W307186ASC71_Gerber_PCB_ESP-Now Remote
Today we will look at the remote control unit for the Robotic Toy Car – Part 6.The project is close ...
-
 W307186ASV69_Gerber_PCB_Robot-Car-MCU-Board Prototype
In our last project, we started working on repurposing an old toy car. In this part, Robot Toy Car –...
-
 W307186ASV62_Gerber_PCB_DUAL-H-Bridge
by makeriot2020 on May 27, 2022Many of us have old toys laying around the house, they belong to ou...
-
 CAN-BUS Breakout
Breadboard Compatible CAN-BUS Breakout ModuleWhat is this:Some of us have already used the commonly ...
-
 RA-02 Breakout with Level converters
Breadboard and beginner-friendly RA-02 Breakout ModuleMost Makers and electronics enthusiasts may al...
-
 ATMEGA328P Module with integrated LoRa and CAN Bus
ATMEGA328P Module with integrated LoRa and CAN-BUSINTRODUCTIONIn my quest to perfect my LoRa telemet...
-
 Sx127x-Ra-02-Test-Module with ATMEGA328P-AU
SX127x LoRa/FSK/OOK Prototype Radio BoardI recently had a requirement to do some automation/telemetr...
-
 USB-ASP Programmer ATMEGA8
Build your own USB-ASP Programmer CloneBymakeriot2020 FEB 21, 2022 Arduino, ASP programmerUsing mor...
-
 ATTiny1616-LIGHT-Controller-with-CAN_B_PCB_ATTiny1616-LIGHT-Controller-with-C_2024-09-11
Assembly of the ATTiny1616 Can bus controller PCBThe Assembly of the ATTiny1616 Can Bus Controller P...
-
 ATTiny1616QFN-CAN-Remote-Neopixel-Ligh_PCB_ATTiny1616QFN-CAN-Remote-Neopixel-2024-09-11_2024-09-11
NeoPixel CAN-Bus Module with local controlAs part of my current project to add NeoPixels to the cabi...
-
 PCB_MCP23008_2023-10-08
MCP23008 BreakoutI designed this breakout to assist me during prototyping my next version of the “RP...
-
 PCB_XiaoRP2040-Mouse-REV2
Xiao RP2040 Joystick Mouse – revision 2.00Revision 1.0 of the ProjectOver the last few months, I hav...
-
 Multi Purpose IO Card
Multi-Purpose IO CardWhen we are working on a prototype, we always need access to pushbuttons, encod...
-
 Variable Voltage Power Module
Powering electronics projects are always challenging. This Variable vol...
Variable Voltage Power Module
Variable Voltage Power ModulePowering electronics projects are always challenging. This Variable vol...
-
 I2C Matrix Keypad
An I2C Matrix KeypadThe completed I2C Matrix KeypadIn a previous post this month I introduced my 4×4...
-
 ESP32-S Development Board, in "Arduino Uno" form factor
UPDATE 24/06/2023:This board now has a Hardware Revision 2.0 available. It is the same board but wit...
-
-
Commodore 64 1541-II 1581 Floppy Disk Drive C64 Power Supply Unit USB-C 5V 12V DIN connector 5.25
321 1 3 -
Easy to print simple stacking organizer with drawers
114 0 0 -
-
-
-
-
-
-
Modifying a Hotplate to a Reflow Solder Station
1218 1 6 -
MPL3115A2 Barometric Pressure, Altitude, and Temperature Sensor
694 0 1 -


