CH552 Dragon
* * HARDWARE OVERVIEW * *
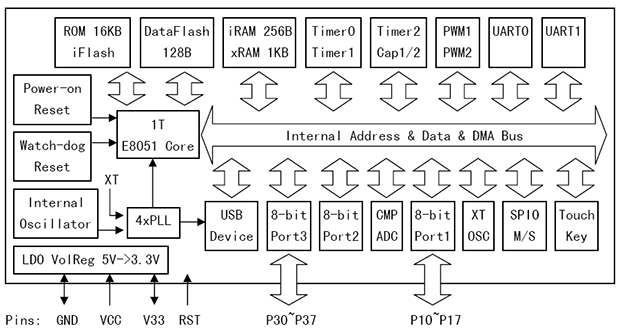
The CH552 is a little MCU with a 8051 core and a USB interface, and is damn cheap.

So far I have never used an 8051 core, so this seemed like a good opportunity to try it out.
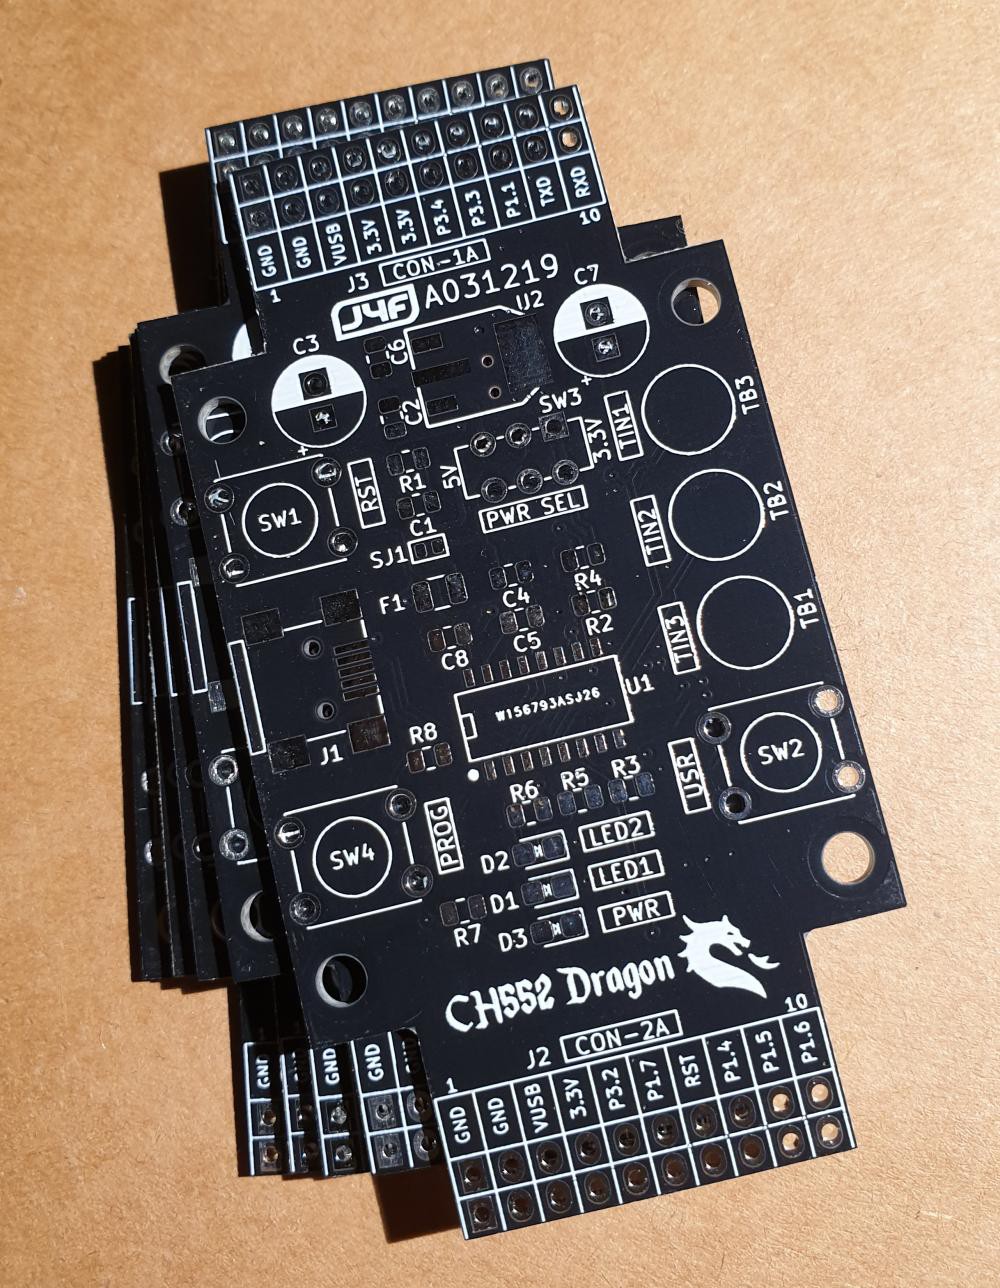
So I bought a small lot of the SO-16 version (CH552G) and made a little board to play with it, the "CH552 Dragon"... :-)

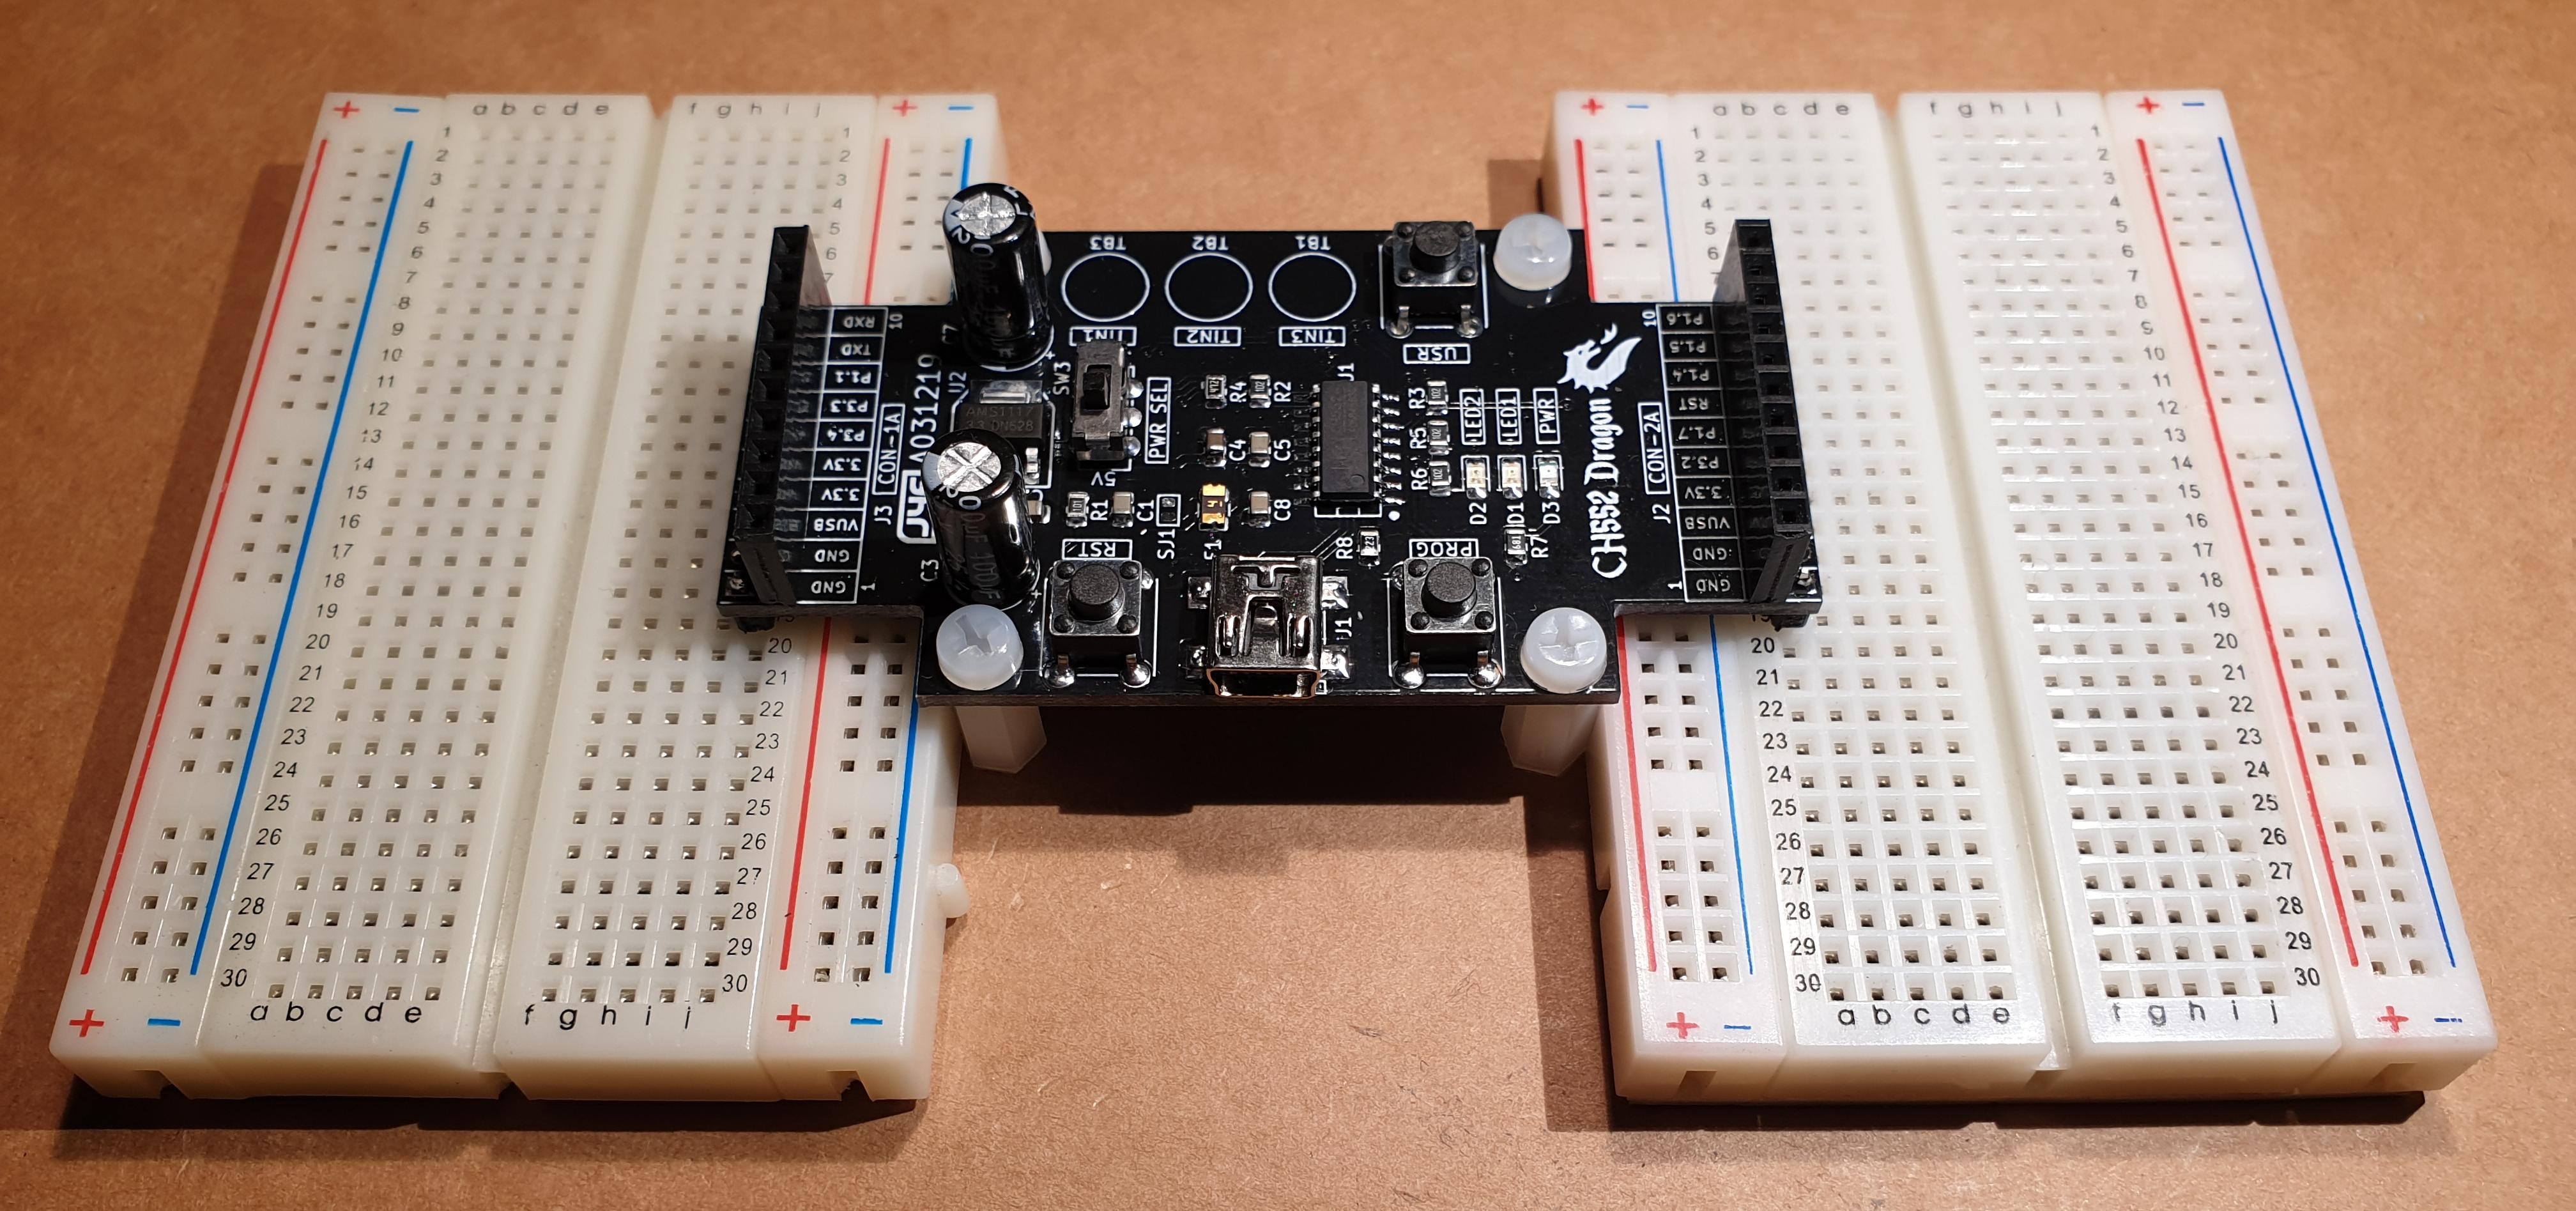
The board follows the same "layout concept" of the previous ARMando, so can be directly inserted in one or two breadboards:


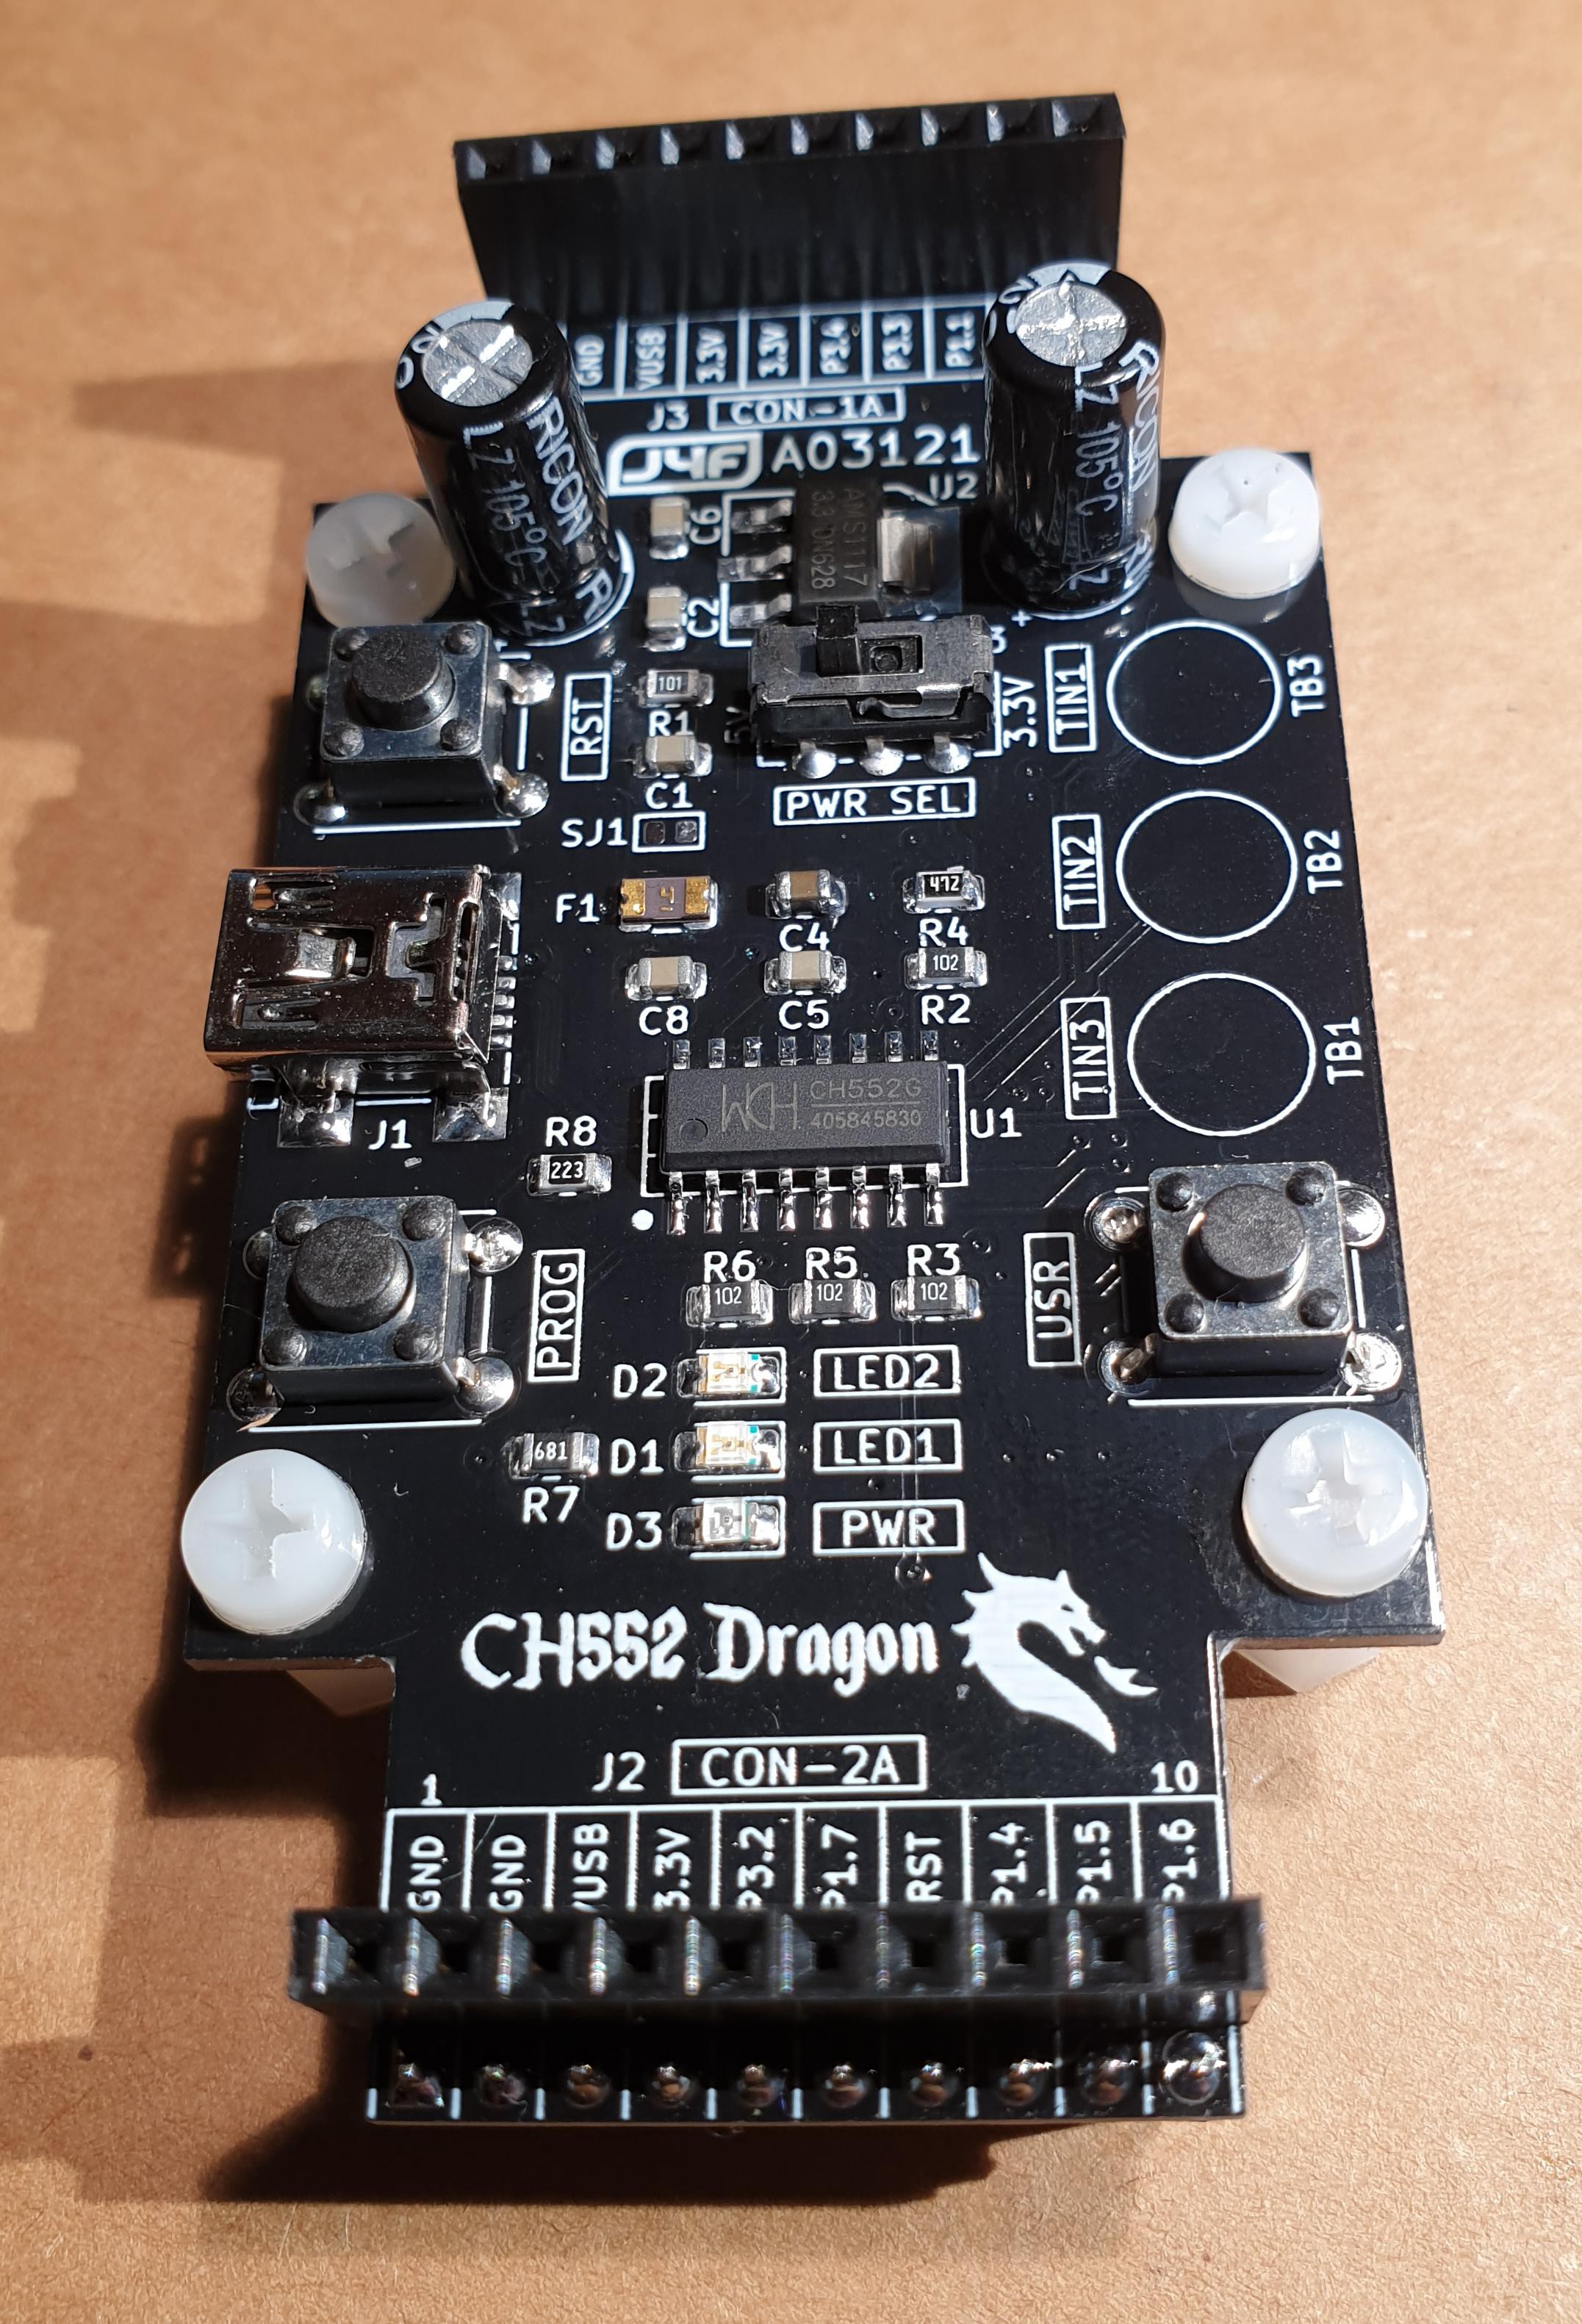
On the CH552 Dragon I've added a physical "user" key (USR) and three touch buttons (TIN1, TIN2 and TIN3) because the CH552 has the hardware to use them.
There is also an optional 3.3V power supply (you can choose not to populate it if not interested, see the schematic) to choose the GPIO supply between 5V or 3.3V (i.e. if you want connect 3.3V stuff) using the PWR SEL switch.
All the official documentation of the manufacturer (WCH) is written only in Chinese, but using Google Translator can be more readable for sure. Here a link to the CH552 page with automatic English translation.
* * SOFTWARE OVERVIEW * *
To program the CH55X MCU family it is available an open source C toolchain based on the SDCC compiler and can be found on Github.
In the same repository there is a english translation on the CH554 manual (the MCU version that adds the USB Host capability) and can be used for the CH552 too.
In the following video there is the usual blink test example:
To flash the executable .HEX file I've used here (on Windows 10) the original tool made by WCH (WCHISPTOOL) that can be found here.
The CH55X MCU comes with a bootloader that allows to use both the USB (used in the previous video) or the serial interface (the bootloader "eats" some of the flash space, and cannot be overwritten using the USB or serial interface).
To program the CH552 you need to power it with a 5V supply (the CH552 can work at 3.3V too but you can't program it. The PWR SEL switch, if populated, must be in the 5V position to allow the MCU programming), press the PROG button and then power it (i.e. attaching to an USB port).
It Is not possible to activate the bootloader pressing the RST and the PROG key, but a power-on is needed (with the PROG key pressed).
Remember also that accordingly with the datasheet the flash has a limited "guaranteed" number of 200 write cycles.
All the details and updates are in this page: https://hackaday.io/project/169671
CH552 Dragon
*PCBWay community is a sharing platform. We are not responsible for any design issues and parameter issues (board thickness, surface finish, etc.) you choose.

Raspberry Pi 5 7 Inch Touch Screen IPS 1024x600 HD LCD HDMI-compatible Display for RPI 4B 3B+ OPI 5 AIDA64 PC Secondary Screen(Without Speaker)
BUY NOW
ESP32-S3 4.3inch Capacitive Touch Display Development Board, 800×480, 5-point Touch, 32-bit LX7 Dual-core Processor
BUY NOW
Raspberry Pi 5 7 Inch Touch Screen IPS 1024x600 HD LCD HDMI-compatible Display for RPI 4B 3B+ OPI 5 AIDA64 PC Secondary Screen(Without Speaker)
BUY NOW- Comments(1)
- Likes(0)
 Log in to post comments.
 PCBWay Support TeamFeb 02,20200 CommentsReply
- 6 USER VOTES
- YOUR VOTE 0.00 0.00
- 1
- 2
- 3
- 4
- 5
- 6
- 7
- 8
- 9
- 10
- 1
- 2
- 3
- 4
- 5
- 6
- 7
- 8
- 9
- 10
- 1
- 2
- 3
- 4
- 5
- 6
- 7
- 8
- 9
- 10
- 1
- 2
- 3
- 4
- 5
- 6
- 7
- 8
- 9
- 10

-
8design
-
7usability
-
8creativity
-
9content

-
8design
-
8usability
-
9creativity
-
8content

-
8design
-
8usability
-
7creativity
-
8content

-
8design
-
8usability
-
8creativity
-
9content

-
10design
-
9usability
-
8creativity
-
10content

-
8design
-
7usability
-
8creativity
-
6content
 More by Just4Fun
-
 Dual channel RS232 adapter
This is a simple board I made to play with my FPGA board "The Thing". This board has two RS-232 chan...
-
 uCom (a RS232 adapter for the Z80-MBC2)
uCom (micro-Com) is a RS232 adapter for the Z80-MBC2 (https://hackaday.io/project/159973). It has a ...
-
 uTerm (a VT100-like terminal for the Z80-MBC2)
uTerm (micro-Term) is a VT100-like terminal for the Z80-MBC2 (https://hackaday.io/project/159973). I...
-
 "The Thing": FPGA + STM32, Multicomp compatible
### DESCRIPTIONTwo dev boards into one: a STM32 based Arduino ("Maple Mini" compatible) and a Cyclon...
-
 ESP-01 NanoBoard (ESP8266)
### DESCRIPTIONThe ESP-01 NanoBoard is a little "motherboard" for the well known ESP-01 ...
-
 Z80-MBC2: 4ICs homemade Z80 computer
### DESCRIPTIONThe Z80-MBC2 is an easy to build Z80 SBC (Single Board Computer with 8MHz Z80, 128kB ...
-
 SPP (Standard Parallel Port) Adapter for the 68k-MBC
The Standard Parallel Port (SPP) Adapter board allows to use the GPIO port of the "retro-board" 68k-...
-
 uTerm2-S: a multi-emulation color RS232 terminal
* * HARDWARE OVERVIEW * *The uTerm2-S (micro Term2 stand-alone) is an easy to build multi-emulation ...
-
 68k-MBC: a 3 ICs 68008 homebrew computer
* * DESCRIPTION * *The 68k-MBC is an easy to build 68008 CPU SBC (Single Board Computer), using only...
-
 Parallel Printer (SPP) Emulator Shield
* * HARDWARE OVERVIEW * *Playing with retro-computers or messing with dated instruments a simple SPP...
-
 Azz!Duino: A W806 (Winner Micro) MCU on a Arduino Mega shaped board
* * OVERVIEW * *The W806 is an interesting low cost MCU made by Winner Micro. There is a page about ...
-
 uHat add-on board for uTerm2-S
It is a little add-on board with a PSRAM (specific for the ESP32) and a microSD socket. I've called ...
-
 PicOne (PIC18F47Q10)
I was searching a DIL MCU for another "project" and found this one that seems interesting. It is che...
-
 V20-MBC: an easy to build 8088 + 8080 computer
DescriptionThe V20-MBC2 is an easy to build V20HL CPU SBC (Single Board Computer). It follows the sa...
-
 CH552 Dragon
* * HARDWARE OVERVIEW * *The CH552 is a little MCU with a 8051 core and a USB interface, and is damn...
-
 ARMando (STM32F030R8 board)
I wanted a board with a "standard" form factor as the common dev boards, but that could be easily in...
-
 RC-Z8BASIC
Never used a Z8 MCU before, but when I found that chip "forgotten" for decades and started to read t...
-
 uTerm-S: stand-alone RS232 VT100 terminal with VGA/PS2
* * HARDWARE OVERVIEW * *uTerm-S (micro-Term Stand-alone) is a legacy RS232 VT100-like terminal. It ...
-
 Dual channel RS232 adapter
This is a simple board I made to play with my FPGA board "The Thing". This board has two RS-232 chan...
-
 uCom (a RS232 adapter for the Z80-MBC2)
uCom (micro-Com) is a RS232 adapter for the Z80-MBC2 (https://hackaday.io/project/159973). It has a ...
-
 uTerm (a VT100-like terminal for the Z80-MBC2)
uTerm (micro-Term) is a VT100-like terminal for the Z80-MBC2 (https://hackaday.io/project/159973). I...
-
 "The Thing": FPGA + STM32, Multicomp compatible
### DESCRIPTIONTwo dev boards into one: a STM32 based Arduino ("Maple Mini" compatible) and a Cyclon...
-
 ESP-01 NanoBoard (ESP8266)
### DESCRIPTIONThe ESP-01 NanoBoard is a little "motherboard" for the well known ESP-01 ...
-
 Z80-MBC2: 4ICs homemade Z80 computer
### DESCRIPTIONThe Z80-MBC2 is an easy to build Z80 SBC (Single Board Computer with 8MHz Z80, 128kB ...
-
 SPP (Standard Parallel Port) Adapter for the 68k-MBC
The Standard Parallel Port (SPP) Adapter board allows to use the GPIO port of the "retro-board" 68k-...
-
 uTerm2-S: a multi-emulation color RS232 terminal
* * HARDWARE OVERVIEW * *The uTerm2-S (micro Term2 stand-alone) is an easy to build multi-emulation ...
-
 68k-MBC: a 3 ICs 68008 homebrew computer
* * DESCRIPTION * *The 68k-MBC is an easy to build 68008 CPU SBC (Single Board Computer), using only...
-
 Parallel Printer (SPP) Emulator Shield
* * HARDWARE OVERVIEW * *Playing with retro-computers or messing with dated instruments a simple SPP...
-
 Azz!Duino: A W806 (Winner Micro) MCU on a Arduino Mega shaped board
* * OVERVIEW * *The W806 is an interesting low cost MCU made by Winner Micro. There is a page about ...
-
 uHat add-on board for uTerm2-S
It is a little add-on board with a PSRAM (specific for the ESP32) and a microSD socket. I've called ...
-
-
-
-
Modifying a Hotplate to a Reflow Solder Station
1009 1 6 -
MPL3115A2 Barometric Pressure, Altitude, and Temperature Sensor
545 0 1 -
-
Nintendo 64DD Replacement Shell
449 0 2 -
V2 Commodore AMIGA USB-C Power Sink Delivery High Efficiency Supply Triple Output 5V ±12V OLED display ATARI compatible shark 100W
1279 4 2 -
How to measure weight with Load Cell and HX711
767 0 3


