|
|
ESP32-S3-MINI-1-N8Espressif Systems
|
x 1 | |

|
DHT22AMAZON
|
x 1 | |

|
Bread Board 3.3/5V Power Supply Module |
x 1 | |
|
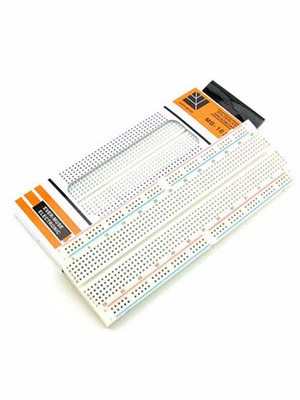
Breadboard 830 Point Solderless PCB Bread Board MB-102 MB102 Test Develop DIY |
x 1 | |
|
|
BME280 |
x 1 |

|
arduino IDEArduino
|
ESP32 Avanced Weather Station
Introducing the BME280 Sensor Module
The BME280 sensor module reads temperature, humidity, and pressure. Because pressure changes with altitude, you can also estimate altitude. There are several versions of this sensor module, but we’re using the one shown in the figure below.

The sensor can communicate using either SPI or I2C communication protocols (there are modules of this sensor that just communicate with I2C, these just come with four pins).
To use SPI communication protocol, you use the following pins:
SCK – this is the SPI Clock pin
SDO – MISO
SDI – MOSI
CS – Chip Select
To use I2C communication protocol, the sensor uses the following pins:
SCK – this is also the SCL pin
SDI – this is also the SDA pin
Schematic
We’re going to use I2C communication with the BME280 sensor module.
Installing the BME280 library
To take readings from the BME280 sensor module we’ll use the Adafruit_BME280 library. Follow the next steps to install the library in your Arduino IDE:
Open your Arduino IDE and go to Sketch > Include Library > Manage Libraries. The Library Manager should open.
Search for “adafruit bme280 ” on the Search box and install the library.

Installing the Adafruit_Sensor library
To use the BME280 library, you also need to install the Adafruit_Sensor library. Follow the next steps to install the library in your Arduino IDE:
Go to Sketch > Include Library > Manage Libraries and type “Adafruit Unified Sensor” in the search box. Scroll all the way down to find the library and install it.

After installing the libraries, restart your Arduino IDE.
Reading Temperature, Humidity, and Pressure
To get familiar with the BME280 sensor, we’re going to use an example sketch from the library to see how to read temperature, humidity, and pressure.

After installing the BME280 library, and the Adafruit_Sensor library, open the Arduino IDE and, go to File > Examples > Adafruit BME280 library > bme280 test.
Sea level pressure
A variable called SEALEVELPRESSURE_HPA is created.
#define SEALEVELPRESSURE_HPA (1013.25)
This saves the pressure at the sea level in hectopascal (is equivalent to milibar). This variable is used to estimate the altitude for a given pressure by comparing it with the sea level pressure. This example uses the default value, but for more accurate results, replace the value with the current sea level pressure at your location.
I2C
This example uses I2C communication by default. As you can see, you just need to create an Adafruit_BME280 object called bme.
Adafruit_BME280 bme; // I2C
If you would like to use SPI, you need to comment this previous line and uncomment one of the following lines depending on whether you’re using hardware or software SPI.
//Adafruit_BME280 bme(BME_CS); // hardware SPI
//Adafruit_BME280 bme(BME_CS, BME_MOSI, BME_MISO, BME_SCK); // software SPI
setup()
In the setup() you start a serial communication
Serial.begin(9600);
And the sensor is initialized:
Upload the code to your ESP32, and open the Serial Monitor at a baud rate of 9600. You should see the readings displayed on the Serial Monitor.

Creating a Table in HTML
As you’ve seen in the beginning of the post, we’re displaying the readings in a web page with a table served by the ESP32. So, we need to write HTML text to build a table.
To create a table in HTML you use the <table> and </table> tags.
To create a row you use the <tr> and </tr> tags. The table heading is defined using the <th> and </th> tags, and each table cell is defined using the <td>and </td> tags.
To create a table for our readings, you use the following html text:
<table>
<tr>
<th>MEASUREMENT</th>
<th>VALUE</th>
</tr>
<tr>
<td>Temp. Celsius</td>
<td>--- *C</td>
</tr>
<tr>
<td>Temp. Fahrenheit</td>
<td>--- *F</td>
</tr>
<tr>
<td>Pressure</td>
<td>--- hPa</td>
</tr>
<tr>
<td>Approx. Altitude</td>
<td>--- meters</td></tr>
<tr>
<td>Humidity</td>
<td>--- %</td>
</tr>
</table>
We create the header of the table with a cell called MEASUREMENT, and another called VALUE. Then, we create six rows to display each of the readings using the <tr> and </tr> tags. Inside each row, we create two cells, using the <td> and </td> tags, one with the name of the measurement, and another to hold the measurement value. The three dashes “—” should then be replaced with the actual measurements from the BME sensor.
ESP32 Avanced Weather Station
- Comments(0)
- Likes(0)
- 0 USER VOTES
- YOUR VOTE 0.00 0.00
- 1
- 2
- 3
- 4
- 5
- 6
- 7
- 8
- 9
- 10
- 1
- 2
- 3
- 4
- 5
- 6
- 7
- 8
- 9
- 10
- 1
- 2
- 3
- 4
- 5
- 6
- 7
- 8
- 9
- 10
- 1
- 2
- 3
- 4
- 5
- 6
- 7
- 8
- 9
- 10
 More by Engineer
-
 Esp8266 Task Publisher
In this project you’re going to build an ESP8266 Wi-Fi Button that can trigger any home automation e...
-
 ESP32 Avanced Weather Station
Introducing the BME280 Sensor ModuleThe BME280 sensor module reads temperature, humidity, and pressu...
-
 Esp32 Pir Sensor Time Interrupts
Introducing InterruptsTo trigger an event with a PIR motion sensor, you use interrupts. Interrupts a...
-
 Multiple Temperature Sensor Data Logging With Esp32
Introducing the DS18B20 Temperature SensorThe DS18B20 temperature sensor is a 1-wire digital tempera...
-
 IOT Button
IFTTTFor this project we’re going to use a free service called IFTTT that stands for If This Than Th...
-
 Wemos D1 Multishield Arduino
Project OverviewThe shield consists of a temperature sensor, a motion sensor, an LDR, and a 3 pin so...
-
 Motion Detection Alarm
ABOUT THIS PROJECTIn this project we’ll modify a commercial motion sensor (powered with mains voltag...
-
 Iot Spirit Level
ABOUT THIS PROJECTThe gyroscope measures rotational velocity (rad/s), this is the change of the angu...
-
 PIR Night Security Light
Parts Required:Here’s a list of the parts needed for this project:PIR Motion Sensor 220V (or 110V PI...
-
 Arduino Temperature Logger With Sd Card
Parts requiredHere’s a complete list of the parts required for this project:Arduino UNO – read Best ...
-
 Arduino Location Tracker
Introducing the NEO-6M GPS ModuleThe NEO-6M GPS module is shown in the figure below. It comes with a...
-
 Attendance System With Arduino & Rfid Tag
MFRC522 RFID ReaderIn this project we’re using the MFRC522 RFID reader and that’s the one we recomme...
-
-
AEL-2011 Power Supply Module
545 0 2 -
AEL-2011 50W Power Amplifier
505 0 2 -
-
-
Custom Mechanical Keyboard
706 0 0 -
Tester for Touch Screen Digitizer without using microcontroller
337 2 2 -
Audio reactive glow LED wristband/bracelet with NFC / RFID-Tags
317 0 1 -
-
-


