Temporized Traffic Light
Introduction
One of the big problems when we programming Arduino is to create or develop projects based on problems in our around. Thinking about this, we create a printed circuit board of the traffic light with other features.
In this article, we'll teach how to create a printed circuit board to simulate a temporized traffic light. Through this PCB you can create several activities with Arduino Board.
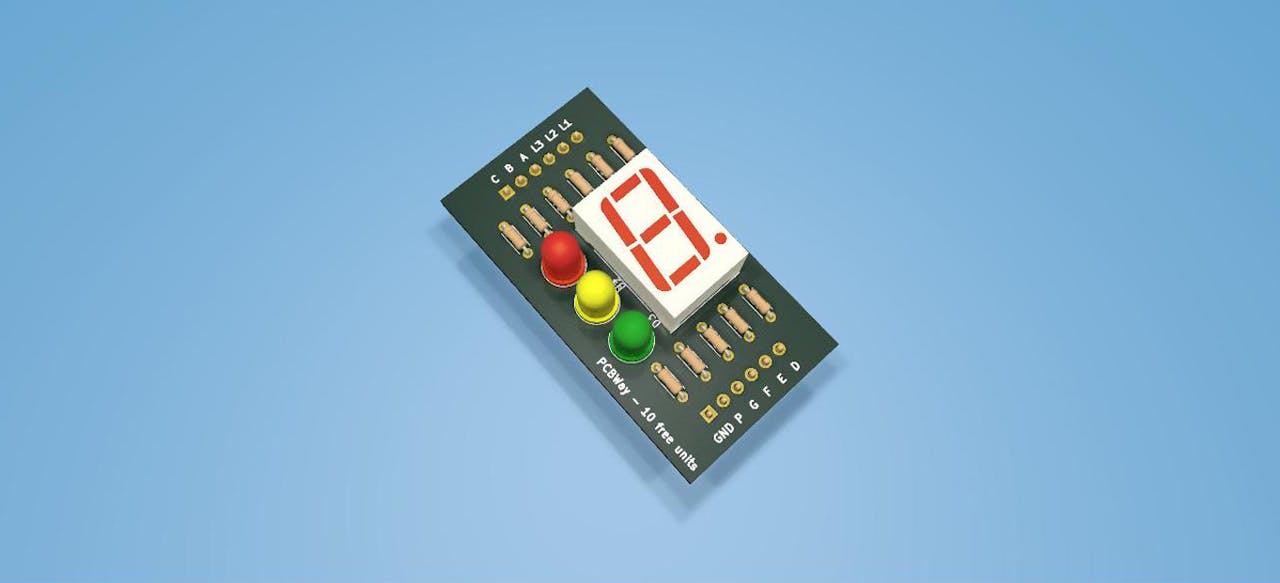
In Figure 1, we present the temporized traffic light board.

Figure 1 - Temporized Traffic Light.
This circuit board is an evolution of a last board of traffic light developed and you can access through this link: Traffic Light Board - PCB
Now, you'll learn how to construct the schematic circuit of the temporized traffic light.
Schematic Circuit
In Figure 1 is presented the schematic circuit. As you see in the circuit, was used three LED's to represent the lights red, yellow and green of the Traffic Light.
And following, we use the 7-segment cathode display to create a counter to present for the user.

Figure 2 - Electronic Schematic.
Through the display, is possible to create a counter to inform at pedestrian when the traffic light will change of state.
Therefore, based on the circuit, was developed a PCB Design layout to create a temporized traffic light.
Hereafter, will be presented the full layout and will be provided all files for download.
PCB Layout of the Board
The PCB layout was created with two layers and all files are in our repository and you can download through the link: Download of the PCB
In layout of the Figure 3, was used two headers pin to create a better organization and distribution of the components on the board. In addition tofacilitate the connection with the breadboard.

Figure 3 - PCB Design Layout.
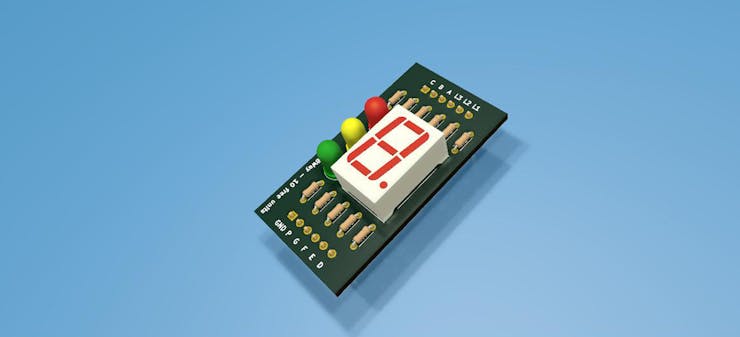
The three LED's and 7-Segment Display are centralized on the board. Finally, see the results of the PCB in 3D view.

Figure 4 - 3D View Results.
Acknowledgments
The Silícios Lab thanks PCBWay for its support and work together.
Temporized Traffic Light
*PCBWay community is a sharing platform. We are not responsible for any design issues and parameter issues (board thickness, surface finish, etc.) you choose.

Raspberry Pi 5 7 Inch Touch Screen IPS 1024x600 HD LCD HDMI-compatible Display for RPI 4B 3B+ OPI 5 AIDA64 PC Secondary Screen(Without Speaker)
BUY NOW
ESP32-S3 4.3inch Capacitive Touch Display Development Board, 800×480, 5-point Touch, 32-bit LX7 Dual-core Processor
BUY NOW
Raspberry Pi 5 7 Inch Touch Screen IPS 1024x600 HD LCD HDMI-compatible Display for RPI 4B 3B+ OPI 5 AIDA64 PC Secondary Screen(Without Speaker)
BUY NOW- Comments(2)
- Likes(5)
 Log in to post comments.
 MaryuFeb 29,20200 CommentsReply
 IObrizio FabrizioJul 22,20190 CommentsReply
-
 Engineer
Dec 19,2021
-
 Maryu
Feb 29,2020
-
 Ali yolcu27
Sep 07,2019
-
 NOEL benoit
Aug 02,2019
-
 IObrizio Fabrizio
Jul 22,2019
- 4 USER VOTES
- YOUR VOTE 0.00 0.00
- 1
- 2
- 3
- 4
- 5
- 6
- 7
- 8
- 9
- 10
- 1
- 2
- 3
- 4
- 5
- 6
- 7
- 8
- 9
- 10
- 1
- 2
- 3
- 4
- 5
- 6
- 7
- 8
- 9
- 10
- 1
- 2
- 3
- 4
- 5
- 6
- 7
- 8
- 9
- 10

-
10design
-
10usability
-
10creativity
-
10content

-
10design
-
10usability
-
10creativity
-
10content
-
10design
-
10usability
-
10creativity
-
10content

-
9design
-
10usability
-
10creativity
-
10content
 More by Silícios Lab silicioslab
-
 Electronic Enclosure for Programmable Logic Controller
The housing developed for programmable logic controllers is a practical and efficient solution for t...
-
 Payment PCB for machines and services
IntroductionIn many commercial establishments, hospitals and other places, there are video game equi...
-
 Relay High Power Printed Circuit Board
IntroductionEfficient management of electrical loads is essential for optimizing performance and saf...
-
 Weather gadget with clock through ESP8266
IntroductionImagine a device that combines technology with an elegant design, bringing functionality...
-
 ESP32 MPU6050 Monitor
IntroductionVarious industrial equipment is essential for the adequate production of products, parts...
-
 Digital Speedometer for Bicycles
IntroductionCycling, increasingly popular both as a recreational activity and as a means of transpor...
-
 How to measure weight with Load Cell and HX711
IntroductionThe purpose of this project is to develop a printed circuit board (PCB) that allows weig...
-
 Electronic Enclosure applied for electronic projects
IntroductionWhen designing electronics, the enclosure plays a crucial role that is often overlooked....
-
 IoT Indoor system with ESP32 to monitor Temperature, Humidity, Pressure, and Air Quality
IntroductionAir quality, temperature, humidity and pressure are essential elements to ensure healthy...
-
 WS2812B RGB LED Controller with ESP8266 via WiFi
IntroductionWS2812b addressable RGB LEDs are devices widely used in lighting projects. They are foun...
-
 Electronic Board for Cutting Electrical Power to Devices and Machines
IntroductionAn energy saving system for cutting electrical energy in machines is a fundamental piece...
-
 PCB Board Home Automation with ESP8266
IntroductionThe incorporation of the ESP8266 module into home automation represents a significant ad...
-
 Dedicated Control Board for Mobile Robots with Wheels
IntroductionFor a long time we developed several prototypes and teaching kits of mobile robots and w...
-
 Traffic turn signal for bicycles
IntroductionDoes every project with electronic logic need a Microcontroller or Arduino to be develop...
-
 Mini Arduino with ATTINY85
Do you know the ATTINY85 microcontroller? This article has news and a gift for you. Many people deve...
-
 Christmas Tree
The tree used to signal light of Christmas.
-
 IoT Access control and communication system with Raspberry Pi/PC using ESP32
IntroductionIn the world of automation and the Internet of Things (IoT), access control systems have...
-
 Electronic Enclosure applied for electronic devices
IntroductionWhen designing electronics, the enclosure plays a crucial role that is often overlooked....
-
 Electronic Enclosure for Programmable Logic Controller
The housing developed for programmable logic controllers is a practical and efficient solution for t...
-
 Payment PCB for machines and services
IntroductionIn many commercial establishments, hospitals and other places, there are video game equi...
-
 Relay High Power Printed Circuit Board
IntroductionEfficient management of electrical loads is essential for optimizing performance and saf...
-
 Weather gadget with clock through ESP8266
IntroductionImagine a device that combines technology with an elegant design, bringing functionality...
-
 ESP32 MPU6050 Monitor
IntroductionVarious industrial equipment is essential for the adequate production of products, parts...
-
 Digital Speedometer for Bicycles
IntroductionCycling, increasingly popular both as a recreational activity and as a means of transpor...
-
 How to measure weight with Load Cell and HX711
IntroductionThe purpose of this project is to develop a printed circuit board (PCB) that allows weig...
-
 Electronic Enclosure applied for electronic projects
IntroductionWhen designing electronics, the enclosure plays a crucial role that is often overlooked....
-
 IoT Indoor system with ESP32 to monitor Temperature, Humidity, Pressure, and Air Quality
IntroductionAir quality, temperature, humidity and pressure are essential elements to ensure healthy...
-
 WS2812B RGB LED Controller with ESP8266 via WiFi
IntroductionWS2812b addressable RGB LEDs are devices widely used in lighting projects. They are foun...
-
 Electronic Board for Cutting Electrical Power to Devices and Machines
IntroductionAn energy saving system for cutting electrical energy in machines is a fundamental piece...
-
 PCB Board Home Automation with ESP8266
IntroductionThe incorporation of the ESP8266 module into home automation represents a significant ad...
-
-
Commodore 64 1541-II 1581 Floppy Disk Drive C64 Power Supply Unit USB-C 5V 12V DIN connector 5.25
340 1 3 -
Easy to print simple stacking organizer with drawers
121 0 0 -
-
-
-
-
-
-
Modifying a Hotplate to a Reflow Solder Station
1228 1 6 -
MPL3115A2 Barometric Pressure, Altitude, and Temperature Sensor
705 0 1 -


