


|
|
Arduino Nano R3 |
x 1 | |
|
|
HMC5883L Compass module |
x 1 | |
|
|
0.96 |
x 1 | |
|
|
NeoPixel Ring: WS2812 5050 RGB LED |
x 1 |

|
arduino IDEArduino
|
|

|
Soldering iron |
|

|
Soldering Iron Wire Welding Lead Roll |
Arduino Analog + Digital Compass with HMC5883L sensor
Compass is device used for navigation and orientation, and consists of a magnetic needle that is mounted on a pivot and is free to rotate horizontally. The needle aligns itself with the Earth's magnetic field, and scale under her typically has four cardinal directions marked on it: North, East, South, and West.

In addition to these four main directions, many compasses also have additional markings indicating the degrees or fractions of a circle.
The device presented in the video represents an electronic version of the Compass, where the position of the needle is indicated by group of a three light-emitting diodes.
There is also an Oled display in the middle of the device, which shows the angle relative to the North Pole. In this case the resolution is greater than one degree, while in the case of LEDs the resolution is 6 degrees when moving one diode. When the red diode coincides with the top of the arrow and the value of the angle on the Oled display is about 0 and 360 degrees, then this side is North, opposite to it is South, and East and West are located at an angle of 90 degrees.

The device is relatively simple to build and consists of several components:
- Arduino Nano microcontroller
- HMC5883L compass module
- Led ring with 60 adressable RGB Leds type WS2812B

If you want to make a PCB for this project, or for any other electronic project, PCBway is a great choice for you. PCBway is one of the most experienced PCB manufacturing company in China in field of PCB prototype and fabrication. They provide completed PCB assembly service with worldwide free shipping , and ISO9001 quality control system. Also, on their site there is an online gerber viewer where you can upload your gerber and drill files to render your board.

The Arduino code is simple as it uses libraries for the Led ring as well as the Compass module. The only modification is conditioned by the fact that we need to enter the declination angle for the specific area for a more accurate result, which we can find it at:
http://magnetic-declination.com/
We also have to calibrate the sensor using the calibration code provided in the library, and input the resulting values into the code in line:
compass.setOffset(27, 200);// Set calibration offset. See HMC5883L_calibration.ino
At the beginning, let me emphasize that the instrument is very sensitive to local magnetic fields and massive metal objects in its surroundings, so the results of this video may deviate to a certain extent. First we need to place the compass in a horizontal position and then turn it on. After the initial logo, a group of 3 LEDs appears on the screen, the two surrounding ones are Green, and the middle one, which represents the direction, is Red.

By equating the arrow with the Red Led we get the direction of the North pole. By rotating the compass around its own axis the OLED display shows the angle between north and the tip of the arrow at the given moment. So the Red LED always points North.
In my case I use a box with a oled display from one of my previous projects, and Led ring is mounted in a situable case made of 3D Printer, and below is the .STL file for 3D printing.

/* Start of Code */
#include <SPI.h>
#include <Wire.h>
#include "FastLED.h"
#include <HMC5883L.h>
#include <Adafruit_GFX.h>
#include <Adafruit_SH1106.h>
#define OLED_RESET     4
#define SCREEN_ADDRESS 0x3C
Adafruit_SH1106 display(OLED_RESET);

#define NUM_LEDS 60 // Number of LEDs on Ring
#define DATA_PIN_RING 3 // Pin 3 connected to RGB Ring

CRGB leds_RING[NUM_LEDS];

HMC5883L compass;
int fixedHeadingDegrees; // Used to store Heading value

void setup()
{
Serial.begin(9600);
Wire.begin();
FastLED.addLeds<NEOPIXEL,DATA_PIN_RING>(leds_RING, NUM_LEDS);

    display.begin(SH1106_SWITCHCAPVCC, SCREEN_ADDRESS);
     display.clearDisplay();
       display.setTextSize(2);
  display.setTextColor(WHITE);
  display.setCursor(22,10);
  display.println("mircemk");// Print text
  display.setCursor(22,40);
  display.println("COMPASS");
  display.display();
  delay(2000);

// Set measurement range
compass.setRange(HMC5883L_RANGE_1_3GA);

// Set measurement mode
compass.setMeasurementMode(HMC5883L_CONTINOUS);

// Set data rate
compass.setDataRate(HMC5883L_DATARATE_30HZ);

// Set number of samples averaged
compass.setSamples(HMC5883L_SAMPLES_8);

// Set calibration offset. See HMC5883L_calibration.ino
compass.setOffset(27, 200);
}

void loop()
{
Vector norm = compass.readNormalize();

// Calculate heading
float heading = atan2(norm.YAxis, norm.XAxis);

// Set declination angle on your location and fix heading
// You can find your declination on: http://magnetic-declination.com/
// (+) Positive or (-) for negative
// For Montreal,QC declination angle is -14'35W (negative)
// Formula: (deg + (min / 60.0)) / (180 / M_PI);
float declinationAngle = (5.0 + (3.0 / 60.0)) / (180 / M_PI);  //for Ohrid
heading -= declinationAngle;

// Correct for heading < 0deg and heading > 360deg
if (heading < 0)
{
heading += 2 * PI;
}

if (heading > 2 * PI)
{
heading -= 2 * PI;
}

// Convert to degrees
float headingDegrees = heading * 180/M_PI;

// To Fix rotation speed of HMC5883L Compass module
if (headingDegrees >= 1 && headingDegrees < 240)
{
fixedHeadingDegrees = map (headingDegrees * 100, 0, 239 * 100, 0, 179 * 100) /100.00;
}
else {
if (headingDegrees >= 240)
{
fixedHeadingDegrees = map (headingDegrees * 100, 240 * 100, 360 * 100, 180 * 100, 360 * 100) /100.00;
}
}

int headvalue = fixedHeadingDegrees/4.88;
int ledtoheading = map(headvalue, 0, 59, 59, 0);

Serial.print("Angle:");
Serial.print(headingDegrees);
Serial.println();

    display.clearDisplay();
    display.setTextSize(3);
    display.setTextColor(WHITE);
    display.setCursor(20,10);
    display.println("Angle");

    display.setCursor(10,40);
    display.println(headingDegrees);
    display.display();

FastLED.clear();

if (ledtoheading == 0){
leds_RING[59] = CRGB::Red;
leds_RING[0] = CRGB::Green;
leds_RING[58] = CRGB::Green;
}
else {
if (ledtoheading == 59){
leds_RING[0] = CRGB::Red;
leds_RING[59] = CRGB::Green;
leds_RING[1] = CRGB::Green;
}
else {
leds_RING[ledtoheading] = CRGB::Red;
leds_RING[ledtoheading+1] = CRGB::Green;
leds_RING[ledtoheading-1] = CRGB::Green;
}
}

FastLED.setBrightness(50);
FastLED.show();
delay(100);
}

/* End of Code */

Arduino Analog + Digital Compass with HMC5883L sensor
*PCBWay community is a sharing platform. We are not responsible for any design issues and parameter issues (board thickness, surface finish, etc.) you choose.


- Comments(0)
- Likes(0)
More by Mirko Pavleski
-
 Arduino 3D Printed self Balancing Cube
Self-balancing devices are electronic devices that use sensors and motors to keep themselves balanc...
Arduino 3D Printed self Balancing Cube
Self-balancing devices are electronic devices that use sensors and motors to keep themselves balanc...
-
 DIY 5-Day Rainfall Forecast Device - ESP32 E-Paper Project
In several of my previous projects I have presented ways to make weather stations, but this time I ...
DIY 5-Day Rainfall Forecast Device - ESP32 E-Paper Project
In several of my previous projects I have presented ways to make weather stations, but this time I ...
-
 Build simple Retro Style VFO (Variable frequency oscillator) with Crowoanel 1.28 inch Round Display
Today I received a shipment with a Small round LCD display from Elecrow. The device is packed in tw...
Build simple Retro Style VFO (Variable frequency oscillator) with Crowoanel 1.28 inch Round Display
Today I received a shipment with a Small round LCD display from Elecrow. The device is packed in tw...
-
 Human vs Robot – Rock Paper Scissors with MyCobot 280 M5Stack
Today I received a package containing the few Elephant Robotics products. The shipment is well pack...
Human vs Robot – Rock Paper Scissors with MyCobot 280 M5Stack
Today I received a package containing the few Elephant Robotics products. The shipment is well pack...
-
 How to Build a Simple Audio Spectrum Analyzer with Adjustable Settings
An audio spectrum analyzer is an electronic device or software tool that measures and visually disp...
How to Build a Simple Audio Spectrum Analyzer with Adjustable Settings
An audio spectrum analyzer is an electronic device or software tool that measures and visually disp...
-
 How to Make a Digital Clock on a Vintage B&W TV using Arduino
These days I accidentally came across this small retro Black and White TV with a built-in Radio, so ...
How to Make a Digital Clock on a Vintage B&W TV using Arduino
These days I accidentally came across this small retro Black and White TV with a built-in Radio, so ...
-
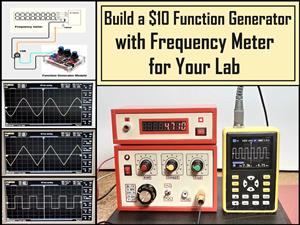 Build a $10 Function Generator with Frequency Meter for Your Lab
A function generator is a piece of electronic test equipment used to generate various types of elec...
Build a $10 Function Generator with Frequency Meter for Your Lab
A function generator is a piece of electronic test equipment used to generate various types of elec...
-
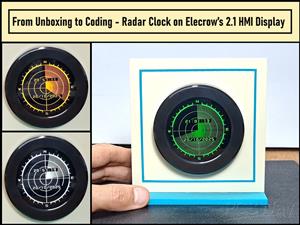 From Unboxing to Coding - Radar Clock on Elecrow’s 2.1 HMI Display
Today I received a shipment with a large round LCD display from Elecrow. The device is packed in two...
From Unboxing to Coding - Radar Clock on Elecrow’s 2.1 HMI Display
Today I received a shipment with a large round LCD display from Elecrow. The device is packed in two...
-
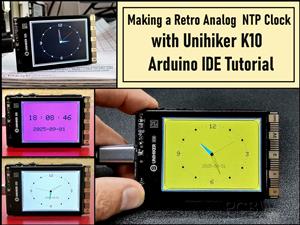 Making a Retro Analog NTP Clock with Unihiker K10 - Arduino IDE Tutorial
Some time ago I presented you a way to use standard Arduino libraries on the Unihiker k10 developme...
Making a Retro Analog NTP Clock with Unihiker K10 - Arduino IDE Tutorial
Some time ago I presented you a way to use standard Arduino libraries on the Unihiker k10 developme...
-
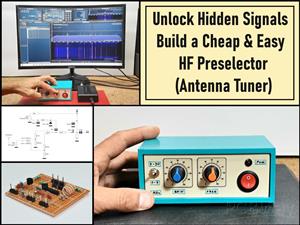 Build a Cheap & Easy HF Preselector - Antenna Tuner
HF antenna preselector is an electronic device connected between an HF radio antenna, and a radio r...
Build a Cheap & Easy HF Preselector - Antenna Tuner
HF antenna preselector is an electronic device connected between an HF radio antenna, and a radio r...
-
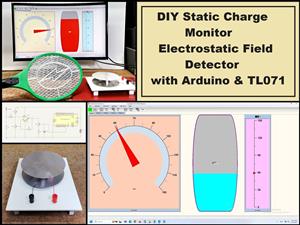 DIY Static Charge Monitor - Electrostatic Field Detector (Arduino & TL071)
A Static Charge Monitor also known as a Static Field Meter or Electrostatic Voltmeter is a device u...
DIY Static Charge Monitor - Electrostatic Field Detector (Arduino & TL071)
A Static Charge Monitor also known as a Static Field Meter or Electrostatic Voltmeter is a device u...
-
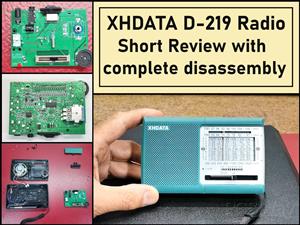 XHDATA D-219 Radio Short Review with complete disassembly
Some time ago I received an offer from XHDATA to be one of the first test users of their new radio m...
XHDATA D-219 Radio Short Review with complete disassembly
Some time ago I received an offer from XHDATA to be one of the first test users of their new radio m...
-
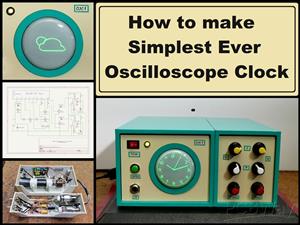 How to make Simplest ever Oscilloscope Clock
An oscilloscope clock is a unique and creative way to display the time using an oscilloscope, which...
How to make Simplest ever Oscilloscope Clock
An oscilloscope clock is a unique and creative way to display the time using an oscilloscope, which...
-
 DIY Digital Barograph with BME280 and ESP32 - 24 Hour Pressure Trends
A barograph is a self-recording barometer that continuously measures and records atmospheric pressu...
DIY Digital Barograph with BME280 and ESP32 - 24 Hour Pressure Trends
A barograph is a self-recording barometer that continuously measures and records atmospheric pressu...
-
 Build a Raspberry Pi Pico SDR Radio with Waterfall Display
Software-defined radio (SDR) is a radio communication system where components that have traditional...
Build a Raspberry Pi Pico SDR Radio with Waterfall Display
Software-defined radio (SDR) is a radio communication system where components that have traditional...
-
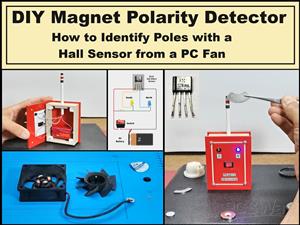 DIY Magnet Polarity Detector - How to Identify Poles with a Hall Sensor from a PC Fan
Recently, while working on a project, I needed to determine the polarity of several permanent magne...
DIY Magnet Polarity Detector - How to Identify Poles with a Hall Sensor from a PC Fan
Recently, while working on a project, I needed to determine the polarity of several permanent magne...
-
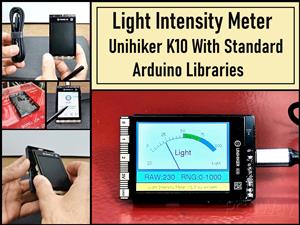 Light Meter Project - Making Dfrobot Unihiker K10 Work with Standard Arduino Libraries
The other day I received a shipment with a UNIHIKER K10 development board from DFRobot, which I rec...
Light Meter Project - Making Dfrobot Unihiker K10 Work with Standard Arduino Libraries
The other day I received a shipment with a UNIHIKER K10 development board from DFRobot, which I rec...
-
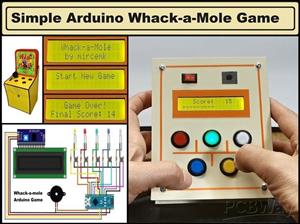 DIY Simple Arduino Whack-a-Mole Game
A "Whack-a-Mole" game is a classic arcade-style game where moles pop up randomly from holes, and th...
DIY Simple Arduino Whack-a-Mole Game
A "Whack-a-Mole" game is a classic arcade-style game where moles pop up randomly from holes, and th...
-
-
-
-
Tester for Touch Screen Digitizer without using microcontroller
321 2 2 -
Audio reactive glow LED wristband/bracelet with NFC / RFID-Tags
304 0 1 -
-
-


