
|
arduino IDEArduino
|
|

|
TensorFlow |
New Era Farming with TensorFlow on Lowest Power Consumption
Overview:
This project demonstrates how to build a device using TensorFlow and Artemis module to solve most of the problems faced by the rural or agricultural communities anywhere. The device uses Machine Learning algorithms to check overall plant health, extreme climate prediction and protection, auto-greenhouse adaptation and detecting deadly disease spreading vectors or illegal logging of forests using audio analysis. The project also demonstrates how we can have more insights into our farm just by collecting and utilizing the data got from our sensors. I got the inspiration for making this project from news like Australian wildfires, the Indian GDP falling down due to faulty agricultural practices and locust swarm which is damaging the crops in East Africa, Pakistan and many other nations very rapidly, mosquitoes breeding at an alarming rate, neglected tropical diseases, so I found a call within me as an active member of this innovative, committed community.
The important measure taken while making this project was collecting data efficiently and patiently, once the data is collected the job becomes a lot easier (You are bound to fail if you don't collect correct data to feed your hungry ML frameworks).
The backbone of this project is that you need to tune your device after every stage. So let's get started, and enjoy learning with Machine Learning.
Technical Overview:
I still love my village though we have shifted to a modern city. The freshness of the village still restores me from any pensive mood but due to pollution all around we are suffering from bad health and whatever crop we grow they too have some undesired effect on our body, so it is important to look after those crops as well as an early sign of diseases in plants as well as humans that too without using complex, power-hungry devices which need lots of maintenance and far beyond the reach of poor farmers or village men. So I decided to use Edge devices capable of using ML features with low latency and almost no carbon footprint.
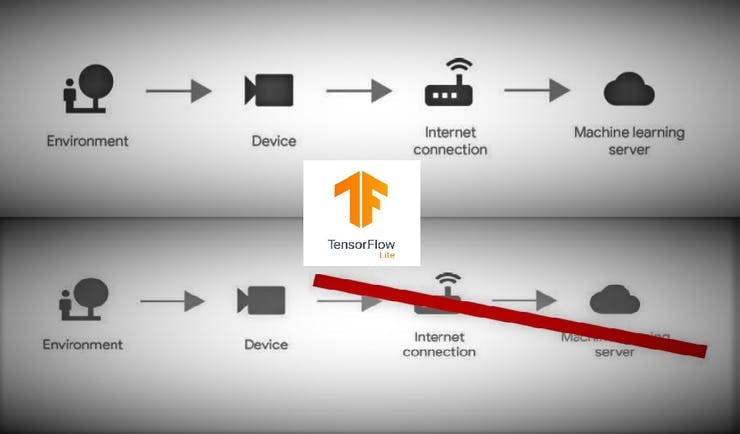
Background
- FarmAnalysis: With the increasing population a sustainable method of farming is important. Previously we just used to play with sensors but now using Tensorflow we can not only sense but analyse, predict and take actions. Using all the collected data we will find abnormalities in crop growth, photosynthesis rate, extreme climate and the need for smart greenhouse adaptation. This step will stop the competition among the farmers for using excess fertilizers, pesticides, and insecticides to boost production. Using the correct farm analysis the machine would auto-suggest the farmer when to use the chemicals on his farm and thus save his money, efforts and degradation of the environment. You can check this website for more problems faced by my country's agricultural community. https://www.mckinsey.com/industries/agriculture/our-insights/harvesting-golden-opportunities-in-indian-agriculture
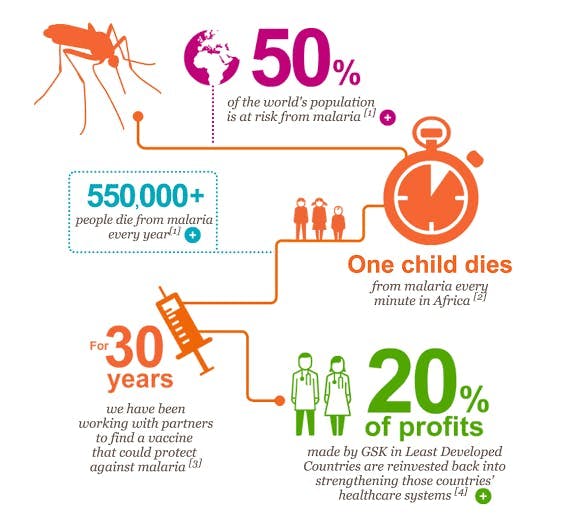
- Detection of certain beneficial and harmful organisms using audio analysis: Farmers are using lots of chemicals to boost their farm yield but we tend to forget that due to excessive use of those pesticides, insecticides and inorganic manures, cross-pollinating agents, the arthropods( 90% of living organisms found on earth are insects) don't get attracted to those plants or otherwise die due to excessive chemical exposure and pollution. More than 2, 000 pollinating insects are extinct by now and only 500 are left extinct if not protected. We also need to detect diseases in crops as early as possible to stop them from spreading on farms. To solve this problem I thought why not tell farmers to use chemicals only if there are any bad growth patterns or harmful pests, nowadays even if there are no diseases farmers uselessly spray chemicals and kill useful insects like honeybees. It will also detect certain pollinating agents and how frequently they are there on fields, based on the observation it can assist farmers in planting ornamental plants, also it can detect big animals who destroy the crop just by their voice and frequency. For now, I trained my device to recognise the sounds of several breeds of mosquitoes like Aedes, culex and anopheles also honeybees. I will also add crickets, locusts and some other pests too since I have a very small dataset for them. The point here is that on the first occurrence of any sign of pest the farmer or government can take action before it gets spread everywhere, also the user gets to know exactly from which device was the signal received.
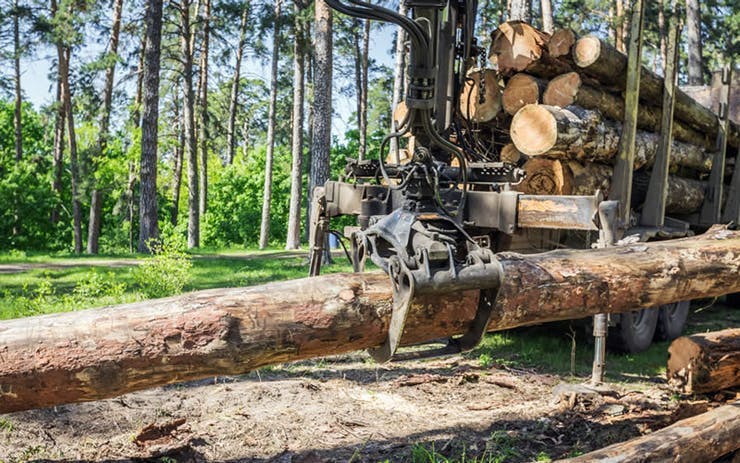
- Stopping deforestation: There is much illegal cutting of trees so my device would make the concerned authorities aware of the cutting of trees using sound analysis technique, particularly it would detect the tone and frequency of wood cutting tools being operated.
- Predicting wildfires and adapting for extreme situations: If we are able to analyse the data coming from environmental sensors and gas sensors we can easily predict wildfires also the device can be made to learn to take action in case the plant does not get the optimum temperature and light so the device can activate greenhouse mode.

Let's go!
Audio Classification:
Step 1: Collecting the required dataset for audio analysis:
I got audio files from Kaggle dataset for different kinds of mosquito wing beat, honeybee, you can too download it from there, the file is big but we don't need that much dataset since our device memory is small, so we will limit our self to 200 audio files of each class only, of one second's utterance each. Similarly, you can get a chainsaw, locust, or cricket in this way. You can also record your own data if you have a silent room with insects, that would be much better and more accurate and that would be very much exciting but I wasn't able to do so because of my stressful school exams. Note: If we directly load the audio data downloaded for the training process it won't work because the microphone architecture would differ and the device won't recognize anything. So once the files are downloaded we need to record it again via the Artemis microphone so that we can train on the data which is exact to be used for running inference. So let's configure our Arduino IDE for Artemis Redboard ATP, look at the below link for that.
https://learn.sparkfun.com/tutorials/hookup-guide-for-the-sparkfun-redboard-artemis-atp
Select the board as Artemis ATP then from File->Examples->Sparkfun Redboard Artemis Example->PDM->Record_to_wav
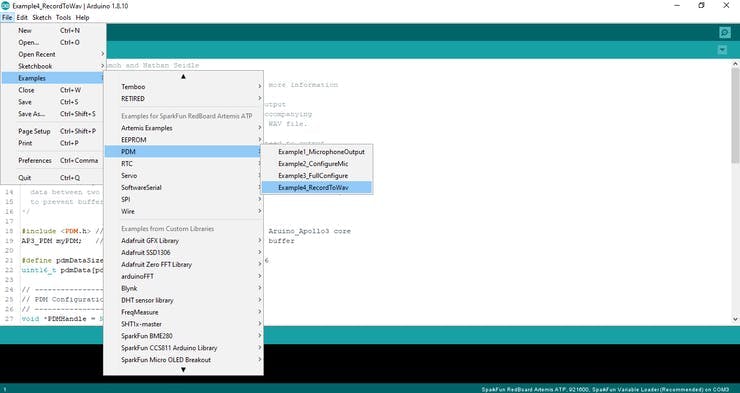
Along with the code there comes a python script that you need to run to record audio from the onboard mic. It is very necessary because audio files came from different mics so there might be a chance that the board would not be able to recognize the frequencies accurately and treat the sound like noise.
(Protip: While recording makes variations of the air column by bringing the source of sound back and forth slowly as a simulation of a real insect coming near the mics so that we get better results. I tried it myself and it increased the accuracy.)
#!/usr/bin/python
from __future__ import division
"""
Author: Justice Amoh
Date: 11/01/2019
Description: Python script to stream audio from Artemis Apollo3 PDM microphone
"""
import sys
import serial
import numpy as np
import matplotlib.pyplot as plt
from serial.tools import list_ports
from time import sleep
from scipy.io import wavfile
from datetime import datetime
# Controls
do_plot  = True
do_save  = True
wavname  = 'recording_%s.wav'%(datetime.now().strftime("%m%d_%H%M"))
runtime  = 50#100                      # runtime in frames, sec/10, set it according to your audio duration default is 5 seconds, I set it to 4 minutes as per my audio duration

# Find Artemis Serial Port
ports = list_ports.comports()
try:
sPort = [p[0] for p in ports if 'cu.wchusbserial' in p[0]][0]
except Exception as e:
print 'Cannot find serial port!'
sys.exit(3)
# Serial Config
ser = serial.Serial(sPort,115200)
ser.reset_input_buffer()
ser.reset_output_buffer()
# Audio Format & Datatype
dtype   = np.int16                  # Data type to read data
typelen = np.dtype(dtype).itemsize  # Length of data type
maxval  = 32768. # 2**15            # For 16bit signed
# Plot Parameters
delay   = .00001                    # Use 1us pauses - as in matlab
fsamp   = 16000                     # Sampling rate
nframes = 10                        # No. of frames to read at a time
buflen  = fsamp//10                 # Buffer length
bufsize = buflen*typelen            # Resulting number of bytes to read
window  = fsamp*10                  # window of signal to plot at a time in samples
# Variables
x = [0]*window
t = np.arange(window)/fsamp         # [x/fsamp for x in range(10)]
#---------------
# Plot & Figures
#---------------
plt.ion()
plt.show()
# Configure Figure
with plt.style.context(('dark_background')):
fig,axs = plt.subplots(1,1,figsize=(7,2.5))
lw, = axs.plot(t,x,'r')
axs.set_xlim(0,window/fsamp)
axs.grid(which='major', alpha=0.2)
axs.set_ylim(-1,1)
axs.set_xlabel('Time (s)')
axs.set_ylabel('Amplitude')
axs.set_title('Streaming Audio')
plt.tight_layout()
plt.pause(0.001)
# Start Transmission
ser.write('START')          # Send Start command
sleep(1)
for i in range(runtime):
buf = ser.read(bufsize)                 # Read audio data
buf = np.frombuffer(buf,dtype=dtype)    # Convert to int16
buf = buf/maxval                        # convert to float
x.extend(buf)                           # Append to waveform array
# Update Plot lines
lw.set_ydata(x[-window:])
plt.pause(0.001)
sleep(delay)
# Stop Streaming
ser.write('STOP')
sleep(0.5)
ser.reset_input_buffer()
ser.reset_output_buffer()
ser.close()
# Remove initial zeros
x = x[window:]
# Helper Functions
def plotAll():
t   = np.arange(len(x))/fsamp
with plt.style.context(('dark_background')):
fig,axs = plt.subplots(1,1,figsize=(7,2.5))
lw,     = axs.plot(t,x,'r')
axs.grid(which='major', alpha=0.2)
axs.set_xlim(0,t[-1])
plt.tight_layout()
return
# Plot All
if do_plot:
plt.close(fig)
plotAll()
# Save Recorded Audio
if do_save:
wavfile.write(wavname,fsamp,np.array(x))
print "Recording saved to file: %s"%wavname
Once the audio is recorded you can use any audio splitter to split audio files into 1 second each. I used the below piece of code with jupyter notebook to achieve the above step.
from pydub import AudioSegment
from pydub.utils import make_chunks

myaudio = AudioSegment.from_file("myAudio.wav" , "wav")
chunk_length_ms = 1000 # pydub calculates in millisec
chunks = make_chunks(myaudio, chunk_length_ms) #Make chunks of one sec

#Export all of the individual chunks as wav files

for i, chunk in enumerate(chunks):
    chunk_name = "chunk{0}.wav".format(i)
    print "exporting", chunk_name
    chunk.export(chunk_name, format="wav")
I used Audacity to clean up my downloaded audio files before I slice them up, also there are very awesome features which you can use to know whether your audio is pure or not, audio spectrogram.
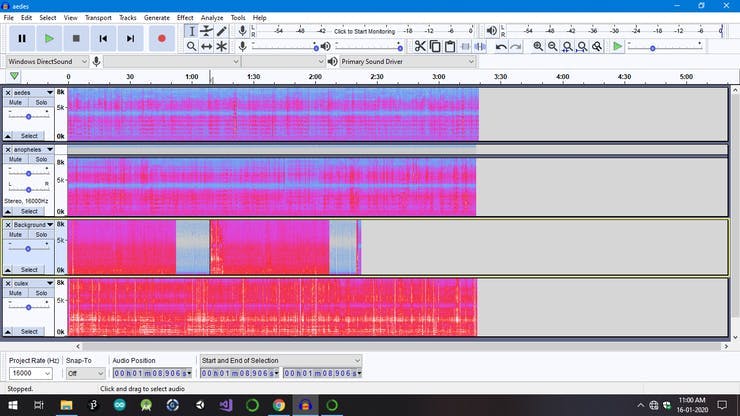
Once the audio files are sliced up you are ready to train those files for your Artemis. However, you need to tweak it to make it work perfectly because the data might contain lots of noise due to enclosure or working environment hence I recommend you to train the background dataset also so that it can work even if there is constant peculiar noise. The background contains all the trimmed audio segments in Audacity software and some distinct noise.

For training, I used Google Colab, below are full training process images, you need to upload these files while training in Colab notebook and run on GPU, for me it took nearly 2 hours. I had to train thrice because the notebook kept disconnecting due to my slow internet connection, so I trained first a small dataset only bee, mosquito(no gene or breed classification) and chainsaw after that I trained the whole dataset for two times and luckily I got success.
Step 2:Training the audio data
- Audio Training #1: Labels = mosquito, bee, chainsaw
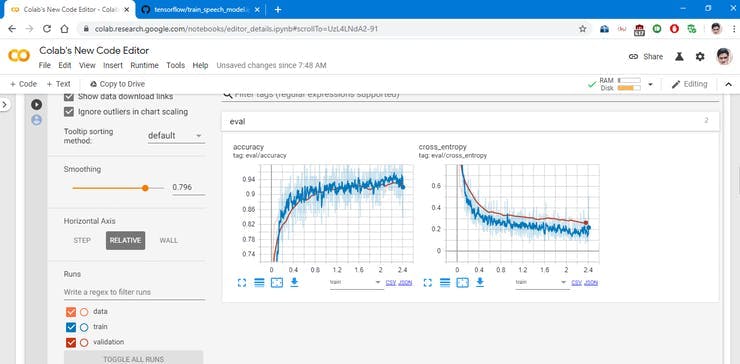
Once the training is complete we need to freeze the model and convert it into the lite model to be used in the Edge device. I will attach the code along with all required comments.
- Audio Training #2: Labels = Aedes, culex, anopheles, bee, chainsaw
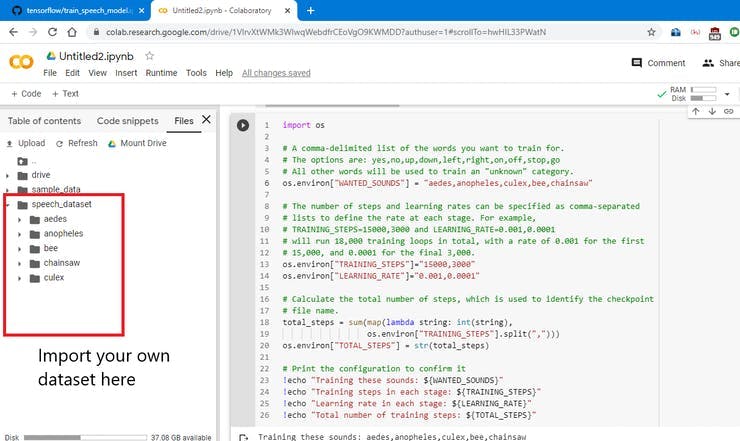
Download all the files generated from the above steps, also you need to generate a microfeature file for every class audio file, I will explain this when we code the device. Also, you can read the TensorFlow Lite for Microcontrollers documentation for more information.
Data Classification:
Step 1: Collecting sensor data for both desired and undesired behaviours
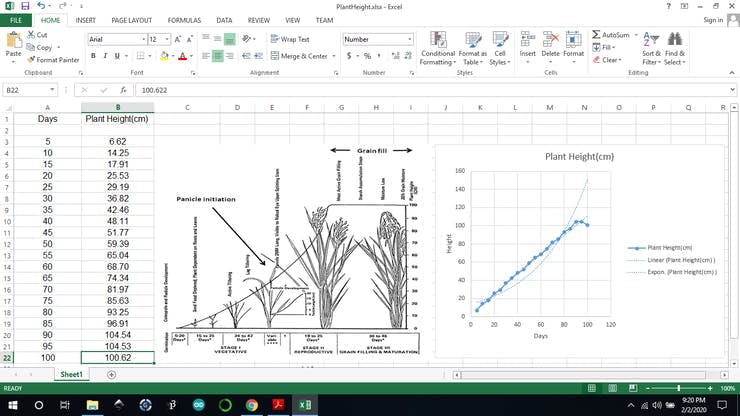
1) Plant height: I used my past project to find out rice plant height after germination but that too was not sufficient because I could keep my device on for so long as there is no SigFox connectivity in India so whatever reading I got I used Excel mathematical-statistical functions, regression technique to find all other points and added some noise. I am really sorry for having a small dataset for ML but thankfully it suits my application, if I someday make it a business product then I would expand my dataset by generating synthetic data.
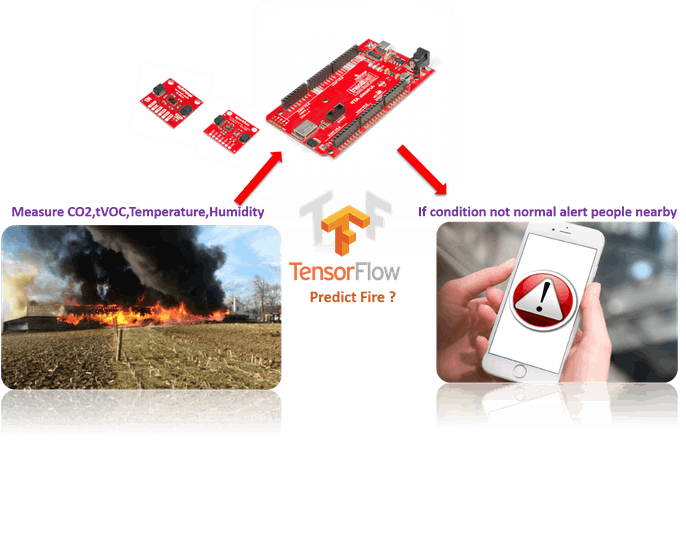
2) Fire prediction: I used the environmental combo quiic sensor to collect the normal readings as well as fire situation readings. For fire, we need humidity, temperatures, tVOC, and CO2 readings. So basically we are using making a classification model using the regression technique to make predictions. I used the example code of the sensor to take all the readings. It is a very essential feature to detect wildfires.
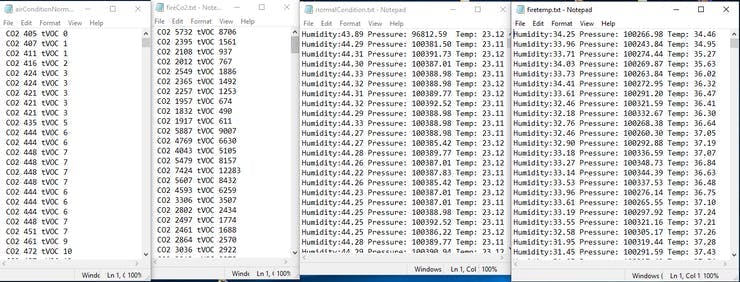
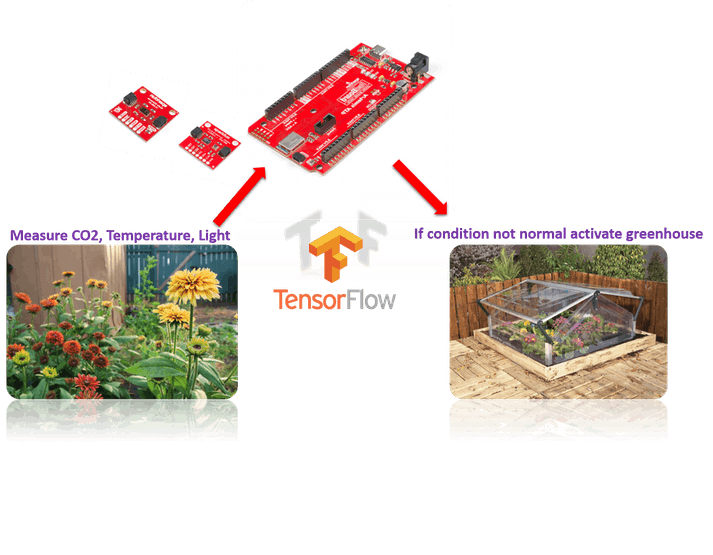
3) Greenhouse Adaptation: I used the quiic VCNL4040 module to detect ambient light levels and an environmental combo sensor for temperature and CO2 sensing. Based on the data the device can predict when to adapt to greenhouse mode to save the crops. It can be further optimized to protect the crop from hailstorms or heavy snowfalls.
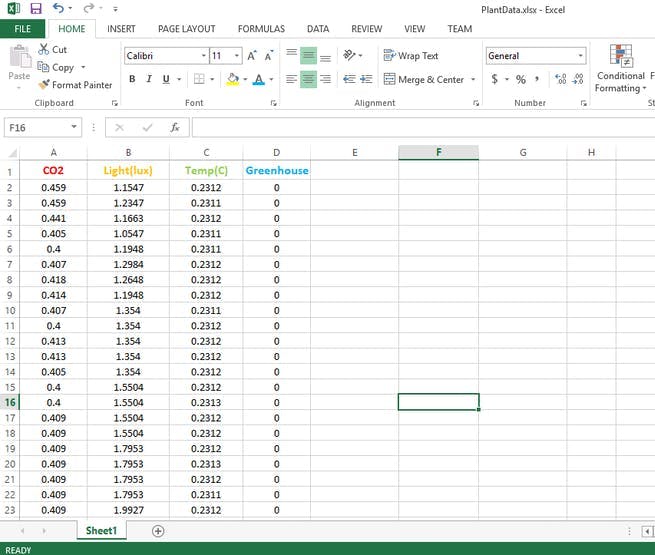
Step 2:Training the data using deep learning
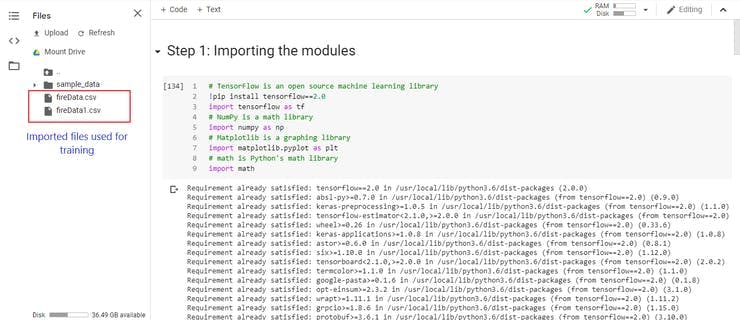
Never proceed with any training without normalization as you will never see your model improving its accuracy. Below are some images of my training process, it is good enough for anyone to know what is happening during the training.
Training #1: Fire prediction
I used 'adam' optimizer and 'binary_crossentropy' loss, they worked better than any other methods, you can use whatever accordingly. The same training step was followed for other datasets also. Also sigmoid is used as an activation function for the output layer as sigmoid is good for non-linear data and binary predictions
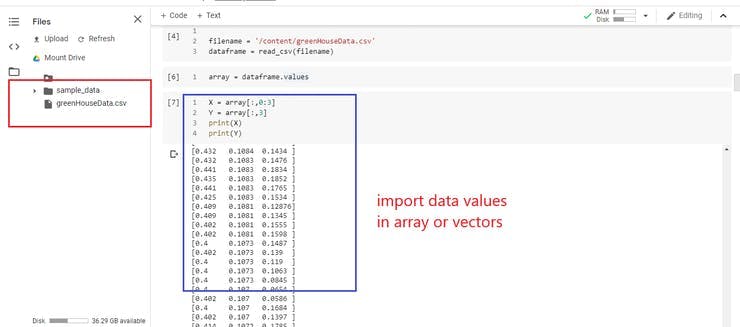
Training #2: Greenhouse adaptation prediction
The same regression model configuration for the neural network was used as that of the fire prediction model. The output prediction will help the user to know on the basis of relevant sensor data whether the plants are getting enough CO2, light, warmth or not if not then the device can take action to adapt to the greenhouse( I will tell how when we will code the device).
Training #3: Plant growth tracking
Here instead of adam optimizer, rmsprop was used and mse as loss function. In this, I have trained the underlying neural network to identify the pattern of growth with regard to days, so I will use it to compute plant height from a model based on days and check with my sensor readings if the values differ greatly it means the plant is not growing well in that season.
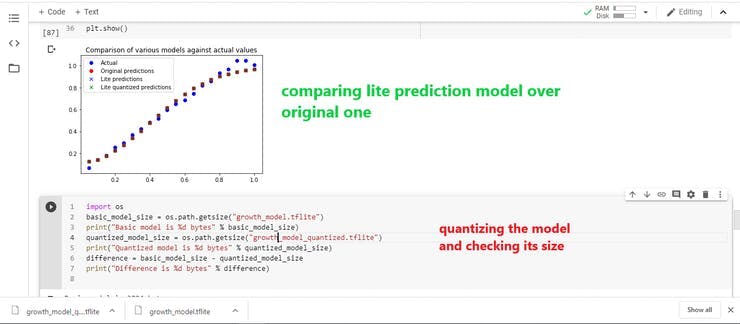
Since we have completed all our training steps we will head toward programming the device.
Getting our codes ready:
Here I will describe all the header files which are common to all our project implementations,
#include "xyz_model_data.h"
The model we trained, converted and transformed into C++ using xxd
#include "tensorflow/lite/experimental/micro/kernels/all_ops_resolver.h"
A class that allows the interpreter to load the operations used by our model
#include "tensorflow/lite/experimental/micro/micro_error_reporter.h"
A class that can log errors and output to help with debugging
#include "tensorflow/experimental/lite/micro/micro_interpreter.h"
The TensorFlow Lite for Microcontrollers interpreter, which will run our model
#include "tensorflow/lite/schema/schema_generated.h"
The schema that defines the structure of TensorFlow Lite FlatBuffer data, is used to make sense of the model data in sine_model_data.h
#include "tensorflow/lite/version.h"
The current version number of the schema, so we can check that the model was defined with a compatible version.
//You need to install Arduino_Tensorflow_Lite library before proceeding.
#include <TensorFlowLite.h>
A namespace is defined before the void setup() function, namespace is used to solve name conflicts among different packages. Also, you need to allocate memory for tensors and other dependent operations.
namespace
{
tflite::ErrorReporter* error_reporter = nullptr;
const tflite::Model* model = nullptr;
tflite::MicroInterpreter* interpreter = nullptr;
TfLiteTensor* input = nullptr;
TfLiteTensor* output = nullptr;
// Create an area of memory to use for input, output, and intermediate arrays.
// Finding the minimum value for your model may require some trial and error.
constexpr int kTensorArenaSize = 6 * 1024;
uint8_t tensor_arena[kTensorArenaSize];
}  // namespace
You can just start with the Arduino Tensorflow Lite example in the Arduino IDE examples section and just transfer your converted lite model data to model_data.h file and then take any action based upon the output by the predicted model.
Programming, Model Testing and Connecting the Sparkfun Artemis device:
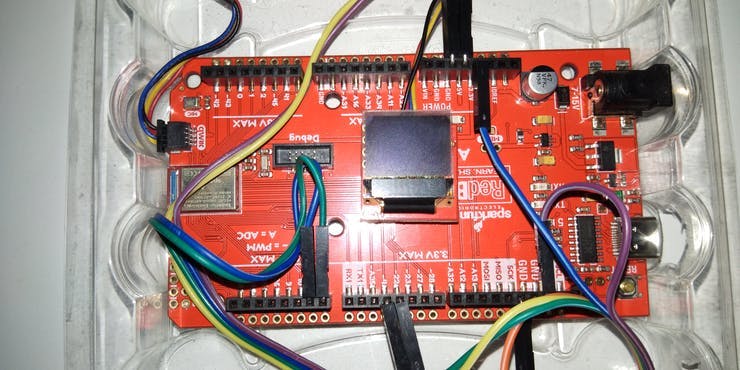
Test #1: Audio Analysis-
Checking our speech model and displaying results on the OLED screen. If you are not confident about programming the whole project you can pick up an example project and keep it as a base to modify it, you will easily learn to debug also in this manner. The images don't show in detail hence I have uploaded the codes but you will still need to tweak them as per your project. You can also easily modify it to send the results to a mobile or base stations on the basis of detected sounds, like mosquitoes, so one can easily see where are the most occurrence of such insects in the locality and prevent its breeding or make automated drone navigation system to spray particular insecticides, pesticides in farm areas or inform agencies about illegal logging with full precision control. Look below for our test result images.
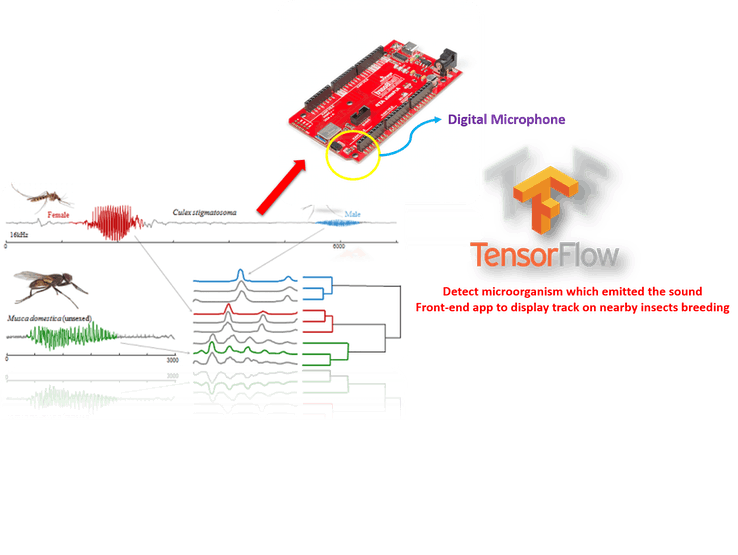
We have completed our training and programming the audio analysis model for our project, now I will proceed with programming other value-based output models.
Test #2: Fire prediction-
We will load the data model on the board and then perform real-time predictions for our sensor values, based upon the prediction we will display the notification on the OLED screen, thereby eliminating the chance of widespread fire in farms. This really took most of my time since my board was giving me compilation errors every time however hard I tried. But thanks to the Hackster community, who helped me to upload the code successfully.
Test #3: Greenhouse prediction
Here we will utilize ambient light, temperature and CO2 concentration detection sensor to predict whether there is sufficient light, temperature and CO2 available for plant growth or not, if the condition is not normal we will direct servo motors to activate and protect the plants by bringing a layer over the farm like Greenhouse set-up.
Test #4: Plant Height Determination
We have trained our model to determine plant height through regression but with regression, there is one drawback, the drawback is that it determines the values in one linear direction only therefore if left to run forever it would return the height of the plant in kilometres someday if no upper limit is set. So what we will do is that we will detect the height of the plant for corresponding days and check with our model for the corresponding day and check whether the height predicted by the model differs widely from our measured plant height, it differs widely it means there is some nutritional deficiency.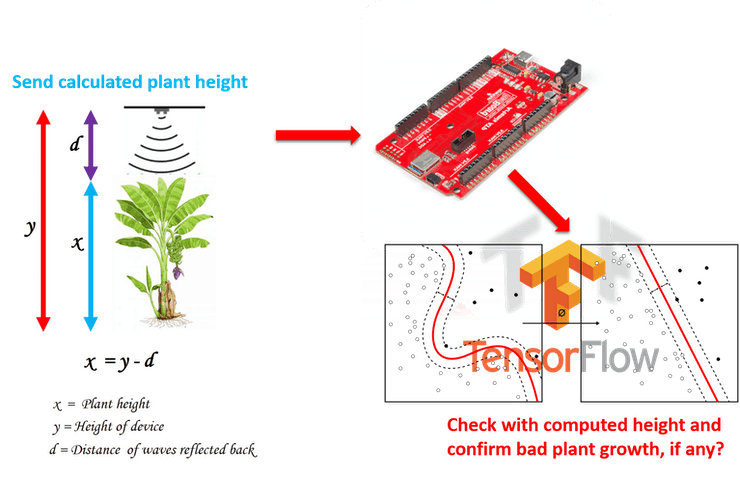
I have attached all the codes which are commented very well and readable enough for you to implement your own algorithm, don't waste your time thinking about codes, invest your time to make your training dataset as good as possible.
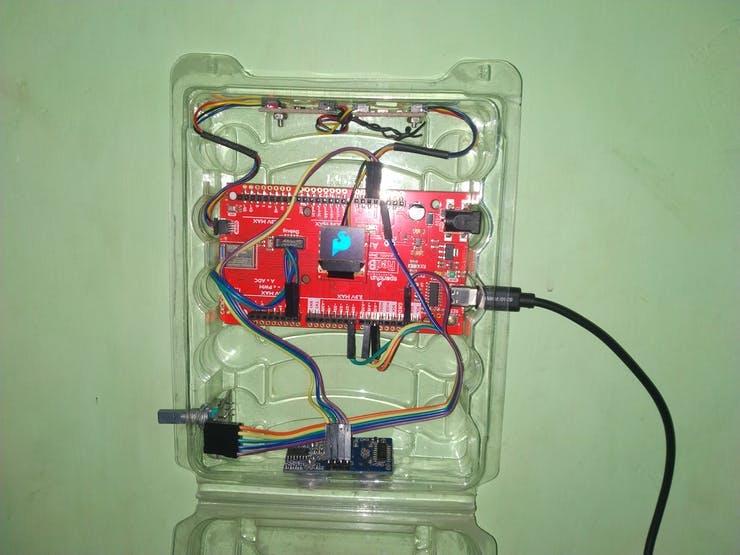
You can just set your device to whatever mode you want and wherever you want. I also wanted to implement moisture adaptation for my plants I will finish that too later.
Sustainable Development Goals:

SDG 3: GOOD HEALTH AND WELL-BEING
Using our device we have tried to make locality aware of all the disease-carrying vectors present or breeding also we are able to save the crop as soon as we hear a sound made by any pest, so it saves lots of efforts of farmer and makes them spray chemicals only when required, eats healthily.
SDG 13 and SDG 15: CLIMATE ACTION AND LIFE ON LAND
UNAim: By 2020, promote the implementation of sustainable management of all types of forests, halt deforestation, restore degraded forests and substantially increase afforestation and reforestation globally. Mobilise significant resources from all sources and at all levels to finance sustainable forest management and provide adequate. incentives to developing countries to advance such management, including conservation and reforestation. Through our project, we are able to recognize the illegal logging of trees and carry forth the message to the Forest department to take action. Thus in no time, we are ready to halt deforestation, also I have thought of another inclusion which is to detect gunfire sounds and keep the government informed about poachers in a particular area and take stern actions against them.
Anyone is free to recommend to me any new feature which can be easily implemented and be helpful for the community. It was not very comfortable to add lots of code files directly in the code section so I have added the Github link. Thank you for reading my ideas and implementations carefully.
New Era Farming with TensorFlow on Lowest Power Consumption

Raspberry Pi 5 7 Inch Touch Screen IPS 1024x600 HD LCD HDMI-compatible Display for RPI 4B 3B+ OPI 5 AIDA64 PC Secondary Screen(Without Speaker)
BUY NOW
ESP32-S3 4.3inch Capacitive Touch Display Development Board, 800×480, 5-point Touch, 32-bit LX7 Dual-core Processor
BUY NOW
Raspberry Pi 5 7 Inch Touch Screen IPS 1024x600 HD LCD HDMI-compatible Display for RPI 4B 3B+ OPI 5 AIDA64 PC Secondary Screen(Without Speaker)
BUY NOW- Comments(0)
- Likes(1)
 Log in to post comments.
-
 Sebastian Mackowiak
Mar 21,2023
- 0 USER VOTES
- YOUR VOTE 0.00 0.00
- 1
- 2
- 3
- 4
- 5
- 6
- 7
- 8
- 9
- 10
- 1
- 2
- 3
- 4
- 5
- 6
- 7
- 8
- 9
- 10
- 1
- 2
- 3
- 4
- 5
- 6
- 7
- 8
- 9
- 10
- 1
- 2
- 3
- 4
- 5
- 6
- 7
- 8
- 9
- 10
 More by vilaksh01
-
 CliSensio - Climate Sensing and Insect Infestation Control
Overview:Climate Change, is a highly debated high school topic, but do we really care about it? We s...
-
 AI For truck APS Failure Detection on a $4 MCU
IntroductionThe automotive industry is among the pioneers to adopt cutting-edge technologies, machin...
-
 New Era Farming with TensorFlow on Lowest Power Consumption
Overview:This project demonstrates how to build a device using TensorFlow and Artemis module to solv...
-
 TinyML Gearbox Fault Prediction on a $4 MCU
StoryIs it possible to make an AI-driven system that predicts gearbox failure on a simple $4 MCU? Ho...
-
 AREC - Agricultural Records On Electronic Contracts
Objective:One of the biggest reasons behind the growth of fake products in the agrochemical industry...
-
 AquaMon - Aquaponics and Fish Tank Monitoring with Tuya IoT
IntroductionDo you love sea creatures? I don't think I would find a single person who would not fall...
-
 Predictive Maintenance Of Compressor Water Pumps
An ordinary resident of a metropolis rarely thinks about how water enters taps or central heating pi...
-
 Unlock Passwords With Tinyml-based Digit Recognition
Story? IntroductionThe active development of smart gadgets with touch interfaces is trending nowaday...
-
 Handmade Drawing Recognition Interface As From My Smartphone
StoryIntroductionI was inspired by such features on our smartphones. My smartphone “Vivo V7” has a f...
-
 Recognizing MNIST-based Handwritten Digits on M5Stack Core2
IntroductionIn my previous experiment, I had great fun adding handmade drawing gestures for our M5St...
-
 Tuya Link SDK IoT Smart Environment Sensing And Humidifier
IntroductionI had been exploring the Tuya IoT platform for the past few months and they never fail t...
-
 Tuya IoT Cloud Smart Weather Lamp
IntroductionHello everybody, ever felt like having a smart home device to visually show/signal you t...
-
 Getting Started With Arduino IoT Control With Tuya
Introduction:I have always enjoyed using Arduino UNO since it was my first programmable board but it...
-
 Coronavirus - India cases tracker
Today everyone is gazing at their phone to keep track of the coronavirus in their country but we ten...
-
 CliSensio - Climate Sensing and Insect Infestation Control
Overview:Climate Change, is a highly debated high school topic, but do we really care about it? We s...
-
 AI For truck APS Failure Detection on a $4 MCU
IntroductionThe automotive industry is among the pioneers to adopt cutting-edge technologies, machin...
-
 New Era Farming with TensorFlow on Lowest Power Consumption
Overview:This project demonstrates how to build a device using TensorFlow and Artemis module to solv...
-
 TinyML Gearbox Fault Prediction on a $4 MCU
StoryIs it possible to make an AI-driven system that predicts gearbox failure on a simple $4 MCU? Ho...
-
 AREC - Agricultural Records On Electronic Contracts
Objective:One of the biggest reasons behind the growth of fake products in the agrochemical industry...
-
 AquaMon - Aquaponics and Fish Tank Monitoring with Tuya IoT
IntroductionDo you love sea creatures? I don't think I would find a single person who would not fall...
-
 Predictive Maintenance Of Compressor Water Pumps
An ordinary resident of a metropolis rarely thinks about how water enters taps or central heating pi...
-
 Unlock Passwords With Tinyml-based Digit Recognition
Story? IntroductionThe active development of smart gadgets with touch interfaces is trending nowaday...
-
 Handmade Drawing Recognition Interface As From My Smartphone
StoryIntroductionI was inspired by such features on our smartphones. My smartphone “Vivo V7” has a f...
-
 Recognizing MNIST-based Handwritten Digits on M5Stack Core2
IntroductionIn my previous experiment, I had great fun adding handmade drawing gestures for our M5St...
-
 Tuya Link SDK IoT Smart Environment Sensing And Humidifier
IntroductionI had been exploring the Tuya IoT platform for the past few months and they never fail t...
-
 Tuya IoT Cloud Smart Weather Lamp
IntroductionHello everybody, ever felt like having a smart home device to visually show/signal you t...
-
-
-
-
Modifying a Hotplate to a Reflow Solder Station
1010 1 6 -
MPL3115A2 Barometric Pressure, Altitude, and Temperature Sensor
546 0 1 -
-
Nintendo 64DD Replacement Shell
449 0 2 -
V2 Commodore AMIGA USB-C Power Sink Delivery High Efficiency Supply Triple Output 5V ±12V OLED display ATARI compatible shark 100W
1280 4 2 -
How to measure weight with Load Cell and HX711
767 0 3


