|
|
ESP8266EXESPRESSIF(乐鑫)
|
x 1 | |

|
618Adafruit Industries LLC
|
x 1 | |
|
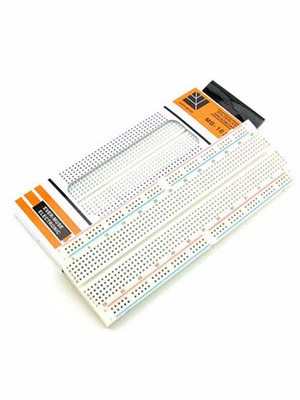
Breadboard 830 Point Solderless PCB Bread Board MB-102 MB102 Test Develop DIY |
x 1 | |
|
422001 BK005Alpha Wire
|
x 1 | |
|
1451300701Molex
|
x 1 |

|
arduino IDEArduino
|
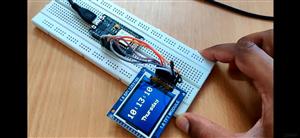
ESP8266 Network Clock Without Any RTC
In the project will be making a clock project without RTC, it will be taking time from internet using wifi and it will display it on st7735 display.
things needed
esp8266
tft display
jumper cables
usb for programming
NTP stands for Network Time Protocol and it is a networking protocol for clock synchronization between computer systems. In other words, it is used to synchronize computer clock times in a network.
There are NTP servers like pool.ntp.org that anyone can use to request time as a client. In this case, the ESP8266 is an NTP Client that requests time from an NTP Server (pool.ntp.org).
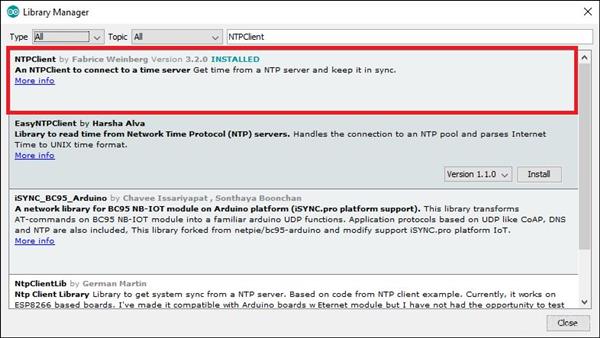
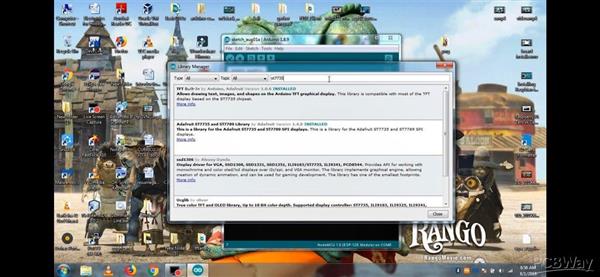
We’ll use the NTPClient library to get time. In your Arduino IDE, go to Sketch > Library > Manage Libraries. The Library Manager should open.
Search for NTPClient and install the library by Fabrice Weinber as shown in the following image.
The NTPClient Library comes with the following functions to return time:
getDay() – returns an int number that corresponds to the the week day (0 to 6) starting on Sunday;
getHours() – returns an int number with the current hour (0 to 23) in 24 hour format;
getMinutes() – returns an int number with the current minutes (0 to 59);
getSeconds() – returns an int number with the current second;
getEpochTime() – returns an unsigned long with the epoch time (number of seconds that have elapsed since January 1, 1970 (midnight GMT);
getFormattedTime() – returns a String with the time formatted like HH:MM:SS;
This library doesn’t come with functions to return the date, but we’ll show you in the code how to get the date (day, month and year).
After downloading the file just add st7735 library and NTPClient library into your arduino ide
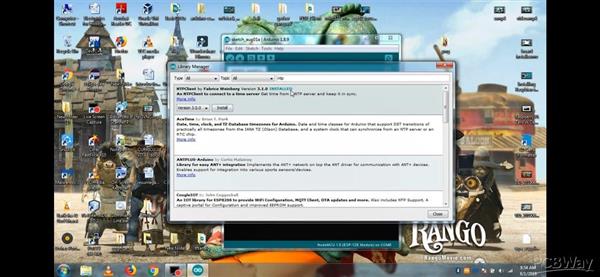
Then open the NTP_CLK sketch
And before uploading the code just edit it and you need to provide your wifi ssid and password in it and then
You need to set offsettime for me it is 19800
Because my timezone is utc+5:30 so
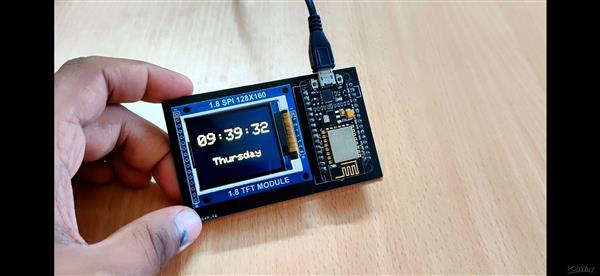
this is a code for esp8266 NTP clock, which will get time from NTP server which means you don't need an RTC to get the time. There are three codes provided here : 1: simple code to print time from NTP server in serial monitor 2: printing time on 1.8" SPI ST7735 TFT display 3: printing time on 1.8" SPI TFT ST7735 display with custom 7seg font and the font file (.h) is already added in this repo.
Get Time
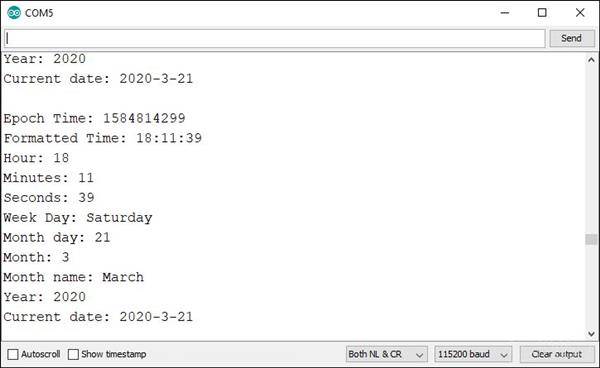
Then, we can use the functions provided by the library to get time. For example, to get the epoch time:
unsigned long epochTime = timeClient.getEpochTime();
Serial.print("Epoch Time: ");
Serial.println(epochTime);
The getFormattedTime() function returns the time in HH:MM:SS format.
String formattedTime = timeClient.getFormattedTime();
Serial.print("Formatted Time: ");
Serial.println(formattedTime);
You can get the hours, minutes or seconds separately using the getHours(), getMinutes() and getSeconds() functions as follows:
int currentHour = timeClient.getHours();
Serial.print("Hour: ");
Serial.println(currentHour);
int currentMinute = timeClient.getMinutes();
Serial.print("Minutes: ");
Serial.println(currentMinute);
int currentSecond = timeClient.getSeconds();
Serial.print("Seconds: ");
Serial.println(currentSecond);
Get Date
The getDay() function returns a number from 0 to 6, in which 0 corresponds to Sunday and 6 to Saturday. So, we can access the week day name from the array we’ve created previously as follows
String weekDay = weekDays[timeClient.getDay()];
Serial.print("Week Day: ");
Serial.println(weekDay);
The NTP Client doesn’t come with functions to get the date. So, we need to create a time structure (struct tm) and then, access its elements to get information about the date.
struct tm *ptm = gmtime ((time_t *)&epochTime);
The time structure contains the following elements:
tm_sec: seconds after the minute;
tm_min: minutes after the hour;
tm_hour: hours since midnight;
tm_mday: day of the month;
tm_year: years since 1900;
tm_wday: days since Sunday;
tm_yday: days since January 1;
tm_isdst: Daylight Saving Time flag;
tm structure documentation.
UTC +5:30=5.5*60*60=19800
UTC+1=1*60*60=3600
CALCULATE your timezone and edit it and then upload the code.
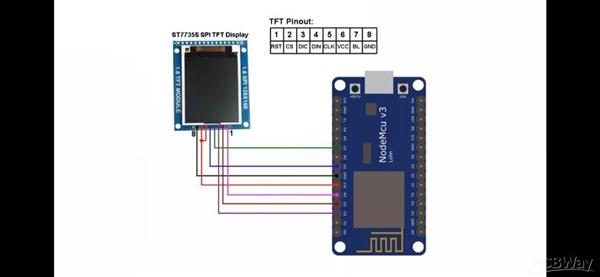
After uploading the code it will look better as shown but to make it more professional lets make a pcb as already uploaded gerber file it is with code files and then i uploaded my gerber to https://pcbway.com , you can also get your pcb from there. And after soldering everything it will look like my image.
make sure before uploading the code you edited the offsetTime which will select your country timezone as for me it is 19800 since my time standerd is UTC+5:30=5.56060=19800 say yours is UTC+1=16060=3600 so refer these two examples to get offset time for your time standerd.
ESP8266 Network Clock Without Any RTC
- Comments(0)
- Likes(0)
- 0 USER VOTES
- YOUR VOTE 0.00 0.00
- 1
- 2
- 3
- 4
- 5
- 6
- 7
- 8
- 9
- 10
- 1
- 2
- 3
- 4
- 5
- 6
- 7
- 8
- 9
- 10
- 1
- 2
- 3
- 4
- 5
- 6
- 7
- 8
- 9
- 10
- 1
- 2
- 3
- 4
- 5
- 6
- 7
- 8
- 9
- 10
 More by electronicguru0007
-
 How to make an alarm clock with pic microcontroller
he five push buttons will act as an input for setting the alarm for the required time. So one end of...
-
 How to make RMS to DC Converter using IC AD736
A True-RMS or TRMS is a type of converter which converts RMS value to equivalent DC value. Here in t...
-
 STM32 SPI Communcation and Data Sent
SPI in STM32F103C8Comparing SPI bus in Arduino & STM32F103C8 Blue Pill board, STM32 has 2 SPI bu...
-
 How to Communicate Arduinos via RS-485
What project will you develop?The project consists of 3 Arduino's. We have an Arduino UNO, a Nano, a...
-
 PIC16F877A Temperature and Humidity Measurement Board
Temperature and Humidity measurement is often useful in many applications like Home Automation, Envi...
-
 Diy Buck Converter
n the field of DC-DC Converters, A single-ended primary-inductor converter or SEPIC converter is a t...
-
 Iot AC Current Measuring System
Smart power monitoring is getting increasingly popular to improve energy efficiency in medium/small ...
-
 ESP32 Weather Station
In this project, we will learn how to create a weather station, which will display reading from a BM...
-
 NRF Data Transfer Via 2 Boards
There are various wireless communication technologies used in building IoT applications and RF (Radi...
-
 Iot patient monitoring system
When we are talking about major vital signs of a human body, there are four major parameters that we...
-
 Setting up zigbee communication with nodemcu and arduino
Zigbee is a popular wireless communication protocol used to transfer a small amount of data with ver...
-
 Ac Dimmer Remote PCB
The brightness can be controlled using the IR remote of TV, DVD, etc. Dimming Control system using M...
-
 Esp32 Home Automation
There are relay modules whose electromagnet can be powered by 5V and with 3.3V. Both can be used wit...
-
 Lora Communication With Network
This was a very simple project and can come in handy for various applications. But what it can't do ...
-
 GPS Module Based Tracking Device Pcb
ESP32 GPS vehicle tracker using NEO 6M GPS module and Arduino IDE. With the help of this GPS tracker...
-
 Traffic Management for Emergency Vehicles using AT89S52 Microcontroller
These days’ traffic congestion is the biggest problem of densely populated cities. The project focus...
-
 Diy Multimeter Pcb
This is a project based on Arduino board which can measureresistance, diode, continuity[H1] , voltag...
-
 Live Instagram Followers Pcb
ESP8266 is capable of functioning reliably in industrial environments, with an operating temperature...
-
-
AEL-2011 Power Supply Module
525 0 2 -
AEL-2011 50W Power Amplifier
485 0 2 -
-
-
Custom Mechanical Keyboard
693 0 0 -
Tester for Touch Screen Digitizer without using microcontroller
330 2 2 -
Audio reactive glow LED wristband/bracelet with NFC / RFID-Tags
310 0 1 -
-
-


