|
|
ESP8266EXESPRESSIF(乐鑫)
|
x 1 | |

|
618Adafruit Industries LLC
|
x 1 |

|
arduino IDEArduino
|
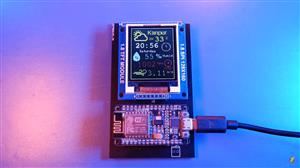
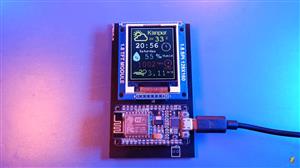
ESP8266 Nodemcu & ST7735 TFT Display based Weather Station
What is a Weather Station?
A weather station is a device that collects data related to the weather & environment using different sensors. There are two types of weather stations, one which is having own sensors and the second type of weather station is where we pull data from the weather station servers. In this tutorial, we will go for the first one, i.e. we will design our own weather station.
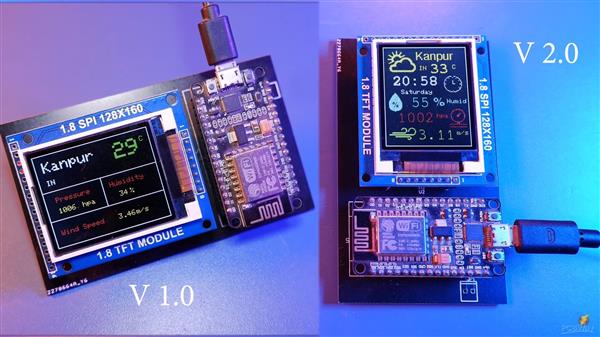
Weather station sensors may include a thermometer to take temperature readings, a barometer to measure the atmospheric pressure, Hygrometer to measure humidity, rain sensor to measure rainfall, an anemometer to measure wind speed, and more. Weather stations are also called weather centers, personal weather stations, professional weather stations, home weather stations, weather forecaster, and forecasters.
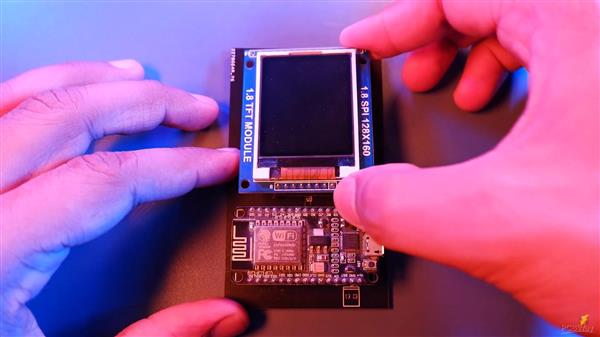
The Network Time Protocol (NTP) is a networking protocol for clock synchronization between computer systems over packet-switched, variable-latency data networks. In operation since before 1985, NTP is one of the oldest Internet protocols in current use. NTP was designed by David L. Mills of the University of Delaware.
NTP is intended to synchronize all participating computers to within a few milliseconds of Coordinated Universal Time (UTC).? It uses the intersection algorithm, a modified version of Marzullo's algorithm, to select accurate time servers and is designed to mitigate the effects of variable network latency. NTP can usually maintain time to within tens of milliseconds over the public Internet, and can achieve better than one millisecond accuracy in local area networks under ideal conditions. Asymmetric routes and network congestion can cause errors of 100 ms or more.

The protocol is usually described in terms of a client–server model, but can as easily be used in peer-to-peer relationships where both peers consider the other to be a potential time source.? Implementations send and receive timestamps using the User Datagram Protocol (UDP) on port number. They can also use broadcasting or multicasting, where clients passively listen to time updates after an initial round-trip calibrating exchange.NTP supplies a warning of any impending leap second adjustment, but no information about local time zones or daylight saving time is transmitted.
Components Required
nodemcu
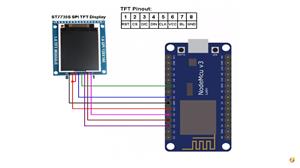
tft display
wires
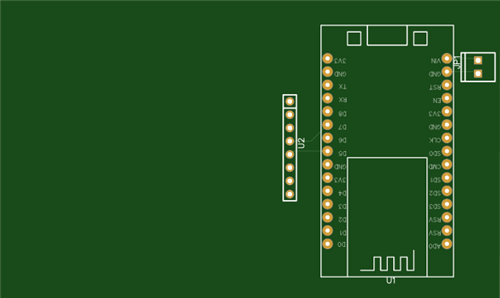
pcb
What Is a NTP and How It Will Work?

What is a NTP : An NTP stands for Network Time Protocol. It’s a standard Internet Protocol (IP) for synchronizing the computer clocks to some reference over a network.
The protocol can be used to synchronize all networked devices to Coordinated Universal Time (UTC).
NTP sets the clocks of computers to UTC, any local time zone offset or day light saving time offset is applied by the client. In this manner clients can synchronize to servers regardless of location and time zone differences.
How it will work for us :
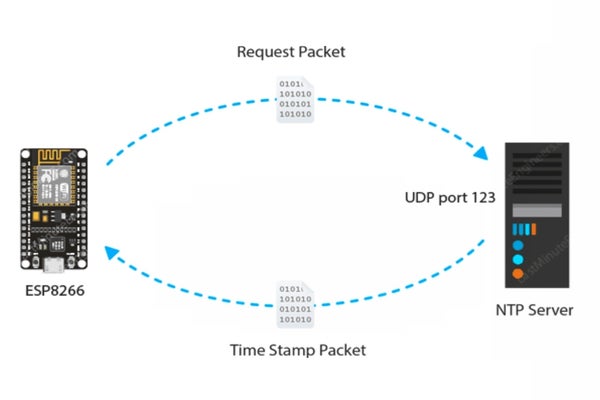
The client device such as ESP8266 connects to the server using the User Datagram Protocol (UDP) on port 123.
A client then transmits a request packet to a NTP server.
In response to this request the NTP server sends a time stamp packet.
A time stamp packet contains multiple information like UNIX timestamp, accuracy, delay or timezone.
A client can then parse out current date & time values.
Add TipAsk QuestionCommentDownload
Step 3: Installing Library on Arduino IDE

In your Arduino IDE go to Libraries manager and search for NTP and just download the NTP client library as i downloaded, refer image for further help.
Please copy the following code & put your network credentials in your code then
You need to set offsettime for me it is 19800
Because my timezone is utc+5:30 so
UTC +5:30=5.5*60*60=19800
UTC+1=1*60*60=3600
CALCULATE your timezone and edit it and then upload the code.
#include "NTPClient.h"
#include "ESP8266WiFi.h"
#include "WiFiUdp.h"
const char *ssid = "***********";
const char *password = "***********";
const long utcOffsetInSeconds = 19800;
char daysOfTheWeek[7][12] = {"Sunday", "Monday", "Tuesday", "Wednesday", "Thursday", "Friday", "Saturday"};
// Define NTP Client to get time
WiFiUDP ntpUDP;
NTPClient timeClient(ntpUDP, "pool.ntp.org", utcOffsetInSeconds);
void setup(){
Serial.begin(115200);
WiFi.begin(ssid, password);
while ( WiFi.status() != WL_CONNECTED ) {
delay ( 500 );
Serial.print ( "." );
}
timeClient.begin();
}
void loop() {
timeClient.update();
Serial.print(daysOfTheWeek[timeClient.getDay()]);
Serial.print(", ");
Serial.print(timeClient.getHours());
Serial.print(":");
Serial.print(timeClient.getMinutes());
Serial.print(":");
Serial.println(timeClient.getSeconds());
//Serial.println(timeClient.getFormattedTime());
delay(1000);
}
Getting TIME

After Uploading the code to Esp8266 you can open the serial monitor and if everything is good then you will able to get the time on the serial monitor as i am able to get the time in my serial monitor.

So with this project you can attach any display and make it a proper network clock. So have fun making your network clock.

Now, before initializing NTP Client object, we need to specify the address of the NTP Server we wish to use. pool.ntp.org is an open NTP project great for things like this.
WiFiUDP ntpUDP;
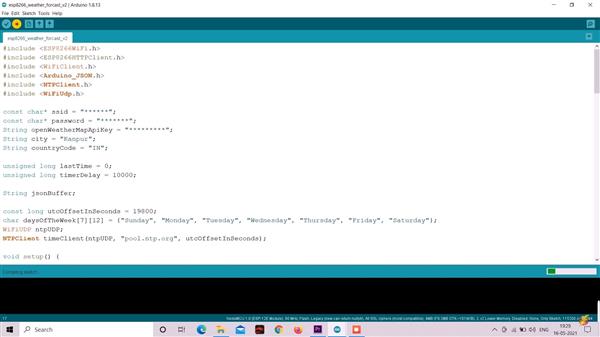
NTPClient timeClient(ntpUDP, "pool.ntp.org", utcOffsetInSeconds);
The pool.ntp.org automatically picks time servers which are geographically close for you. But if you want to choose explicitly, use one of the sub-zones of pool.ntp.org.
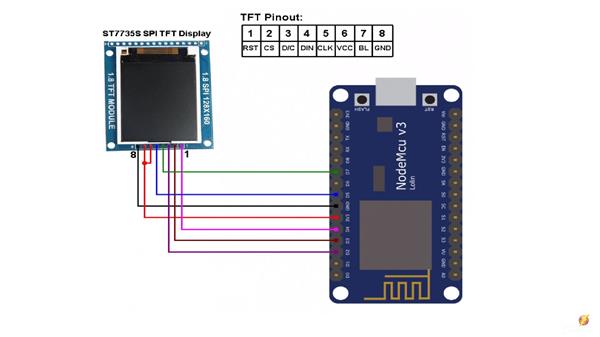
ESP8266 Nodemcu & ST7735 TFT Display based Weather Station
*PCBWay community is a sharing platform. We are not responsible for any design issues and parameter issues (board thickness, surface finish, etc.) you choose.
- Comments(1)
- Likes(2)
-
 Engineer
Jul 16,2023
-
 (DIY) C64iSTANBUL
Jul 08,2022
- 0 USER VOTES
- YOUR VOTE 0.00 0.00
- 1
- 2
- 3
- 4
- 5
- 6
- 7
- 8
- 9
- 10
- 1
- 2
- 3
- 4
- 5
- 6
- 7
- 8
- 9
- 10
- 1
- 2
- 3
- 4
- 5
- 6
- 7
- 8
- 9
- 10
- 1
- 2
- 3
- 4
- 5
- 6
- 7
- 8
- 9
- 10
 More by electronicguru0007
-
 How to make an alarm clock with pic microcontroller
he five push buttons will act as an input for setting the alarm for the required time. So one end of...
-
 How to make RMS to DC Converter using IC AD736
A True-RMS or TRMS is a type of converter which converts RMS value to equivalent DC value. Here in t...
-
 STM32 SPI Communcation and Data Sent
SPI in STM32F103C8Comparing SPI bus in Arduino & STM32F103C8 Blue Pill board, STM32 has 2 SPI bu...
-
 How to Communicate Arduinos via RS-485
What project will you develop?The project consists of 3 Arduino's. We have an Arduino UNO, a Nano, a...
-
 PIC16F877A Temperature and Humidity Measurement Board
Temperature and Humidity measurement is often useful in many applications like Home Automation, Envi...
-
 Diy Buck Converter
n the field of DC-DC Converters, A single-ended primary-inductor converter or SEPIC converter is a t...
-
 Iot AC Current Measuring System
Smart power monitoring is getting increasingly popular to improve energy efficiency in medium/small ...
-
 ESP32 Weather Station
In this project, we will learn how to create a weather station, which will display reading from a BM...
-
 NRF Data Transfer Via 2 Boards
There are various wireless communication technologies used in building IoT applications and RF (Radi...
-
 Iot patient monitoring system
When we are talking about major vital signs of a human body, there are four major parameters that we...
-
 Setting up zigbee communication with nodemcu and arduino
Zigbee is a popular wireless communication protocol used to transfer a small amount of data with ver...
-
 Ac Dimmer Remote PCB
The brightness can be controlled using the IR remote of TV, DVD, etc. Dimming Control system using M...
-
 Esp32 Home Automation
There are relay modules whose electromagnet can be powered by 5V and with 3.3V. Both can be used wit...
-
 Lora Communication With Network
This was a very simple project and can come in handy for various applications. But what it can't do ...
-
 GPS Module Based Tracking Device Pcb
ESP32 GPS vehicle tracker using NEO 6M GPS module and Arduino IDE. With the help of this GPS tracker...
-
 Traffic Management for Emergency Vehicles using AT89S52 Microcontroller
These days’ traffic congestion is the biggest problem of densely populated cities. The project focus...
-
 Diy Multimeter Pcb
This is a project based on Arduino board which can measureresistance, diode, continuity[H1] , voltag...
-
 Live Instagram Followers Pcb
ESP8266 is capable of functioning reliably in industrial environments, with an operating temperature...
-
-
AEL-2011 Power Supply Module
545 0 2 -
AEL-2011 50W Power Amplifier
505 0 2 -
-
-
Custom Mechanical Keyboard
706 0 0 -
Tester for Touch Screen Digitizer without using microcontroller
337 2 2 -
Audio reactive glow LED wristband/bracelet with NFC / RFID-Tags
317 0 1 -
-
-


